How To Seal Attic Air Leaks
Air Leaks Rob Heat-Retaining Efficiency
Adding insulation in your attic can drastically help reduce your heating and cooling bills each month.
Lack of attic insulation and air leaks are usually the biggest offender for heat loss in a home.
This article will teach your how to seal attic air leaks and save money on your energy bills.
 Sealing Air Leaks: Start in the Attic:
The attic is a perfect place for hot and cold air to leak in and out. With no air leaks and proper insulation, your attic can provide you with an energy efficient home.
A client of mine recently had an energy audit to their 20 year old home. This was done by the Concord Municipal Light Plant.
One of the suggestions was to add at 10″ of R-30 insulation in the attic. The survey specified that the savings was $ 106.42 for 32.75 gallons of number 2 heating fuel with an estimated 7.52 year payback.
Tax Benefit
Our lesson in how to seal attic air leaks is a further benefit to the homeowner because it is eligible for a tax credit for installing the insulation.
Homeowners are eligible for a tax credit of 10% of cost up to $500 or a specific amount from $50–$300 for qualified energy efficiency improvements made to their homes.
Air Leak Sealing
I suggested that the client also let me check for and seal any air leaks. See post on air leaks. Adding attic insulation and air leak sealing was our plan of action.
Sealing Attic Air Leaks:
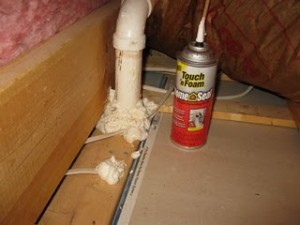
We spent the first hour peeling back the existing insulation and looking for wire penetrations, plumbing vent pipes, electrical light boxes and recessed lights.
We used cans of triple expanding foam to seal all of these leaks.
Examples of air leaks:
- Wire penetrations
- Pipe penetrations
- Openings at partition walls
- Sofit openings
- Openings around chimneys
- At and around recessed lights and fans
Recessed Lights:
For fire safety reasons, insulation needs to be kept back from these fixtures making them a poor choice in attics.
To remedy this issue we built insulated boxes to cover these lights but far enough away to avoid a fire safety issue
Recessed Light Insulation Box:
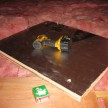
We dealt with these two lights by building a box around and on top of them with 1″ thick, R-6.5, foil rigid insulation board.
We then insulated up to and also over the light boxes to ensure we achieved a better R value.
Sofit Ventilation
We added additional “Proper Vent” baffles to extend up and past the new insulation we added to the attic.
Adding Insulation
To achieve a better R value we added 10-inches or un-faced 24″ wide fiberglass insulation perpendicular to the existing 8″ insulation in this attic.
Batten Down The Hatches
Attic hatches are a MAJOR source of air leaks and heat loss.
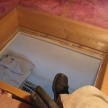
We installed 1″ foil board to the attic hatch door and weather stripped the opening seams.
Prior to leaving the attic we overlapped the hatch with fiberglass insulation. [see bottom photo]
Learning how to seal attic air leaks is a straightforward and simple process and one that will pay dividends in the heating and cooling bills.
Ice Dam Reduction
Sealing air leaks in conjunction with adding insulation in your attic can drastically help reduce your chances of developing ice dams.
A Comprehensive Approach
Learning how to seal attic air leaks is a comprehensive approach. You need to look at how the home is constructed and sometimes even remove insulation bay by bay to track down leak locations.


