How To Build A Shed

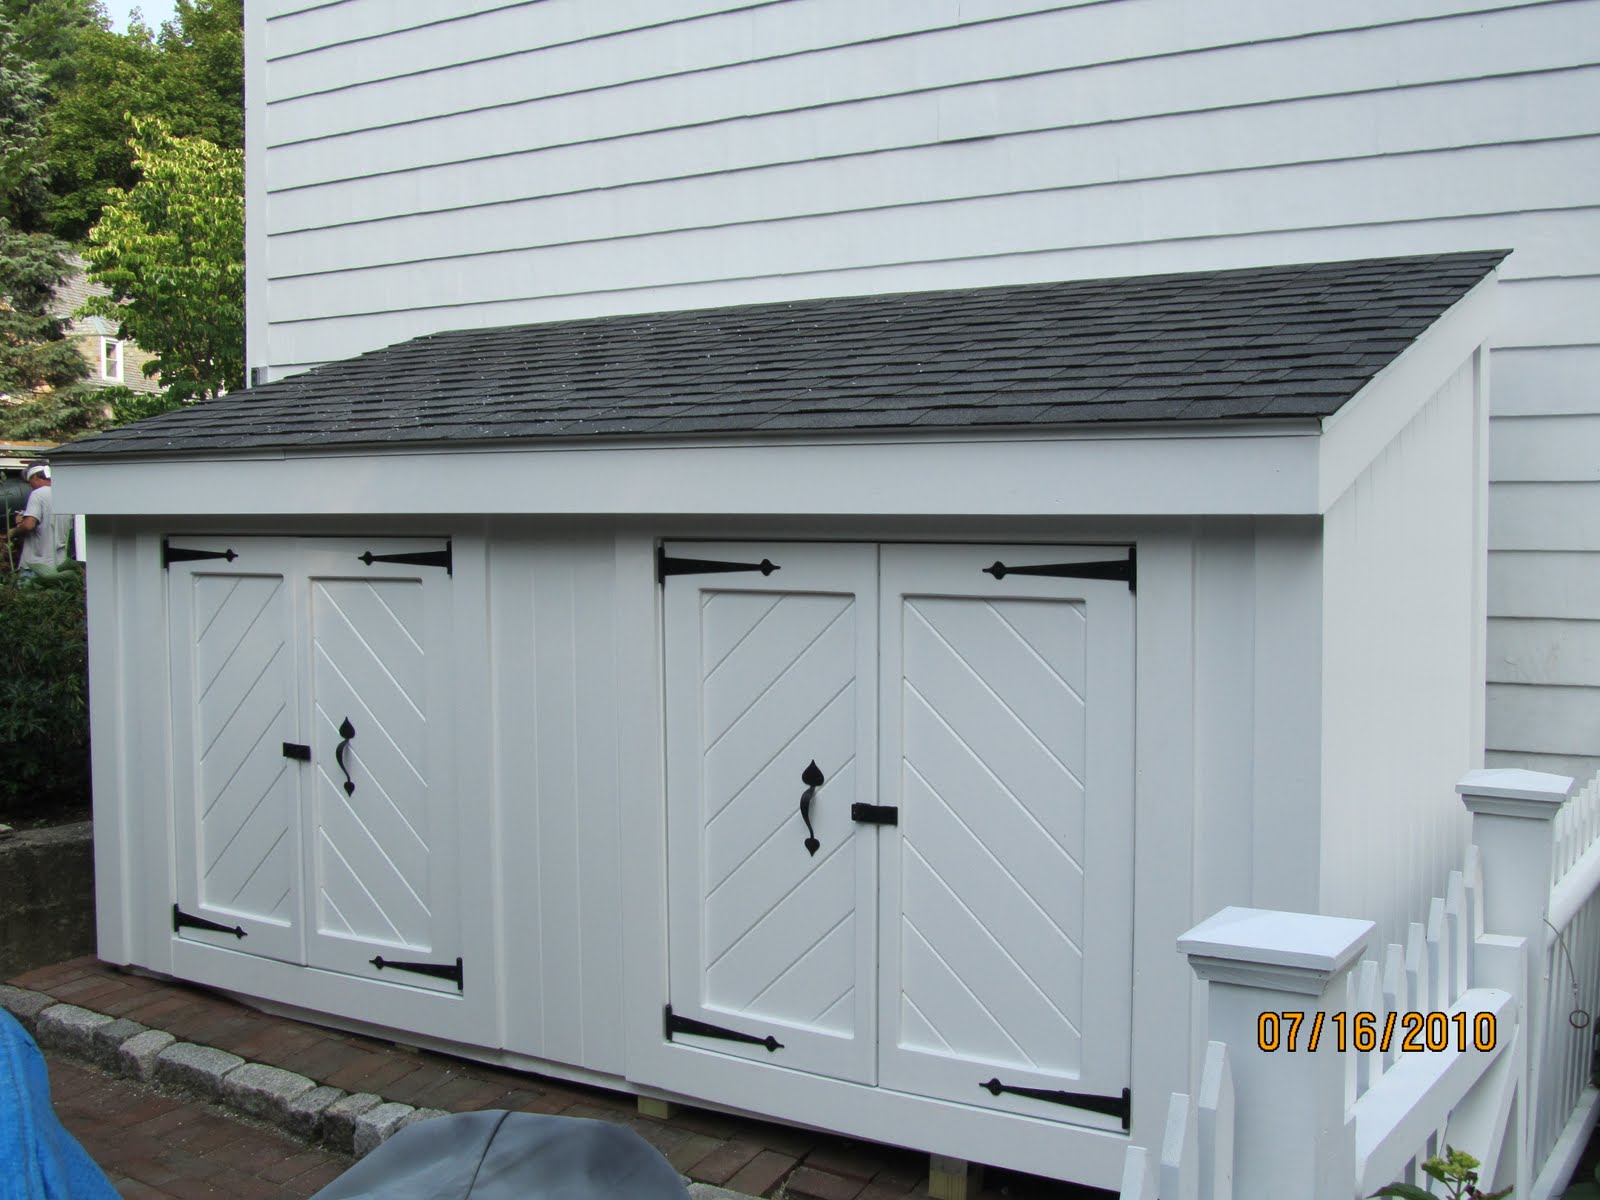
Building A Trash Enclosure
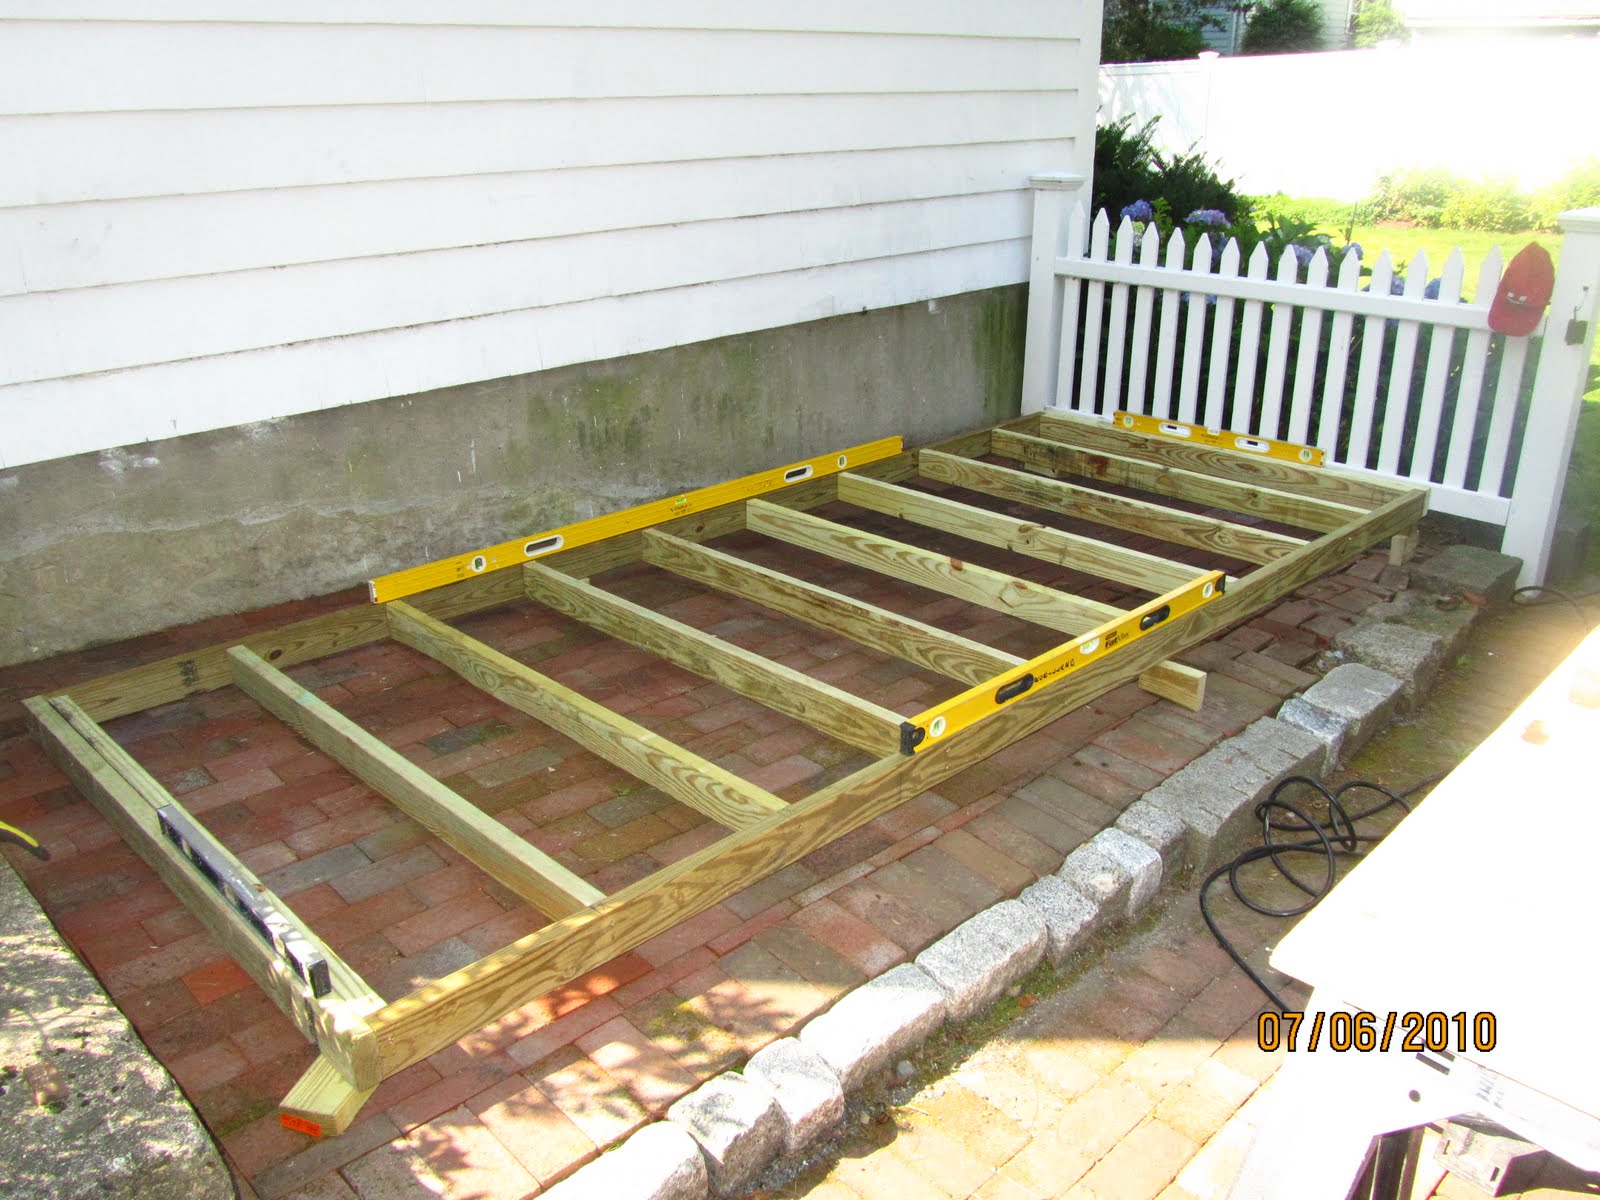
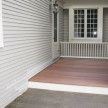
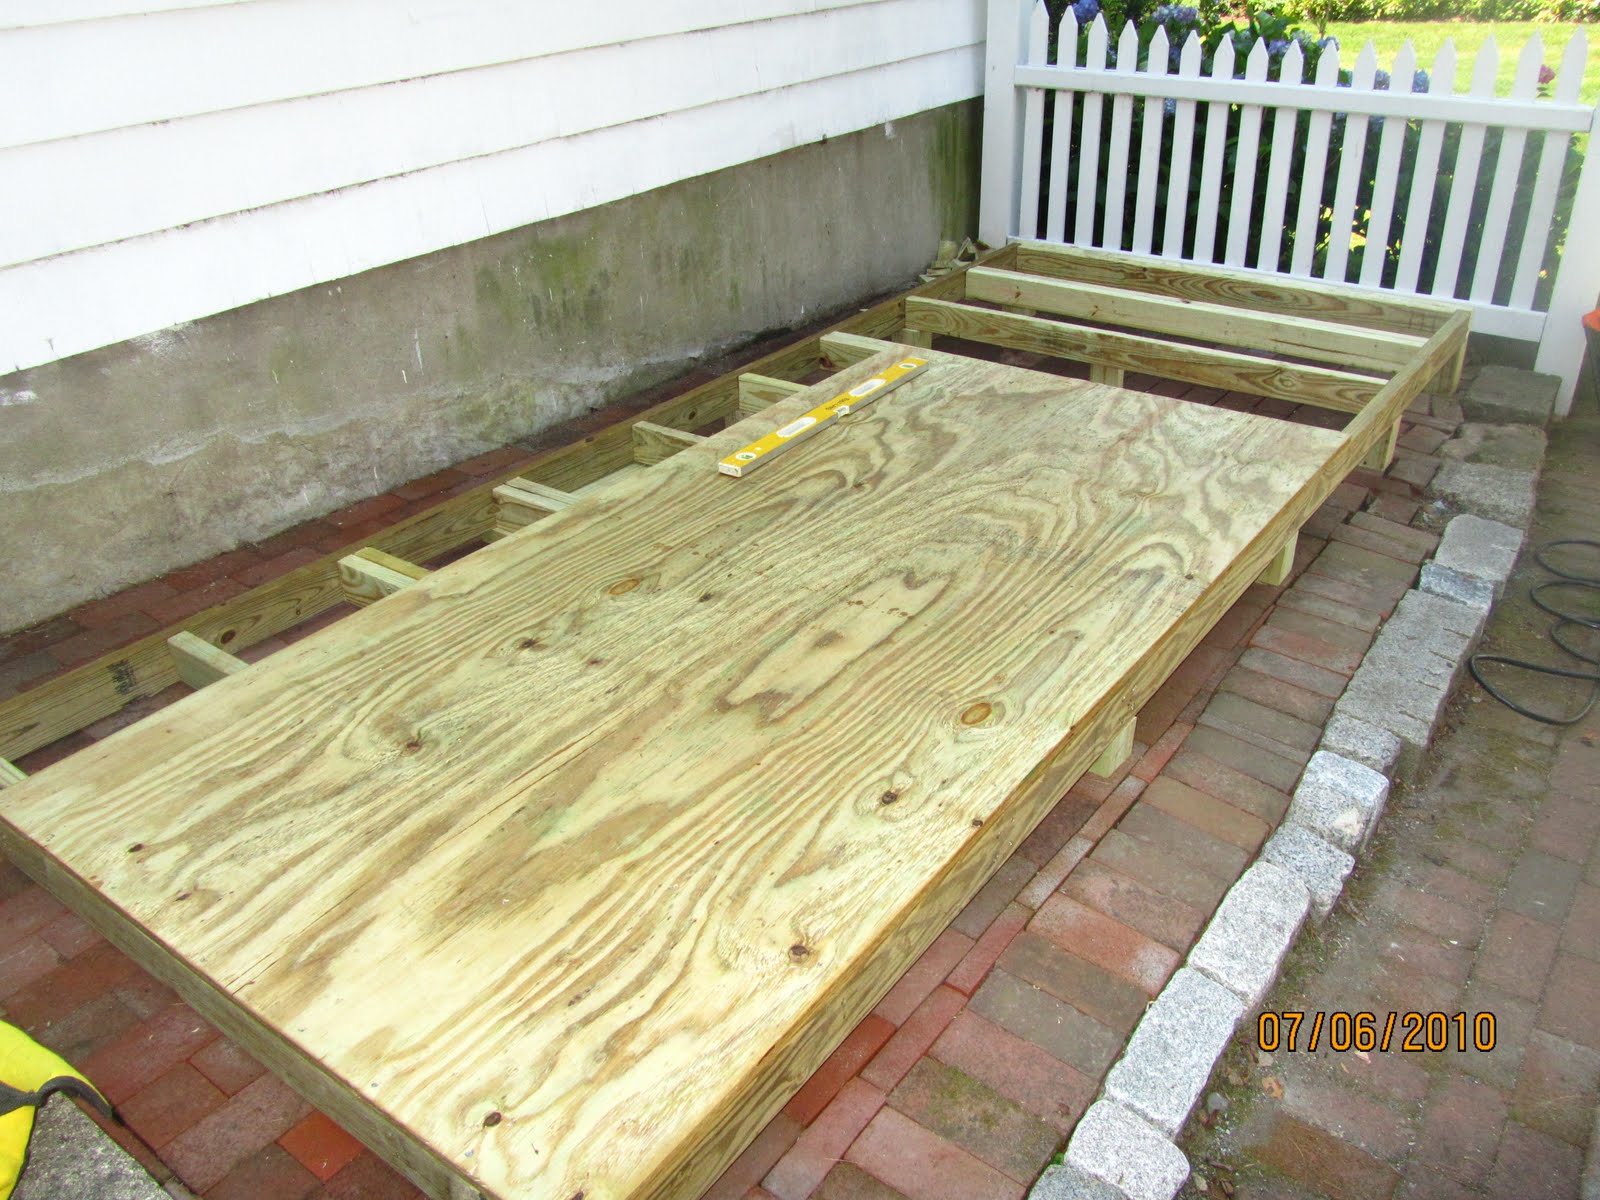
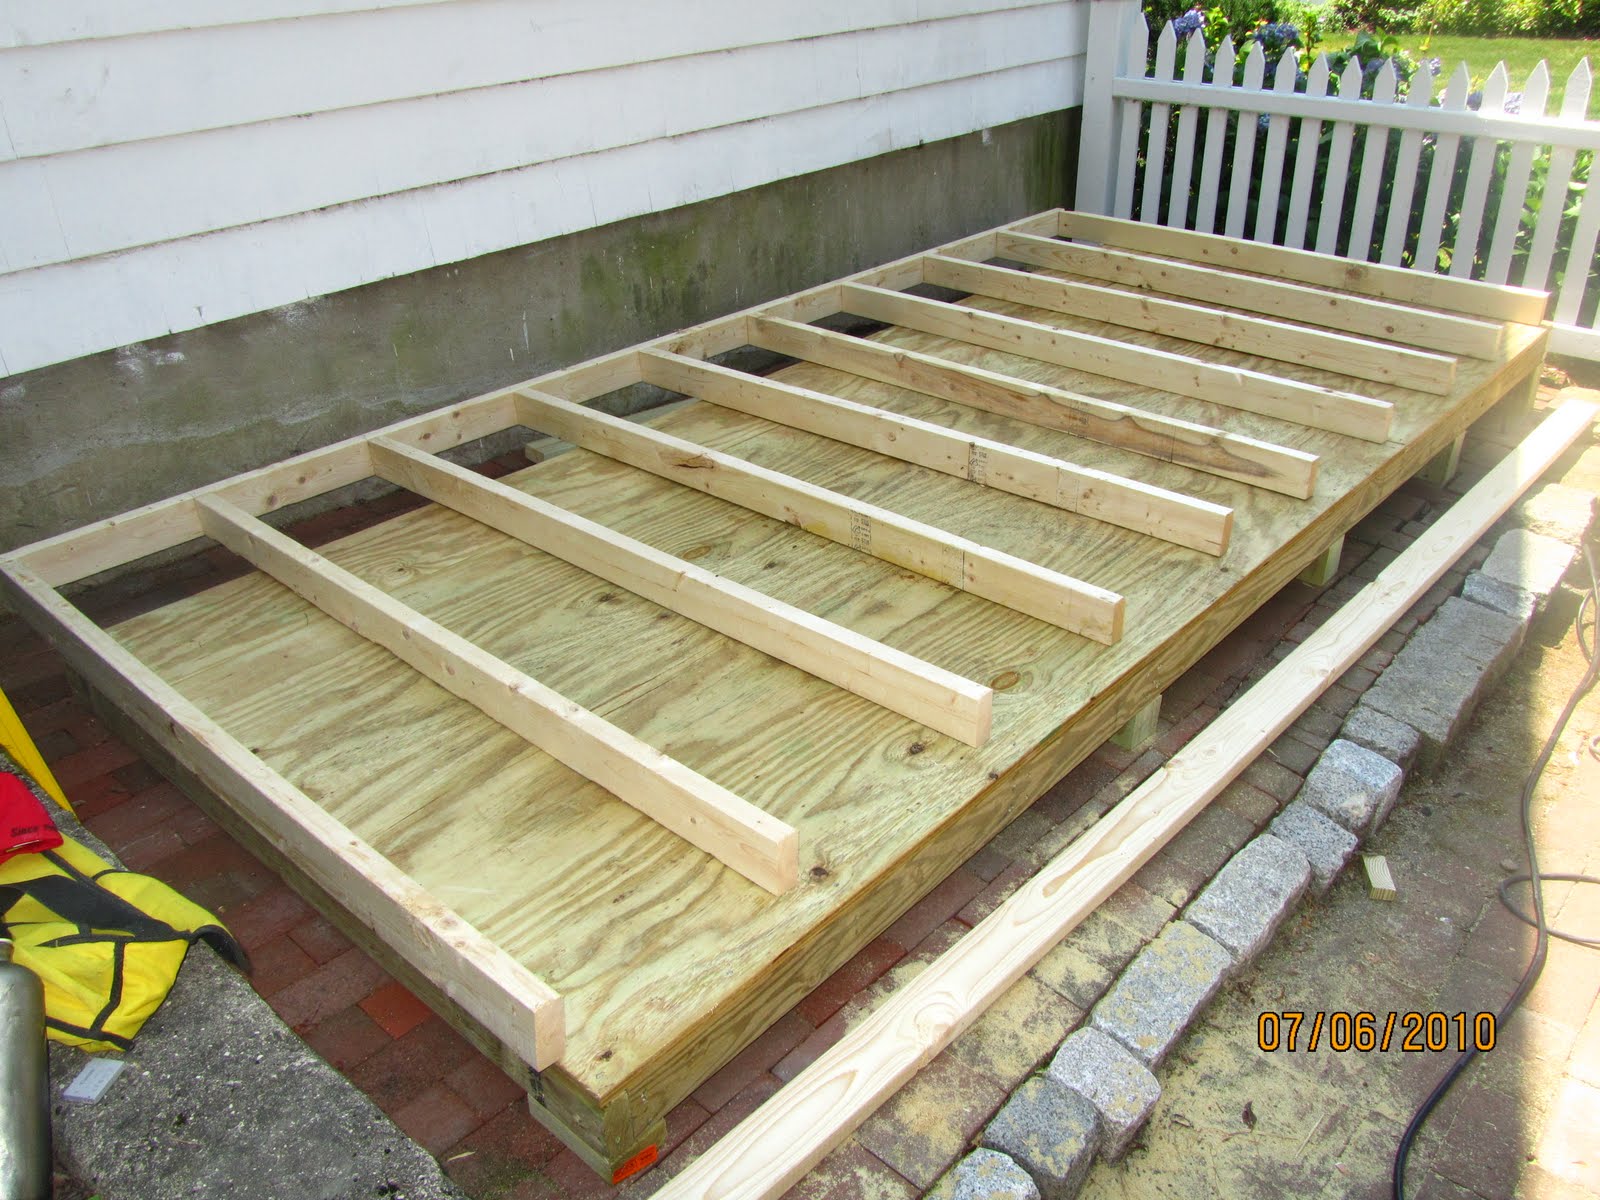
This simple small wood storage building is designed to be moved and was built on an existing brick paver patio with no footings.
The floor, supports and first 16″ of wall sheathing framing is built with treated lumber that will resist wood rot and any attack by wood-destroying insects.
Start Level
It’s important to start with a level structure.
I also use 3/4″ pressure treated-lumber plywood for the floor of the storage sheds. The pressure treated plywood floor prevents the floor from rotting from water that drips from snow blowers, lawn mowers, tools or other things.
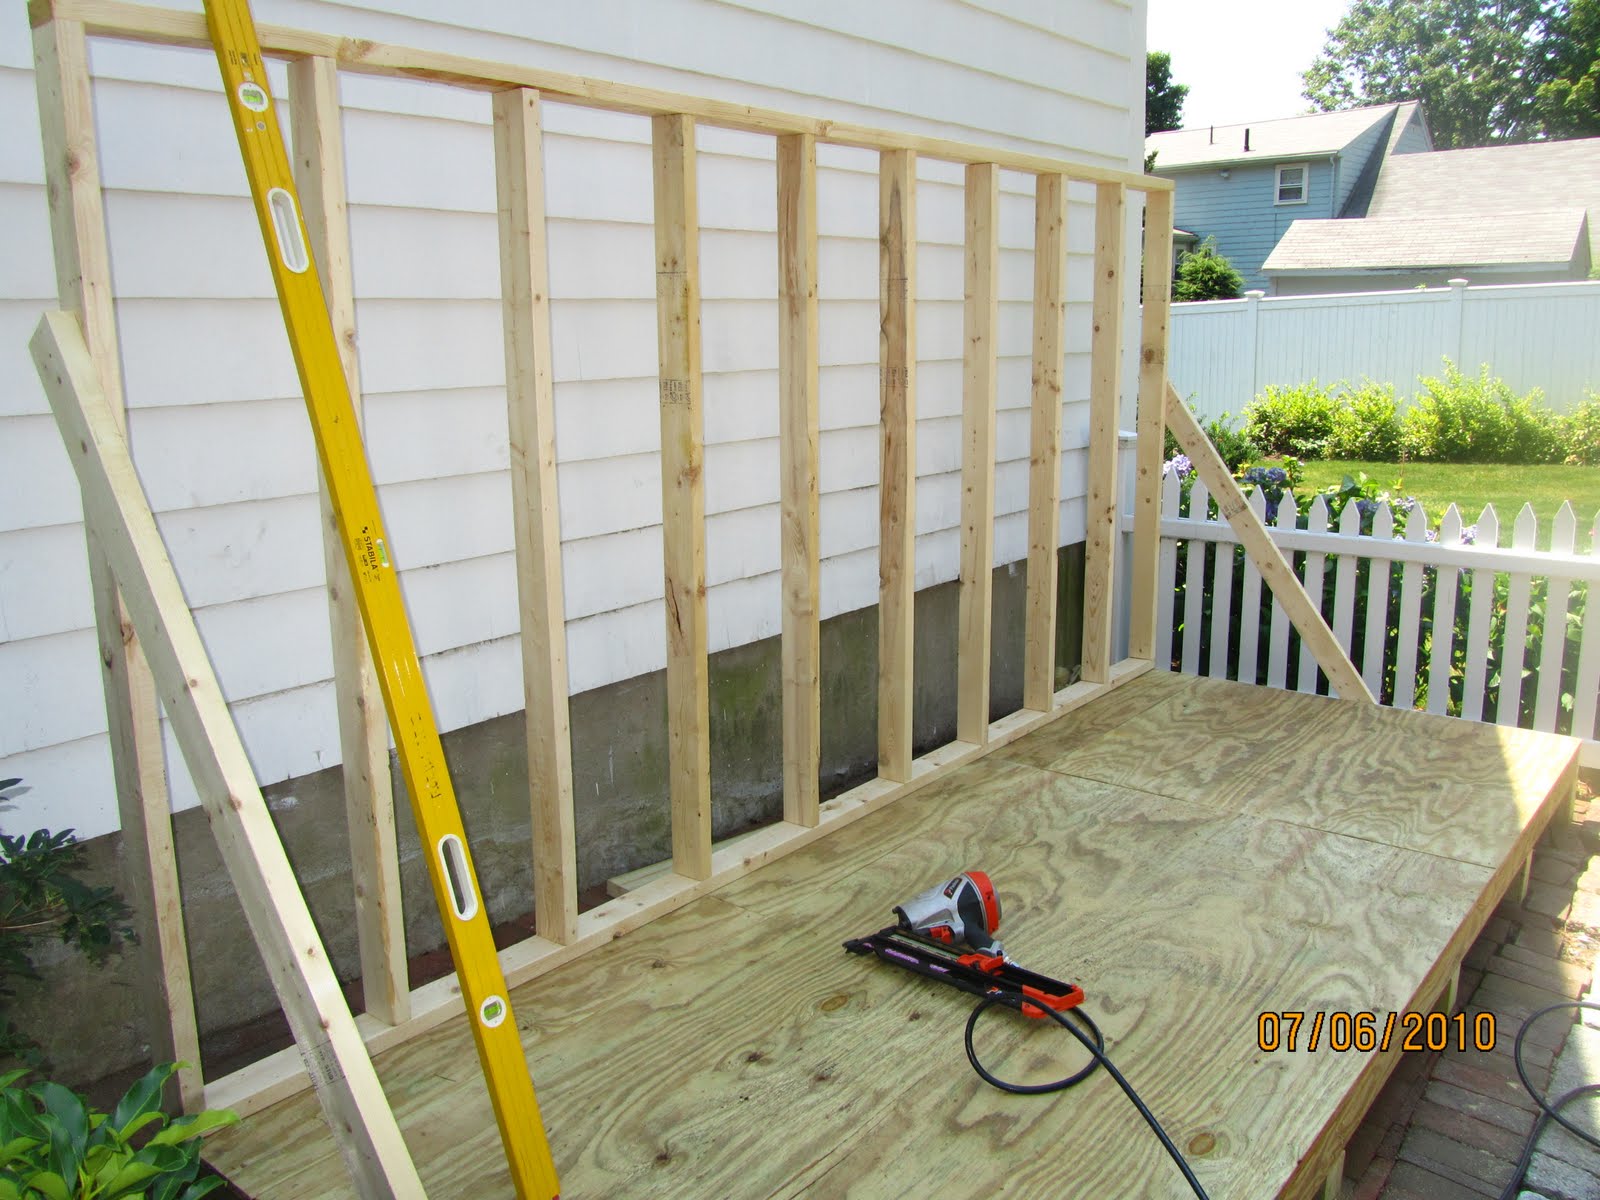
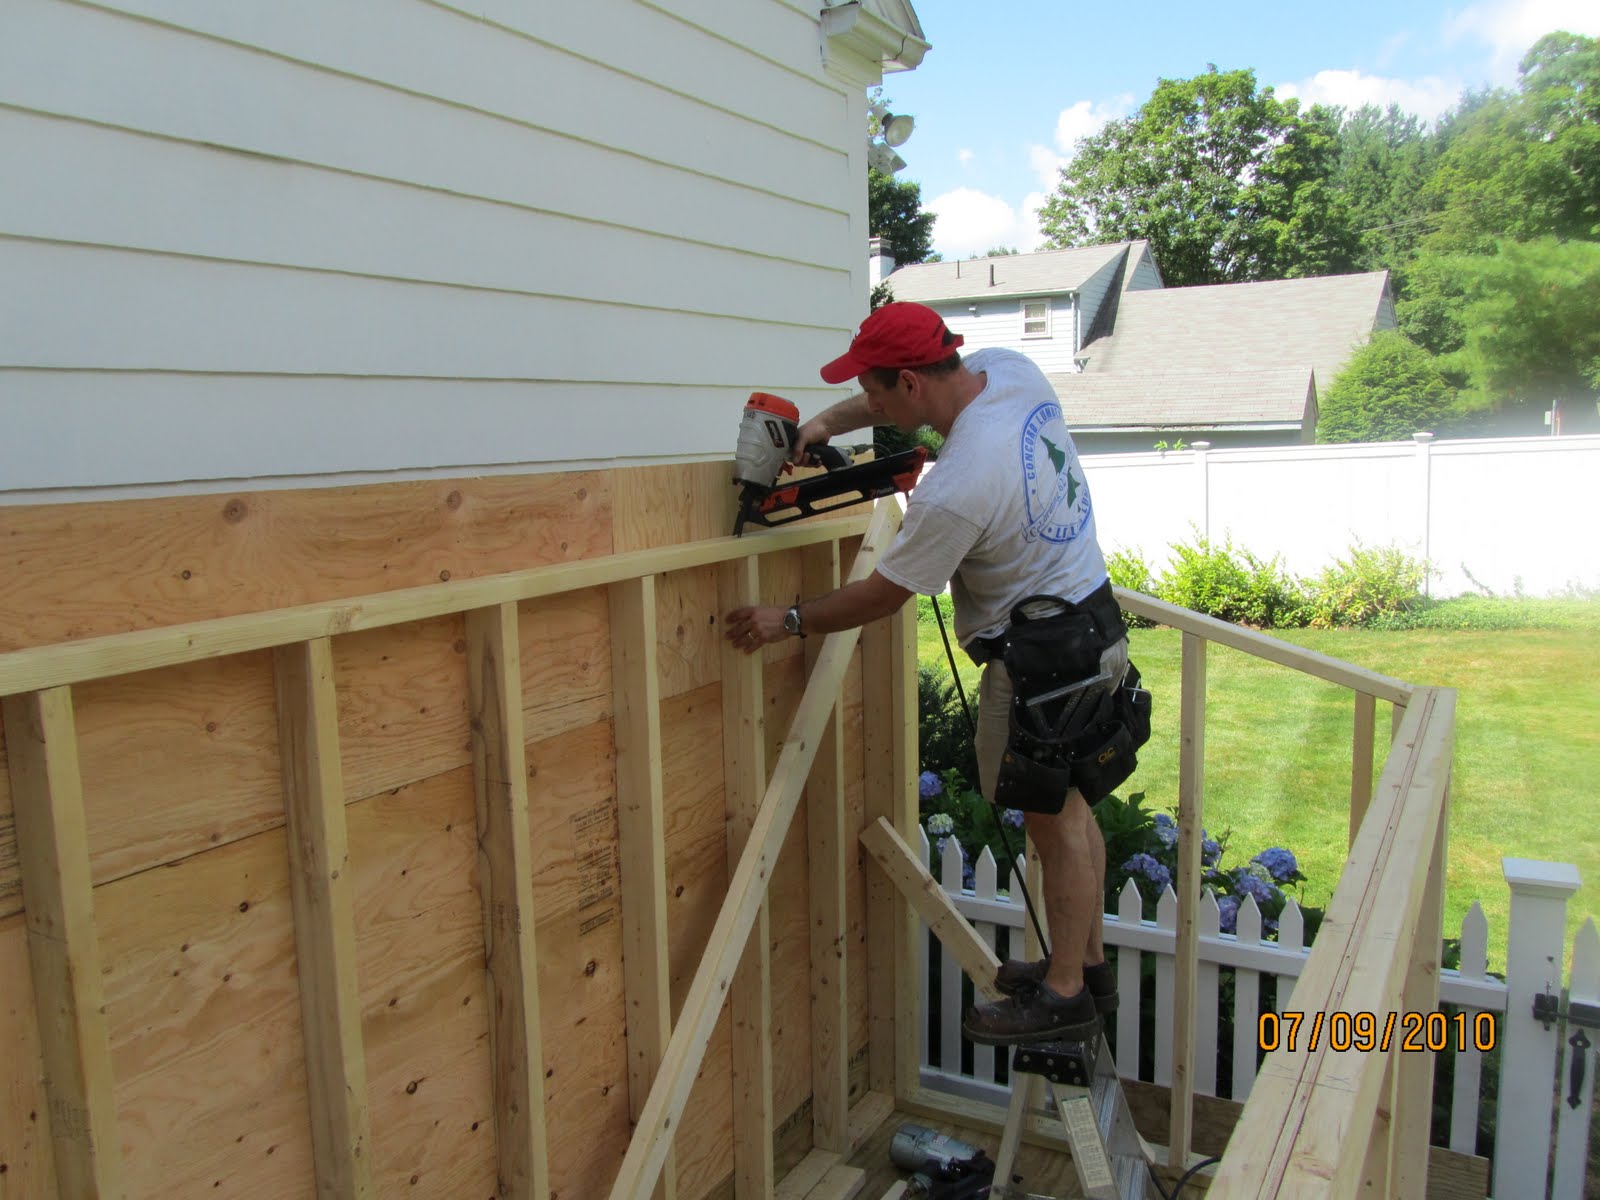
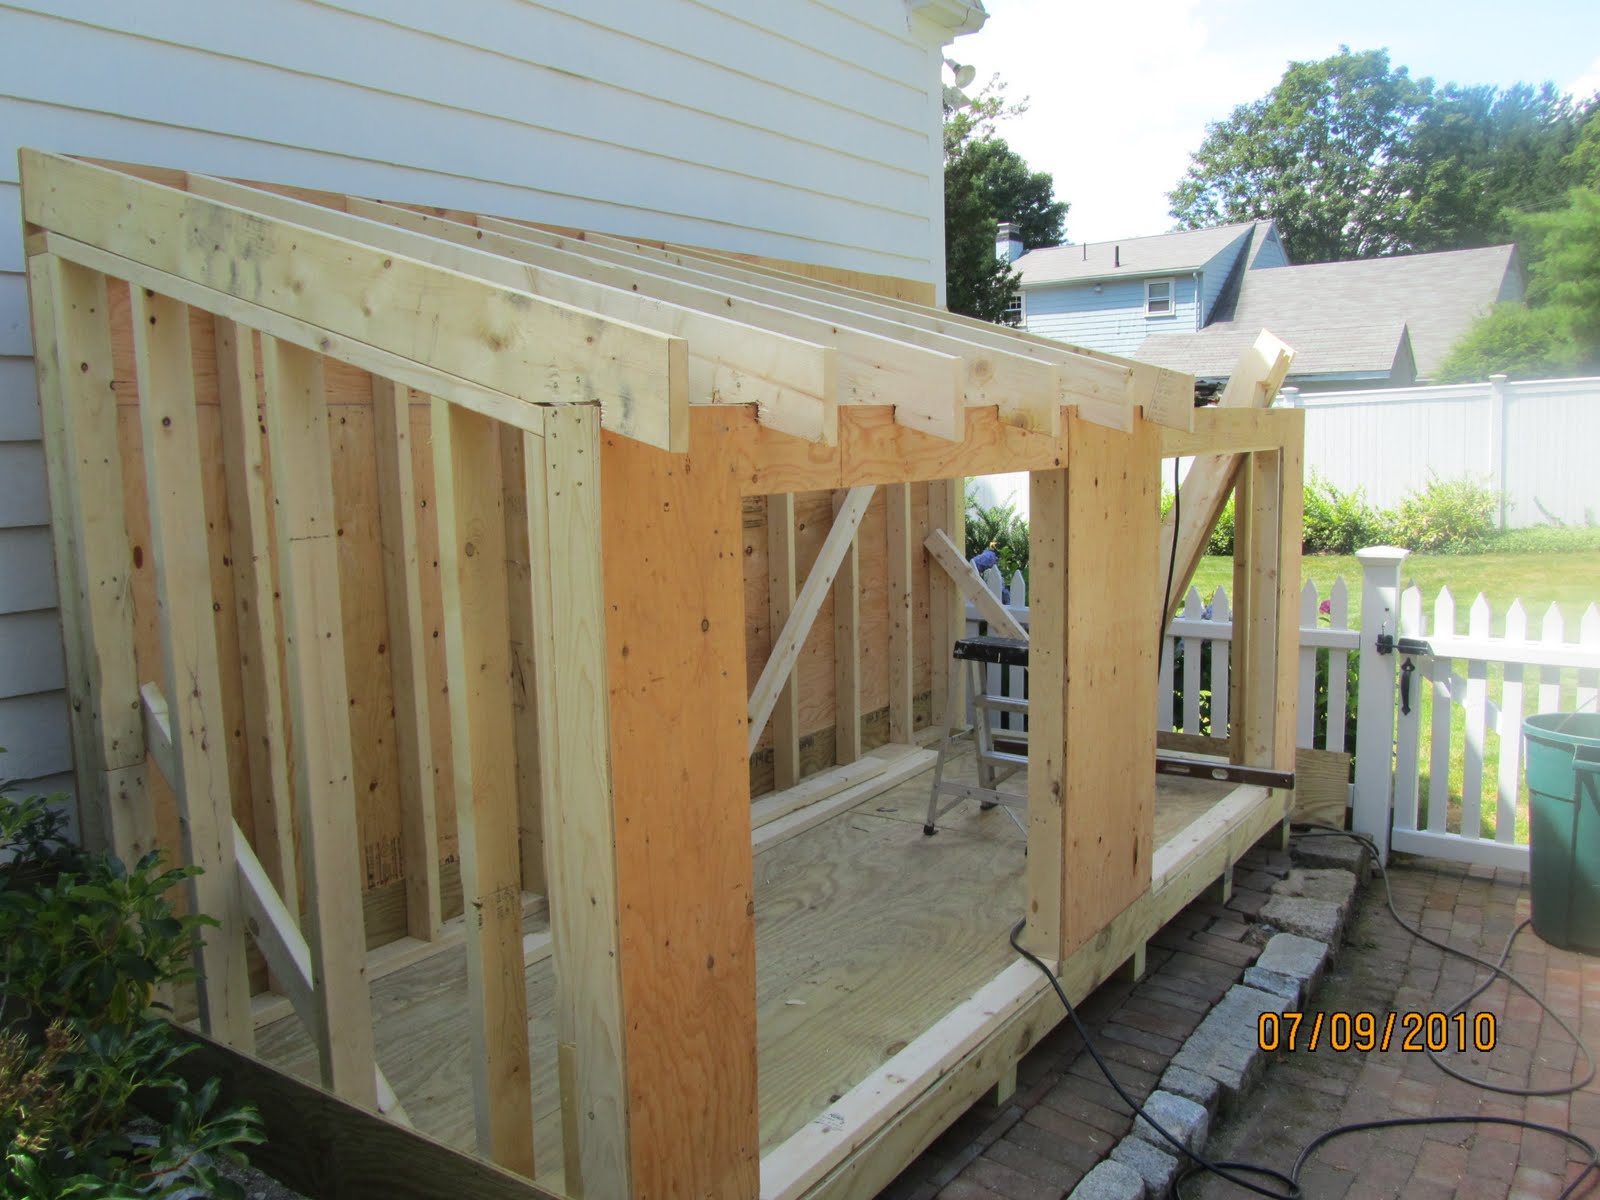
Once the decking was installed it was time to build the walls.
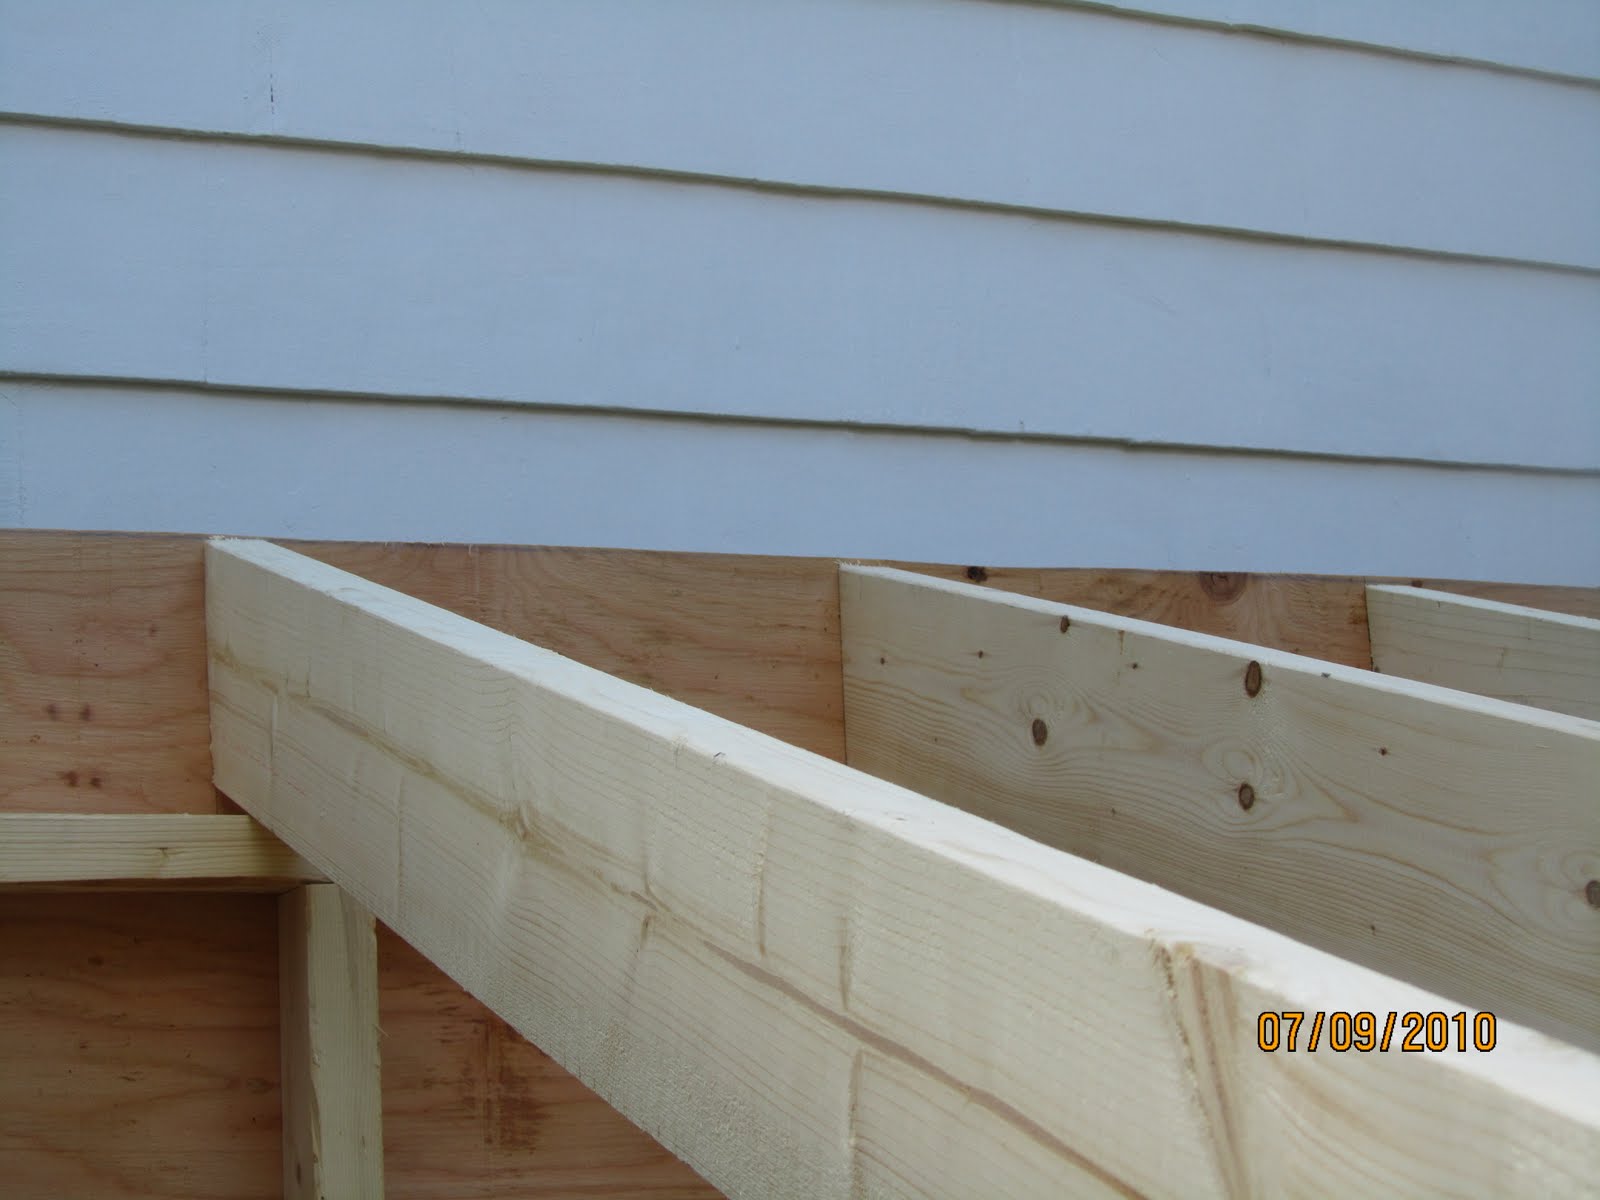
The walls are framed 16″ oc and will support rafters that will be higher in the back and slope to the front. [Shed roof]
The two end diagonal braces hold the wall plumb until the side walls can be built.
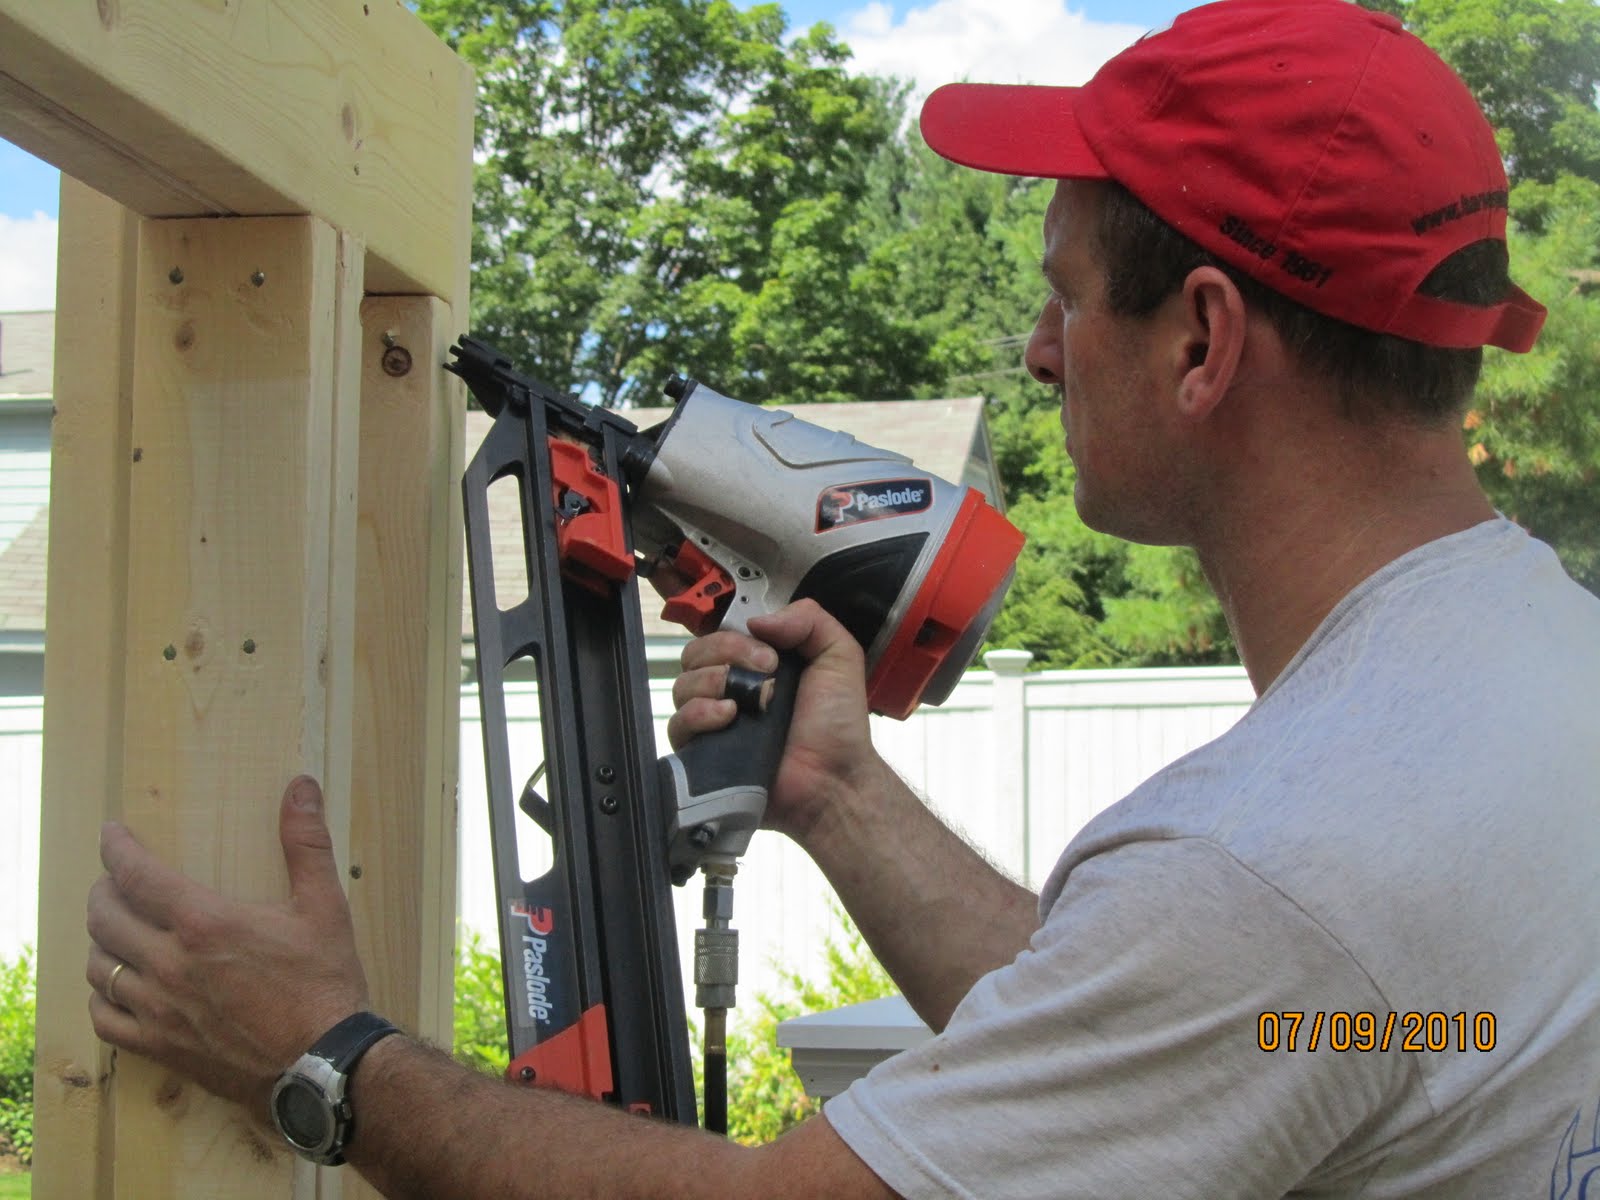
Using my new Paslode PF350S Framing Nailer made nailing super easy. See my review on this nailer.
lode PF350S Power Framer
The front wall and integrated double 2×6 header is built, raised, plumbed and supported with temporary braces on the top.
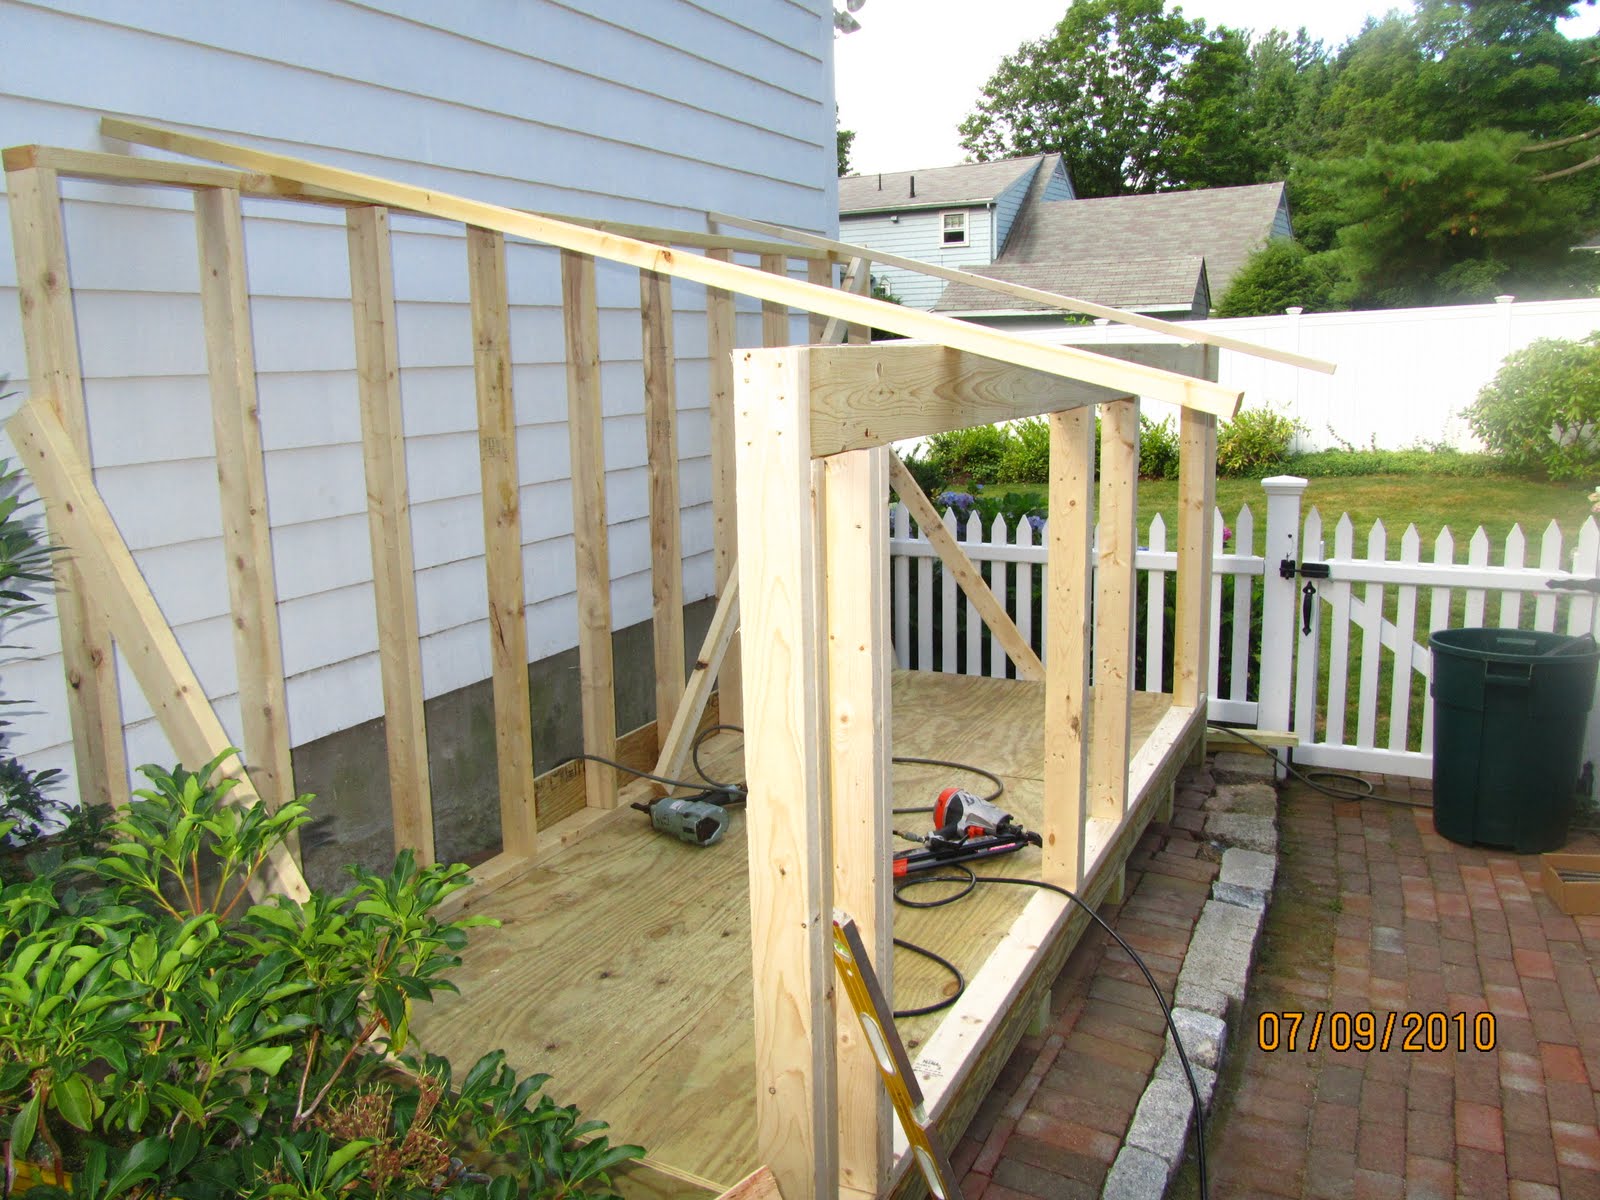
The diagonal brace on the inside back wall was used to “rack” the wall plumb from side to side prior to applying the 1/2″ plywood sheathing. The bottom 16″ of wall sheathing is pressure treated plywood.
Notice the plywood extends above the back wall framing. I purposely did this so I could nail the plywood to the rafter ends.
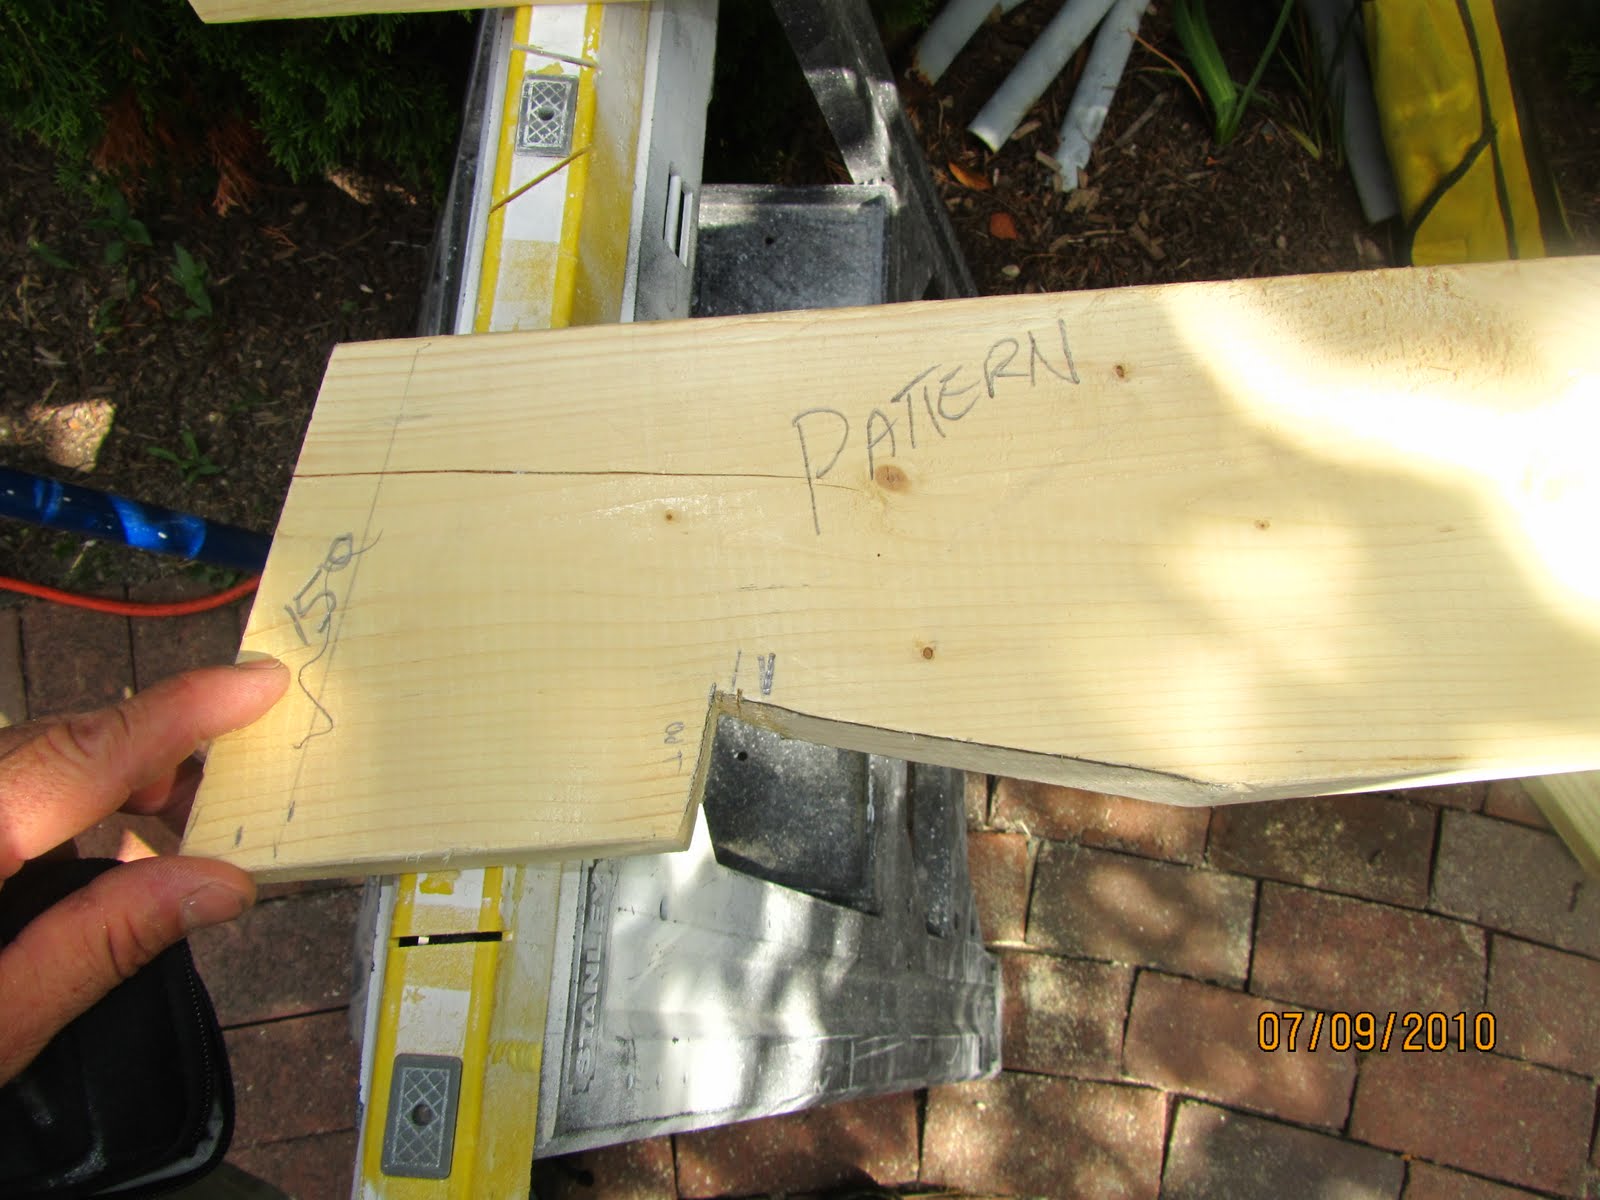
The building is 5′ deep. The front wall is approx. 15″ lower than the rear wall which gives the roof a 3 pitch. Roof pitch relates to the slope angle of the roof. For every foot [12″] of run
the building the roof rafter rises 3″.
Below is a pattern I made to trace all of the rafters from. Using the same template eliminates graduated errors.
Before installing the rafters I made sure to double check the walls for plumb both front to back and side to side.
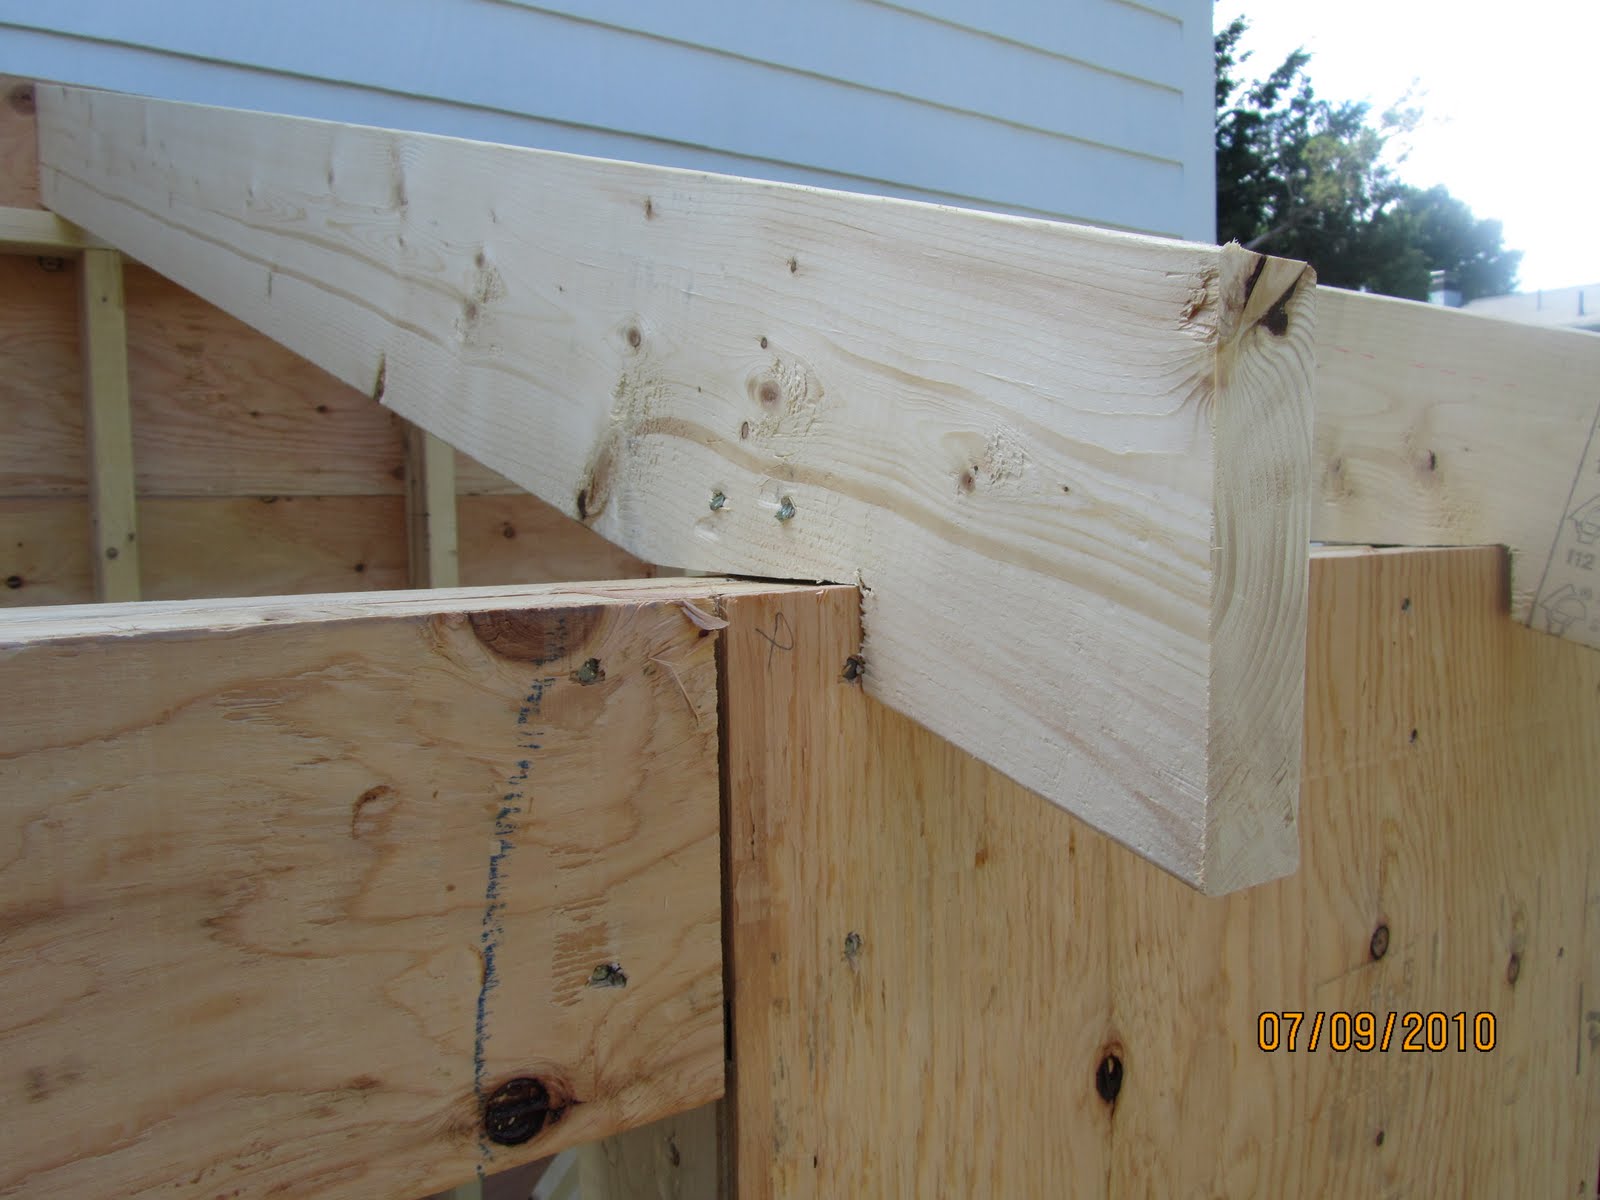
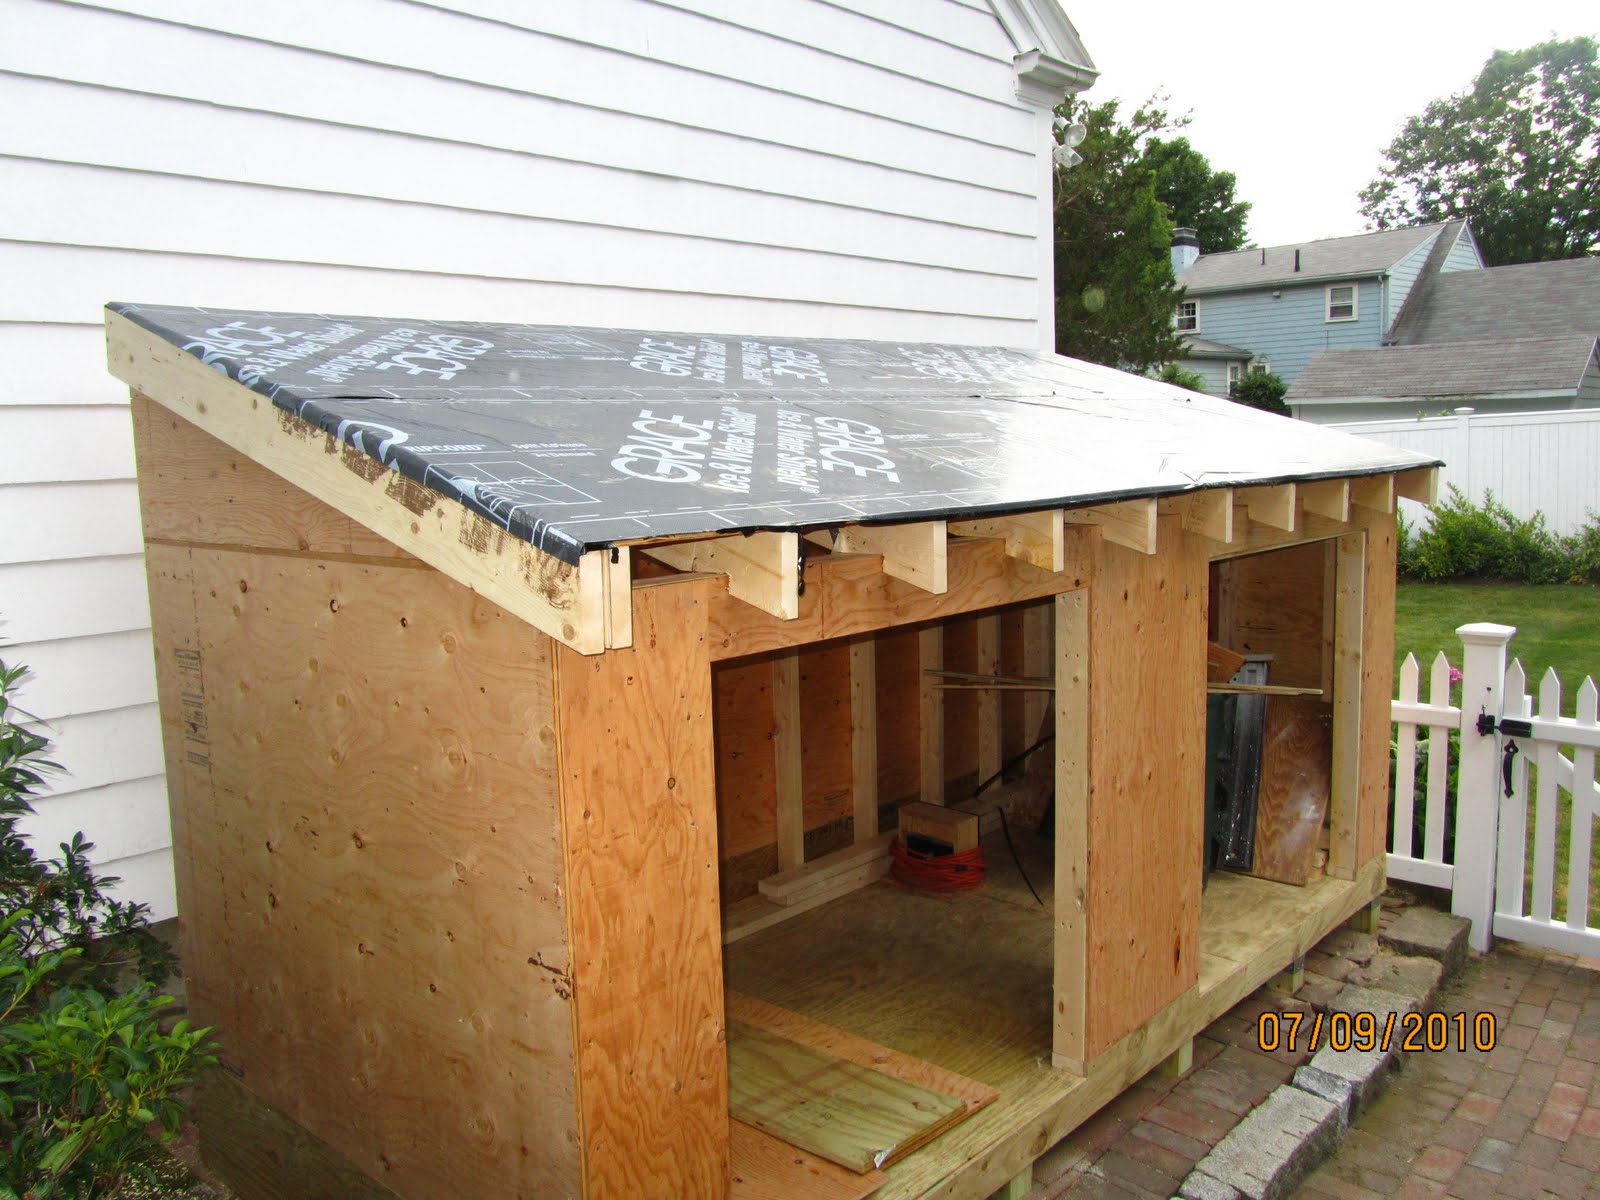
Rafters installed. The rafters seat cut sits on top of the front wall header and receives two 16 penny toe nails on each side. Later I will add hurricane or rafter clips for additional strength and support.
The rafters were secured to the bask wall with hurricane clips and nailed off to the 1/2″ plywood. see below.
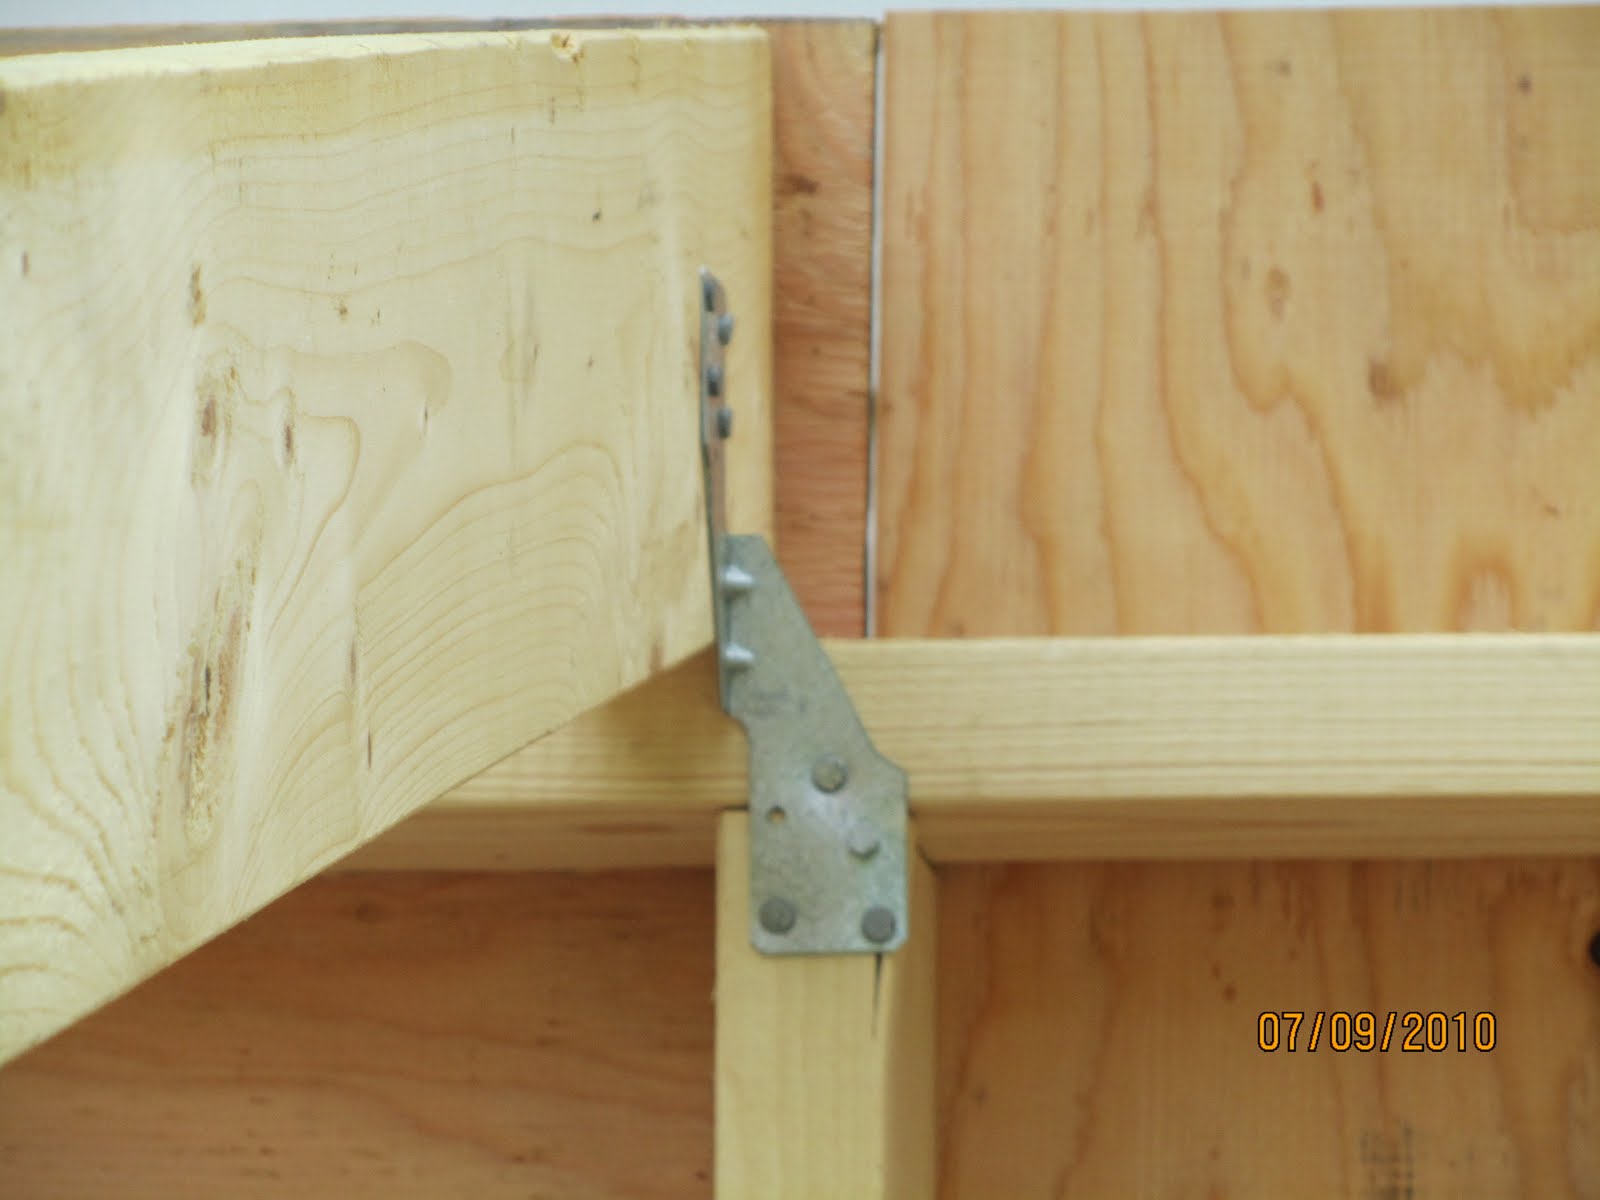
Plywood on rear wall is nailed to the rafter ends.
Roof installed. The next step is to install the 1/2″ plywood on the walls and roof.
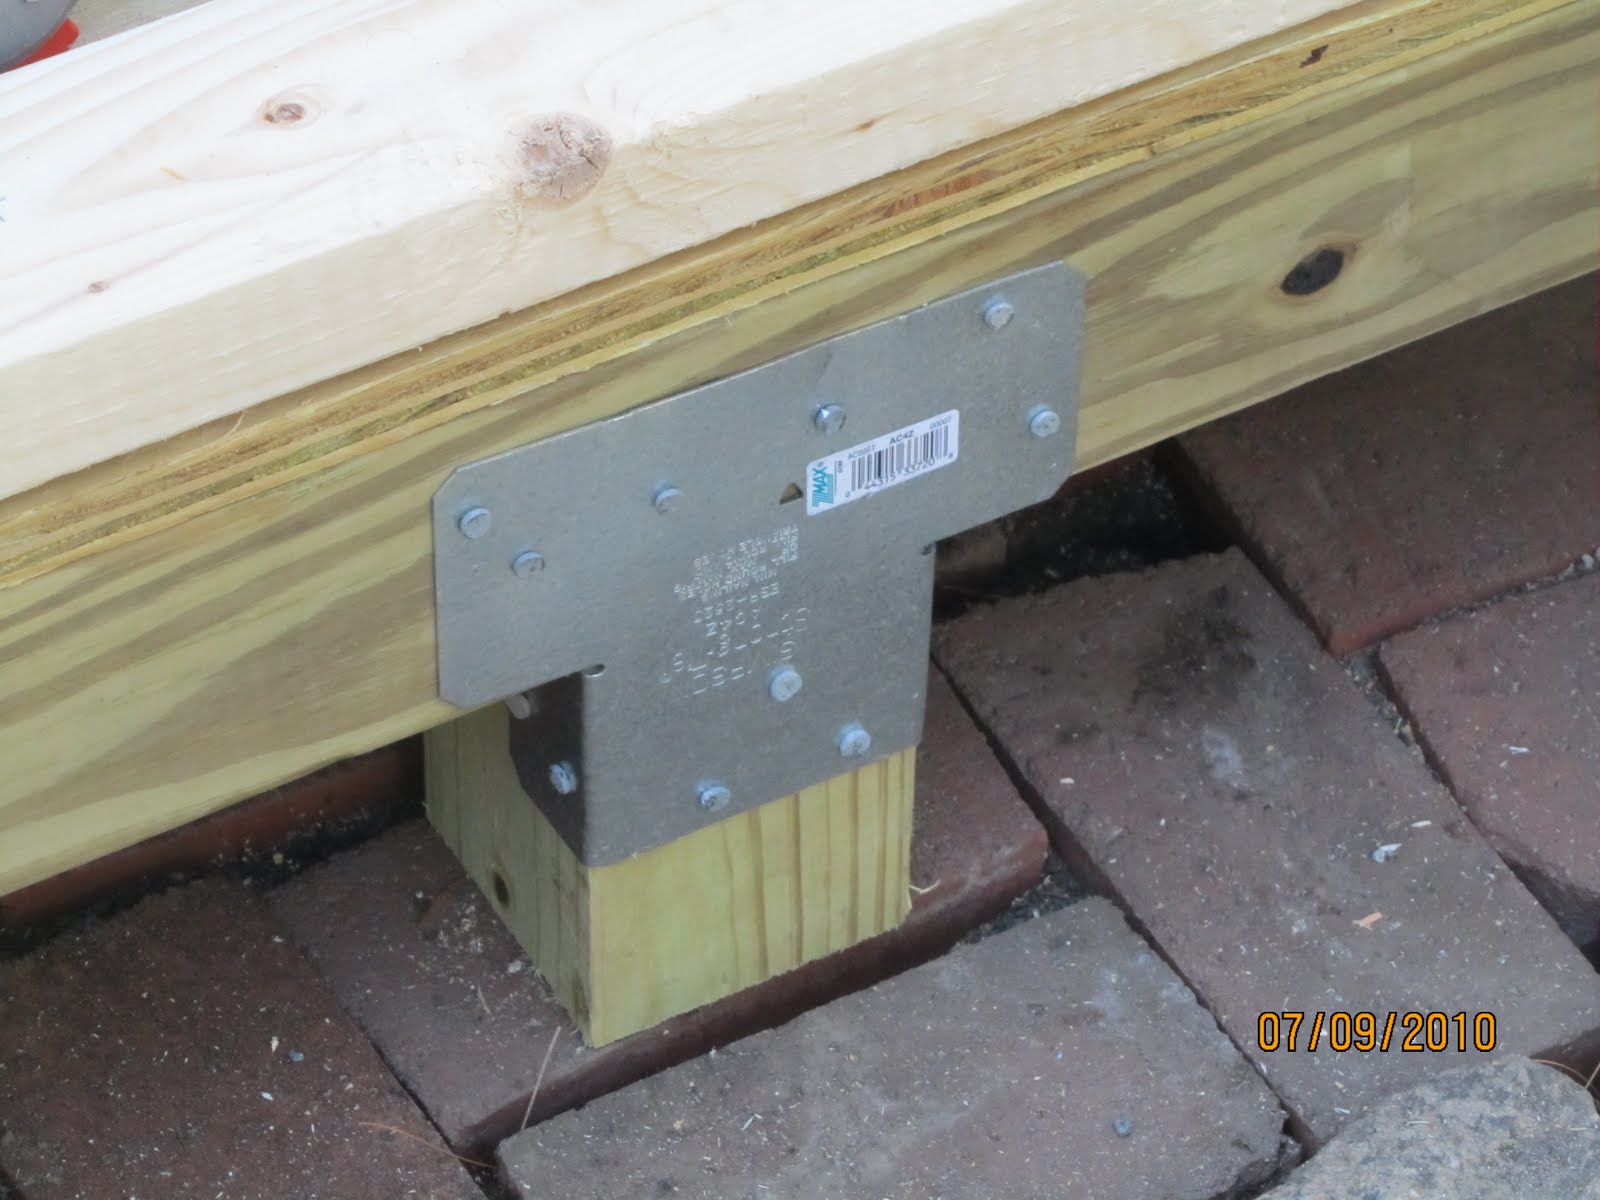
The platform legs were additionally supported with galvanized post to beam connectors.
The roof plywood was installed and a covering layer of ice and water shield [rubber membrane] was installed to keep it dry until the shingles are added later.
The next step is to install the trim and siding.
See my post on building a similar project “Build a shed”

If you enjoyed this post, make sure you subscribe to my RSS feed or receive updates via email