Using Carpentry Patterns And Templates
Making And Using Carpentry Patterns And Templates
Making And Using Carpentry Patterns And Templates in woodworking help to make joints and construction repeatable and accurate. If you are making more than one project, cut or component, and you want to reduce the chance of compound error or a mistake in cutting and expensive piece of wood, tile or granite then making a template first is a very good idea.
Making And Using Carpentry Patterns And Templates are usually low cost to build, increase your accuracy on the job, improve your efficiency and usually product better quality projects.
Once made a template can used over and over again, saving time on future installations.
Some common situations to use a template include:
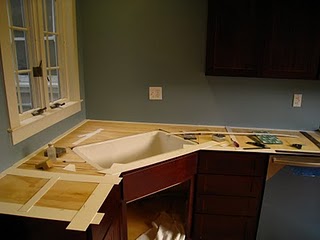
1. Fitting parts into an irregular space or getting an exact fit into a regular space; Granite counter top installers always make a template in order to cut their granite.
2. Mortising with a router.
3. Building and fitting cabinets.
4. Fitting cabinet hardware.
5. Whenever we do a project that has the potential to be built again; or if the design is somewhat difficult, build a jig or template.
Here’s a few tips on making a quick template:
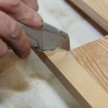
1. Use 3-5″ rips of 1/4″ plywood or luan plywood. Luan is a really thin plywood like substance – it’s so thin it can be cut with a razor knife and snapped.
2. Use a utility knife to score and cut to the material a rough size.
3. Place the strips against the surfaces you will use the template on.
4. Staple, hot glue together the parts. Thin braces can be used throughout the center of the template to strengthen it for transporting. I sometimes will put them in at a 45 degree.
5. Use pencil lines [witness marks] to create a redundancy check line for your template.
6. If your dealing with irregular surfaces, scribe the parts to the surface before putting the template together.


