Ryobi 18V Power Caulk & Adhesive Gun
Ryobi 18v Power Caulk Gun
Ryobi’s 18v line is offering over 50 great one+ tools to choose from. In this review I was able to test out their 18v Power Caulk & Adhesive Gun. I have always wondered about them, and have been skeptical about the discharge rate. As you read you below I will be writing about the positive’s and negative’s I found with the cordless caulk gun.
First Impression:
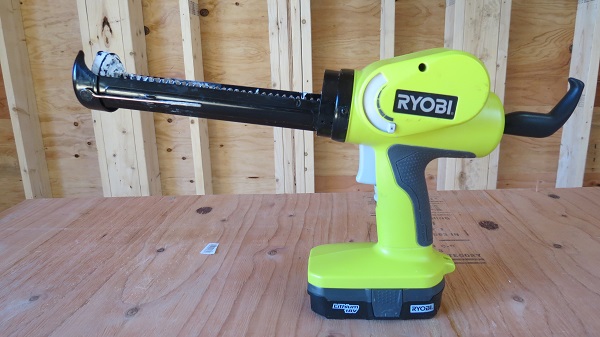
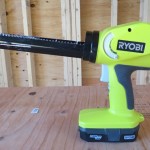
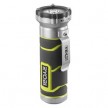
Their Lime green color for the 18v One+ system makes it stand out. The Power Caulk Gun is balanced with no caulk cartridge in. The metal carriage holder feels solid. The grip is comfortable and textured to reduce slippage. Has a variable speed selector with 5 plus settings.
The Ryobi Power Caulk Gun is sold as a bare tool only. You will need to purchase an 18v one+ battery and charger if you do not already have Ryobi 18v batteries.
What’s in the box:
- P310G Caulk Gun.
- Operator’s Manual.
Specifications:
- Powered by 18v battery
- Carriage Std. 10oz
- Discharge Rate Variable
- Tool Weight 70 lbs.
Features:
- 200+ tubes of caulk per charged battery.
- Variable speed selector lets user adjust the discharge rate to control the bead of caulk.
- Switch lock to prevent accidental discharge.
- Center balanced handle for comfort.
- All metal manual plunger rod with hook end allows user to quickly change out carriages.
- Using any Ryobi 18v ONE+ battery.
- Durable gears and carriage frame increase tool life.
- On board puncture tool.
- Over molded Grip-zone.
- 500 lbs. + of push force to keep the caulk flowing.
Job-site:
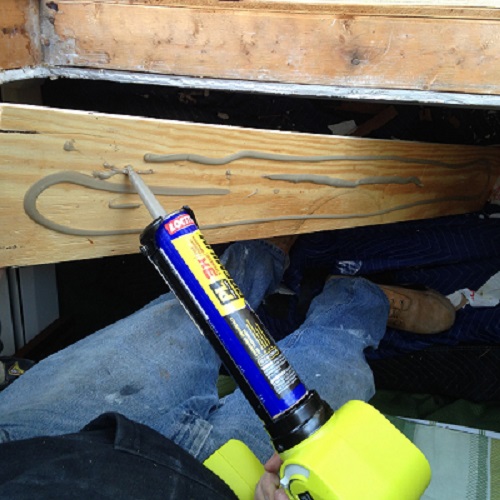
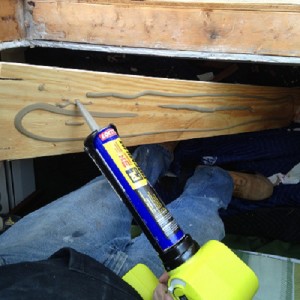
The first job site I tried the power caulk gun on was a basement window job. The Power Caulk Gun worked out well sealing in the windows. Later on when we were building the PVC trim with a pocket screw system. I was able to adjust the flow and run a continuous heavier bead to the back side of the one piece trim. The battery helped balance it up right instead of lying on its side for easier pick up and not having the carriage nozzle in the grass or dirt.
On the next project we are installing new construction windows. This is one project I was glad to have the Power Caulk Gun on. I was building the windows out to the new level of the Rigid foam board and every window will have to be padded out 3/8’’. To set the 3/8’’ plywood I used the Power Caulk and Adhesive Gun with some premium construction adhesive followed by screws. We switched out the carriage to a Tripolymer sealant to caulk the back of the windows nailing flange. Switching out the tubes was quick and the Power Caulk Gun has a puncture rod on the left side of the tool. This project alone saved my wrist and grip strength from applying four carriages of premium construction adhesive and three carriages of the Tripolymer sealant.
The last project it was use on was insulating basement walls with 2” Rigid insulation board. This is where I when through a case of premium construction adhesive. Adhering the sheets to the concrete foundation by pressing a trigger and letting the adhesive follow every 12 inches went very smooth. Using the Ryobi 18v Power Caulk Gun was twice as fast then using the 28oz manual caulk gun carriage set up I first started using.
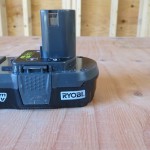
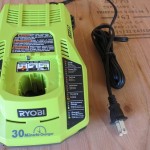
The 18V battery from Ryobi One+ collection offers Lithium- Ion & Ni-Cad cells with 20% more run time. It’s 45% lighter in weight making it compact in size. The dual chemistry charger with Intelliport Technology protects battery cells, maximizes battery life and conserves energy. The Ryobi 18v one+ battery charges in 30 minutes +. The Power Caulk Gun is low in noise and a plus in my book. I noticed that it depended on the product we were using about how much excise would still ooze out after the Power Caulk Gun was off. The variable speed selector worked out well and really adjusts the follow. I did have one carriage blow out inside the carriage and it was messy to clean up. On the back side of the handle you have the option to attach a tether strap.
Improvements:
One concern I have about the Ryobi power caulk & adhesive gun is the plastic housing. The plastic housing might be an issue on day to day job site use. The other option I would like to have seen is a kit model. Offering it in a kit model would make it easier to purchase and could have it all together in 1 bag. The last improvement is the puncture rod could have been longer and thicker. I found it to be short in a few occasions and stronger would be better.
Overall impression:
I throught the Ryobi 18v Power Caulk & Adhesive Gun preformed well. I found it to be wrist saver on larger projects were we were dispensing a lot of sealant. I did find it a little bulky when it came too caulking the interior window trim. The selectable discharge rate did work very well, and it was a lot easier and faster to apply construction adhesive using the Ryobi Power Caulk & Adhesive Gun.
The battery life was never an issue and performed well in cold climates. My wondering is over after using the Ryobi 18v Power Caulk & Adhesive Gun, this cordless caulk gun came on a few projects with me and never failed. The fact that I used a case of premium construction adhesive and never once bothered my wrist is a huge plus. Lastly my only down time was to change the carriage.
Ryobi Nation:
Ryobi Nation is website were you can share projects and vote on them. The membership is free with monthly prizes. They also have celebrity guest bloggers that offer monthly how to projects.
The Ryobi 18v power caulk & adhesive gun can be purchased at Home Depot for $50.00 here: Ryobi-P310G-18-Volt-Adhesive-Tool-Only
- Variable Speed Selector
- On Board Puncture Tool
- Ryobi Compact 18v Battery
- Dual Chemistry Charger with Intelliport Technology
- Ryobi P310G 18V Power Caulk & Adhesive Gun
- Over molded Grip zone


