Installing Cement Board Underlayment

Installing Tile Underlayment
How To Prepare For A Tile Floor
Preparing for tile means following a proper subfloor fastening procedure and usually installing cement board underlayment. [CBU]
Installing cement board underlayment is recommended to provide a flat, smooth and durable surface for tile installation and adhesion.
CBU has a proven track record for longevity and is specifically designed to resist moisture and mold growth – making this a great choice for shower walls and bathroom floors.
What Is Cement board Underlayment?
Cement board underlayment is a ridged substrate made from Portland cement, aggregate and glass mesh. It comes in widths of ¼, 3/8 and ½ inches and 3’ x 5’ or 4’ x 8’ sheet stock
Why Use Cement Board Underlayment?
CBU when installed correctly creates a perfect surface to bond tiles to. CBU is designed not to swell, expand or disintegrate when subjected to prolong exposure to moisture. Its lower absorption of water allows for a better tile bond over time. Which is why we see its used a lot in bathrooms.
Using CBU can eliminate the need to add threshold transitions, as it does not raise the height of tiles floors as much as the older, more traditional methods do, such as a “mud job.”
CBU is mostly used in shower walls, under tile floors on tub decks. I’ve seen an in crease in CBU used in outdoor applications such as counters, and skirt walls on out buildings.
How To Install Cement board Underlayment:
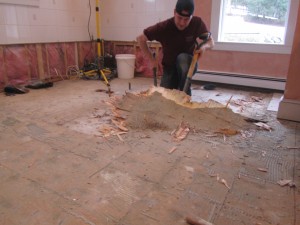
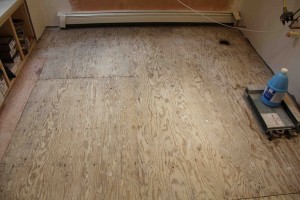
The best tile floor projects start with a solid and secure subfloor. Make sure the subfloor joints are staggered and the panels are glued and screwed down to prevent squeaks.
If your subfloor is not new and was nailed down when it was originally installed I recommend installing some screws to re-secure it and help prevent board movement.
If your subfloor is not new and was nailed down when it was originally installed I recommend installing some screws to re-secure it and help prevent board movement.
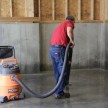
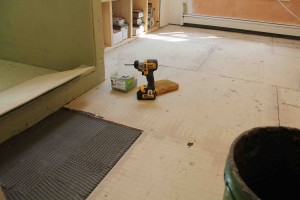
- Vacuum and wipe down the subfloor with a damp rag to clean up all the dust.
- Try to start out by installing a full sheet and then install your smaller sheets in areas that require special fitting and cutting.
- Try to keep factory edges together and put cut edges against the wall or together dead end areas if possible.
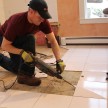
- Use a utility knife or a carbide-scoring tool to cut the CBU. Cutting CBU is similar to cutting drywall. Use the score and snap method. I use a straight edge and score the CBU several times and then bend the board backwards to snap it. A utility
 nife can then be used to cut the glass mesh.
 - If you have jagged cut edges you can use a rasp to smooth the high spots. I simply hit the protruding area with my utility blade to knock off the protrusion or high spot.
- Note – cut your CBU in an area away from where you are installing as the snap and scoring of the CBU causes dust and small particles to litter the cutting area.
- There are several ways to cut circles or cutouts. A hole saw, jigsaw or drill can be used. Most folks simply use a drill to drill multiple holes close together and then lightly tap out the cut out with a hammer.
- Install and dry fit your entire floor prior to securing it to the subfloor.
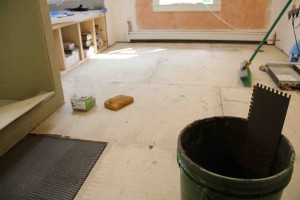
- Mix up a batch of thin set mortar and apply an even coat to the subfloor with a ¼” notched trowel and laminate the CBU down to the subfloor. Follow this up by installing CBU screws every 8 inches on center along the edges and through the field. Ensure that your fasteners are installed perfectly flush or slightly countersunk.
- Note – Stay 3/8 of an inch in from the edges and 2 inches in from the corners. This helps prevent the edges and corners from crumbling under the fastener.
- Stagger the CBU joint from each other and the plywood subfloor and leave a -1/8 inch gap between CBU sheets and a ¼ inch gap at walls and other objects.
- Installing cement board underlayment in this fashion will ensure years of trouble and crack free tile and prevent callbacks.