
Outdoor Showers
This article will discuss planning considerations for, and show you how to build an outdoor shower.
Days of Old Outdoor Showers
Outdoor showers used to be associated just with beach houses, cottages or houses with a pool. Not anymore, outdoor showers are growing in popularity, and powered by the desire of residents longing to be more in touch with the outdoor environment.
Growing Trend?
More and more homeowners are installing outdoor showers in their homes. An outdoor shower is a fun and functional way to add value and interest to their outdoor living space. Showering outdoors just feels good, and when combined with a cool landscape, it can be a relaxing experience.
Today’s Outdoor Showers
Today’s outdoor showers are well-designed and functional extensions of the indoor bathroom, except they’re located outdoors.
They also cost a whole lot less than adding a bathroom shower to a home and add to the whole outdoor living experience that a lot of folks are now designing into their backyards.
Wall Mounted Showers
A wall-mounted shower typically is built off of an existing structure and taps into pre-existing plumbing.
If you plan your outdoor shower in an area that already has plumbing lines nearby you can save time and effort on the plumbing of your outdoor shower. Additionally, the plumbing for these showers will be less exposed and less expensive.
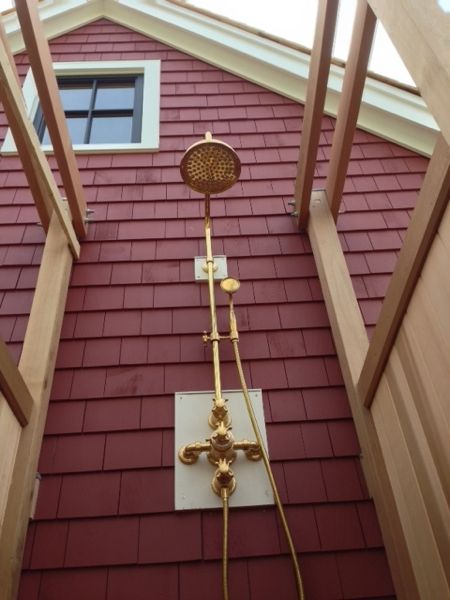
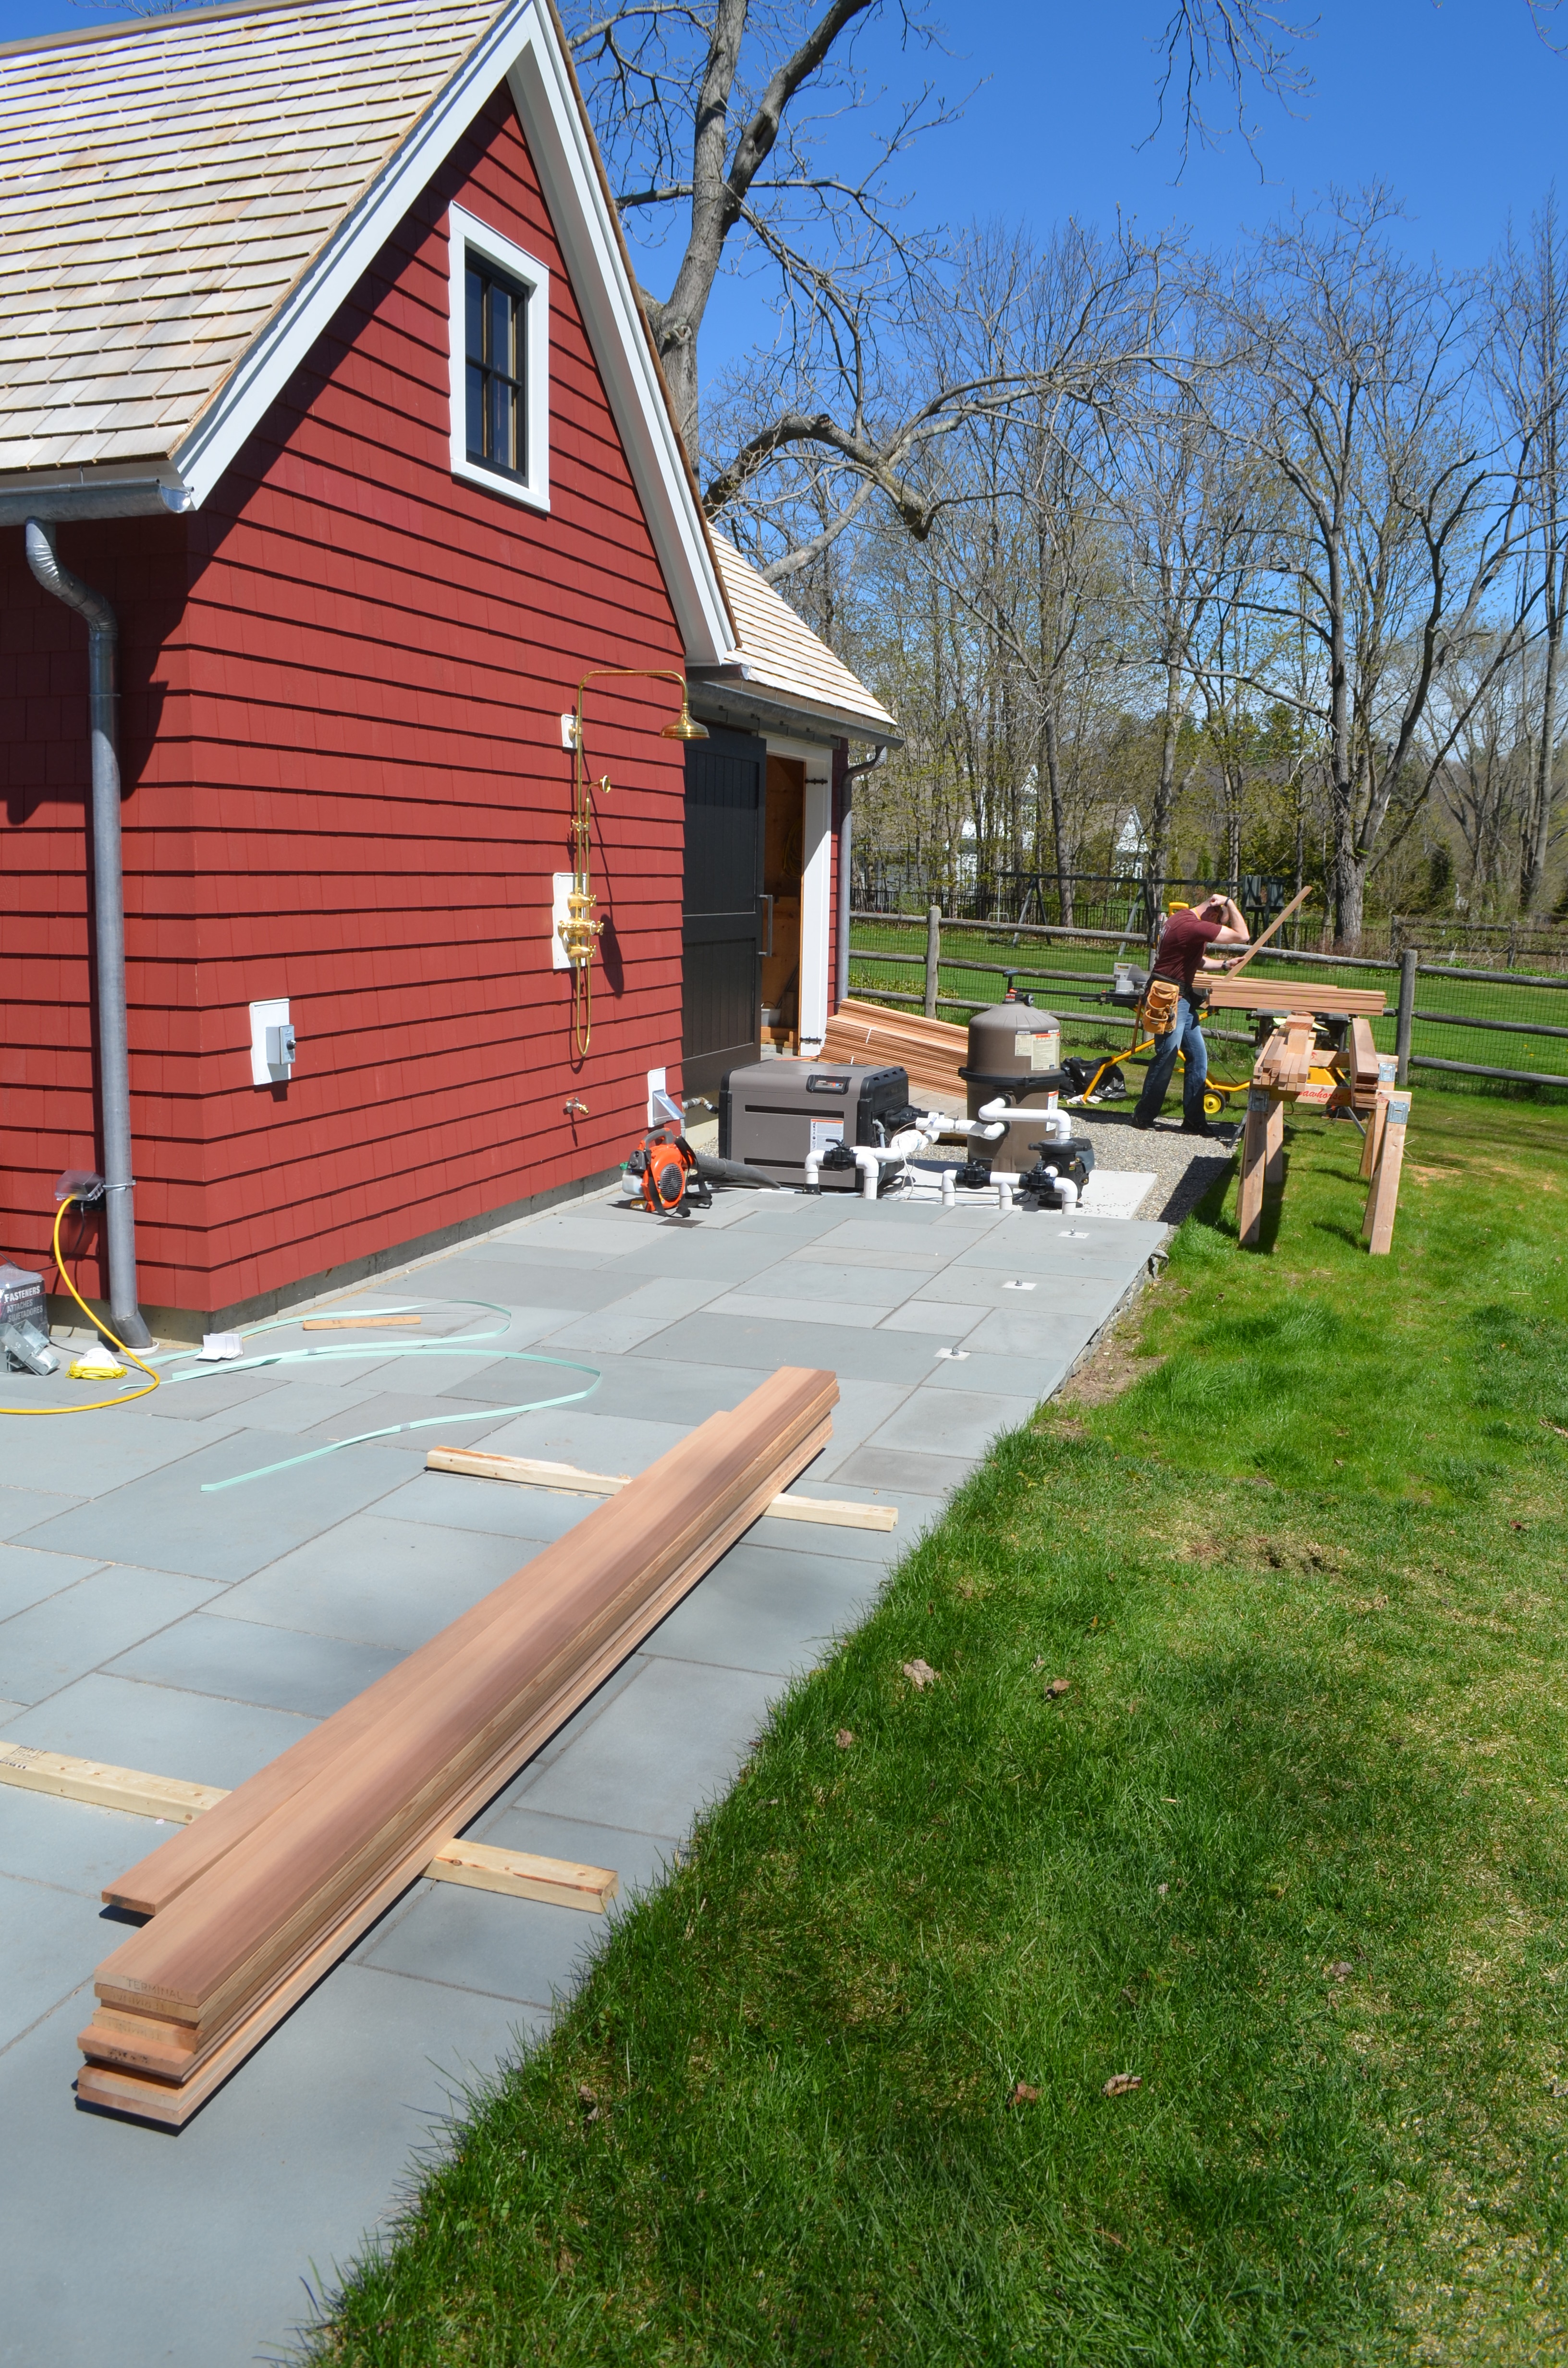
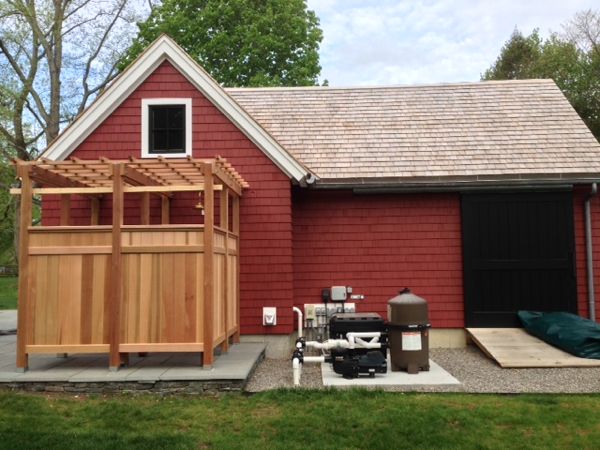
In our project, we added a wall-mounted shower to the rear of an existing pool house that was already plumbed for water, including hot water. Hot water is a plus and almost a necessity if you intend on using this shower a lot.
Continue Reading . . .
Plan!
As with any project, a little bit of planning goes a long way. As a remodeling contractor, I have seen many situations where homeowners spent thousands of dollars in remodeling or building new projects with little to no planning, no budget, or unrealistic expectations.

Prior to starting the project, take the time and effort to thoroughly inspect the site, materials available, and budget and come up with a planned approach.
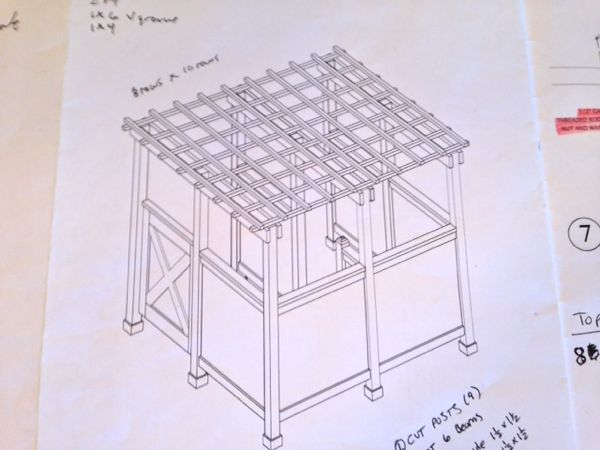
Designing the Outdoor Shower in These Pictures
When the homeowner, also an architect, was thinking about how to design his outdoor shower his concern was function first, then about how to best build it.
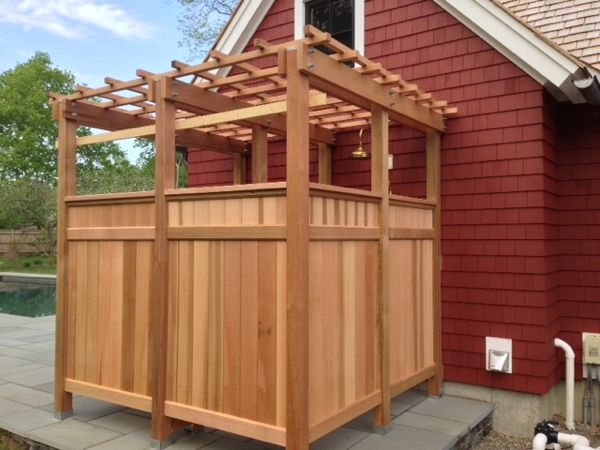
He designed an outdoor shower about 13 years ago, for a client, that had the same plan layout but no trellis structure above. That structure leaned a bit over the years so he added the trellis top structure to help lock in the posts structurally.
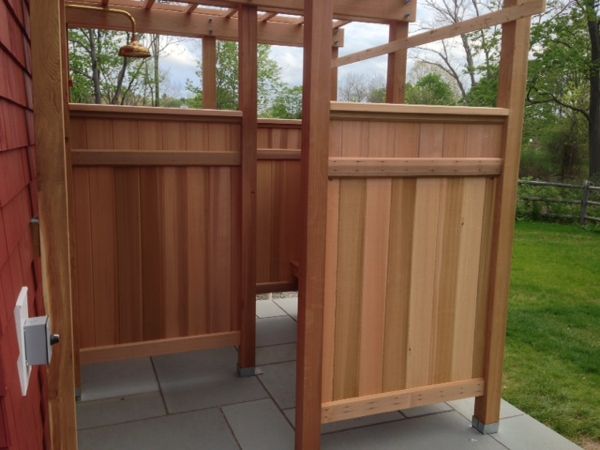
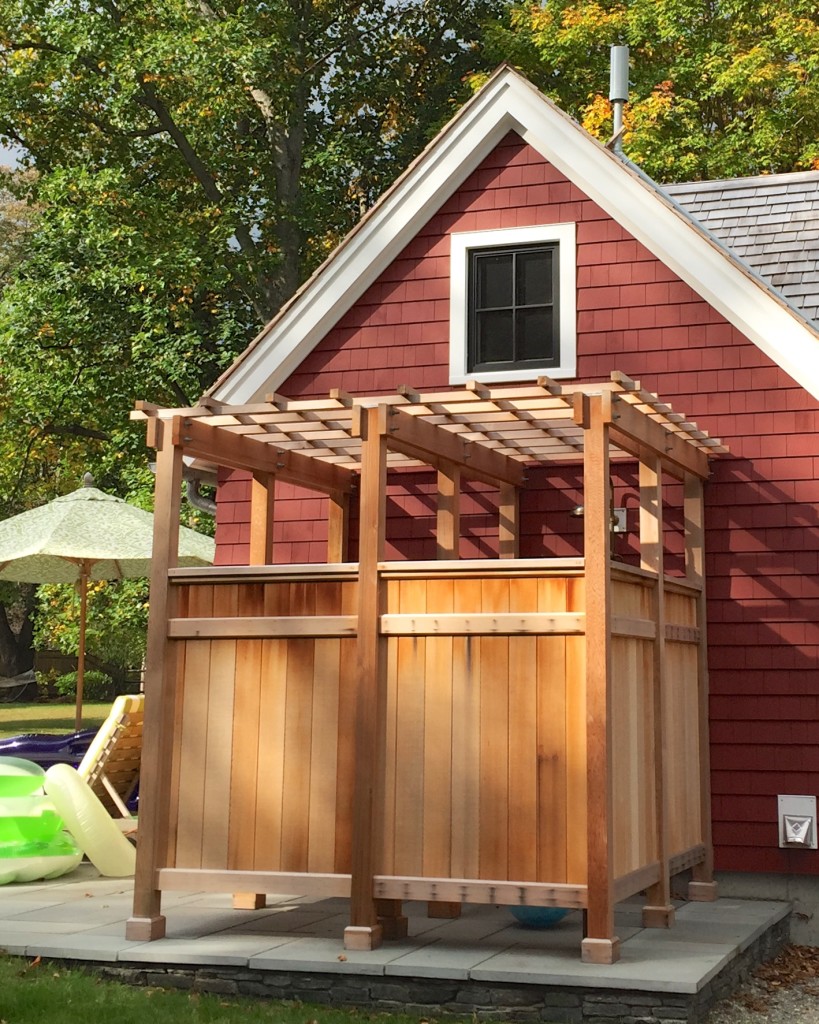
In this current design, he wanted to design a dry entry area to hang towels or clothes. He also wanted the door located so you could open it without exposing a person showering. The homeowner feels that one-room outdoor showers can feel exposed and not very private or cozy.
The shower area has a bench which is usually used for soaps and shampoos, no one usually sits on the bench but it is nice to put your foot upon it. The high posts and trellis structure benefits the structural rigidity and adds an umbrageous element ( like being under a leafy tree).
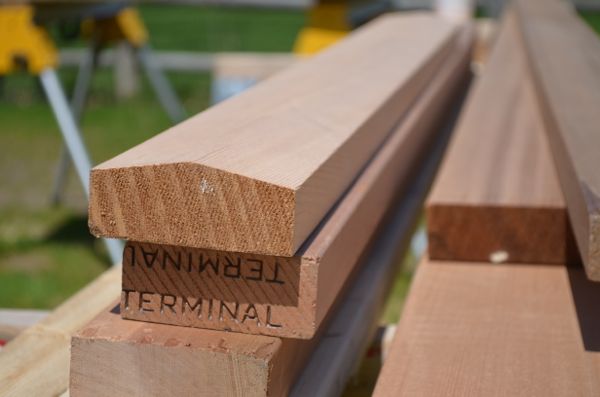
Another consideration was material selection, the intent was to have the wood weather naturally to a silver grey. Not all woods do that well, especially depending on the location. You need good airflow, sunlight, and exposure to rain. It is nice to have your structure look nice while it is going through this process. Using darker woods like red cedar and mahogany helps.
Outdoor Shower Features to Consider:
□ Location
□ Construction materials: wood, tile, stone, metal
□ Plumbing connections
□ Hot water
□ Drainage: dry well, leach pit, septic or municipal?
□ Privacy and access: wall slats, solid walls, the height of walls?
□ Amenities: bench, towel racks, soap holder
□ Usage: 3-season or year-round use. Shut off and drain valves
Continue Reading . . .
Location
Choose the location of your outdoor shower. Select an area that’s relatively level; a slight grade will promote runoff.
If your shower is wall-mounted give consideration to the proximity of your indoor plumbing access for connections and possible municipal drain hookups.
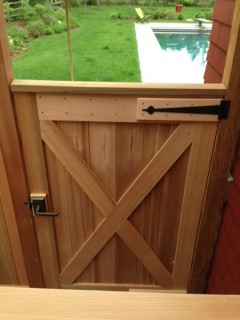
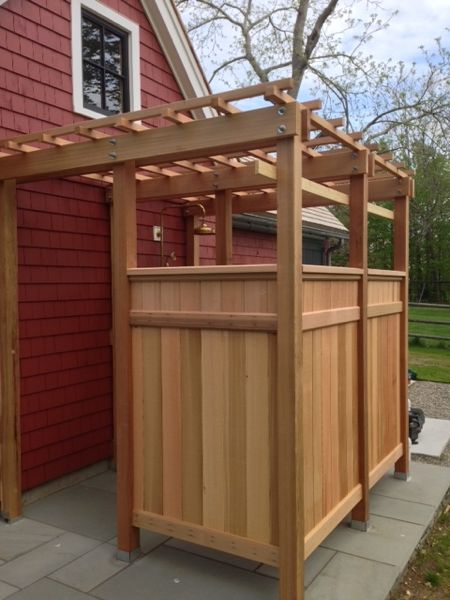
Finished view
Construction Materials
For shower floors, walls, and fixtures, choose a material that will endure the weather conditions.
Outdoor showers can be made of wood, stone, metal, or tile. If using wood consider using insect and weather-resistant materials such as treated lumber, Cedar, Teak, Ipe, or Mahogany.
The floor of the shower area can be many materials from poured concrete, blue stone, tile, or a raised platform out of wood. Some floors are simply installed with a pitch to drain water away from the shower area and others have drains installed. [see drainage below]
Continue Reading . . .

Plumbing
Hook up an outdoor shower much like you would an indoor one. Plumbing connections and practices should mirror indoor plumbing codes and installation practices. For example, if you are including both hot and cold water, add a pressure-balance valve to prevent scalding.
If you live in a cold climate and will be shutting off the shower in the winter, make sure you include a shut-off and drain valve to winterize the shower.
Our shower is attached and connected to a three-season pool house that is winterized at the end of the season. All of the plumbing fixtures will be drained and the pipes blown out with compressed air.
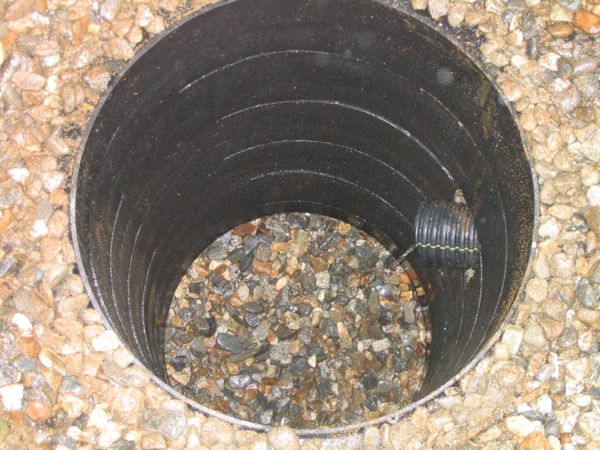
Drainage
Most outdoor showers simply drain into the ground or through a bed of stone. This is less taxing on a septic system than an indoor shower but may be in violation of local codes. In many municipalities, outdoor showers are subject to building codes, check with your local inspector for guidance.
Our project has a blue stone patio with a built-in drain. It drains into a nearby dry well. Read more here on installing a dry well.
Privacy Enclosures
Most people want some privacy, typically that means a small fenced-in area. To be safe, design your outdoor shower to accommodate the most modest person and you’ll be fine.
If large enough, outdoor showers can contain a bench to sit down on, clothes – towel racks, and soap dishes. Some larger showers even feature a separate “dry” changing area.
Depending on the location of your shower enclosure you may want to consider overhead privacy or protection from the sun. This might be more of a concern in the city with privacy concerns from windows in adjacent buildings.
Amenities
On our outdoor shower project, we built in a “dry” changing area adjacent to the shower area. The dry area could also be used to store towels or a laundry hamper for dirty clothes or wet towels.
The shower area also has a bench seat just out of the flow of water that could be used for changing as well as holding a towel or shampoo.
Continue Reading . . .

How to Build an Outdoor Shower – Steps:
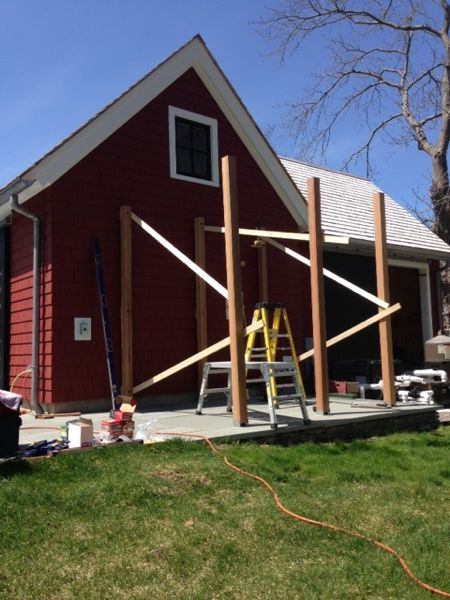
Step 1 – Secure Posts
Layout your shower enclosure. Many times this can be as simple as measuring out from a known point like a house foundation.
Typically the two outside corners of any structure receive support posts and then the middle and sides are filled in as needed. Once you have the footprint determined and marked, lay out the other supporting posts and check for square.
Carpenters often use the 3-4-5 method for squaring corners and ensuring that the projects they are building have a precise 90-degree angle. In residential construction using a framing square and straight edges can help you get there but to check larger you will need to employ a 3-4-5 triangle technique and check diagonal measurements to ensure accurate 90-degree angles.
After the layout is complete drill holes and install threaded anchors and fasten galvanized or stainless steel metal post bases to concrete footings or pads with expansion anchors or threaded road and epoxy.
Set bases, tap in expansion anchors, and secure with washers, nuts, and ratchet.
TIP: When preparing to drill concrete, mark the depth on a masonry bit with tape and use a rotary hammer drill.

Step 2 – Attachment to House
On a wall-mounted shower, you will be building off of an existing structure. Take pains in keeping this structure sound to try to prevent premature rot caused by adding the shower.
Installing the shower head on the wall and pointing it away from the house structure is one method to minimize water spray exposure. Another method to protect the building is to install spacers and flashing to allow airflow and drying of the house siding and shower enclosure.
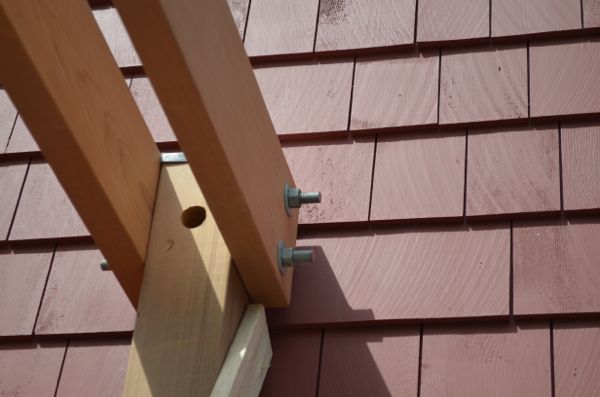
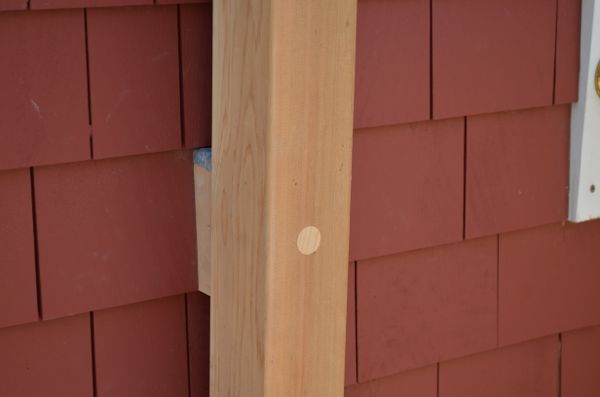
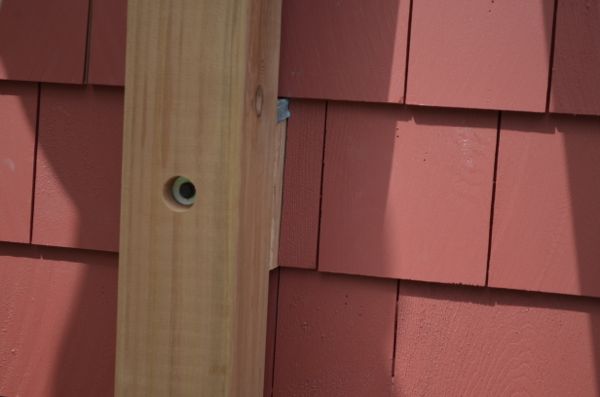
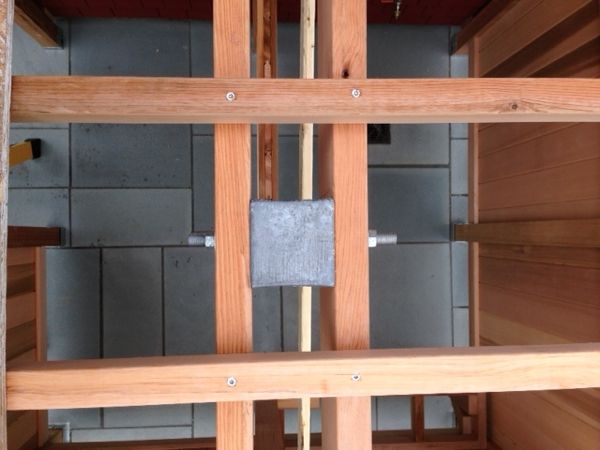
In our project, we installed 2×6 cedar blocking to the house wall, and cut angles on the blocks to shed water left and right of the post. Additionally, we also covered the blocks with flashing that was installed under the siding. [The spacer blocks allow airflow behind the first support post so both the post and house siding can dry out.]
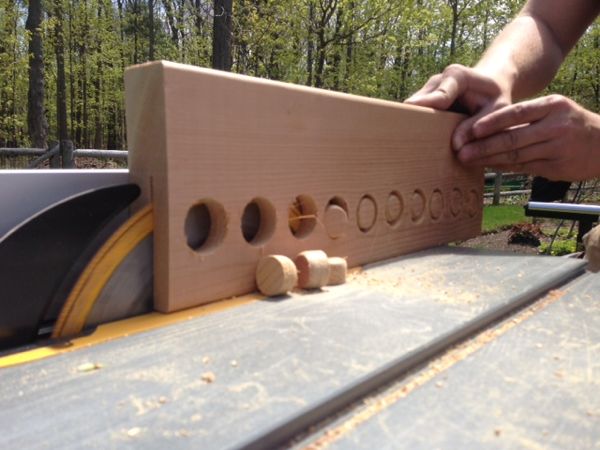
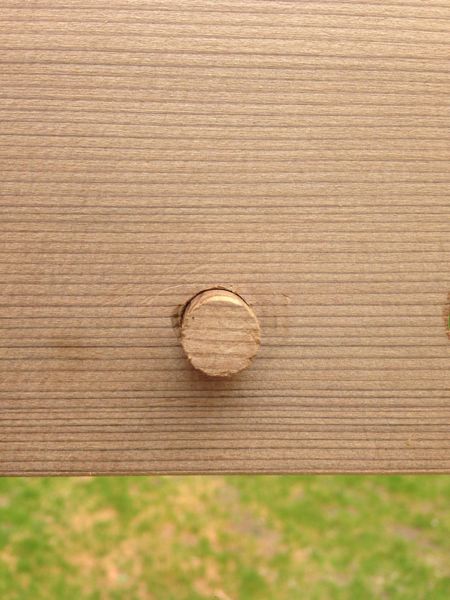
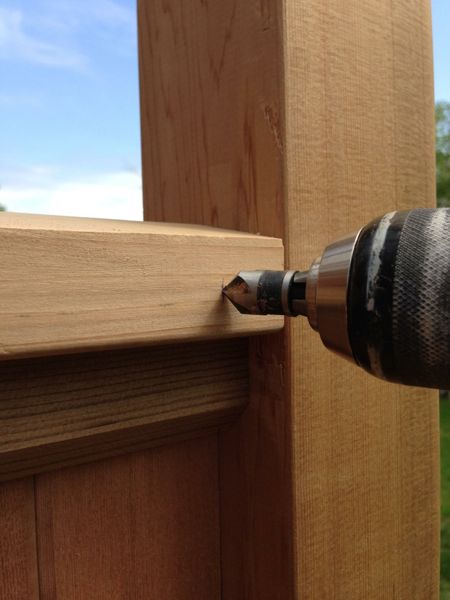
On the house wall support 4×4 post, we bored 1-inch holes in the post and then installed through bolts where we could and timber locks into solid framing, such as the sill beam. Using a 1-inch plug cutter we made plugs and filled the holes afterward.
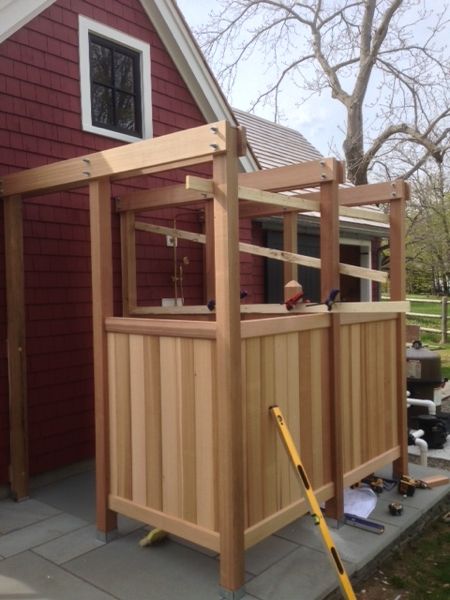
Step 3 – Install Support Post
Almost all structures will have walls and some will have a roof or trellis-type structure overhead.
Cut and secure your support posts to the post bases you just installed. Support posts can be 4×4, 4×6, or 6×6 depending on your design.
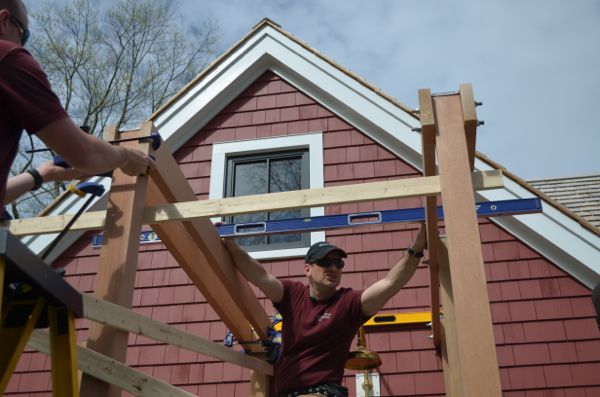
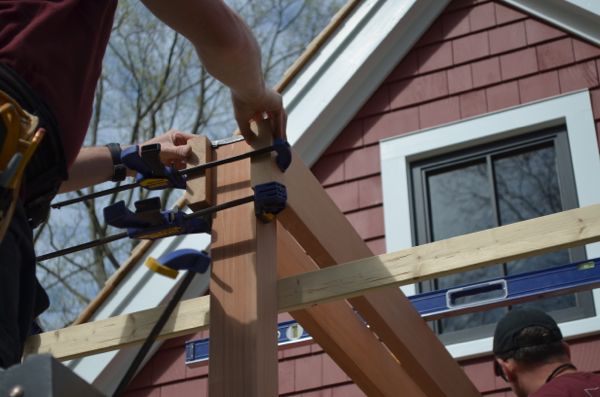
To hold the posts in place use 1×2 strips of wood or “strapping” and a pneumatic finish nailer or clamps. Finish nailers are great for temporarily tagging shoring in place. Tie posts to one another and to the house wall for support as needed. The goal is to keep them in a plumb position.
Use levels to plumb the support posts and constantly check them. We installed a total of nine support posts and capped each one with lead flashing to prevent water from wicking into the end grain.
Secure the posts to the base plates with approved galvanized or stainless steel 10-penny fasteners.
Continue Reading . . .
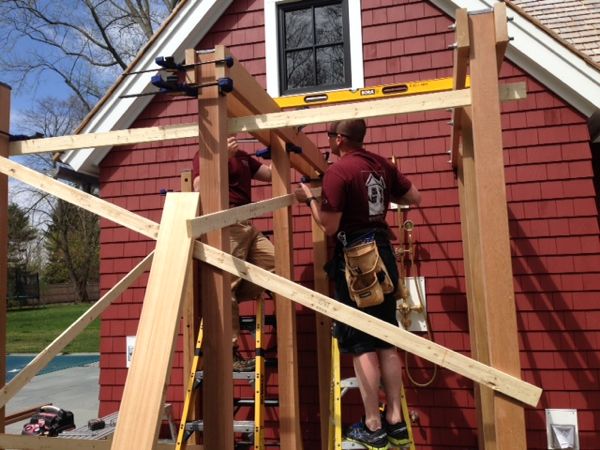
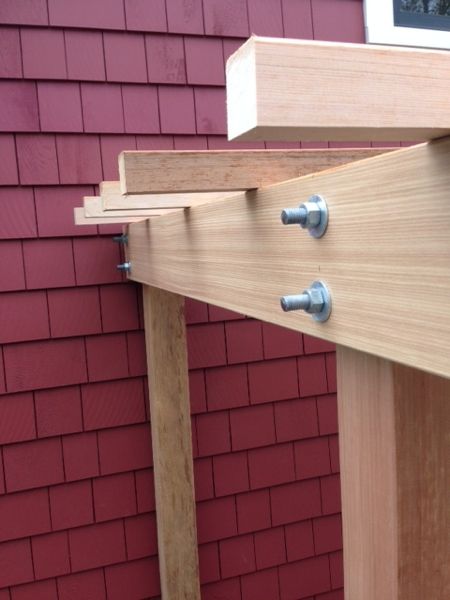
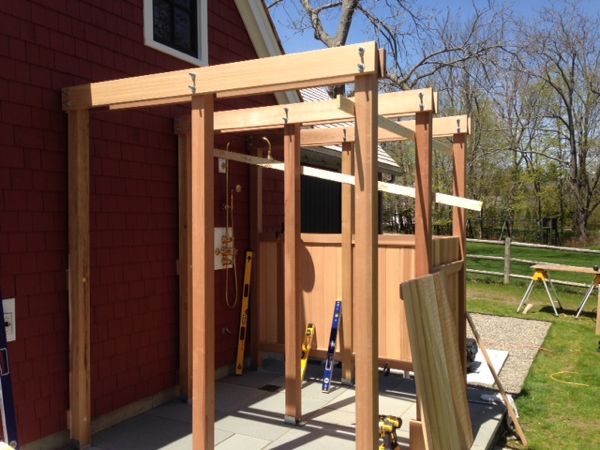
Step 4 – Install Support Rafters
We installed two 2×6 cedar boards on each side of the 4×4 support posts perpendicular to the house wall. This resulted in three pairs of 2×6 rafters, six rafters in total. The rafters each tie a row of support posts together and secure them back to the house.
To install the rafters we temporarily clamped them in place, checked for uniform elevation with a level, and attached them to each post with galvanized threaded rods, washers, and nuts.
Later we will add strips of cedar in a crisscross grid on top of the rafters to achieve a trellis look and also to further support the structure. The crisscross grid could also provide support for future climbing vegetation.
Step 5 – Install Wall partitions
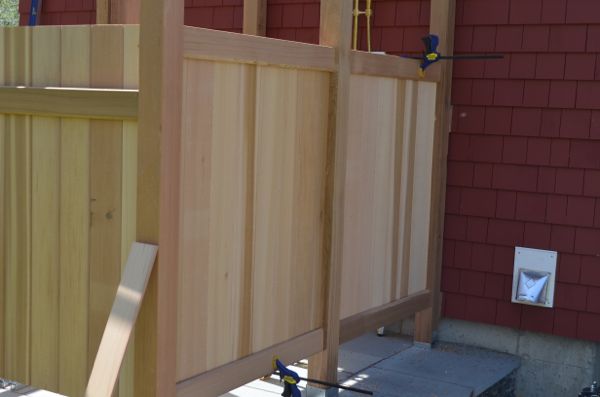
Depending on your design this is the time to install partitions between your support posts. Some folks opt for a solid wall while others prefer the staggered wall board spacing, inside and outside which completely obscures the view of the shower.
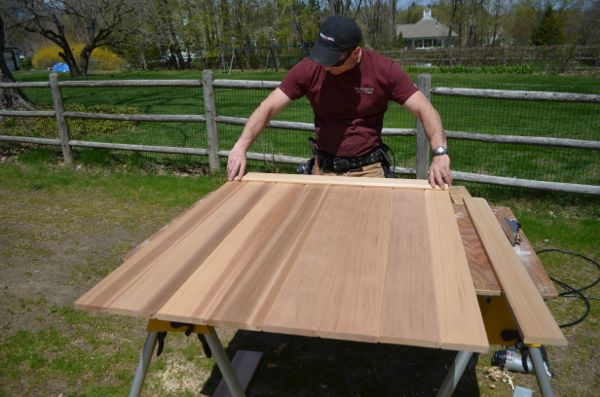
On our project, we used tongue and groove cedar to male our walls. We planned for and ripped our boards on a table saw to achieve even spacing of our boards at each post.
To get tight-fitting partitions I squared one end of my horizontal trim board, leaving the other end long. I held it in a position where the partition wall was to be placed and marked it with a utility knife. I then used this board as my reference to make my wall partitions.
TIP: The utility knife technique is a carpenter’s trick for achieving tight miters and other tight-fitting parts. Read more.
We then used pneumatic finish nails to fasten two chamfered, horizontal trim boards to the top and bottom of one side of the wall partitions.
Our partition walls were spaced off the patio 8 inches. Once in place and plumbed, we secured them in place with countersunk, stainless steel screws.
Screws were installed down from the top edge and sidewall. [top and bottom] Afterward we installed the other side horizontal trim boards to hide our screws.
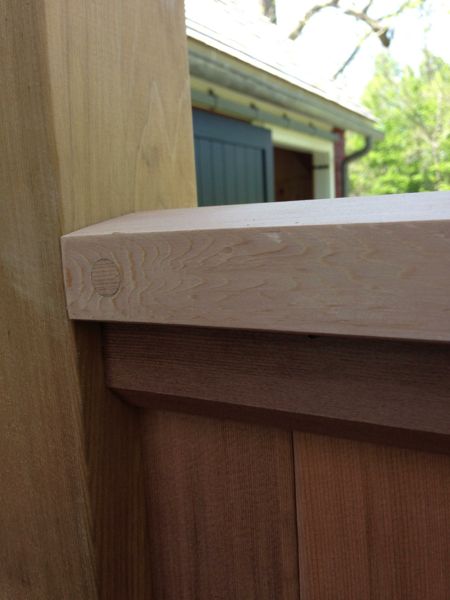
To finish off the partition wall we added a 2×4 top cap that we cut to shed water. This cap also had a dado cut on the bottom to help secure and cover the partition wall seam.
Continue Reading . . .
Step 6 – Install Top Grid
For our trellis grid, we ripped cedar stock into 1-1/2 by 1-1/2 inch strips. We installed our grid, spaced approximately 10 inches apart with stainless steel screws.
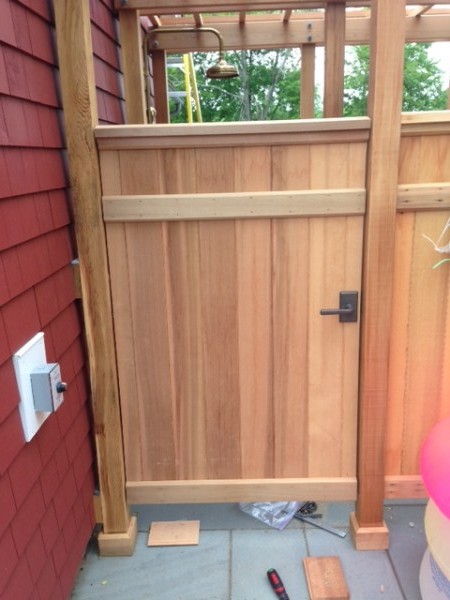
Step 7 – Assemble and Install the Gate
We made our board and batten gate similar to the wall partitions but doubled up on the thickness.
Assemble the door frame first, by fitting the T&G boards and cutting them to size. Ensuring it is square, add the diagonal batten pieces and secure them in place.
Batten doors can be made with tongue and groove doors, ship-lap, or simple boards that are typically suitable for outdoor use. Tongue and groove and shiplap doors offer privacy by closing the seams off. Read more on how to make a board and batten door here. Fasten all the parts with rust-resistant screws.
TIP: Cutting a bevel on the hinge side of the gate will allow the door to open and close better during times of high humidity by reducing the surface area that could touch when the gate is closed. The goal is to install the gate with a consistent reveal or gap on both sides.
Use a track saw, circular saw, power plane, or block plane to adjust the door in place. Once trimmed and fitted install heavy-duty hinges, gate stop, lock and latch set.
TIP– Space gate equally in opening and secure hinges along one edge of the door for maximum support. Rest the door temporarily on support blocks while positioning and securing the hinges. Add a gate stop on the opposite side.

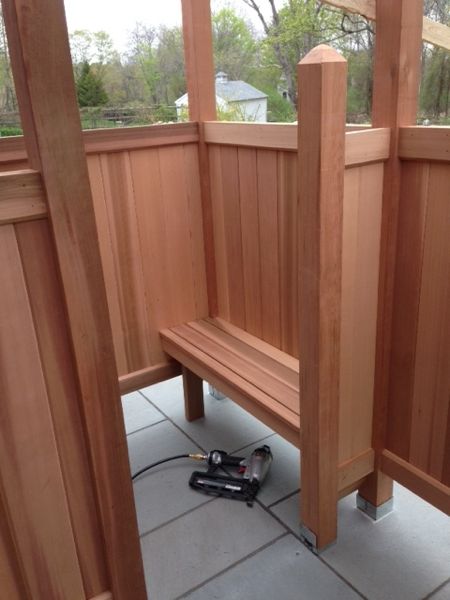
Step 8 – Build Bench Seat
On our shower, we built a seat in the shower area and used all cedar stock. The frame is secured to three support posts with one vertical support leg on the corner not attached to a post.
The bench seat is 1×4 strips of cedar spaced ¼- inch apart for airflow and drainage.
Enjoy Your Outdoor Shower
Regardless of your climate outdoor showers are quickly becoming popular and part of outdoor living.
The goal is to bring the same comforts they have inside to outdoor spaces, by creating multipurpose outdoor living spaces that function as extensions of their home.