Building A Glazed Pottery Fountain Part 1 of 2
Part 1 of 2 posts
How to Build A Hidden Water Fountain
A great friend of ours bought my wife and I a beautiful blue, glazed pot for our wedding anniversary. The blue glaze matches the blue tiles surrounding our pool.
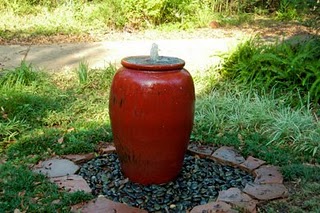
My wife has wanted a water feature by the pool for awhile now and asked me to make this glazed pot into a water fountain. Part of my honey-dew list this weekend was to start building the water feature, similar to the one one shown above, for our back yard.
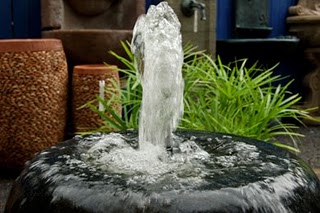
I decided to construct a disappearing fountain. This will be a great way to add the sound of moving water to the pool area and flower garden in our yard. Some quick research has shown that a glazed pot is suitable for a fountain and has a life expectancy of 20 plus years.
My vision is for this fountain to have a 3/4″ copper pipe protruding approximately two inches above the rim / water line. I’m not sure yet if I want the bowl to be completely full of water or whether it will have smooth, round stones in it and water plants around it. I’ll get to that later…
Either way in order for this fountain to overflow, I need a method to collect the overflow and recirculate it through the fountain. This method is called a disappearing fountain basin.
The spot we chose is this corner, to the right of the large stone at the end of the pool deck. [click to enlarge photo]
I decided to use the hidden fountain basin. [shown below]
The basin is made of reinforced plastic and the grating is reinforced PVC with a mesh netting covering the grate.
The basin will house the pump, pipe and other connections as well as a reservoir of water for the fountain.
The basin will be buried at ground level and covered with decorative stones. I plan on using Mexican beach pebbles.
The basin has a mesh layer over it to stop small debris from entering it. [below]
I chose to purchase my pump and basin from a local nursery. I chose a Little Giant submersible pump designed for continuous circulation. This pump can handle up to 400 gallons and pumps 475 gallons per hour.
The pump and hose -below.
To keep my options open, I chose a pump powerful enough to push the water above the waterline, if it’s too powerful I will restrict the water flow with a shut off valve that I plan on installing.
I plan on using Algaefix [pond care] to keep the water clean. Algaefix effectively controls different types of algae that plague ornamental ponds and fountains and will not harm plants.
This solution treats 50 gallons of water with one teaspoon, applied once a week.
I want to achieve several things with this project:
1. I want to install a shut off so I can restrict and control the flow of water. [Photo: below red handle]
2. I want to be able to drain and disconnect the pump and bowl for winter storage.
3. I want to hear the splash of the water as the water overflows from the pot.
4. I may try to add an irrigation head or bury the basin close to one so that the water level can be re-filled without dragging out the hose.
I toyed with a variety of connectors before arriving at the final configuration shown below.
Below is the shut off valve that I will use to restrict the water flow. It is important to put anything that restricts the flow of the water after the pumps discharge and not before the intake.
I connected the shut off valve with a pair of 3/4″ x 3/4″ nylon barb adapters and stainless steel clamps. The nozzles had Teflon applied to the threads before screwing them into the shut off valve. [below]
The shut off vale is connected to the pump with 3/4″ hose and a stainless clamp.
At the end of the hose I used a 90 degree, irrigation, elbow insert 1″ x 3/4″.
The PVC elbow connects to a 3/4″ copper threaded male adapter fitting. A short piece of 3/4″ pipe seperates the male adapter from my disconnect fitting.
The disconnect fitting will allow me to drain the pot and remove it for winter storage.
Disconnect fitting shown open. [below]
The final connections shown below. The copper tube will be mounted through the center of the glazed pot.
My next post will show the following steps that need to be completed:
1. Install the hidden basin in the ground
2. Drill a 3/4″ hole in the pot to receive the copper pipe.
3. Epoxy the hole and fill two existing, not centered, holes.
4. Trench an electrical line to the pump. Tie into electrical circuit.
5. Cut an access panel in basin, closest to the electrical source, to allow pump to be serviced and pot to be disconnected.


