Installing Warmup Radiant Heat Under An Oak Floor
Wood floors and electric radiant heat is a great way to add warmth and comfort to any room. It’s also a fairly simple process: because there are no vents, ducts, pipes, or radiators to deal with, it often solves issues that come up in the remodeling process.
I like using electric radiant heat because, simply put, it heats really well. A radiant heat system heats the entire room from the floor up, resulting in heat that is consistent throughout the room. The heat produced by the system also reduces humidity and draftiness, which results in fewer dust mites and allergens in the air.
Electric Radiant Heat Solves Remodeling Spatial Problems
On one recent remodel, I was updating an unheated 4-season porch with 3 exterior walls, a roof above, and a crawlspace beneath. The client had their HVAC contractor try to access the porch for heat, but all they were able to do was split an existing heating duct to get some heat into the porch. Unfortunately this was not enough and the porch was still cold. They turned to me for help.
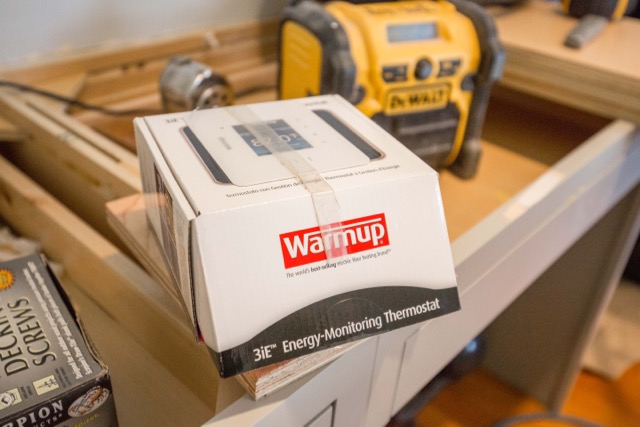
We chose to use the Warmup Inc. “Loose Wire Heating System” (NADWS) paired with their new programmable 4iE Smart Wifi thermostat. Using the Warmup system, were able to offer our clients the ability to continue their hardwood flooring into the adjacent porch, and add heating comfort. The result was luxurious warm floors, and the benefit of a maintenance-free heating system completely hidden under the hardwood floor.

Moisture and Temperature: Common Misconceptions
Radiant heat, whether water-based or electric, does not affect wood floors. Only moisture can negatively impact wood and cause it to contract, resulting in floor cracks. Temperature has little impact on wood floors; it is therefore completely safe to use radiant heat with wood.
It is common to confuse the effects of moisture and temperature on wood. Temperature only has an impact at very high levels, while even moderate amounts of moisture can hurt a wood floor.
Controlling Crawlspace Moisture Issues
Because the porch was built over a dirt floor and adding a concrete sub-floor was not in the budget, we knew we would have to control for moisture. So the first thing we did was close the crawl space vents and apply closed-cell spray to the entire underside of the floor system, encapsulating all of the floor components and rim joist.
Many crawl space floor joists are insulated with fiberglass batt insulation, which tends to absorb moisture and also can fall out if not properly installed. Insulating the perimeter walls is one way to avoid this. Another option is to fill the entire floor joist bay and encapsulate the entire floor joist system (sills, rim joists and joists) with closed-cell, spray foam insulation.
The next step was to cover the floor with a crawlspace liner and open the crawlspace to the basement, which is HVAC conditioned.
Insert Crawlspace Link: http://www.aconcordcarpenter.com/venting-and-insulating-a-crawlspace.html
The goal was to build a sealed, conditioned crawlspace that would avoid condensation during humid seasonal conditions. Once we were satisfied that we addressed those moisture issues, we focused on adding the Warmup electric radiant heat system.
Note: With a non-insulated crawl space under the plywood, you should use insulation boards prior to installing the heating coils.
Using Warmup Electric Radiant Heat Under Oak Floors
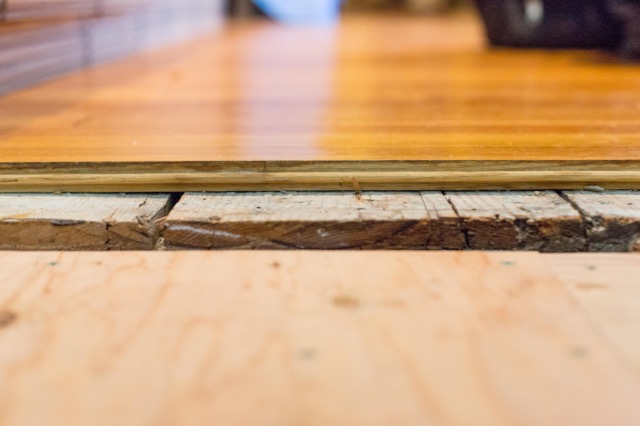
In our four-season porch, we decided to install ¾-inch oak hardwood flooring to match the rest of the house flooring, but we had some floor height issues to deal with first. The 4-season porch floor was 1-1/2 inches lower the finished hardwood floor height of the main house. We wanted the new wood floors and electric radiant heat system to be seamless, and the same height as the main house.
Matching Floor Heights
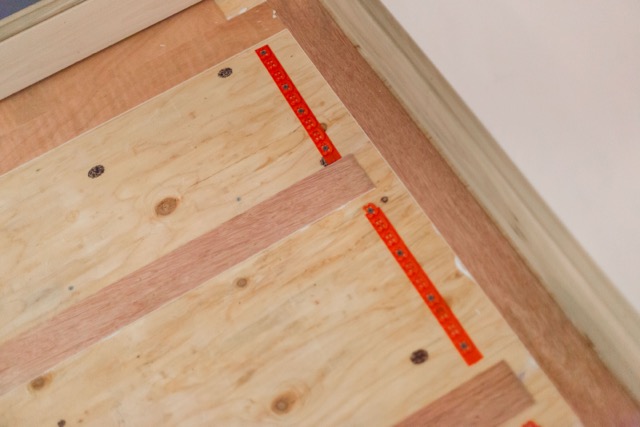
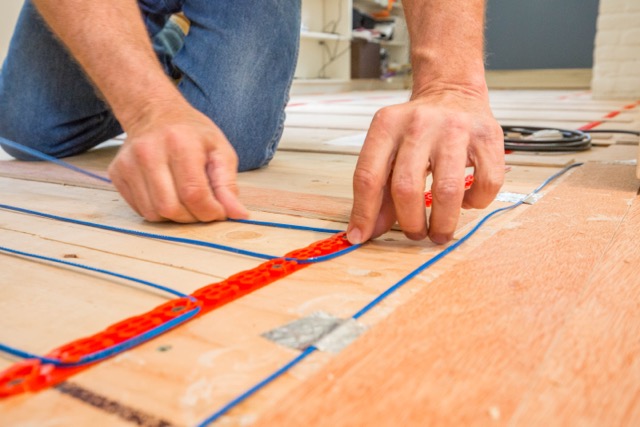
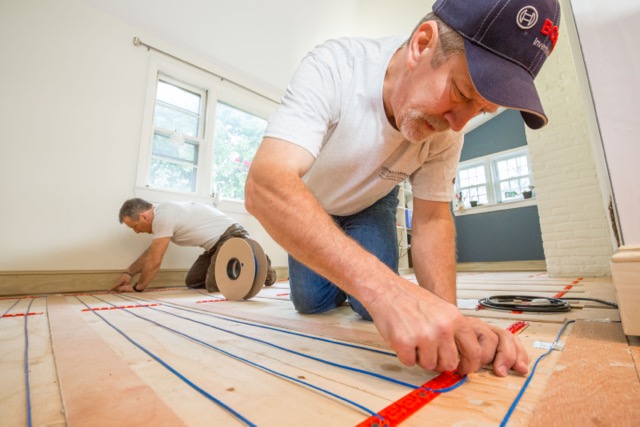
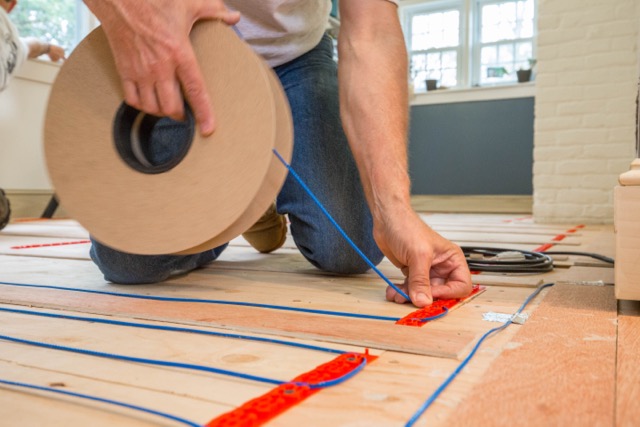
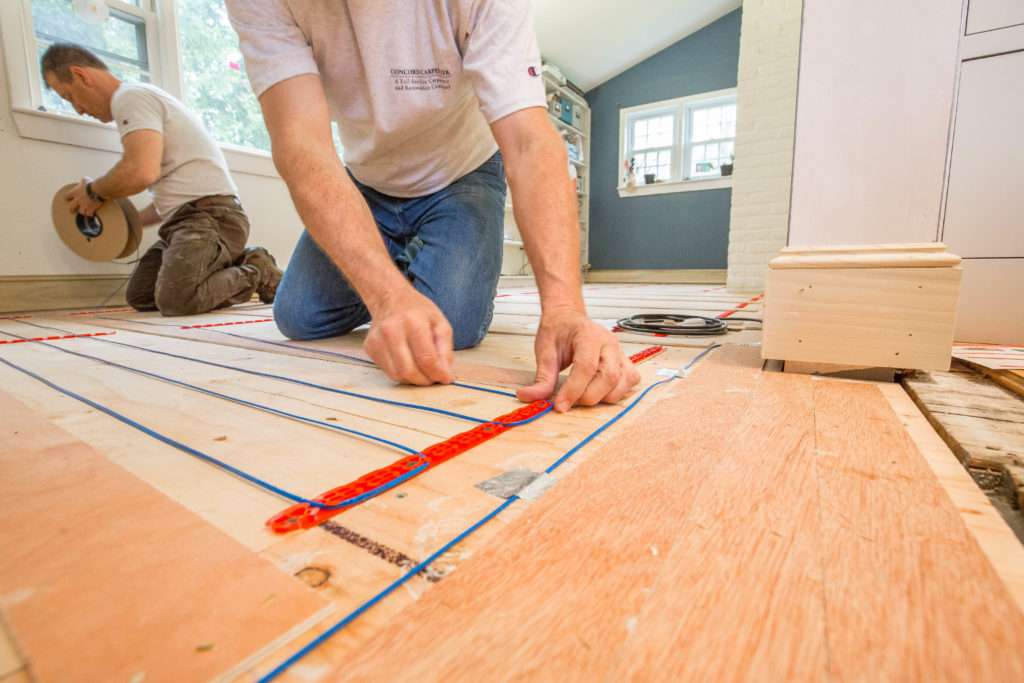
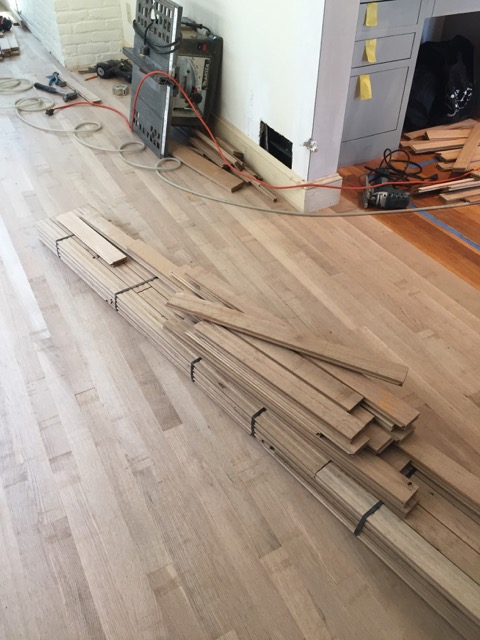
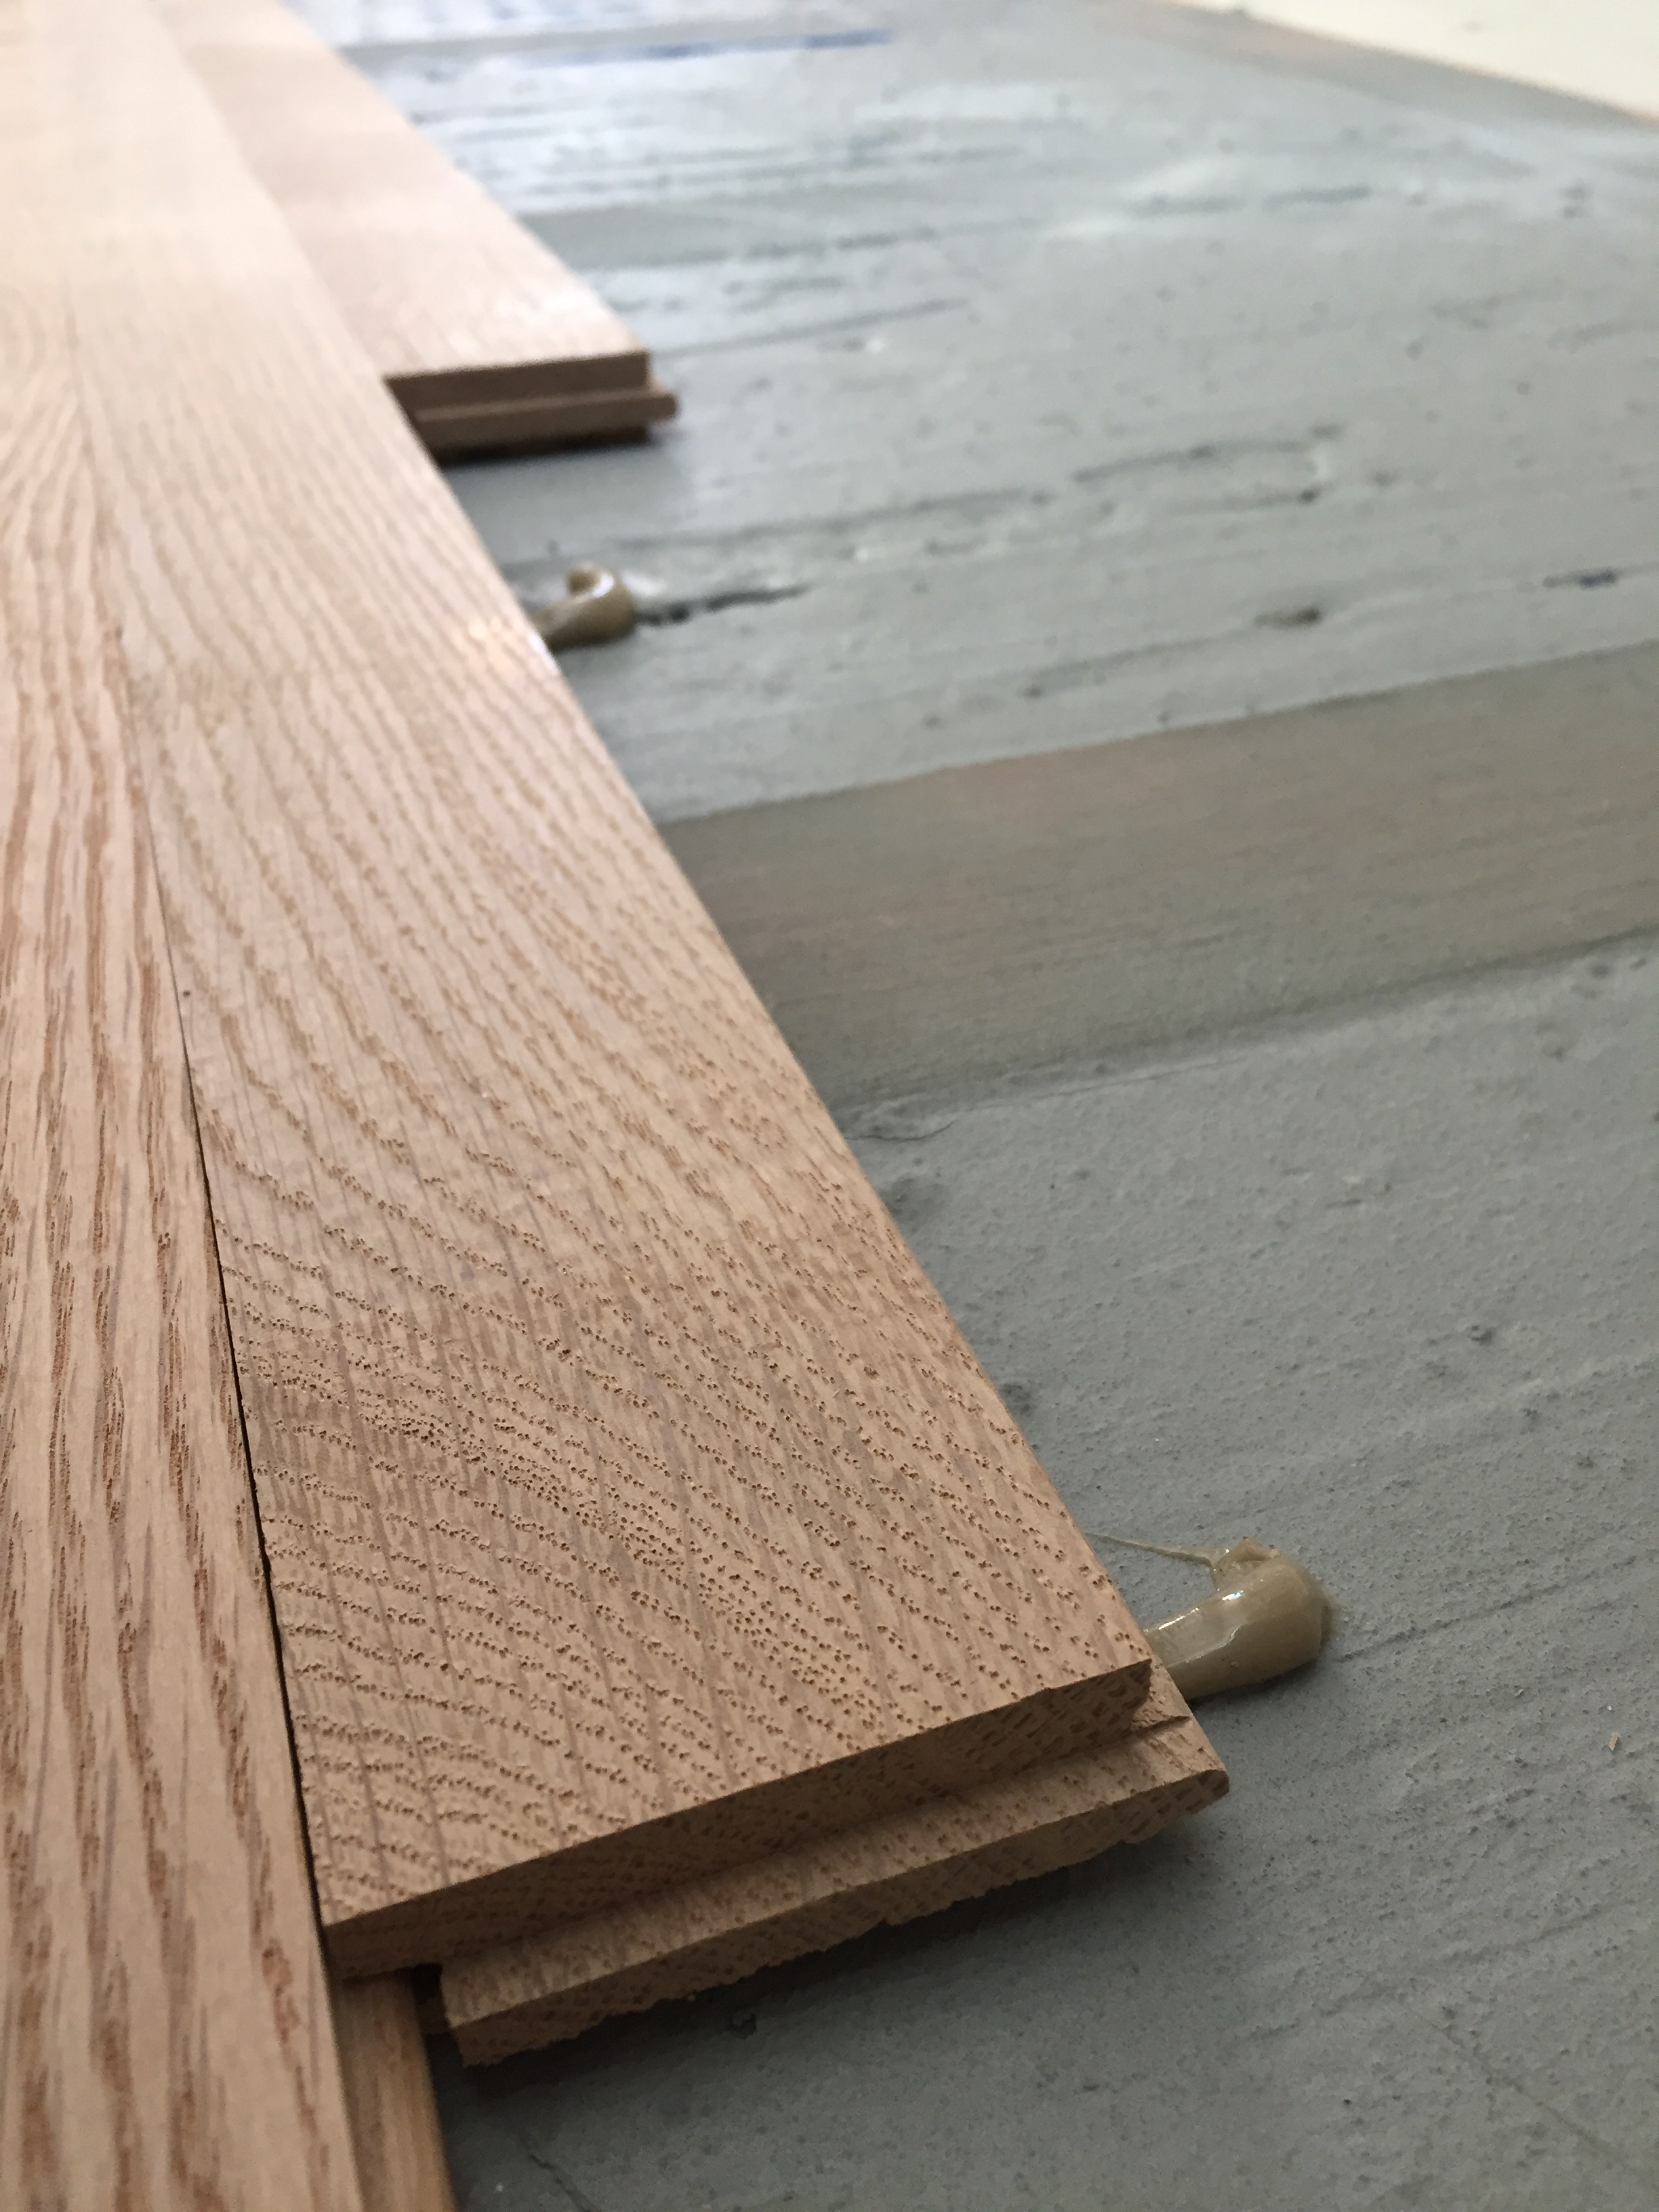
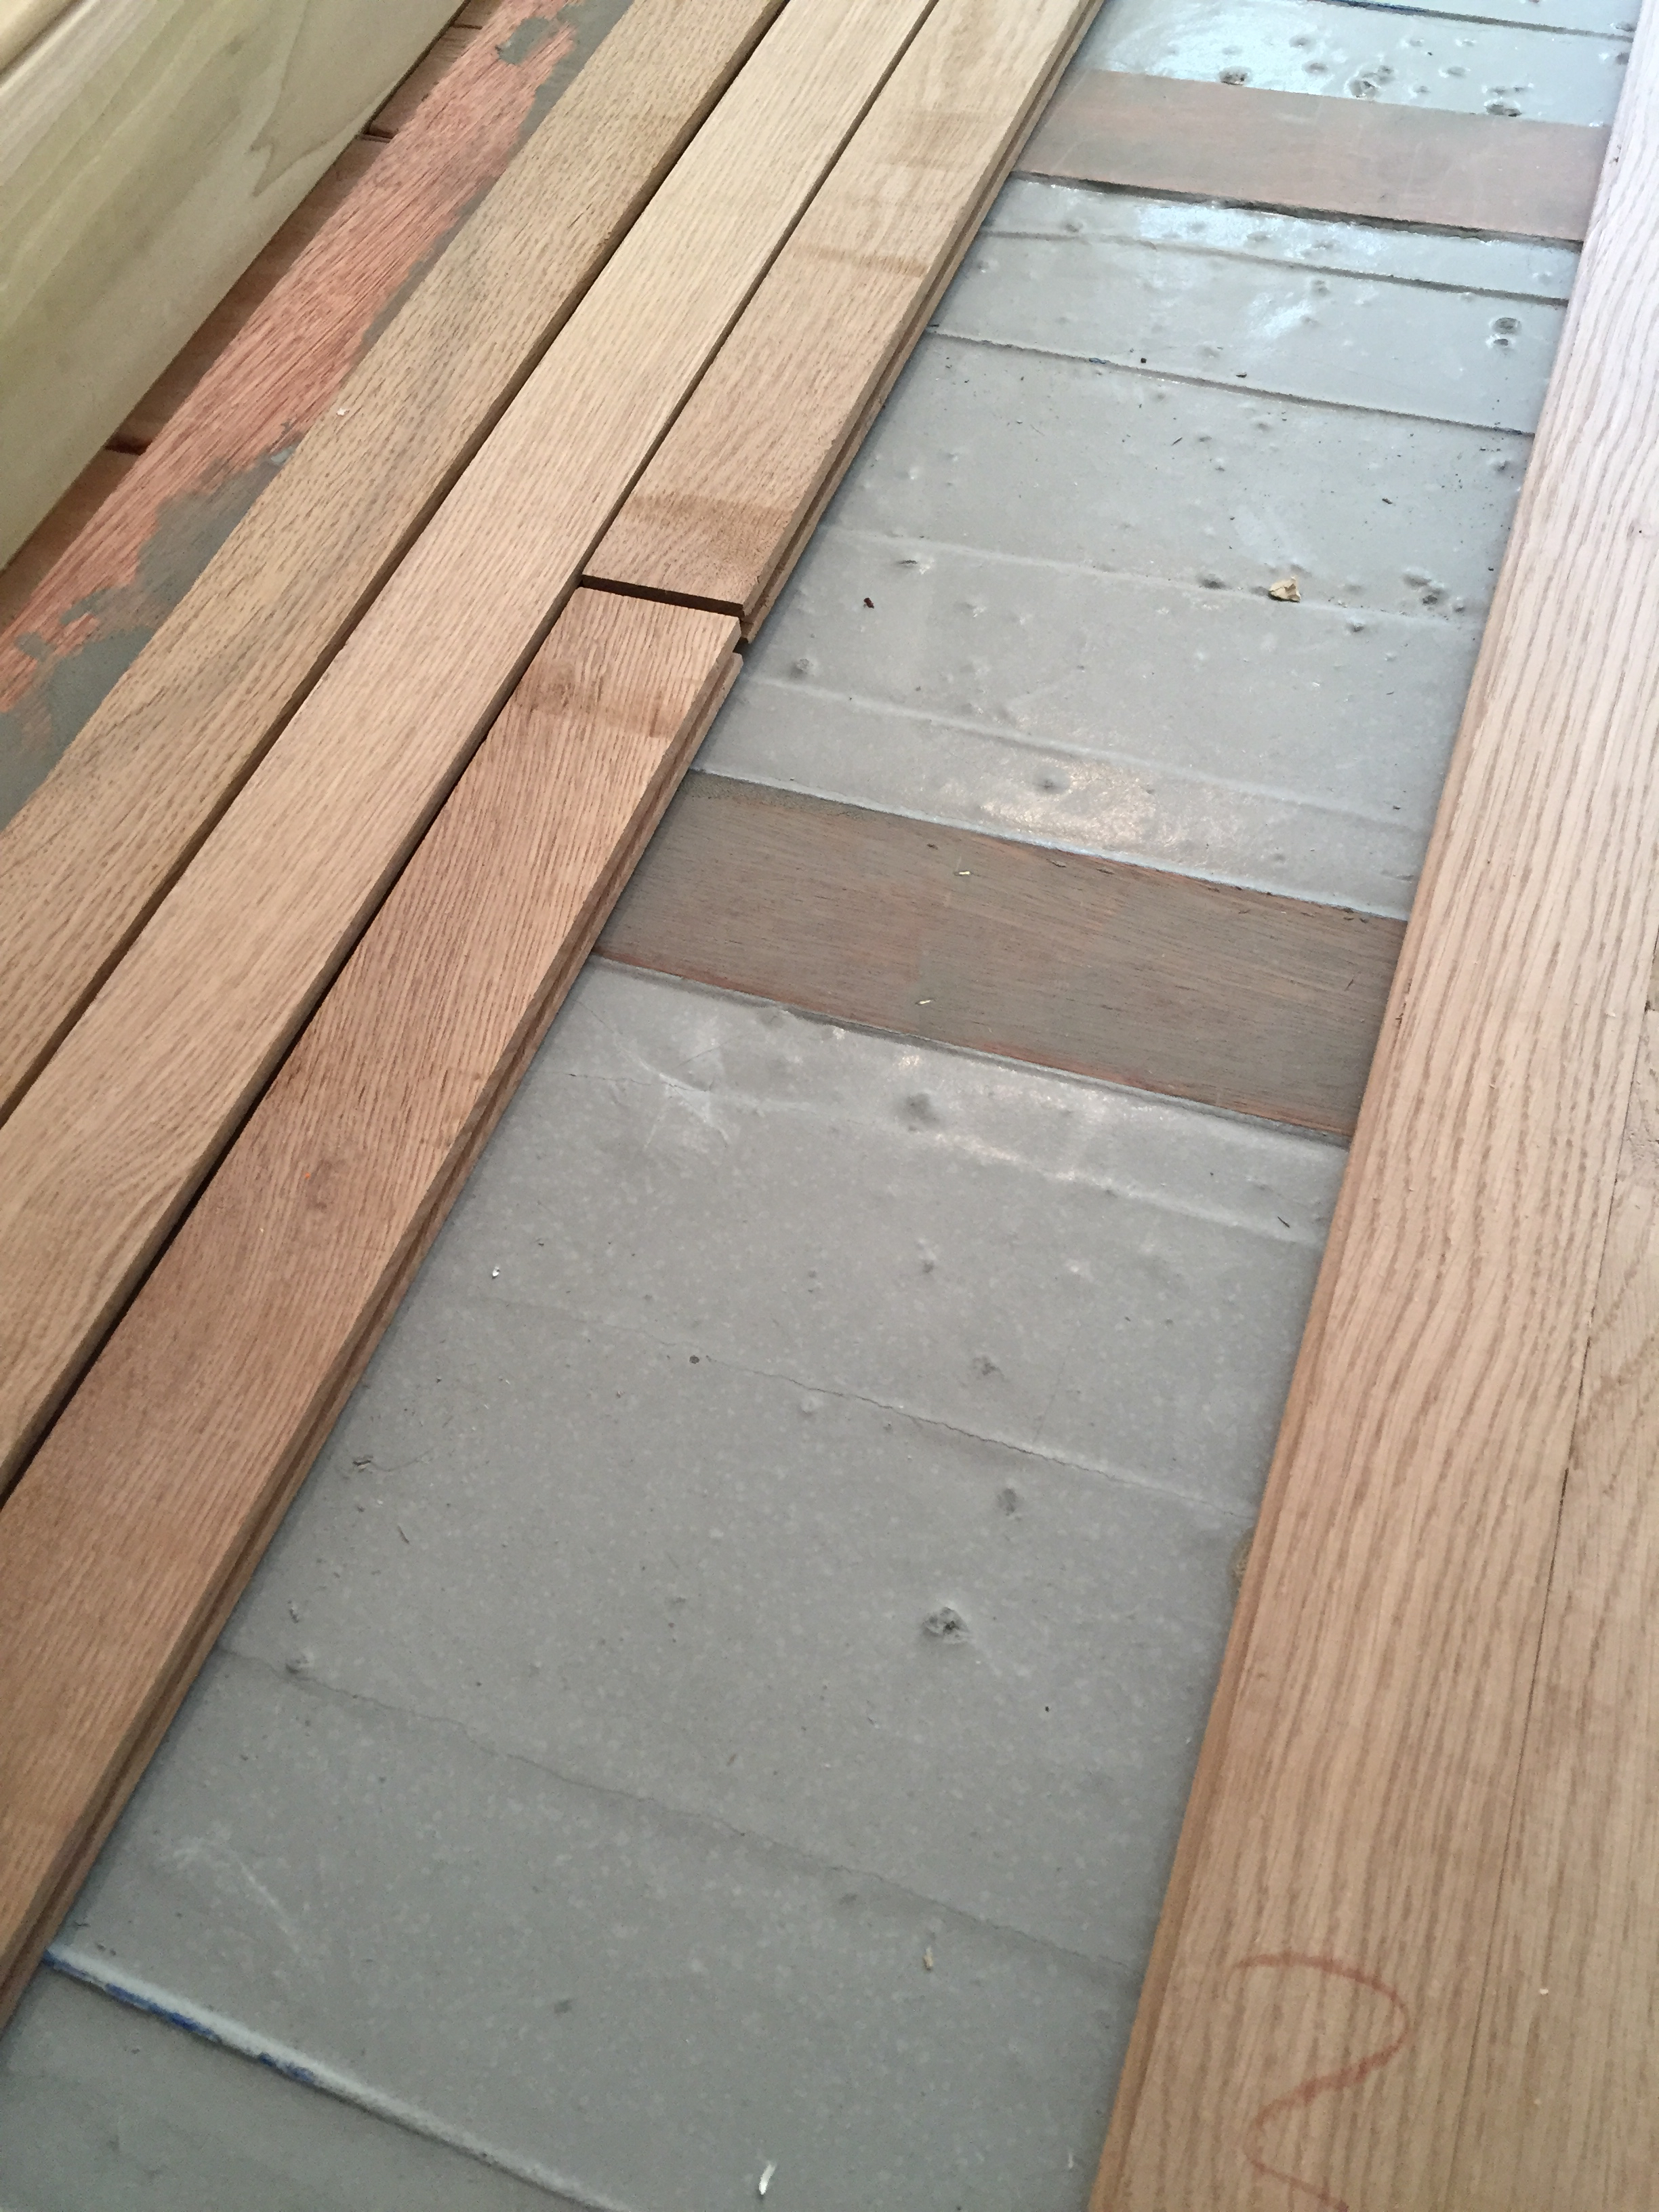
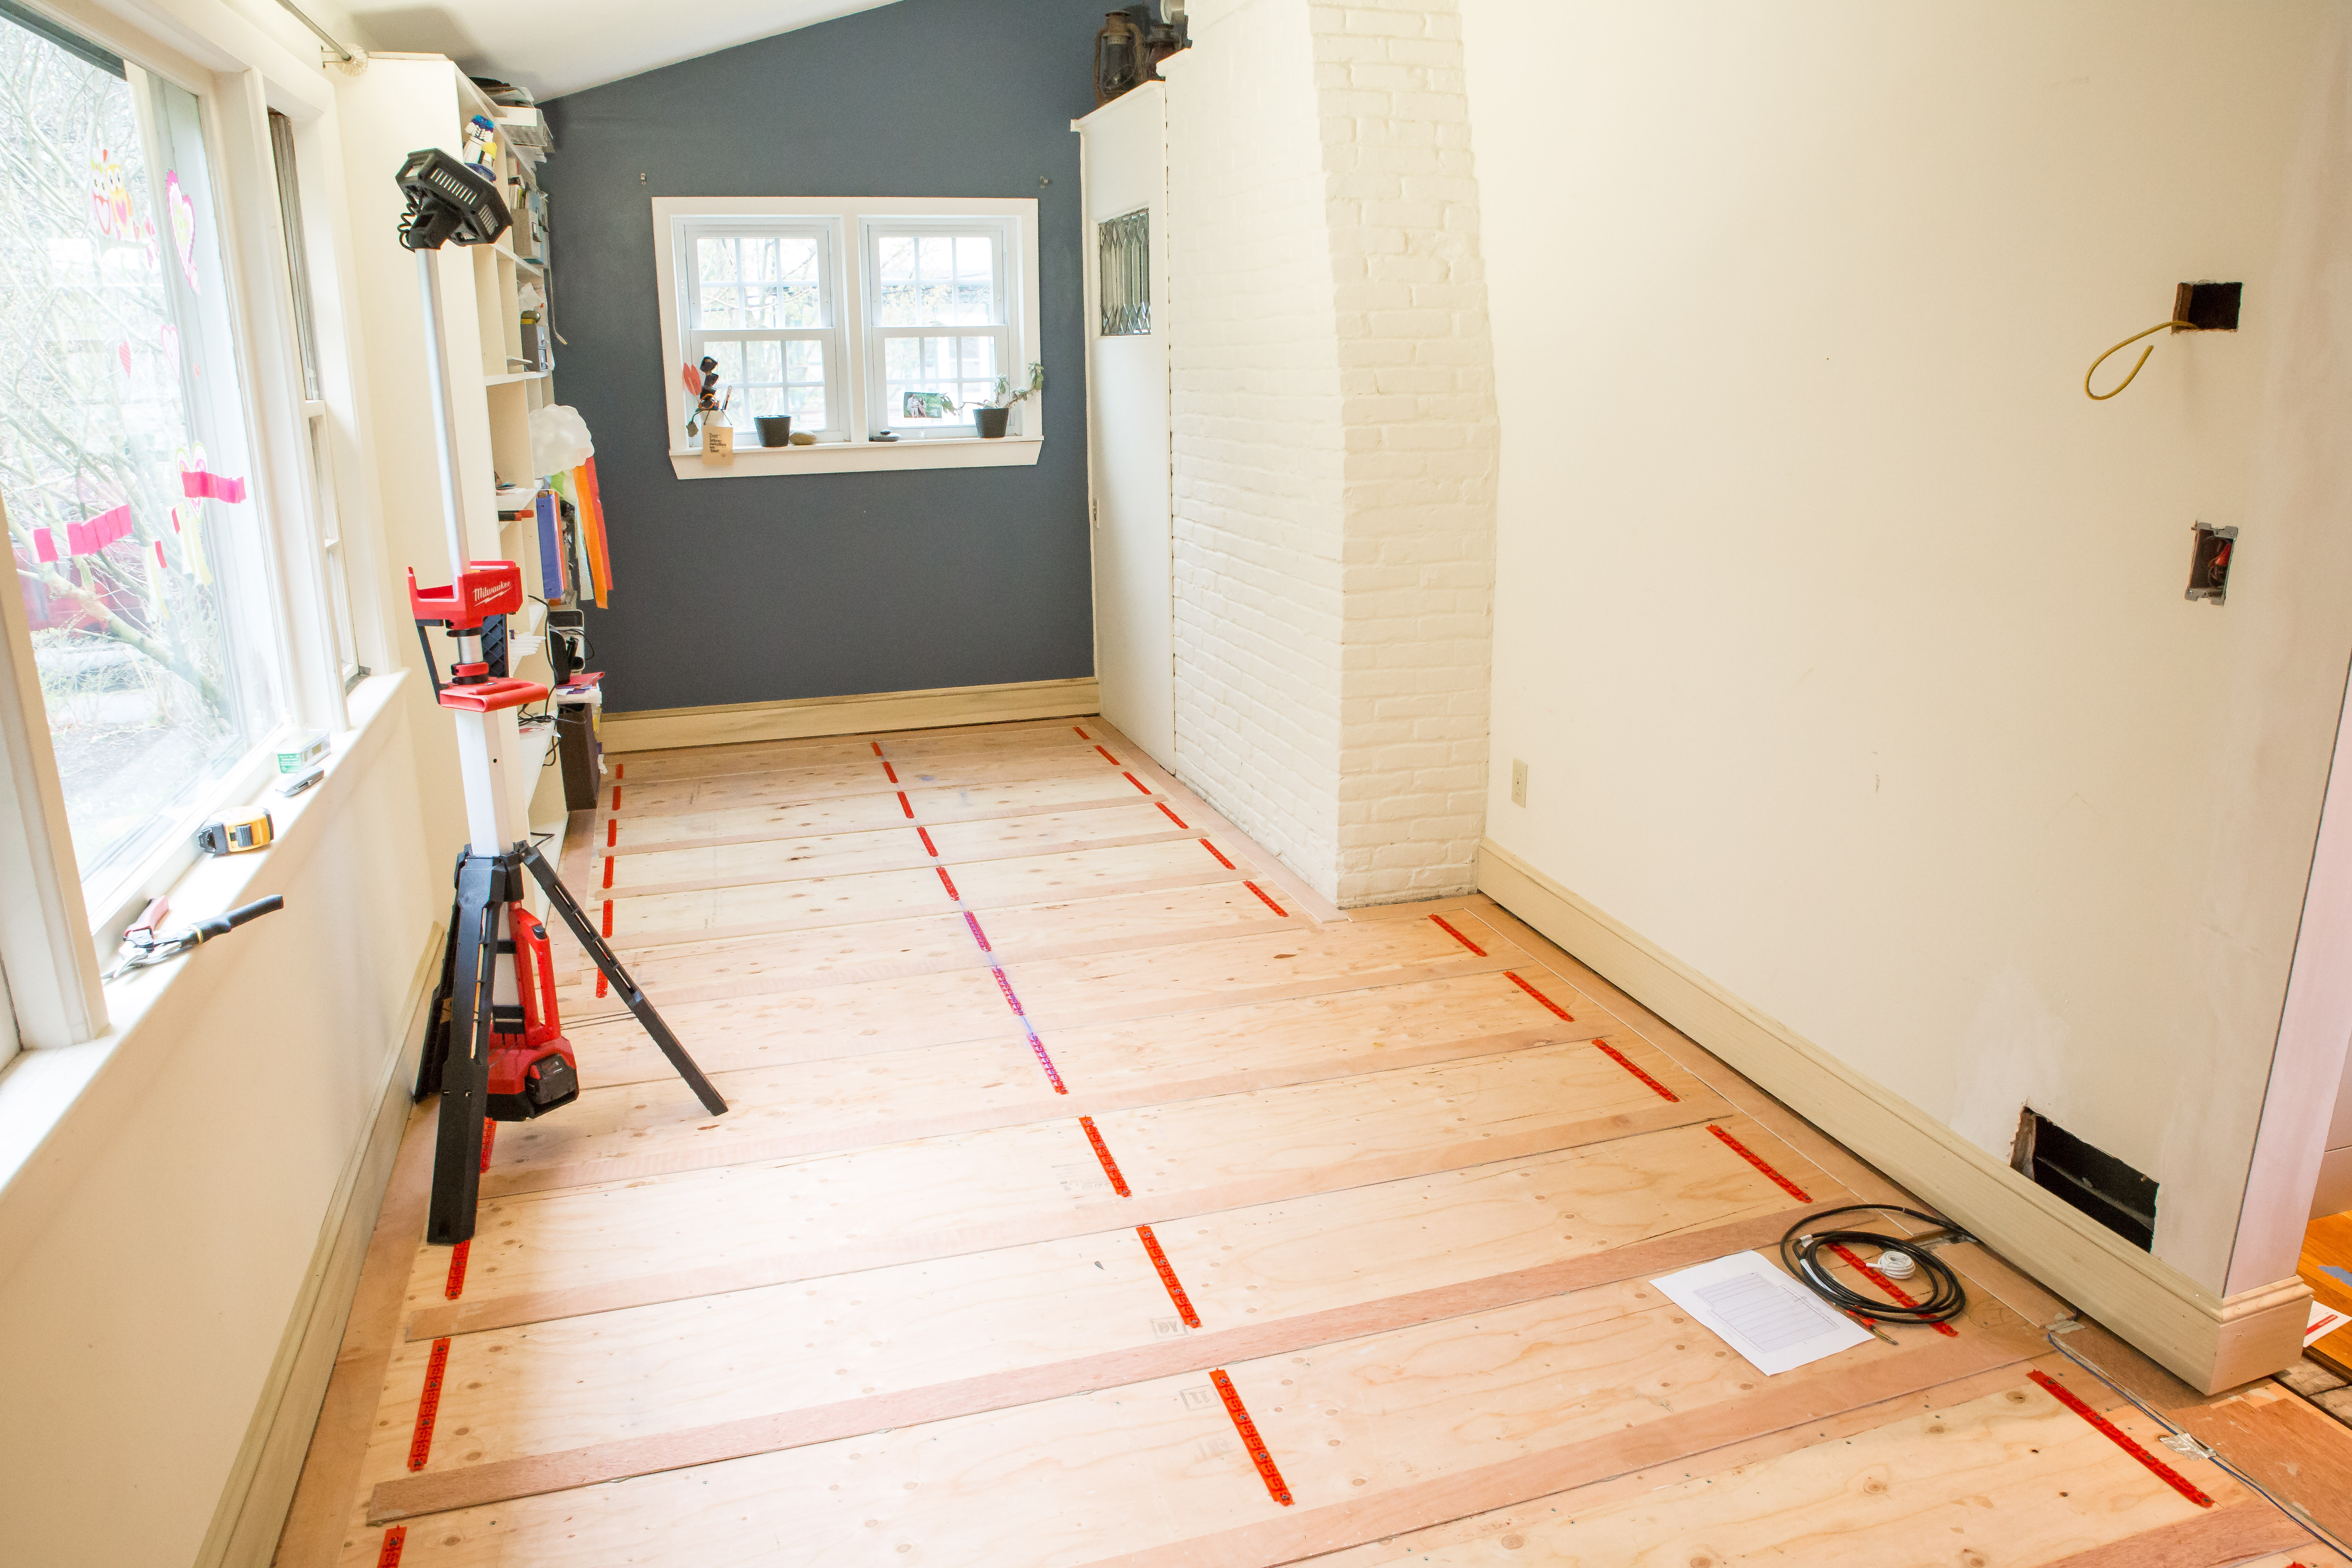
In order to get our new porch floor the same height as the existing house floor, we had to add plywood to the porch floor. We screwed down a layer of ½” CDX plywood to raise the floor and then installed ¼” plywood nailer strips (called “sleepers”) along the perimeter of the room and at 16-inch intervals to get to a total of ¾” height. The radiant heating cable measures 1/8” so we decided to use ¼-inch plywood ripped to 3” for the sleepers.
Sleeper strips create lanes into which the heating cable will be placed and should be installed perpendicular to the hardwood flooring to be fastened into the sleeper.
Using 3-inch wide sleepers allowed us to space out sleepers to the standard 16-inch on-center spacing. This spacing creates a 10-inch wide space to run three loops of radiant cable spaced three inches apart.
Best Practices: Installing the Warmup Radiant Heat Cables
Several manufacturers have tested their products specifically with Warmup products and certified their warranties on combined installations. This list includes Amorim, Wicanders, and Higuera Hardwoods, among others.
Wood Floors and Electric Radiant Heat Install Tips:
Use ¼” or 3/8” sleepers so that filling of the voids with leveler will give you an effective heat bank, yet only minimally raise floors.
Use the standard 10” spacing for our 3-inch wide sleeper runs we spaced three runs of cable (spaced at 2”, 5” and 8”) in each sleeper gap.
Note: Depending on your specific conditions, you may need to adjust sleeper spacing to accommodate the support of the wood floor.
For installations over concrete and/or requiring insulation, a variant of the sleeper method is to use 2×3’s or 2×4’s partly embedded in the slab pour. This allows for insulation to be included and more thermal mass to be poured between the sleepers.

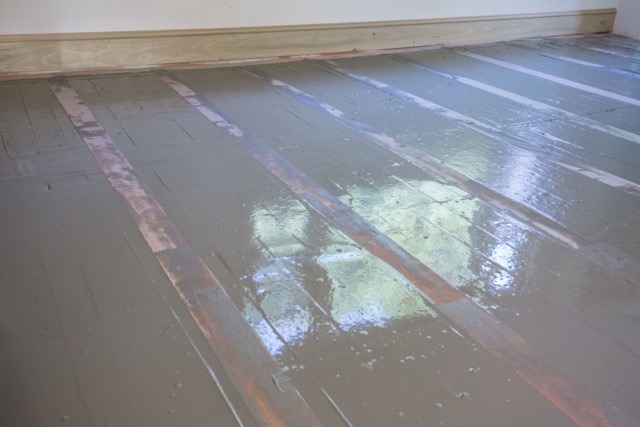
Encapsulating The Radiant Heat Wires
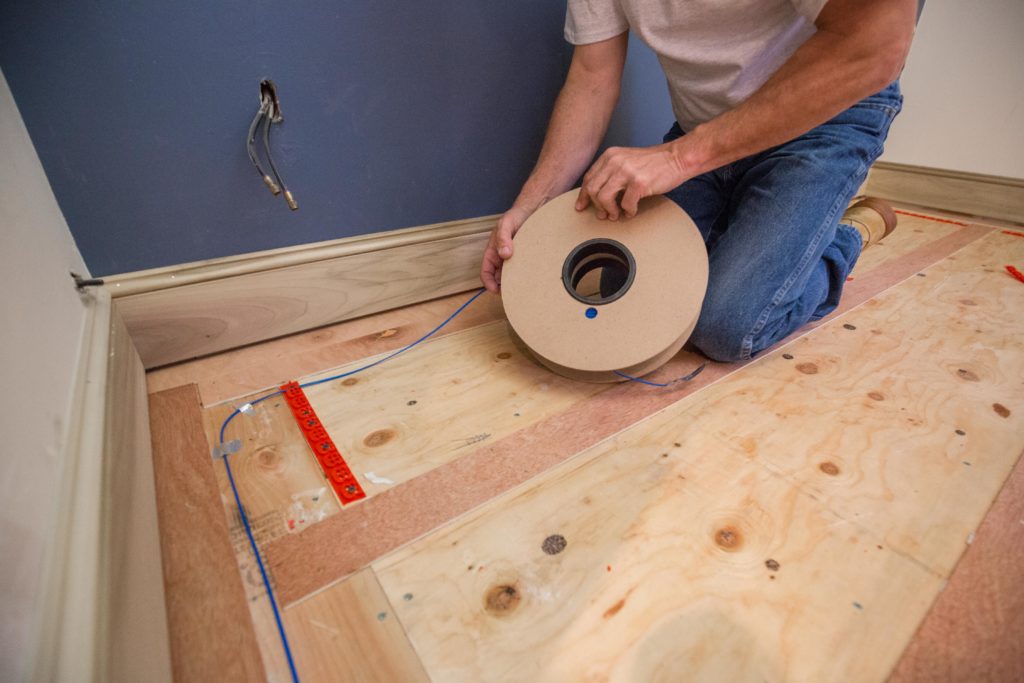
Once the Warmup electric heat cables are in, pour concrete between the sleepers. This in effect creates a thin radiant slab that encases the cables. In all cases, a layer of insulation is normally placed below the existing sub-floor to ensure that most of the heat is directed upward.
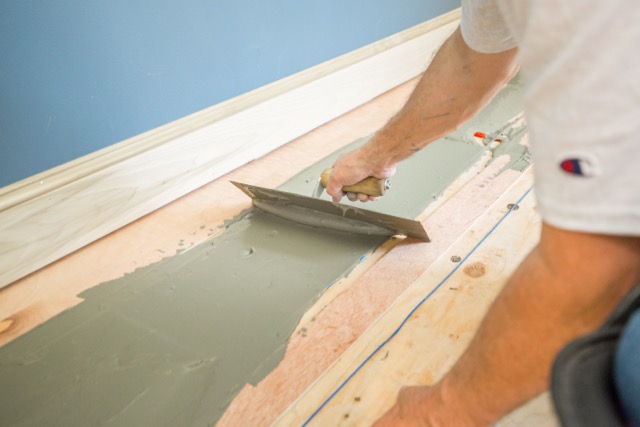
I used latex-modified thin-set [LMT], which is a blend of cement, very finely graded sand, and a water retention compound that allows the cement to properly hydrate. LMT is cheaper than a self-leveling pour, which is frankly not needed in this situation.
Make sure you mix the thin-set “soupier” than when making a tile setting mix. You want the thin-set to flow and level out easily. The goal is to completely encapsulate the Warmup electric heat cable wires. You Do Not want any air gaps between the thin-set or the flooring material, air gaps create a thermal gap and decrease the efficiency of the heating system.
Tip: Use a scrap piece of wood that spans at least two sleepers to level out [screed] the thin-set.
Benefits of using Latex-Modified Thin-set:
- Durable and resistant to cracking.
- Less expensive than self-leveling compound.
- Readily available.
- Priming the sub-floor is not needed.
Choosing Wood Flooring: Rift and Quartered Sawn Oak
Extensive laboratory testing by Launstein Hardwood Floors in Mason, Mich., found that American hardwoods – including cherry, oak, ash, maple, hickory, and walnut – are good choices for radiant-heat flooring. Beech, Australian cypress, and many bamboo products are examples of those that are not.
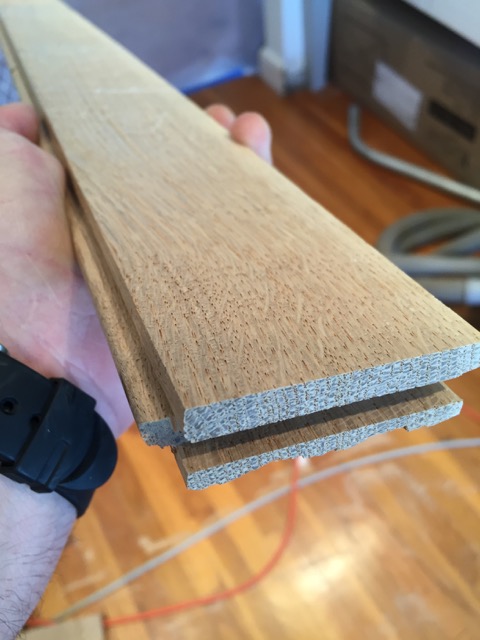
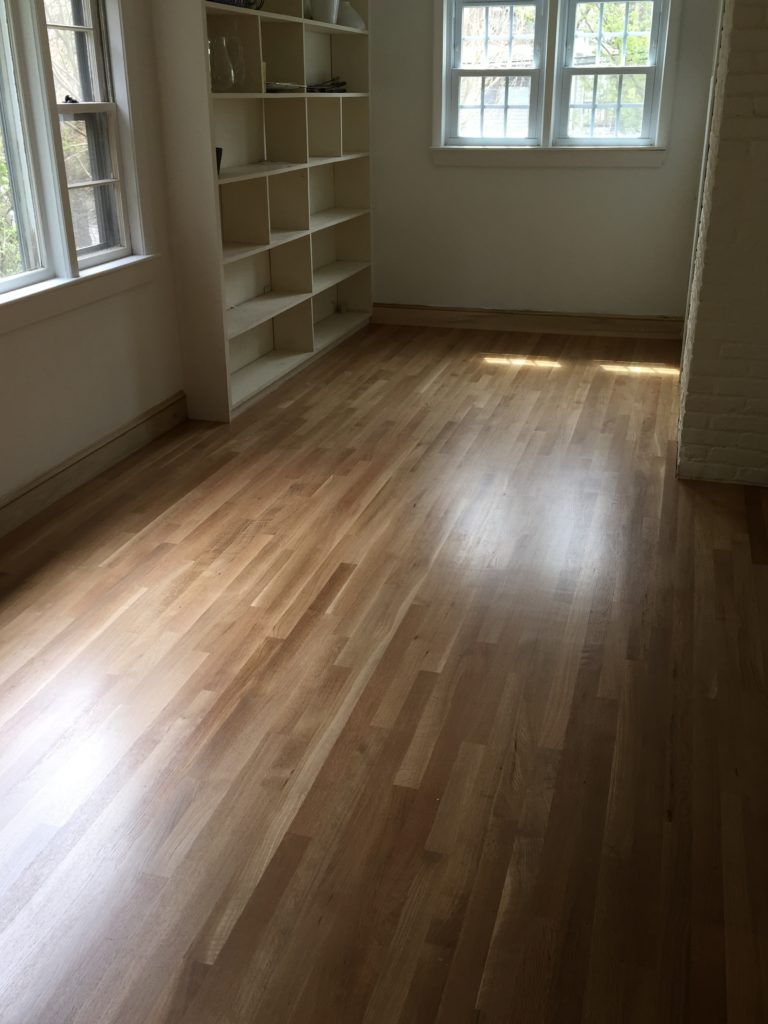
We wanted to purchase and install a material that would not only match the existing oak strip flooring, but be dimensionally more stable with the added floor heat. It’s natural for all floors to shrink and swell, depending on the season, so we chose rift and quartered oak which is touted as approximately 30 percent more stable than plain sawn oak flooring.
Rift and quartered boards rival engineered flooring. These boards will only expand / shrink in thickness (height) and will remain stable from side-to-side (width). They are perhaps the best option for wood floors and electric radiant heat, and also an excellent choice to minimize seasonal gaps, buckling, and so on.
Tips for Choosing Wood Flooring:
Whether your installing a Warmup electric radiant heat under wood floors or any other brand you will want to make good decisions on your flooring choice. Here are some suggestions for choosing wood flooring:
- For best results with wood floors and electric radiant heat, use narrow boards, preferably not wider than 3 inches. Narrow boards will better accommodate wood’s natural expansion and contraction across a floor.
- Use quarter-sawn wood for planks wider than 3 inches, for better dimensional stability.
- Acclimate your wood floor: Wood naturally expands and contracts to reach balance with the relative humidity of its surroundings. Avoid installing wood flooring when moisture levels are high, such as during painting or the installation of plaster.
- Before hardwood floor installation, operate the heating system until the relative temperature and humidity in the space stabilizes to the average level expected for seasonal conditions in the area in which the wood floor will be installed.
- Ensure your flooring’s moisture content is appropriate for your area. Typically, a 6-to-8 percent moisture content is average.
- Engineered floors are inherently more stable.
- Reclaimed woods typically have tighter growth rings (since the wood is more likely to be old-growth) making them denser and more stable.
- Parquet: Overall, parquet floors have less expansion and contraction.
- Dark floors: Their color makes gaps between boards less obvious.
- Flooring with beveled edges make any gaps less obvious.
Wood Floor Installation
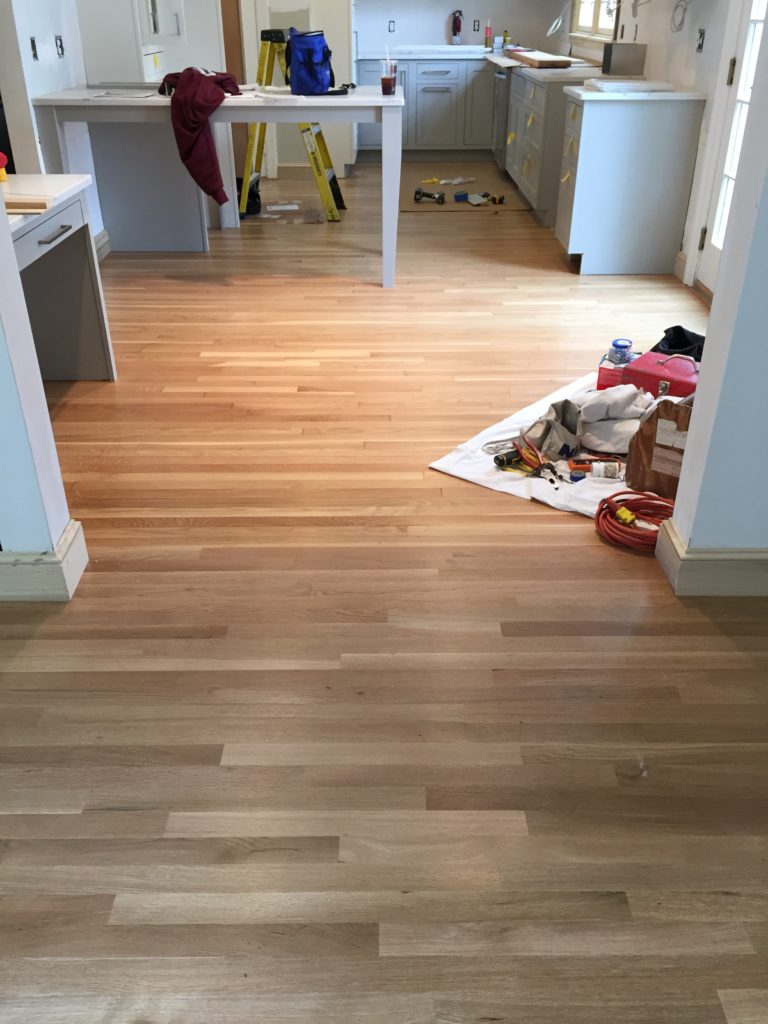
First, deliver the flooring about 1.5 weeks early to let it acclimate to the conditions in the house.
TIP: Your final installation is only as good as the sub-floor you’re installing over. Carefully inspect the sub floor and fix any problems that could affect your installation. We like to add screws thru the sub-floor and into the floor joists to help eliminate loose floor boards and potential squeaks.
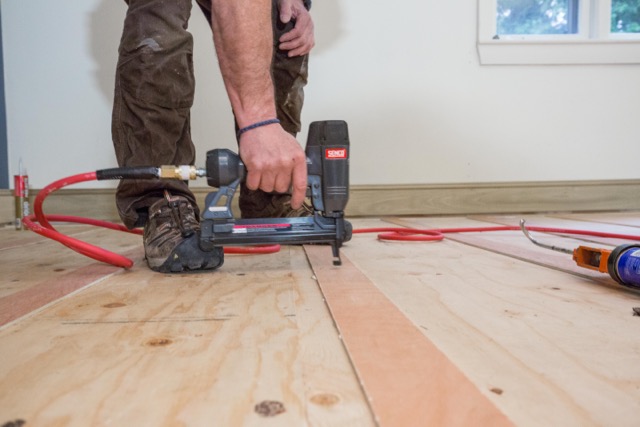
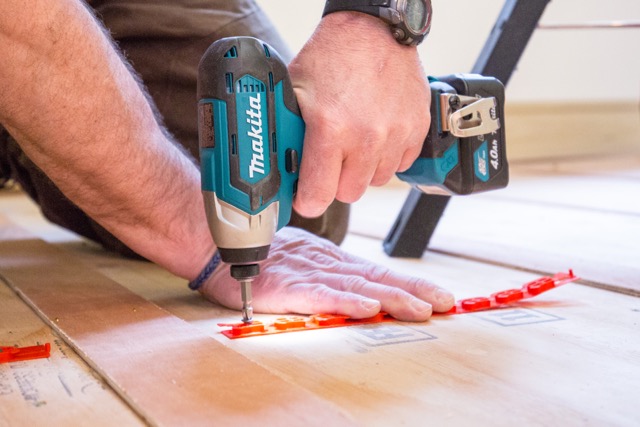
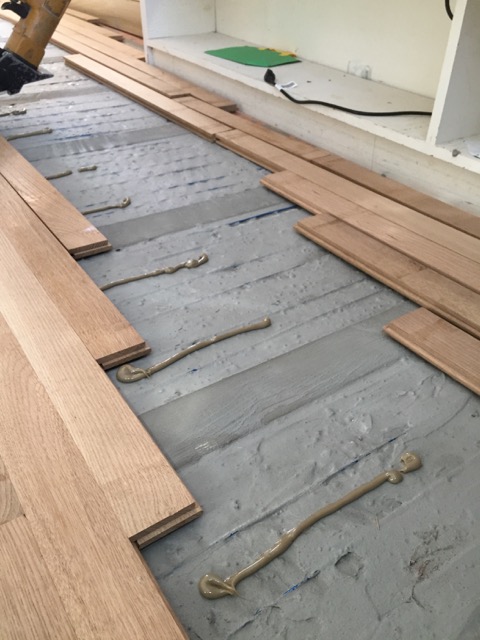
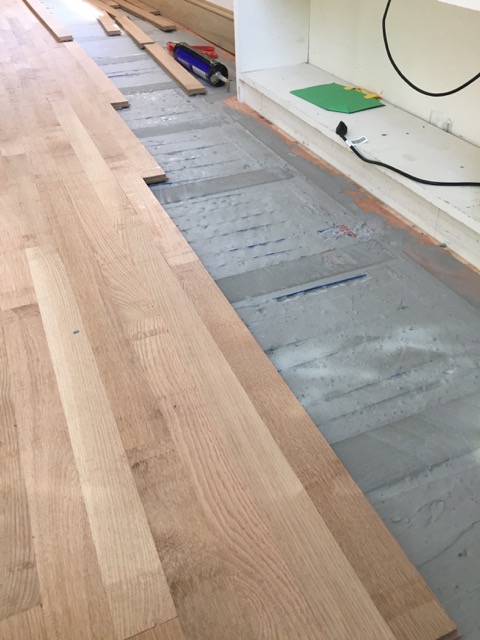
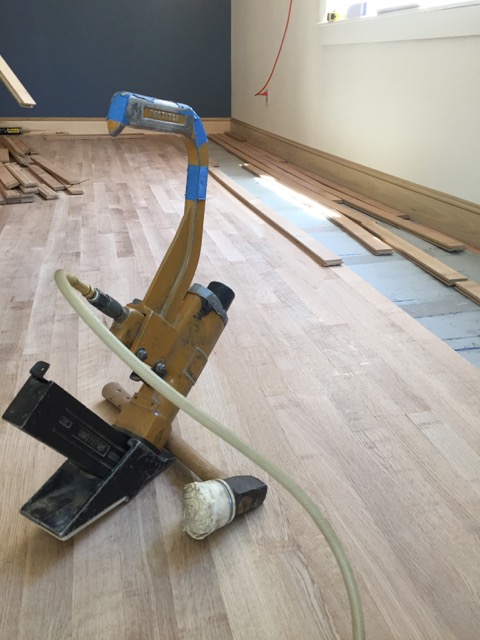
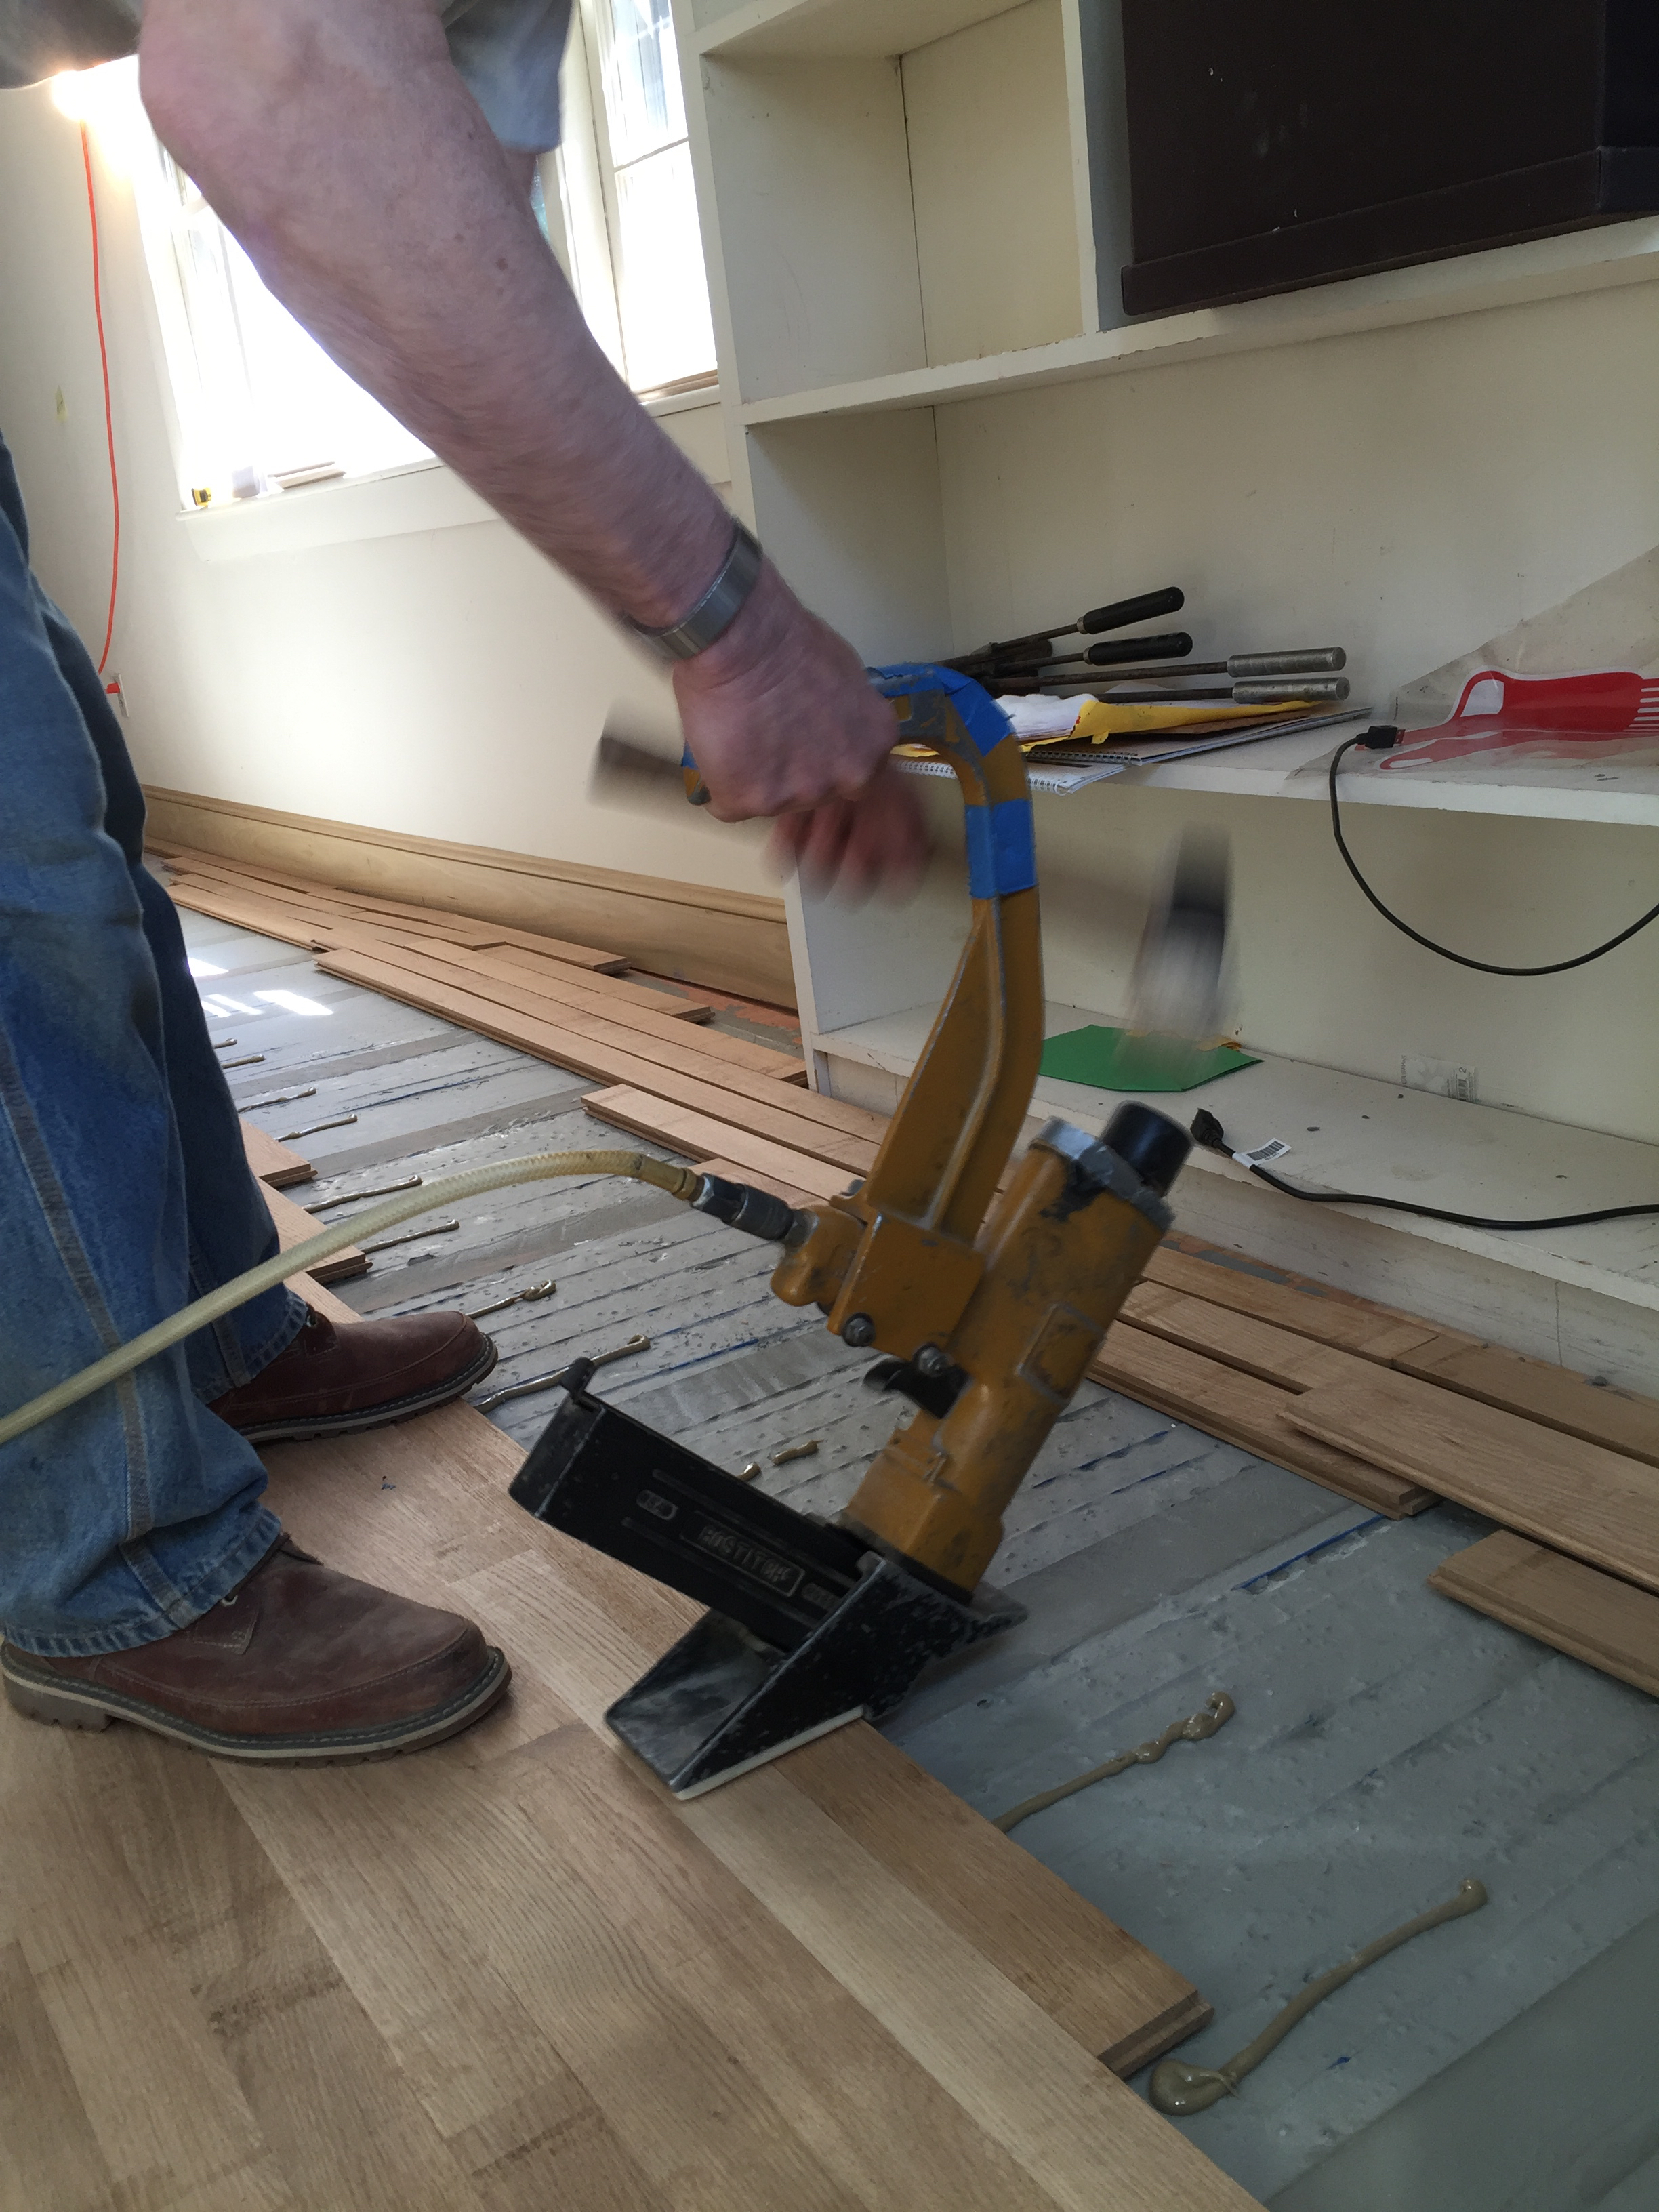
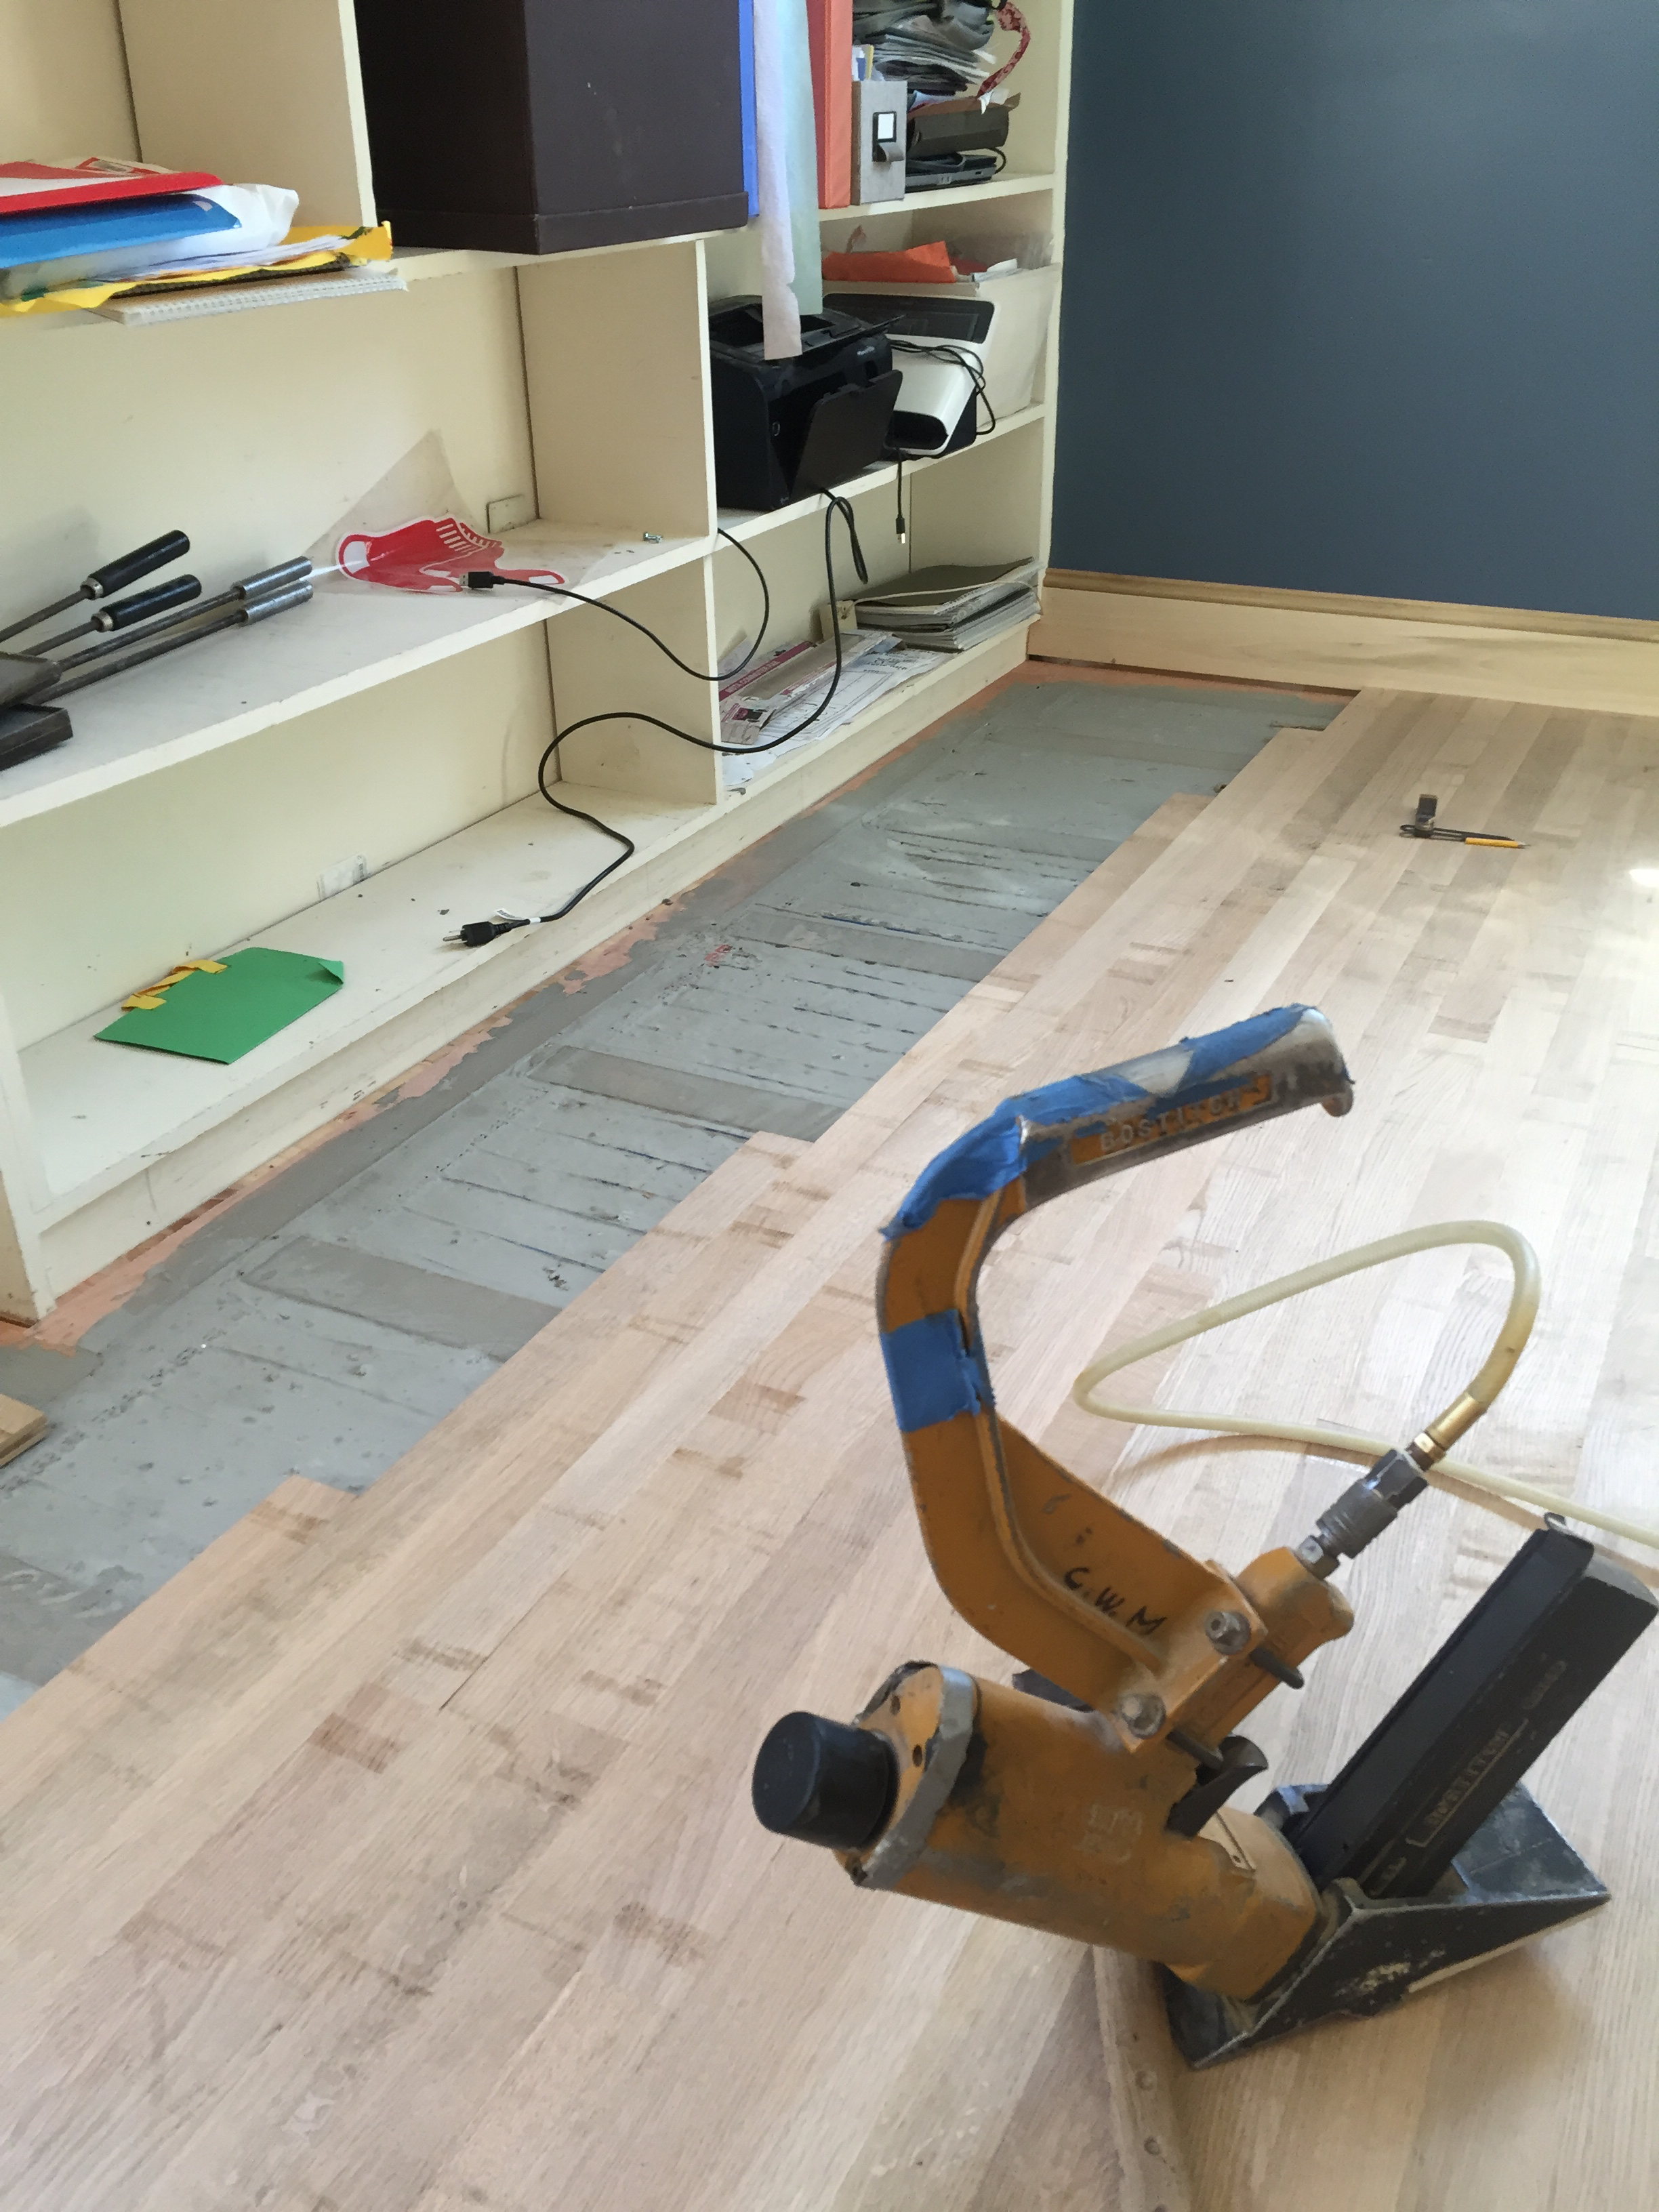
Installing the oak boards is the same as it would be without radiant heat; all the precautions recommended for strip flooring apply. When installing the Warmup electric heat under wood floors, you need to slow down and be precise in placing 1-1/2″ or 2″ fasteners. We blind fastener spacing along the length of the sleeper strips, minimum 2 fasteners per piece near the ends (1”-3”).
TIP: Use construction adhesive and fasten your sleeper strips to the sub-floor, you want to ensure that your sleeper will not pull up off the sub-floor. This especially becomes important when the sleepers are thick, [1/2″ or 3/4″ thick] and the hardwood floor fasteners may not long enough to penetrate thru the sleeper and into the sub-floor.
Installing Warmup Loose Wire Heating System (NADWS) 10-Steps
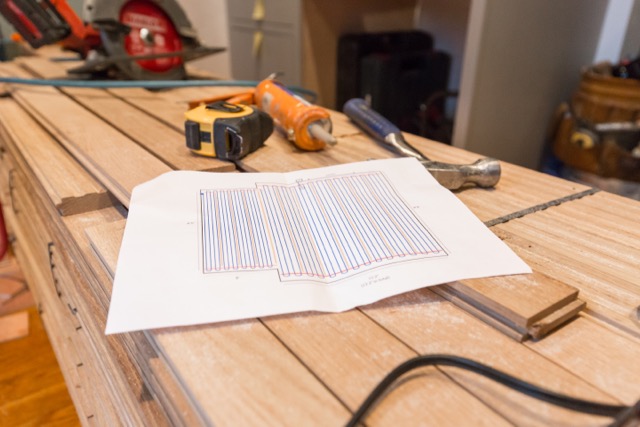
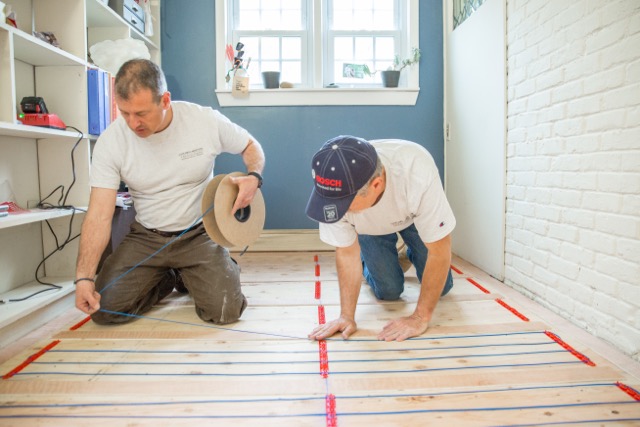
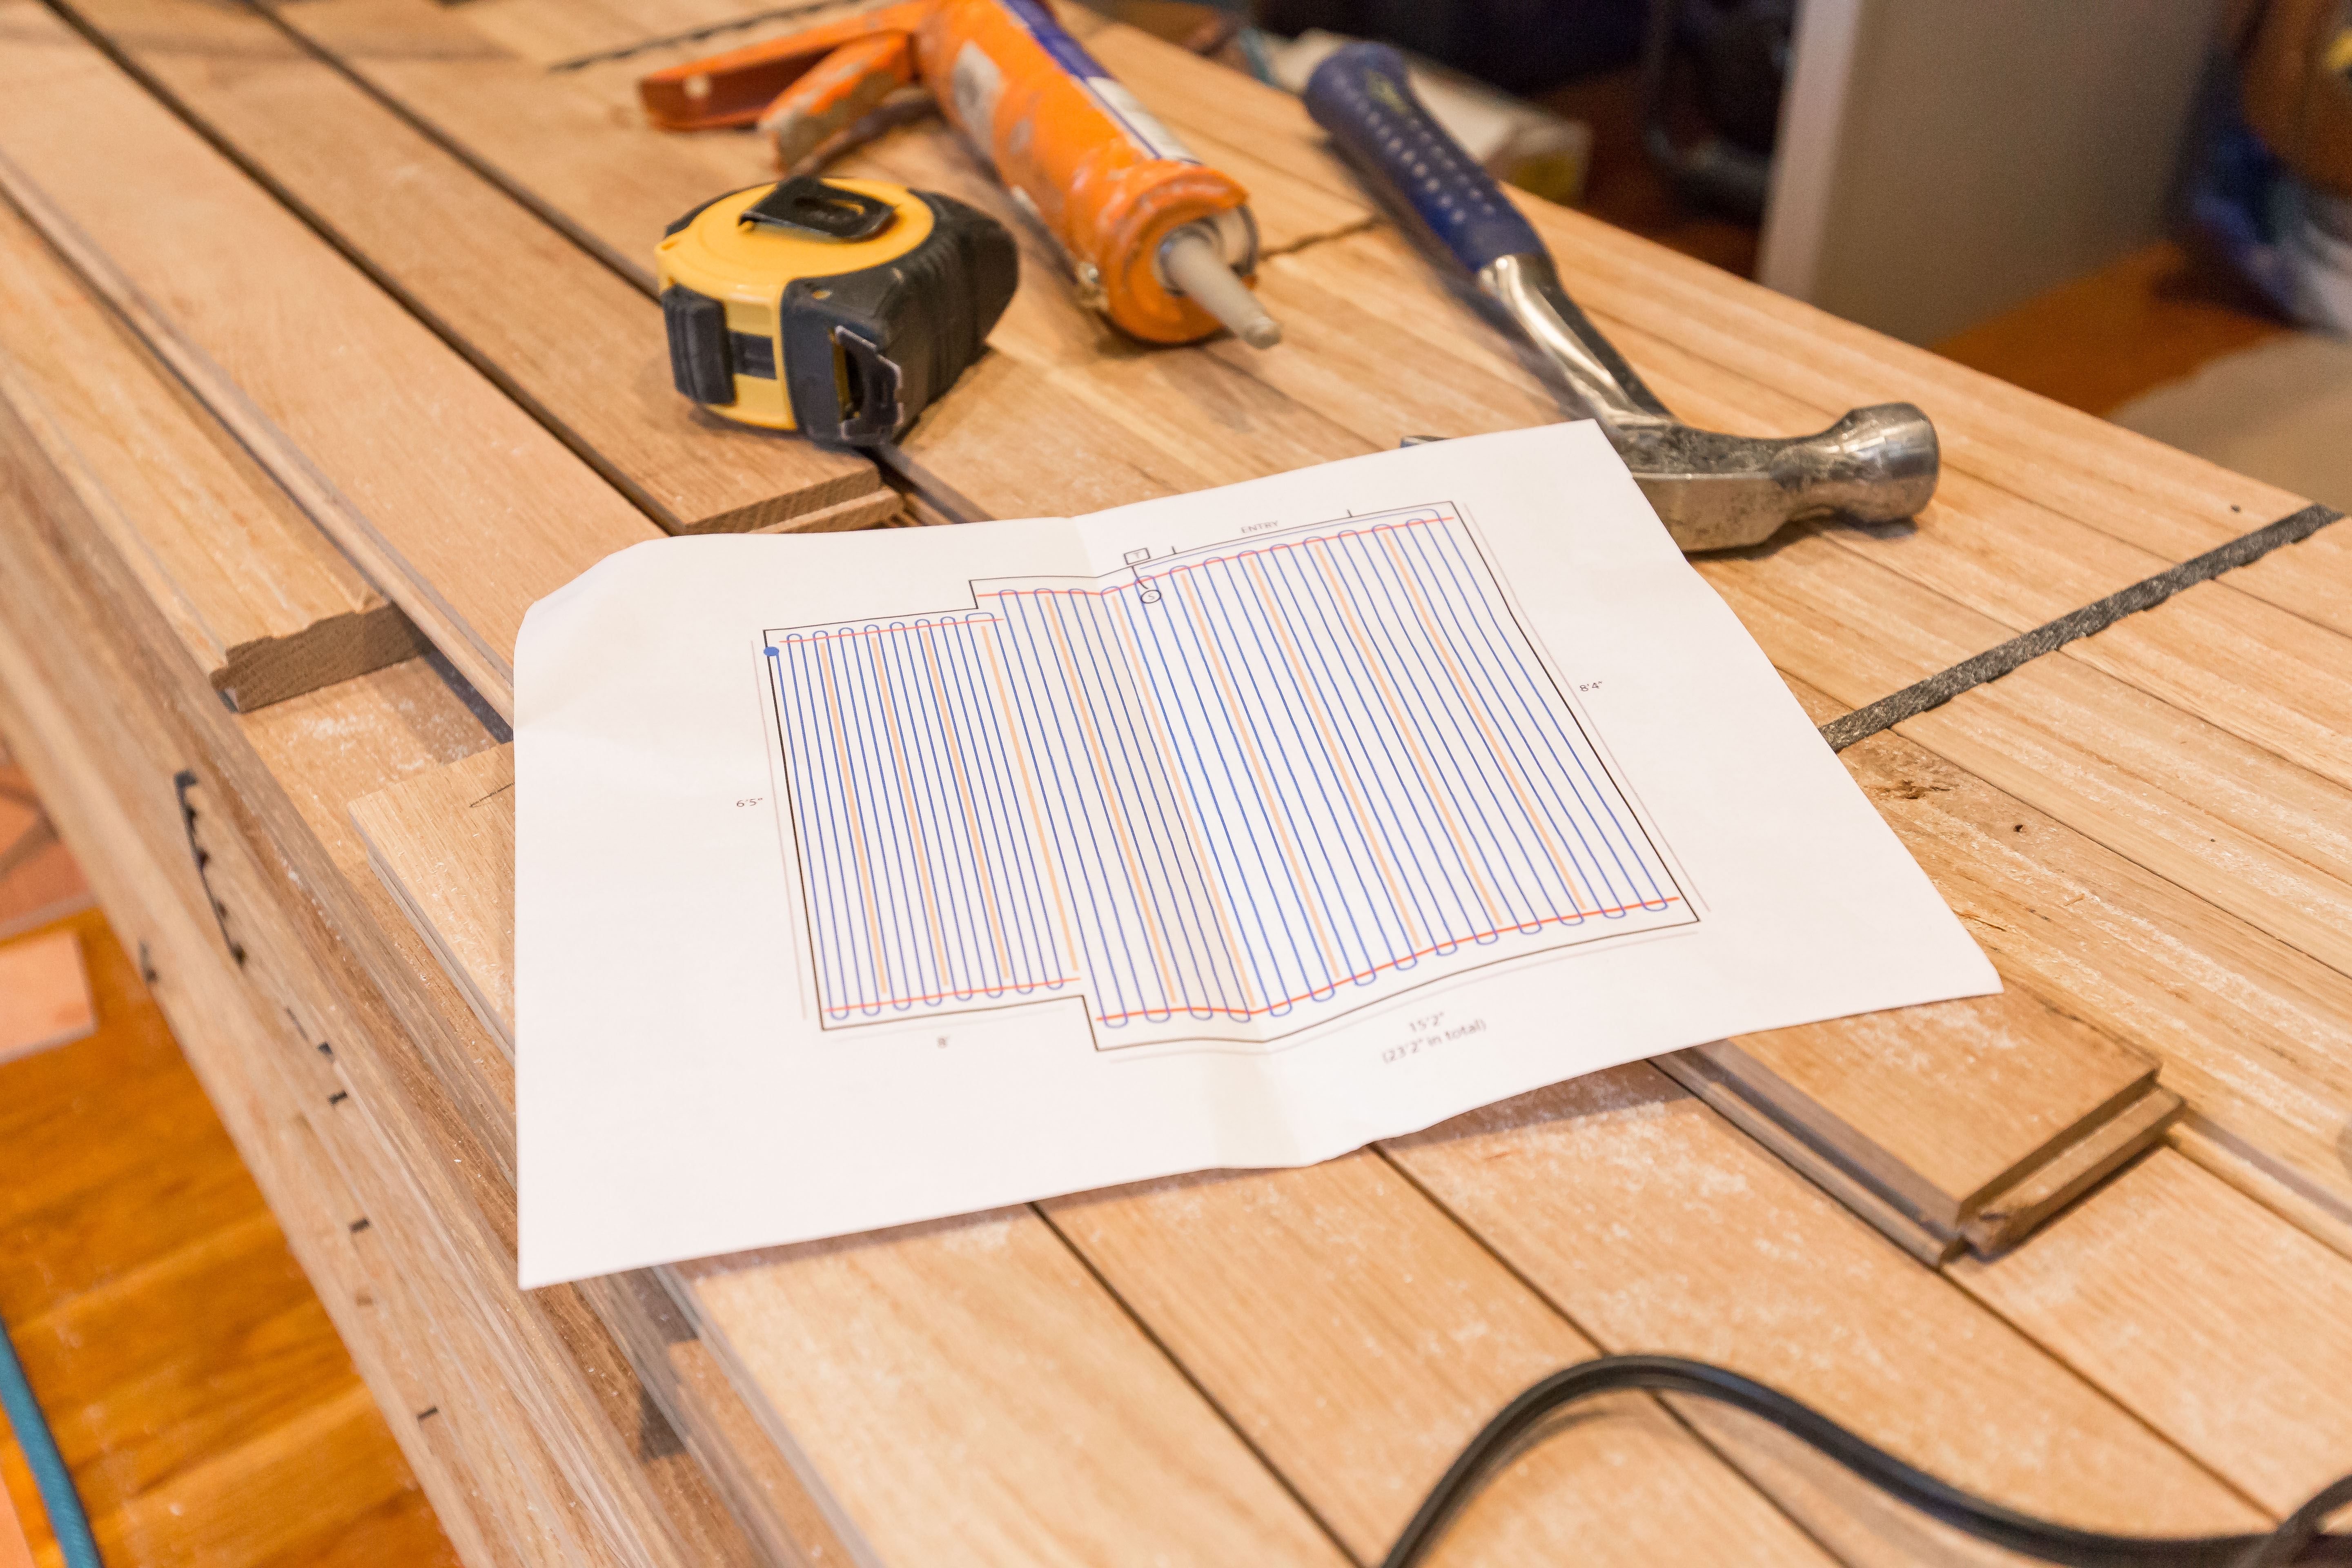
Step 1: Determine heated area
Measure the room that will be receiving radiant heat. Make a sketch or drawing to send to Warmup for a quote. Locate your thermostat location and note its location on your sketch (see Step 2).
Step 2: Locate Thermostat
Warmup electric radiant heat mat systems are designed to be used with a UL Certified programmable thermostat. Locate your thermostat approximately 5 feet off floor and always on an inside wall. Try to avoid placing it near heat sources, excessive sunlight from windows, or skylights.
The Warmup proprietary 3iE Energy-Monitoring and 4iE Smart WiFi Thermostats include the safety of upper-limit temperature monitoring. This means that when selecting “wood floors” in the programming, the heat settings will never rise past 82F and ensure smooth and gradual heating of the floors.
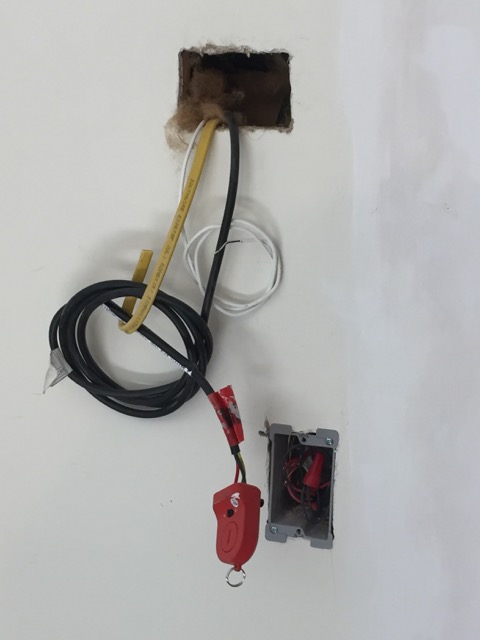
Step 3: Run a 20-amp, GFCI protected circuit
Run a dedicated 20-amp GFCI circuit to your thermostat location. Prior to closing up any walls, I install a wire pull string from the thermostat box, down the wall cavity, and through a notched section of the 2×4 wall shoe plate. After the wallboard is installed the string will be used to pull the cold lead and floor sensor wire up the wall to the thermostat location.
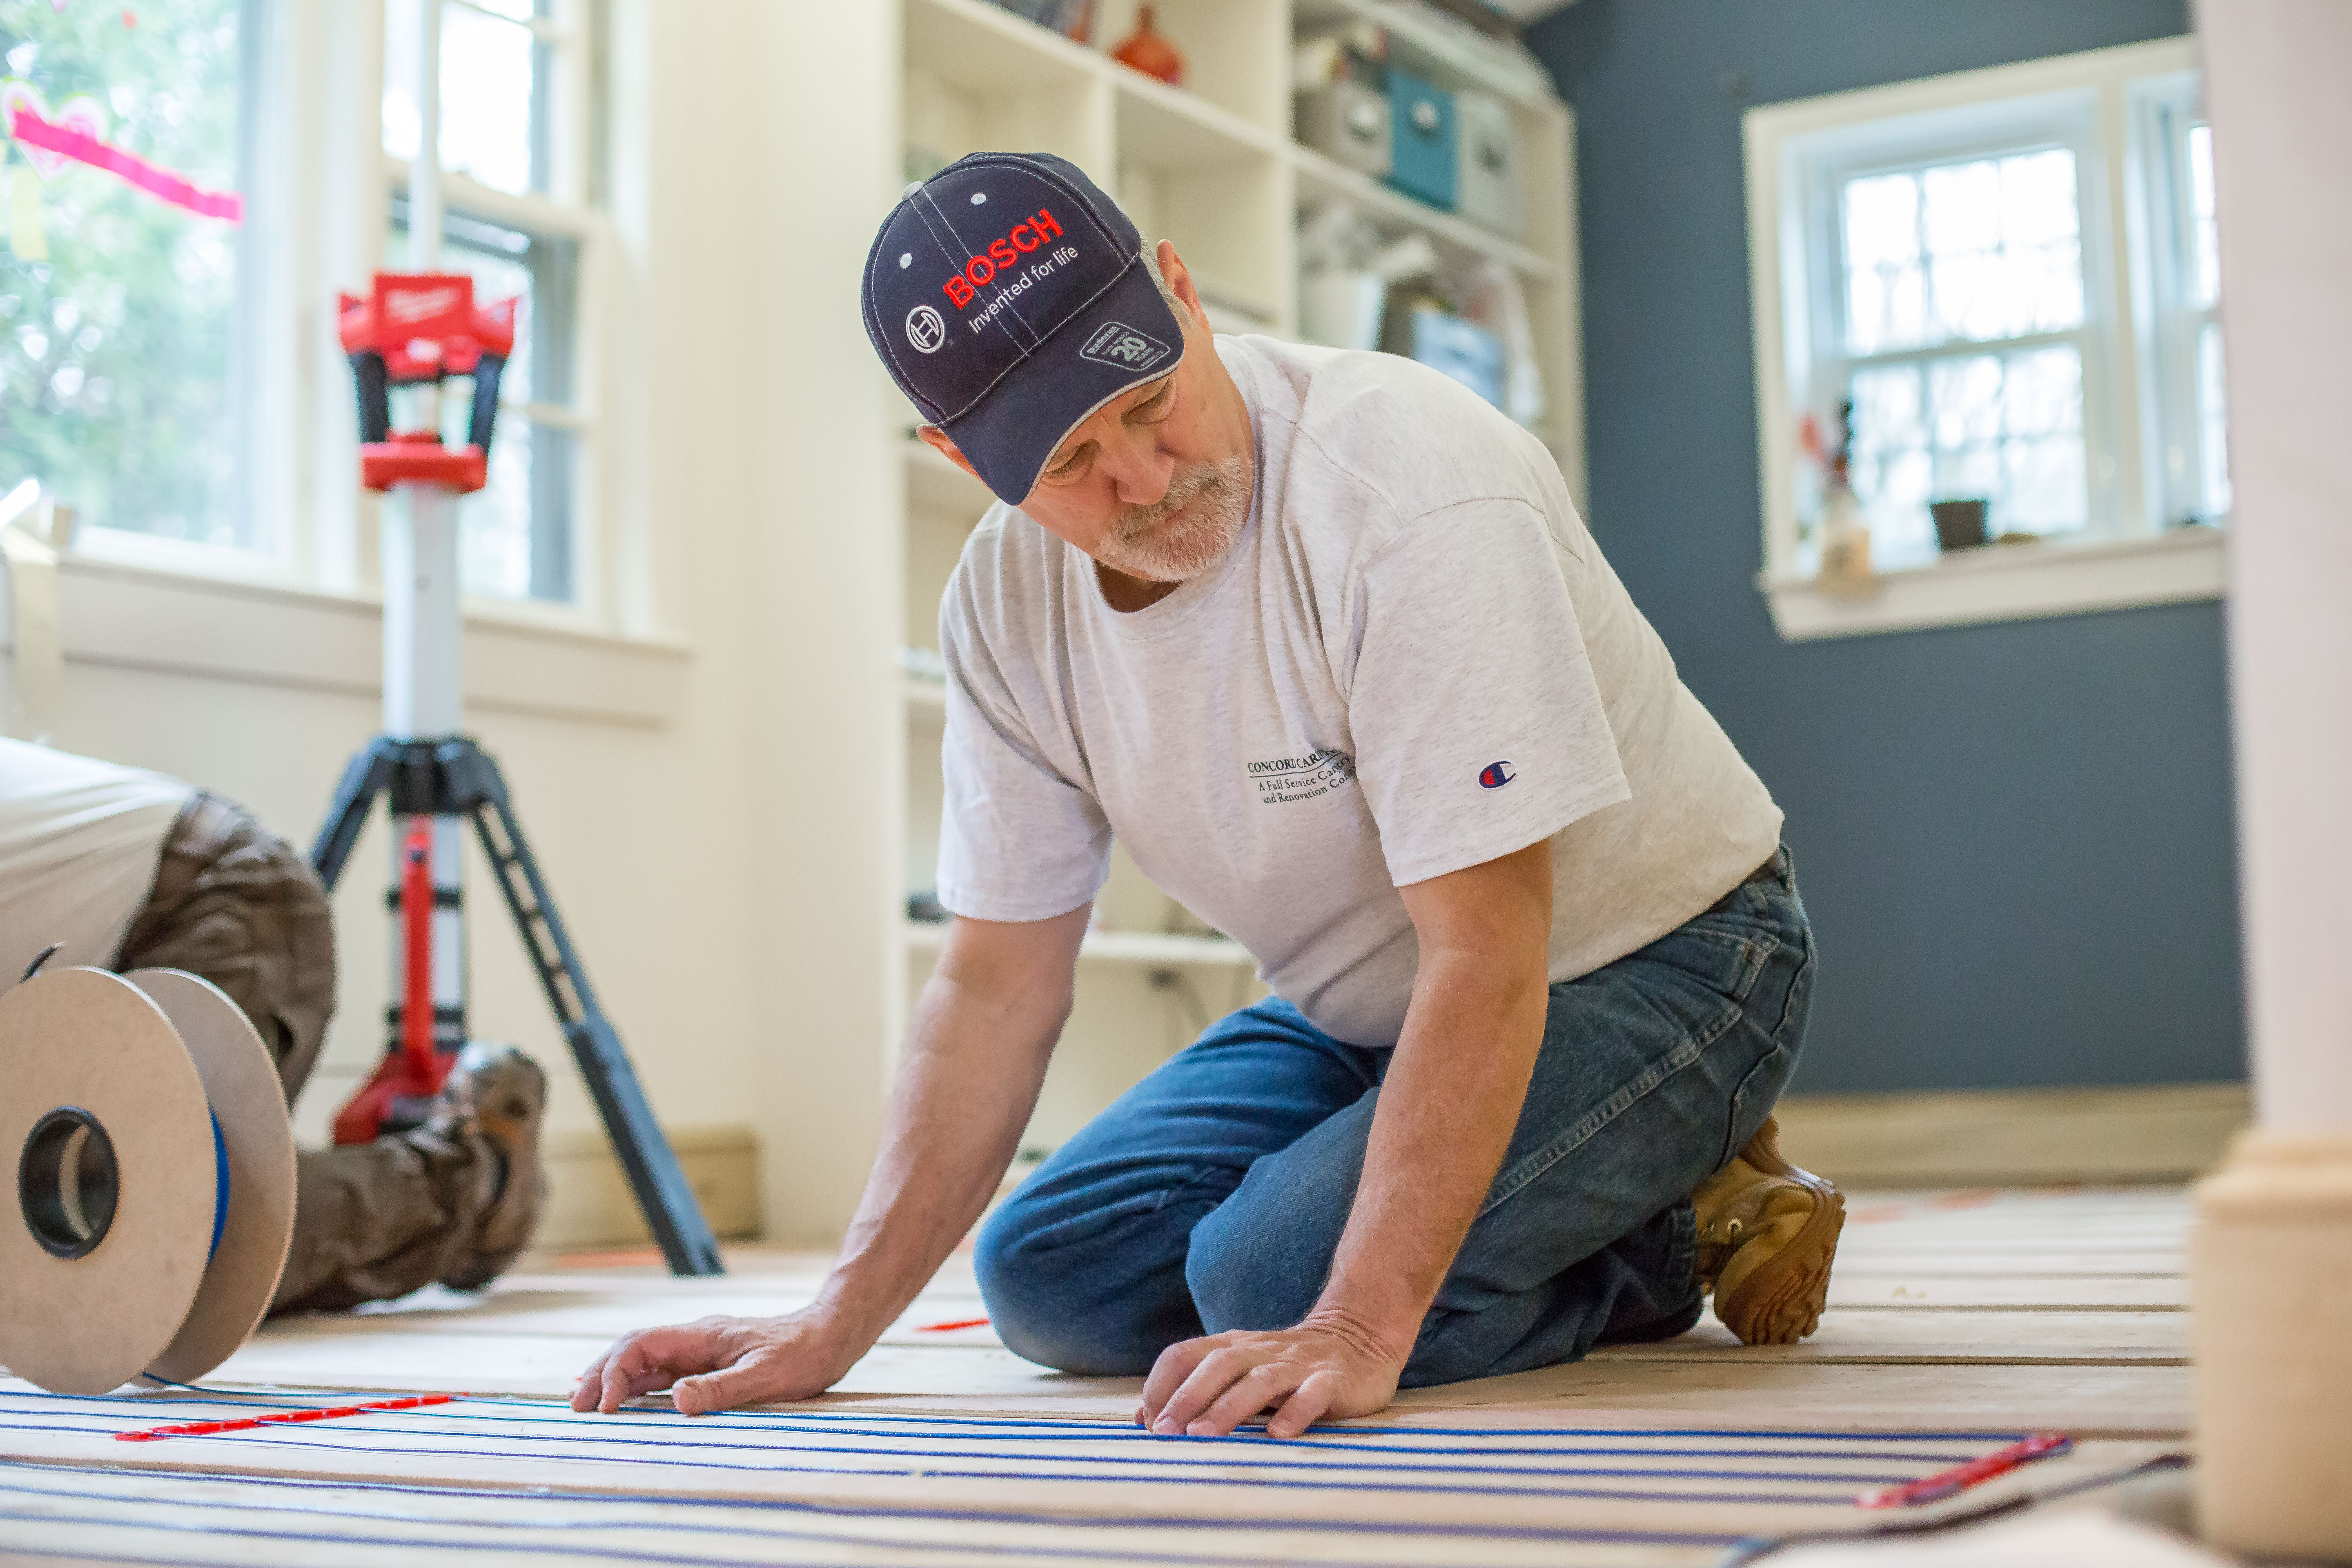
Step 4: Install wood sleepers
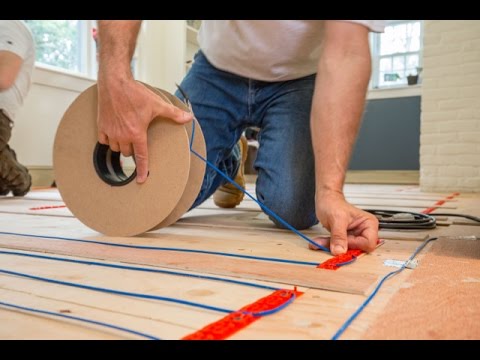
Using wood strips ¼” to ¾” thick and 2” wide, install strips at 12” to 16” intervals when using Warmup Loose Wire Heating System (NADWS). Leave a 2” gap at alternate ends of strips for heating wires to cross from one section to the next. [See diagram]
Step 5: Install fixing strips
Using hot glue, nails or screws, secure the strips to the floor with a minimum of 3” away from the walls and permanent fixtures.
Step 6: Install heating system
Starting at the closest point on the floor to the thermostat, tape the joint to the subfloor. Lace the heating cable on the fixing strip and run it back and forth in parallel to the wood sleepers until all the sections are filled in.

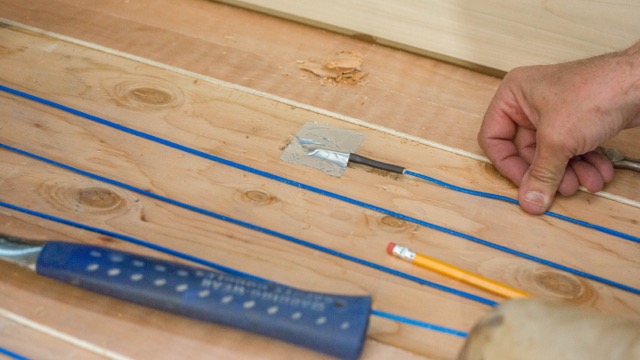
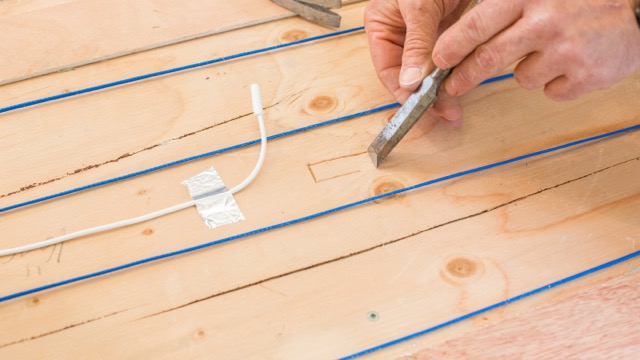
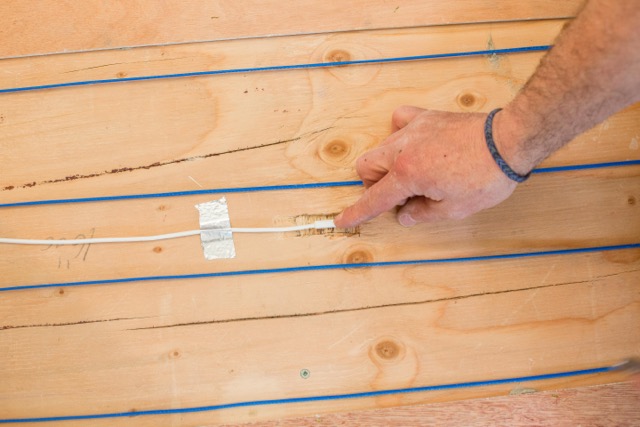
Step 7: Install temperature floor sensor probe
Place the probe wire containing the capped sensor evenly between two runs of heating cables at least 12” from the wall into the heated area. At no time should the probe wire cross the heating cable.
Step 8: Embed heating system using leveling compound
When the heating system is completely installed, apply a mixture of modified latex thinset compound over the entire heating system. Use a scrap board to spread and level the thinset to the top of the sleepers. Leveling compounds/thin-set/adhesive MUST contain latex compounds and capable of withstanding temperatures of up to 140°F (60°C) when used with underfloor electric heat systems.
Step 9: Install hardwood flooring
When leveling compound has cured, install the hardwood flooring by attaching it to the wood sleepers only. Use caution not to damage wires with your fasteners.

Step 10: Program Thermostat
Program the thermostat to a maximum of 81°F (26.5°C) to avoid drying out the wood or causing warping. The thermostat must be regulated by a floor probe positioned between the heating cables. Note the Warmup 4iE Smart Wifi Thermostat does this automatically when selecting Wood Floors in the menu.
Installing Electric Radiant Heat Under Wood Floors