Water Proofing Your Shower

 Paint-on Liquid Waterproofing Products For Shower Walls
These past 20 years the tile industry has shown great advances in water proofing tile related products, especially with methods of constructing tile showers with paint-on liquid waterproofing products. Water Proofing your shower involves a few different systems, from copper pans to proper substrates, this article will discuss paint-on liquid waterproofing products for shower walls.
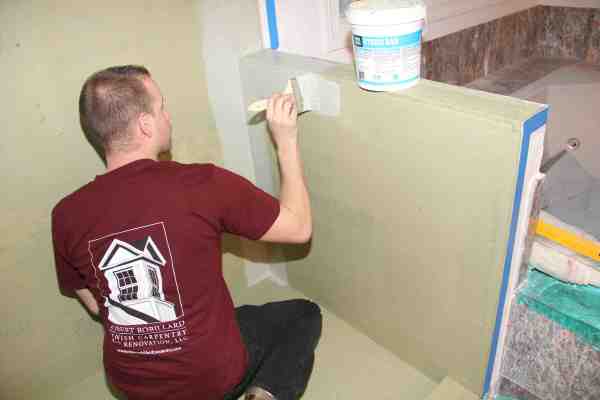
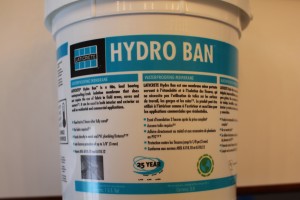
In my neck of the woods there are several liquid paint on water proofing products to choose from; Laticrete Hydo Ban, Custom RedGard, and Mapei AquaDefense. My local tile store sells Hydro Ban comes in a bucket and is applied with a roller or brush. It can be used over cement board, fiber-cement board, concrete, mud work, and other areas where you would be installing tile. It’s a 2 coat system and costs about $100 a gallon, with 5 gallon containers being better priced.
Hydro Ban is a thin, load bearing waterproofing/crack isolation membrane that DOES NOT require the use of fabric in the field, coves or corners. Hydro Ban is a single component self curing liquid rubber polymer that forms a flexible, seamless waterproofing membrane and bonds directly to a wide variety of substrates. Hydro Ban also has an anti-fracture protection of up to 1/8″ (3 mm) over shrinkage and other non-structural cracks
Where Do You Use Liquid Waterproofing?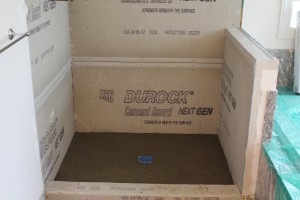
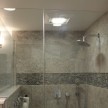
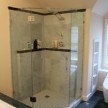
Liquid waterproofing should be applied to all surfaces in the shower that see water, and moisture. Especially horizontal areas exposed to moisture such as shower benches, shelving, half-walls, and even floors in showers.
Even if your horizontal surfaces have a slight pitch to drain they should be water proofed. Liquid waterproofing prevents moisture to get past the tile and grout allowing you to skip the plastic sheeting behind your substrate. I still recommend installing a vapor barrier behind the substrate, and if you plan on using a steam shower – you definitely need a vapor barrier.
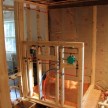
Installing Water Proofing Your Shower
Read and follow the manufacturers instructions for the brand and type of waterproofing that you are using. With some waterproofing, the companies will want you to use a special fabric, along with the liquid, over the whole surface. Some will require the fabric to be used in all corners, while some don’t require it at all. You also need to pay attention to how many coats of the product are required to be applied and how thick they are supposed to be. Some products require three coats and some only two. Some want it to be applied to 30 mils thick when wet and some only 20 mils. A wet film gauge comes in handy for this.
Steps in Water Proofing Your Shower
- Mesh and coat corners and seams with thin set
- Apply liquid water proof-er with a 1/2 or 3/4 nap roller or brush
- Brush corners
- Coat walls
- Coat floor – keeps water out of copper pan
- Hydro Ban is a 2 coat system, [45 min dry time 1st coat – 2nd coat after ]
- 1 gallon 50 Sq Feet
Once membrane has dried to the touch, ceramic tile, stone or brick may be installed with thin set . Allow membrane to cure 2 hours at 70°F (21°C) and 50% RH before covering with concrete, thick bed mortar, screeds, toppings, coatings, epoxy adhesives, terrazzo or moisture sensitive resilient or wood flooring. Do not use solvent-based adhesives directly on membrane.
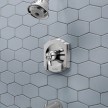
For drains and penetrations: Allow for a minimum 1/4″ (6 mm) space between drains, pipes, lights or other penetrations and surrounding ceramic tile, stone or brick. Use appropriate waterproof sealant (e.g. LATICRETE LatasilTM with LATICRETE Latasil 9118 Primer) and foam backer rod to seal space – do not use grout, joint filler or thin-set mortar.