Installing Warmup Driveway Snow-Melting Mat
As a remodeling contractor I advise on, and oversee, a lot of hardscaping projects. Recently, I’ve seen an increase in snow-melting system installations.
Why Install a Snow Melting System?
Living in the North means shoveling snow, salting your walkway and stairs, and plowing your driveway (or paying someone to do it for you). Over time this becomes a hassle and is probably the reason so many older people become “snow birds” and move South. Let’s face it: who wants to deal with snow, ice, and slipping hazards as your body becomes more fragile? Here are some of the more common reasons I see people considering such systems.
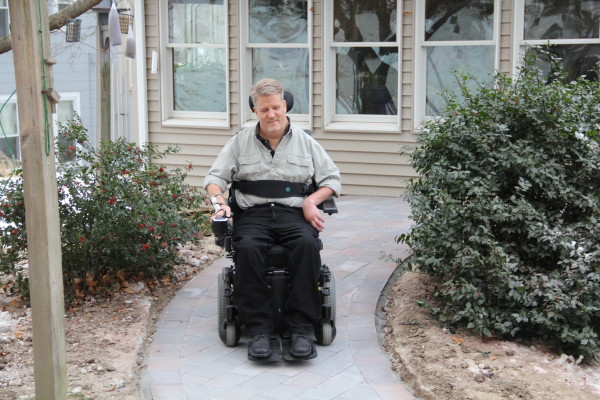
- To improve safety. Personally, I feel the biggest benefit of snow-melting systems is safety. Slips, trips, and falls are the second-most common cause of accidental deaths in the U.S. each year, second only to traffic accidents. Almost 80 percent of slips and falls are due to snow and ice, occurring in parking lots or on sidewalks. One bad fall can ruin your whole day, or more realistically, your whole year! Installing a snow-melting system can reduce the chances of slip-and-fall injuries, costly and lengthy recoveries, and lost income from being hurt. They’re also extremely helpful if you have someone living in your household that is accessibility challenged.
- To reduce liability. A snow and ice melt system is also huge liability reducer and extremely useful if you have a high-foot traffic business, reducing the risk of insurance claims and lawsuits.
- To reduce the use of caustic chemicals. If you have stone walkways, beautiful grass or flowers, hardwood flooring, or pets, you’re probably familiar with the downsides of ice-melt chemicals. They erode concrete and bluestone walkways, kill plants, damage interior hardwood floors, and are unhealthy for pets. Chemical ice-melts and rock salt are also bad for groundwater supplies. Having a system that melts the snow and ice off your steps, walkway, or driveway means you do not need to purchase, store, or use caustic chemicals or rock salt.
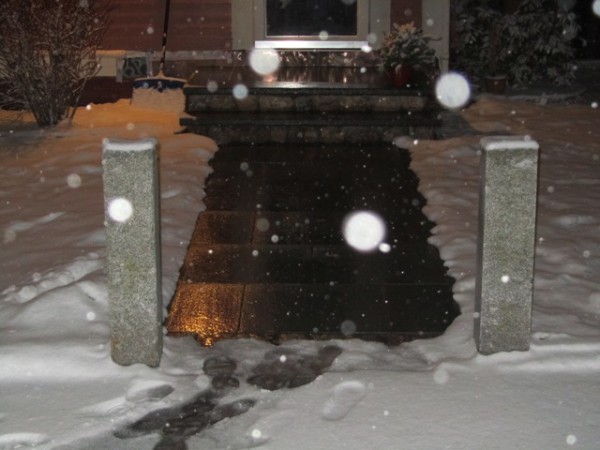

- To protect hardscaping. Ice-melt chemicals aren’t the only way to damage your stone driveway or patio. Plows and snow-blowers can also damage pavers, cobblestones, bricks, and other hardscape details – which are all increasingly popular with homeowners. A snow melting system eliminates the need to shovel, snow blow, or plow your driveway. The system melts the snow evenly as it falls, and the melting snow runs off, following the grade of the driveway. By keeping these heated areas frost-free, the snow-melting system also protects them from frost heaving.
- Convenience. A snow-melting system is completely automatic. You don’t have to remember to turn it on, or even be at home to make sure it’s running. Sensors built into the system monitor weather conditions outside your home and turn the system on and off as needed. These automated systems provide the right heat at the right time, keeping driveways and paths free of ice and snow. There is no need for you to do anything.
Choosing the Right System
Electric snow-melting mat systems are easier to use than hydronic snow-melting systems — and way less money to purchase and install.
Mat systems are also a big improvement over loose-cable snowmelt systems, which require the installer to secure the cable to something to hold it in place. For me, this usually meant installing a 6” x 6” wire grid and securing the cable to the grid with plastic wire ties. This is time-consuming work! And the result could be uneven melting if your work was not meticulous. Snow-melting mat systems solve this problem.
After trying a few different mat snow-melting systems, we recently began working with a company called Warmup. Warmup has a reputation for quality and innovation with heating and snow-melting solutions. They offer a wide range of easy to install snow-melting systems involving electrical mats and cables connected to special sensors that monitor and control the system according to outside environmental conditions.
The Warmup Snow Melting System is a lot easier and faster to install than the cables and grid method. The mats lay out faster, and a lot easier, plus they provide consistent melting coverage.
Electrical systems, like the one featured in this article, are often best installed when renovating an old walkway, patio, or driveway, or installing new ones. The system heats up the paving material, maintaining a temperature just above 32 degrees Fahrenheit.

The Warmup Snow-Melt Mat: Overview and Features
As mentioned above, Warmup electric snow-melting mats are simple and less expensive to install than cable systems or hydronic snow-melting systems.
They are designed for, and effective at, melting snow in the following areas:
- Driveways
- Walkways
- Stairs
- Patios
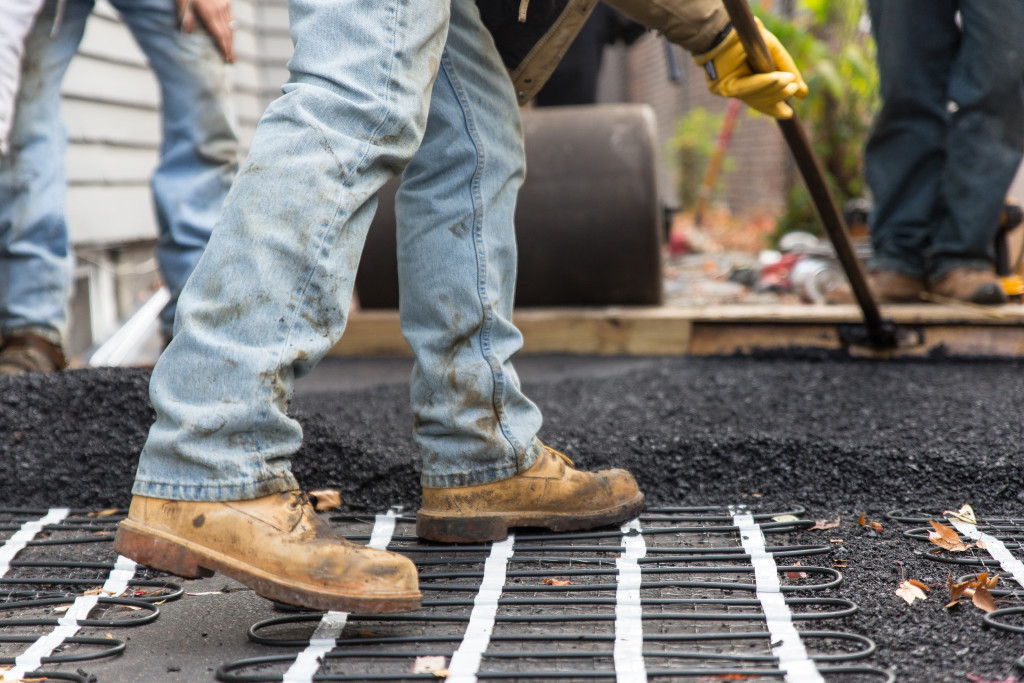
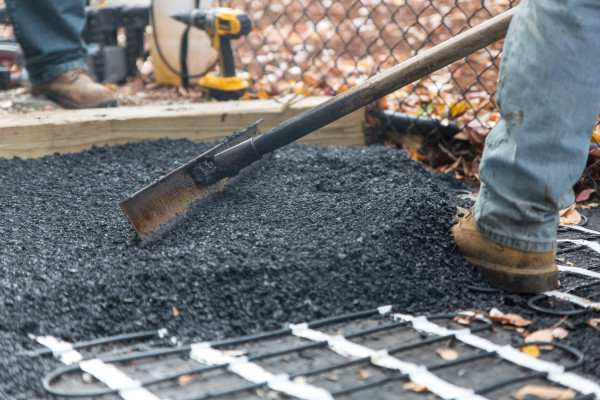
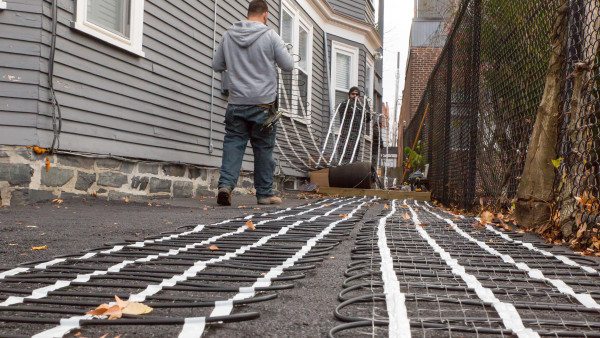
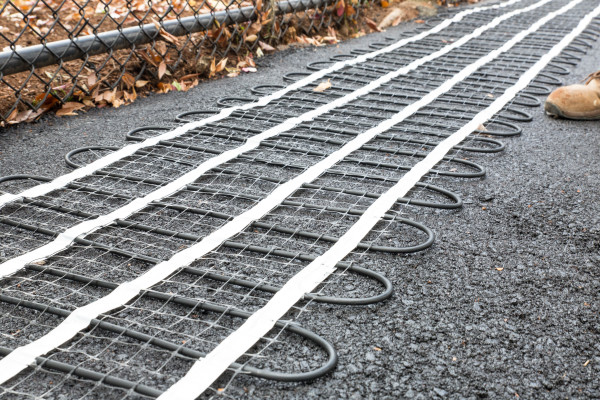
A Warmup mat system is rated both for residential and commercial-grade applications and is easy to install thanks to its a single point of connection and simple controls. All you need is a mat, a control, and a power source. (Compare that to a boiler-fired glycol-based hydronic system.) To make things go more easily and quickly, Warmup’s twin conductor heating cable is factory-connected with a sturdy mesh polypropylene mat. The heating cables are installed in a meandering fashion so that they are equally spaced (3” apart) and evenly distributed on the mat. The 3” cable spacing provides 50 watts of heat per square foot resulting in consistent, even melting. This makes it easy to roll out the mat and install the product correctly.

Additional Features
In addition to the speed and ease of installation, Warmup offers some additional features:
- Versatile installation under asphalt, concrete, or pavers
- Energy efficient twin-conductor heating cable of 1/4” (6mm)
- 10-Year Warranty
- Approval: CSA-us
Heating Cable Specifications:
Warmup’s heating cable consists of a resistance-heating element insulated with Fluoropolymer and Polyolefin-based compound, having high dielectric strength and good temperature resistance, which makes the heating cable totally safe.
A metallic sheath is provided to give additional mechanical strength and provide ground path. A final outer jacket of Zero Halogen Polyolefin based compound is given to make the cable sturdier and provide corrosion protection.
- Voltage: Mats: 120V / 240V – Cable: 240V only
- Output: 120W/ linear foot
- Max Temperature: 464°F (240°C)
- Cold Tail Length: 16’-4”
- Cable Thickness: 3/8”
Warmup snow-melting mats are uniquely designed for parking lots, driveways, patios, pavement, and stairs. They are suitable for embedding under concrete, asphalt, or pavers, but there are a few specifics to be aware of in each case:
Under PAVERS
The Mats should be covered with 2” of sand and not be buried more than 4” underground, including the thickness of the pavers.
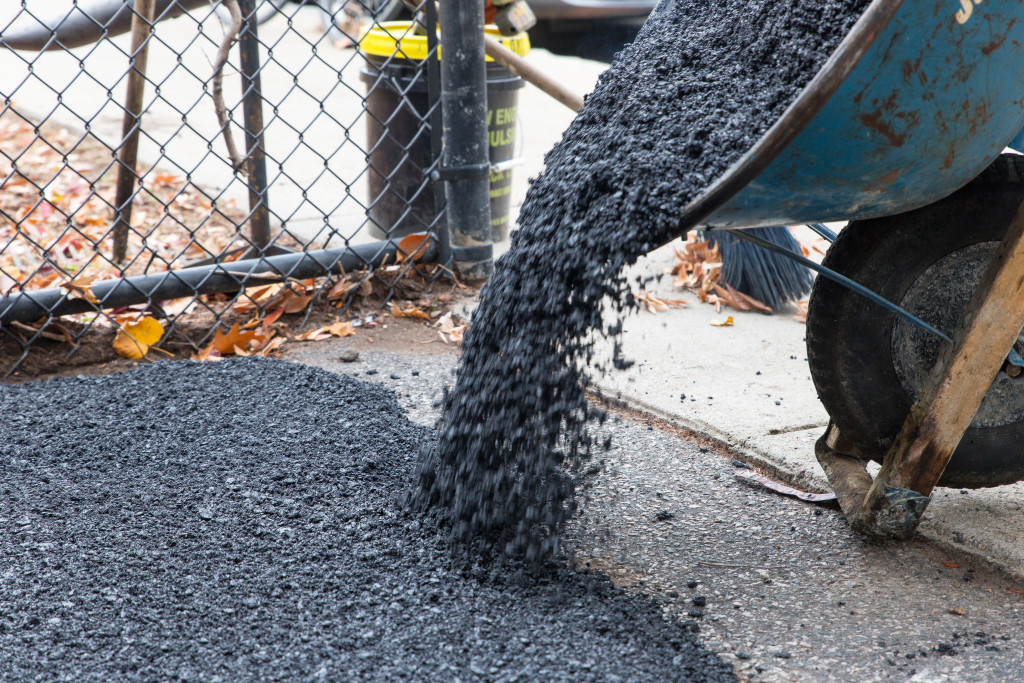
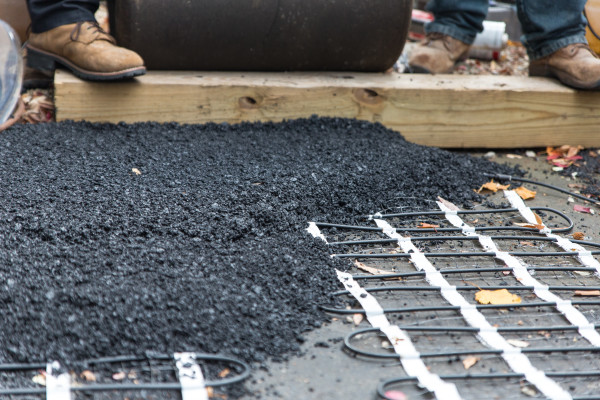
Under ASPHALT
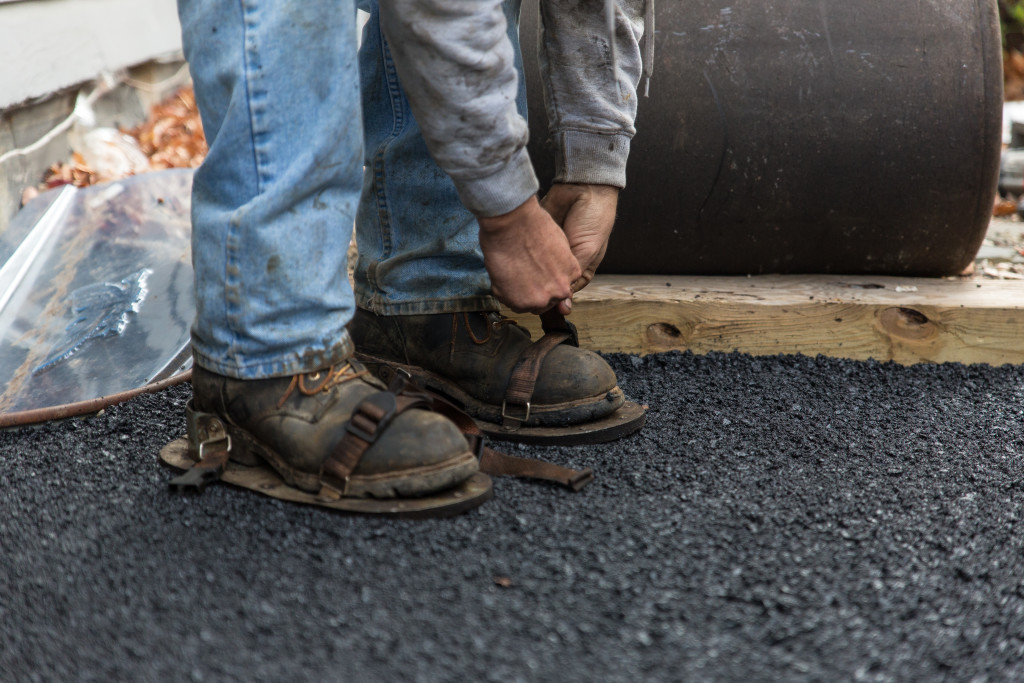
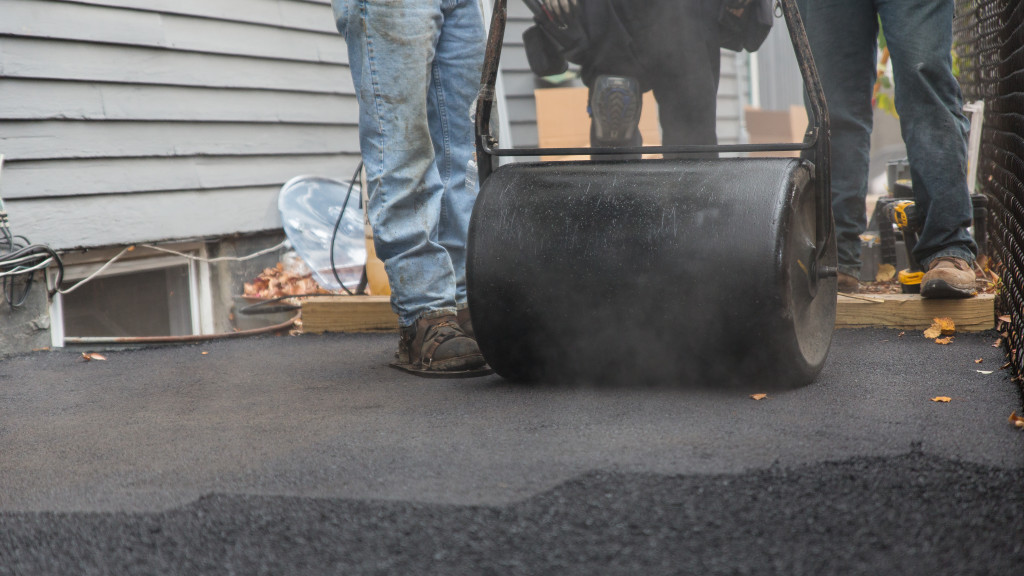
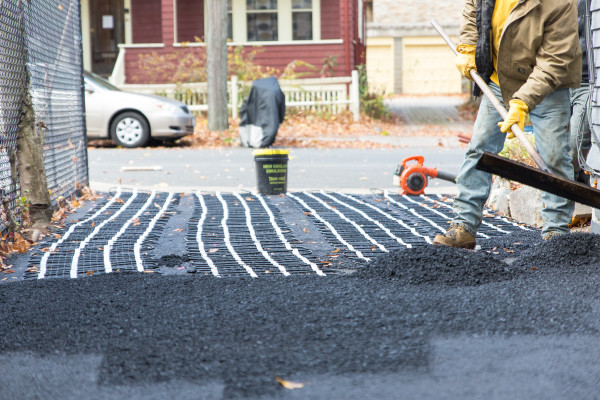
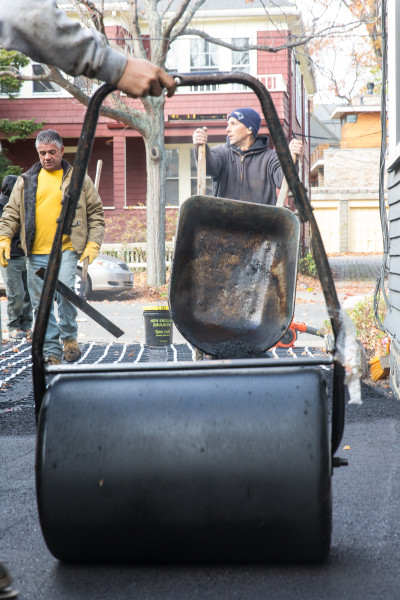
The Warmup mat cable is the only cable that can withstand direct contact with hot asphalt until the asphalt cools. Do not use rollers that weigh more than two tons, however; in fact, hand rolling is preferred.
Under CONCRETE
Ensure the pour is not more than 4” thick. To ensure that the mats stay with-n the 4-inch depth I use zip ties and fasten the mat to a 6×6 metal grid, re-mesh or wire mesh. This allows me to shim up or lower the mat as needed to maintain the proper depth in poured concrete.
Tip: To maintain proper mat depth, the grid height can be maintained with bricks or pulled lower during pour.
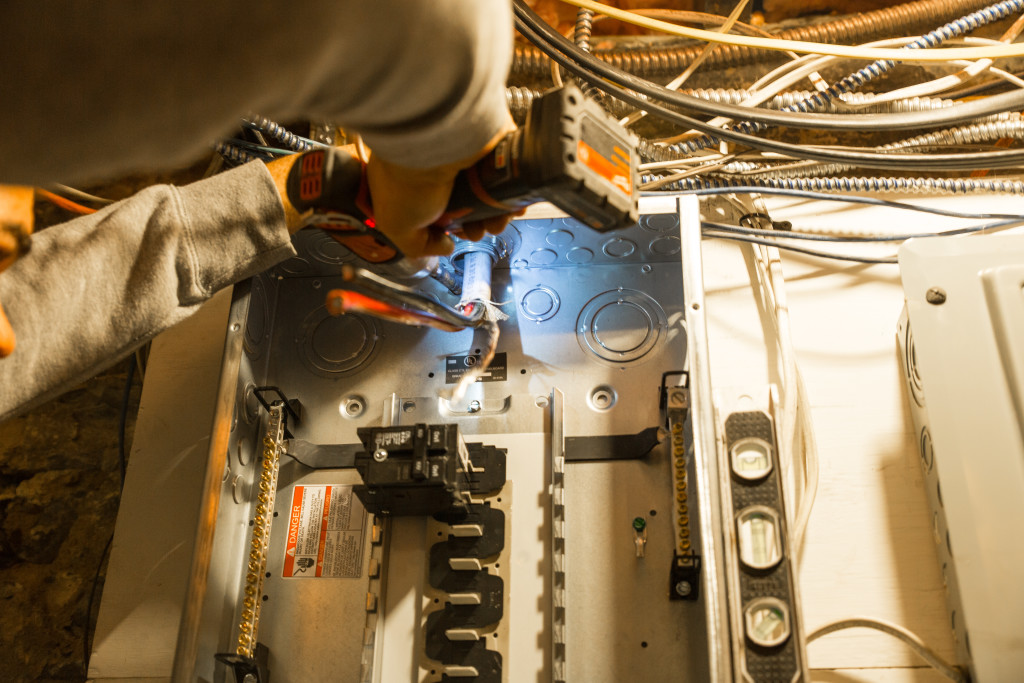
If you’re considering an electric snow melting system, you first need to determine if your home or business can accommodate the electrical demand. An electrician will do this for you.
All Warmup Mats are rated for 208-240-277V applications, and require a licensed electrician for the electrical portion of the installation.
Note: Warmup does not make 120 v mats, only 240v and 480v. They work at 208 and 277v and on 3-phase.
On our project we needed 70 amps / 240 volts to run this system. The electrician needed to install an additional 100-amp service to accommodate the new driveway system.
The Warmup Design Process
Standard Warmup mats are offered at widths of either two or three feet, and can be ordered at any length between five and 60 feet.
The cables can be embedded up to 4” deep. They’re either laid out as tire-tracks or side-by-side for full coverage melting.
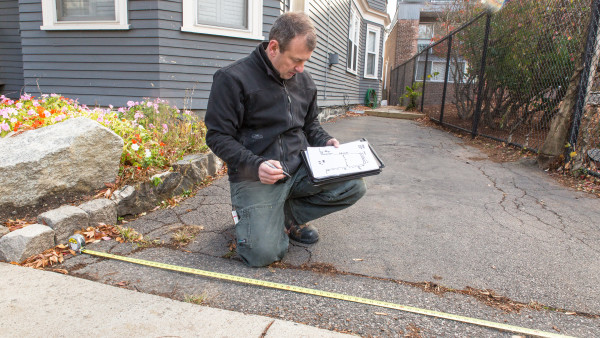
Warmup worked with us to design a custom-fitted system and supplied a drawing and complete instructions on how to correctly install our system. Warmup project managers approve the design with you and follow the project through to the end.
I was impressed with the level of customer attention, hands-on expertise, coordination, and follow-through Warmup provided.
Their effective customer service and sales manager, who also is a hands-on guy, helped us weed out installation and layout risks and ensured quality control and project success.
Warmup also offers 24/7/365 technical support. I found this to be key since I often will do installations past normal business hours and on weekends.
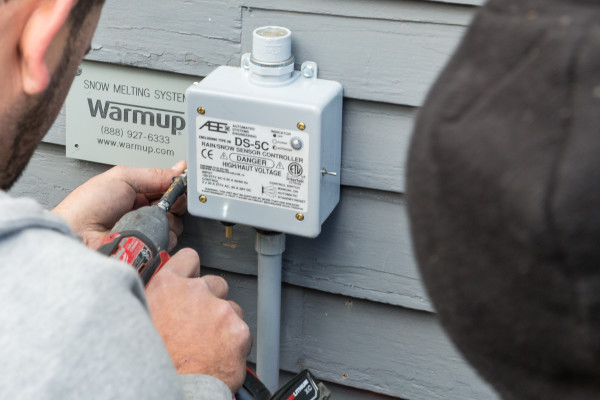
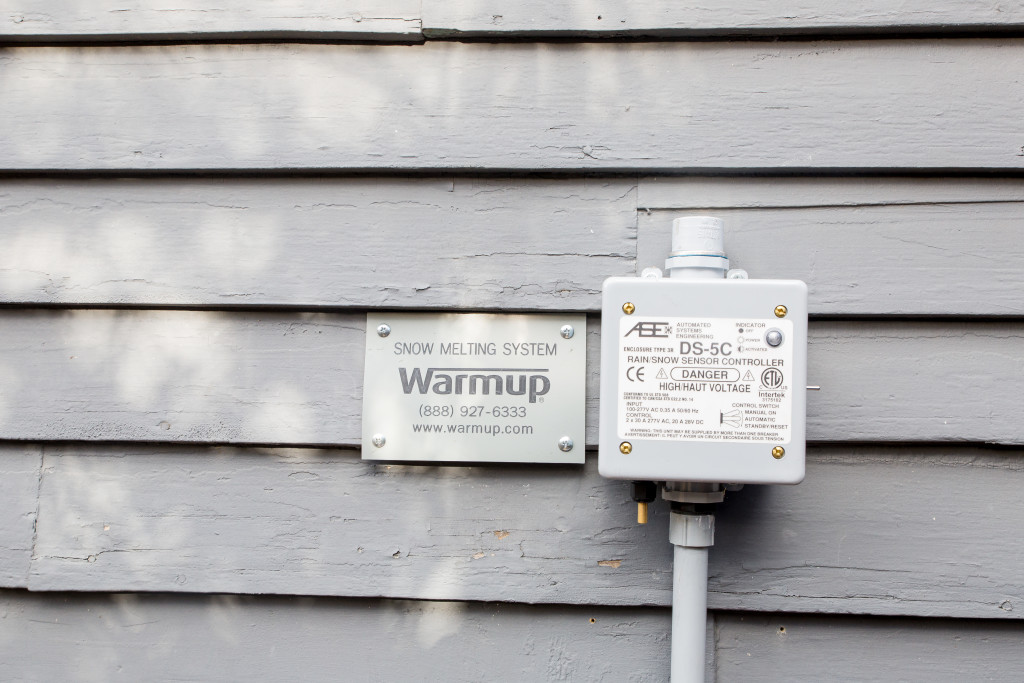
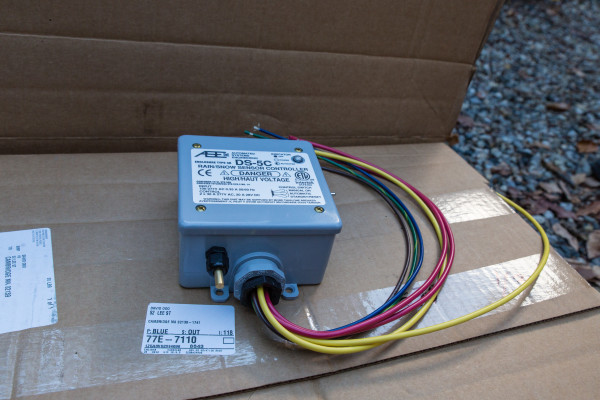
Outdoor Controllers
Warmup offers “smart” controllers that automatically activate the system based on temperature and moisture sensors, and turn the system on or off as needed – once installed, you don’t need to do anything.
Here’s an overview of the different controllers Warmup offers to suit your specific project size:
- DS2: The DS2 Controller can handle 30 amps and is suited for smaller ground surface projects under 150 square feet.
- DS5: The DS5 Controller has 2 x 30 amp relays that are useful when you are combining two systems, such as your driveway/walkway/stairs or even your roof/gutter.
- DS-8: The DS-8 Controller is designed for roof, gutter, and downspout ice melting. This controller is sealed, low voltage, and has a remotely mounted precipitation sensor allows the user to install the small sensor head in a downspout, the bottom of a gutter, or at the end of an antenna boom, up to 10 feet away, while keeping the main controller in a more convenient or protected location, such as under a deck, overhang or porch roof.
Indoor Controllers
Warmup uses an indoor remote control for the DS outdoor controllers, mentioned above. The indoor remote controller, called the CDP-2, is powered with low voltage wiring and allows you the flexibility to monitor your system if you choose.
From the comfort of your home you can manually override the ON, OFF and AUTO functions of your outdoor-mounted control box. I really like that the CDP-2 fits into a standard electrical single gang box, similar to a room light switch. The CDP-2 can be installed anywhere you need it to be without taking up a lot of real estate.
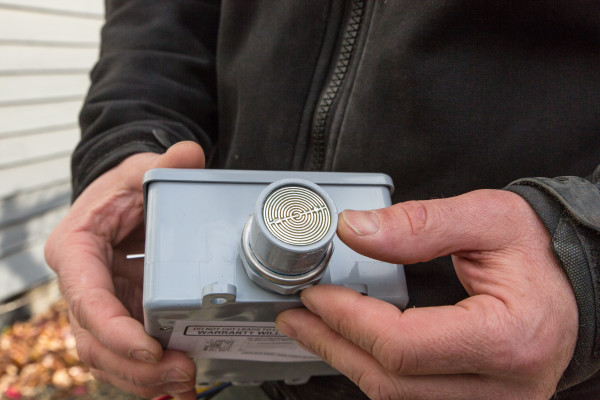
Sensors:
Warmup offers both ground and roof sensors. Ground and roof sensors can be combined on the same controller. Using multiple sensors is to gather faster or more diversified information to trigger your heating system, such as the north and south side of a building, or areas that receive little sun and melt slower.
One tip is to locate one sensor where the snow and ice will manifest first, and another where the snow is going to disappear last. This will guarantee complete clearing of snow and ice.
Installing the Warmup Snow Melt Mats
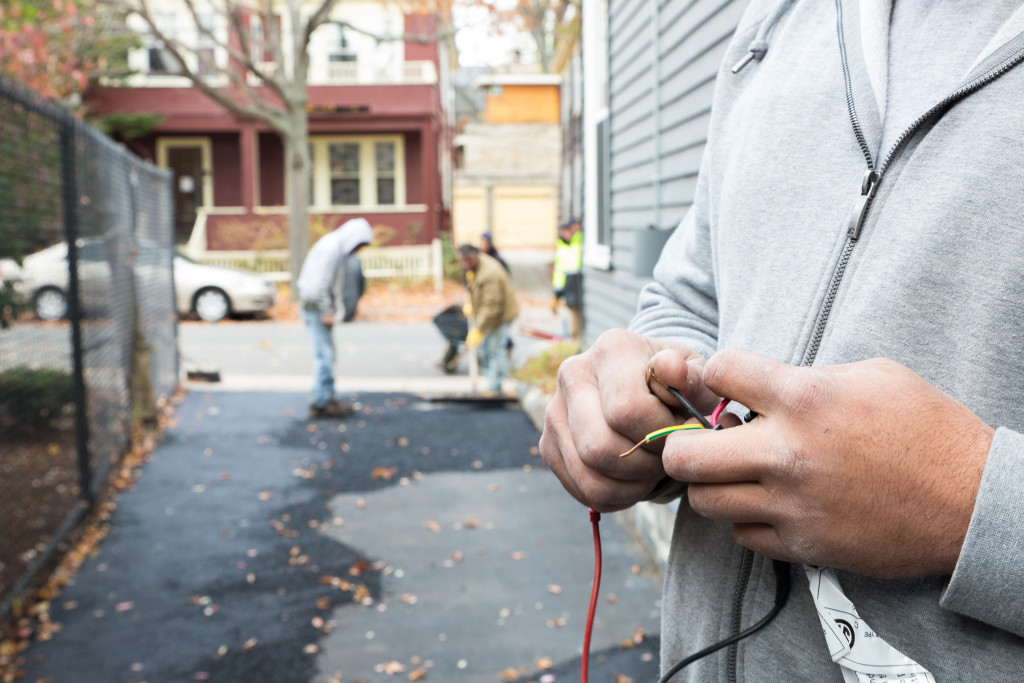
The Warmup mat has a 16’4”-feet section of cold wire. This wire is what you use to connect the mats to the electrical control panel.
The cold lead is not heated and is used to enter into the building or an external weatherproof junction box.
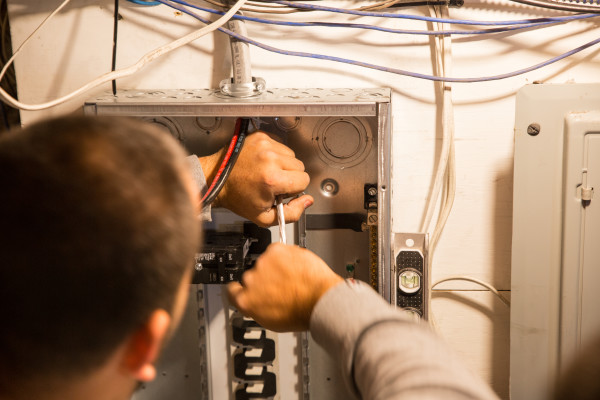
All electrical connections are made by a licensed electrician. The electrician may also run conduit and low voltage wires to any sensors you choose to install.
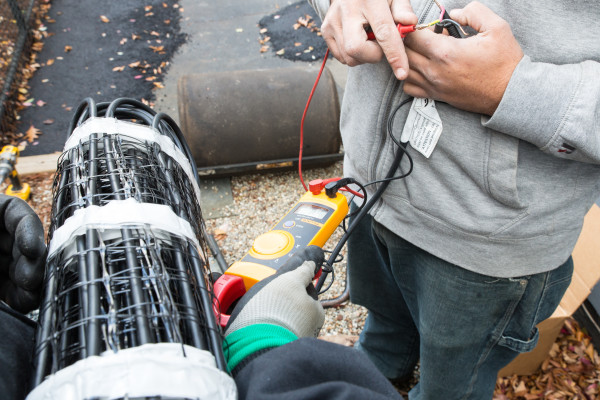
Prior to installation and periodically during installation make sure to check the Ohms, per manufacturers label recommendation, to ensure that the cable is not damaged. All Warmup mats have a label with the factory Ohm reading. A tolerance of 5% to 10% is allowed.
Tips for Installing Warmup Snow-Melting Mats
Before ordering your cables or mats, measure the area to be heated. Draw your plan out and allow for obstructions such as lights, poles, columns, handrails or drains.
- The heating cable should not cross or overlap itself at any point. This could cause the cable to overheat, requiring replacement.
- The heating cable should not be cut, shortened, or lengthened. Trying to alter the length of the cable may cause overheating, resulting in damage to the cable.
- Take precautions to avoid damage to the heating cable during installation. Do not drop sharp objects or drive on the cable. Take care when pouring concrete or asphalt onto the cable.
- Do not install snow-melting mats and cables below 14°F (-10°C).
- Don’t bend the cables more than 2-inches [radius]
- The cold lead, normally 16’4” long (5m), can be cut or extended to suit the location of the electrical power connection box.
- Sensors should be located in open areas, away from overhead obstructions.
- Check the voltage and wattage of the heating cable to ensure you have the right products for your installation. Details are marked on the product box.
- A qualified electrician should connect the heating system.
- Check the continuity and resistance of the snow-melting mat before installing and also after installing. Resistance value should match the value shown in the sizing guide that comes with the product. A tolerance of 5% to 10% is allowed.
- Separate high voltage power wire from low voltage wire in different conduits.
- Use a GFEP protected breaker in the panel.
- Allow sufficient drying or curing period of the concrete/asphalt/sand before energizing the heating cable.
- All outdoor embedded installations must include the application of a nameplate provided by the manufacturer under NEC 426-13.
- Complete the installation in accordance with all enclosed instructions and in compliance with local and national electrical codes. (See manual for additional details.)
Summary
A Warmup electric snow melting mat system provides the right heat at the right time, keeping driveways and paths free of ice and snow automatically. The Warmup mat system is simpler to design, and considerably less expensive to purchase and install than boiler fired glycol-based hydronic systems.
The Warmup system requires no maintenance and comes with a 10-year warranty.
Warmup offers a wide range of snow melting systems for driveways, pipes, roofs and gutters. I like the Warmup system because it’s a “smart” system that does everything for you automatically.
Probably the biggest advantage of all is this is the safety of family and visitors to your home. If your walkways and driveways are heated, ice and snow will be melted, and there will be no danger of slips and falls. And did I mention – no more shoveling?
Warmup Snow Melting Mat Video