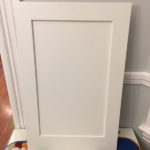
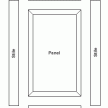
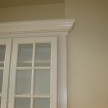
Shaker Profile Cabinet Doors


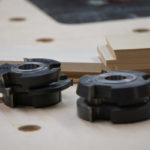
Reversible Shaper Bit Set
A typical reversible set includes one cutter that cuts both the sticking and the cope, and one slot cutter for cutting a panel groove. Some manufacturers offer an additional kit with one more slot cutter which allows you to cut a rabbit below the sticking instead of a slot.
There is a wide variety of bits and shaper cutters available that cut cope and stick joints for cabinet dimension stock (3/4″ standard thickness). These cutter sets are often called ‘stile and rail’ sets.
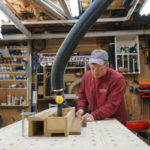
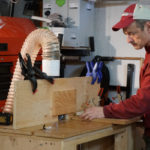
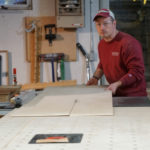
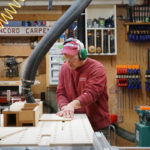
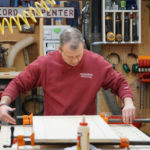
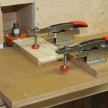
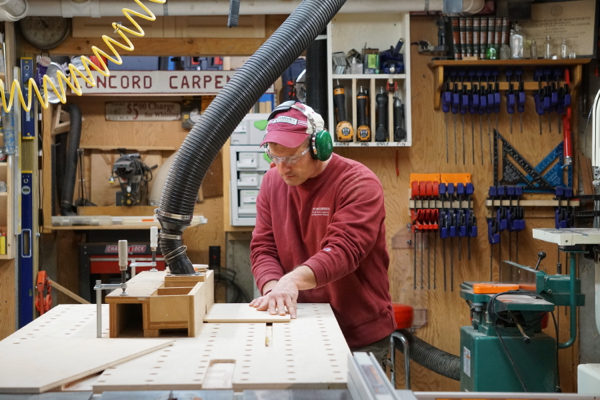
I use my shop made shaper table and sleds with hold down clamps to cut all of my copes and sticks and an old radial arm saw that I modified to become a permanent “panel-cutter,” to make the raised panels.
Steps:
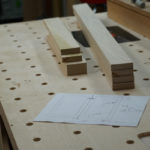
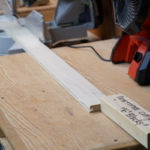
- I start by making my cope cuts on the ends of my rails. Tip: use scrap wood and a “hold-down” sled to get the correct fit prior to cutting into your project wood.
- Reverse the shaper bit and rearrange it to cut the stiles profile. Tip: I use the coped end to assist me in setting the bits height, aligning the slot cutting wing with the tongue on the coped end.
- Cut a test board and check for fit. Although you can do this cut without a hold down sled, I still use one.
- Holding your pieces, face side down – cut your profiles on your stiles and rails.
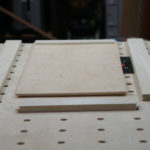
- Dry fit your pieces and measure for your panel.
- I make my panels on my panel cutter, taking several passes to get it to the right size to fit in the grooves. For flat panels I simple put the bevel side in reverse.
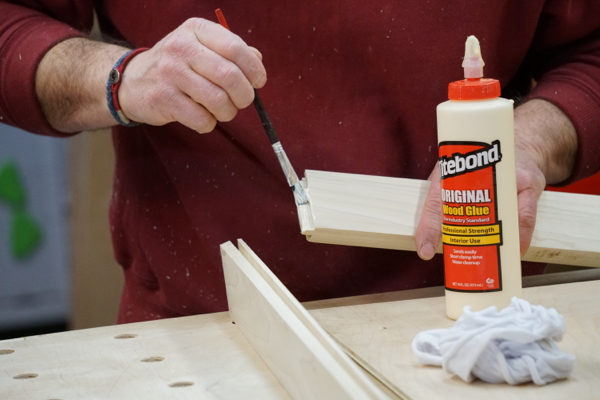
Glue Tip: Only apply glue to the joints between the rails and styles. No glue on the panel, it needs to “float” as it expands and contracts with seasonal movement. I allow 1/16″ all around the panel for expansion.
Sourcing the Flat Panel
Typically, if I were doing this “old school,” I would glued up panels of Poplar stock. Making a flat panel this way I have two choices:
- Use a raised panel cutter to create a raised panel on one side with a continuous tenon. Orient the raised panel on the inside of the door [hidden from view] in order to get my flat panel look, or;
- Run the stock through a thickness planer, bring the wood to ½” or 3/8” thickness, glue it up and achieve the flat panel. I finish off this panel by using the shaper to create the tongue [continuous tenon] to insert into the style and rails groove.
On this project, we neither had the time, not the budget so we used ½” Birch plywood and used a Rockler rabbiting router bit to achieve the tongue [continuous tenon] to insert into the style and rails groove.
Tip:
On the shaper use a power feed or a clamps down sled system like the ones in the photos. It’s safer and more accurate.

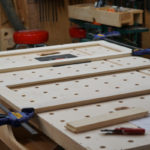
Dry Fit the Door Parts
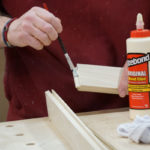
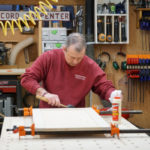
Prior to making the raised panel I dry fit the styles and rails and ensure that I have the proper measurements. I also take into account a 3/16” reveal at the hinge side of both doors and between them. Once the flat panel is made I again dry fit everything prior to glue up. Using a glue brush I apply wood glue to the cope and stick portion of the styles and rails. I do not put glue in the panel groove or on the panel tenon.
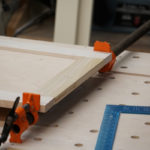
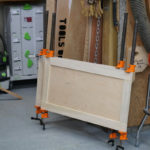
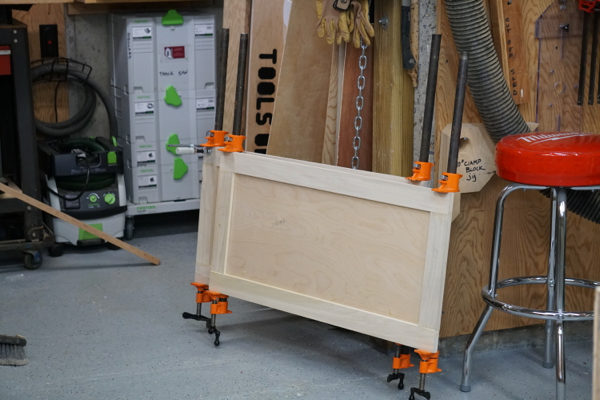
Glue and Clamping
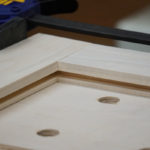
Once the glue is applied I place the unit onto two pipe clamps. The pipe clamps are applied at the cope and stick connections only. Prior to applying clamping pressure, I ensure the doors are square and also that the cope and stick connections are flush.
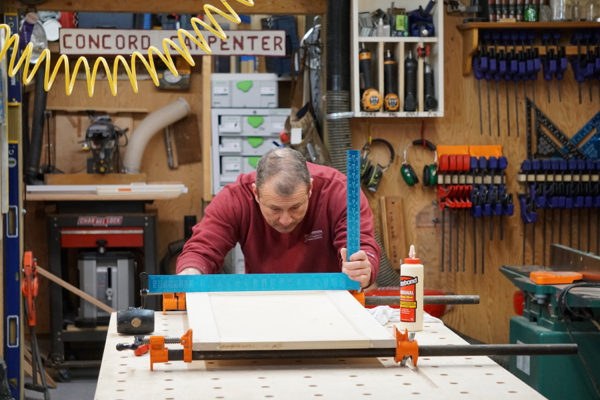
To check square, I use diagonal measurements, a framing square and also 90-degree clamp blocks.
It’s also important to ensure that the door is not bowing – look along the pipe clamp edge to see if you have a consistent reveal between the pipe and door styles and rails. Sometimes I push the parts tight against the pipe.

Sand and Finish
Allow 24 hours for the glue to dry, remove the clamps and sand all the faces of the door. I like to flatten any raised edges at the cope and stick joint first. Then I move on to sanding the flat surfaces to remove mill marks. Mill marks if left on the board face often show up once the door is painted.
After all of the machine sanding is complete I ese all of the sharp edges with hand sanding. Now you’re ready to apply hinges, mount the door and knobs.