Schluter DITRA-HEAT Heated Bathroom Floor

Schluter DITRA-HEAT Installation and Tips
I recently remodeled a 3rdfloor attic for a client. For heating we were only able to get a heat duct on one side of the floor. This heat duct reached every room except a small bathroom, on the opposite side.
To address the lack of heat, we plan to add a Schluter DITRA-HEAT radiant floor heat system under the floor tile. Radiant heat is an excellent way to evenly and consistently heat a room, and achieve a heated bathroom floor..
What is DITRA-HEAT?
Schluter DITRA-HEAT is a complete radiant heating solution. It integrates customizable DITRA-HEAT-E-HK heating cablesand an uncoupling underlayment mat. The DITRA mat uncouples the tile from the wood subfloor and can also be waterproofed. According to Schluter,
DITRA-HEAT provides uncoupling through its geometric configuration, which allows for in-plane movement that effectively neutralizes the differential movement stresses between the substrate and the tile, thus eliminating the major cause of cracking and delaminating of the tiled surface.

The DITRA mats have “wire- stud” like structures evenly spaced. These studs are designed to allow for the easy installation of DITRA-HEAT-E-HK heating cables. Additionally, once installed, you do not need to cover the heating cables with thin set or self-leveling compound, significantly reducing installation time and effort.
This allows you to be able to walk on the cables, and even tile over them immediately after installation.
Custom Placed Heat – Heated Bathroom Floor
I like the Schluter DITRA-HEAT system because it provides protection from tile cracking [uncoupling] and the flexibility to install the heating cables with wherever heat is desired.
Measure The Floor Space
When planning your floor heat, do not run your mat under appliances, permanent fixtures, vanity cabinets, tubs, or showers. The cable is designed to be installed only under the tile that you will walk on.
Measuring Tip: When I measure my bathroom remodels for floor heat I measure exactly to the walls, vanity, tub, or toilet and then deduct three inches from each wall and 2” from cabinet fixtures. The deduction allows for the installation of 3/4″ baseboard trim and gives you some wiggle room.
Keep heating cables away
- 3-inches away from walls
- 2” inches from fixed cabinets
- 6-inches from plumbing drains
- 8-inches from heating ducts, baseboard heaters and fireplaces.
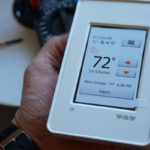
Thermostat Location
Determine ahead of time where you want the t-stat to be placed and have your electrician run a dedicated circuit to that location. The Schluter DITRA-HEAT t-stat runs off of 120 volts.
Thermostat Install Tips:
Here are some thermostat tips that have helped me in my installations of programmable thermostats with radiant floor systems:
- Locate your thermostats approximately 5 feet off floor and always on an inside wall.
- Try to avoid placing it near heat sources, excessive sunlight from windows, skylights or heat generating appliances [i.e., a towel warmer] that could affect its temperature.
- Prior to closing up any walls, I install a wire pull string from the thermostat box, down the wall cavity, and through a notched section of the 2×4 wall shoe plate. After the wallboard is installed the string will be used to pull the 10-foot cold lead and floor sensor wire up the wall to the thermostat location.

Installing DITRA Mats
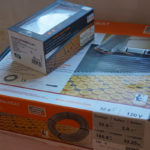
The Schluter DITRA-HEAT mats are available by the roll, or by the sheet to accommodate various room sizes. They cut easily with a knife or shears and install quickly with thin-set. I like to dry-fit the mats first and try to align them so the channels line up, making the installation of the heating wire easier.
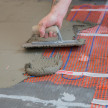
I glue the mats down with a looser thin set mix than is normally used for tile setting. Using the flat side of the trowel we first “key-in” the thin set to better bond it to the wood substrate. Afterward we use the notched portion of the trowel to key-in the thin set. Key your thin set in the same direction.
Once the thin set is applied, lay the mat down and press it down using a one or two rubber floats for even, consistent pressure. The goal is to ensure complete, and even coverage of thin set on the mat.
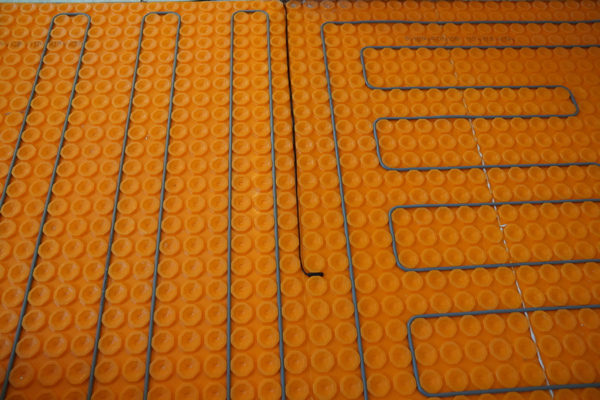
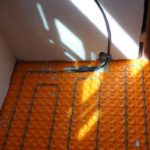
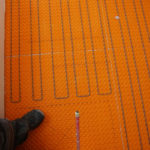
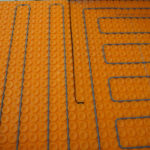
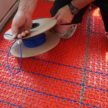
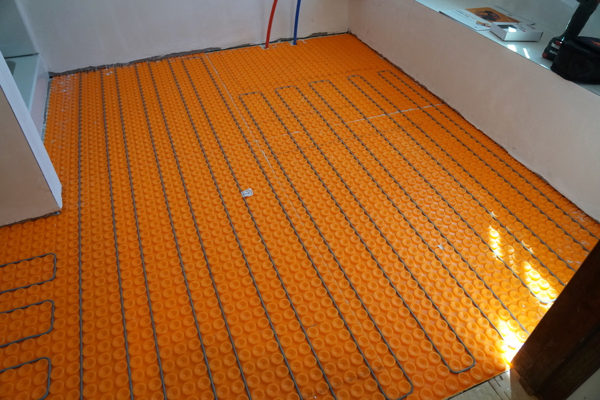
Installing The Heat Cable
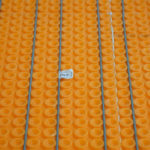
Once the mat is down you can start to install the wire. The wire EASILY embeds between the DITRA studs. Schluter recommends a 3” spacing. [distance of 3-studs]
Non-Standard Cable Spacing
Heating cable may also be spaced alternating 3 stud – 2 stud intervals. This practice may be desirable to increase heat output (e.g., over uninsulated on or below grade concrete subfloors) or to consume more cable length in a given area (e.g., when using the standard 3 stud spacing doesn’t allow the selected cable to fit the floor area and respect minimum spacing requirements from walls, partitions, etc.)
A cable spacing of 4 studs is not recommended, as it can produce inconsistent floor surface temperatures.
What Size Tiles Can I Install?
The minimum required tile format for use with DITRA-HEAT is 2″ x 2″ tile.

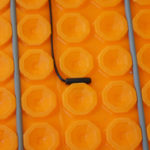
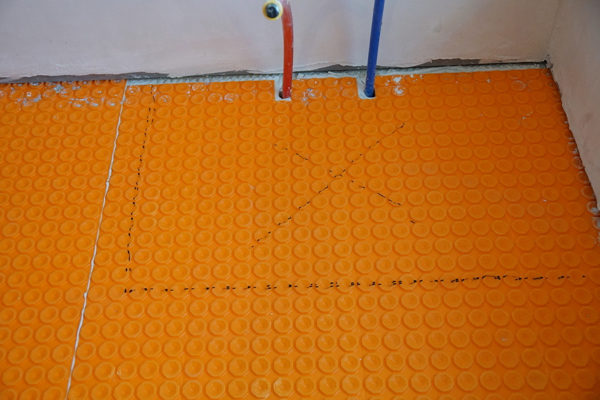
Placement of Power Lead and Sensors
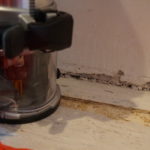
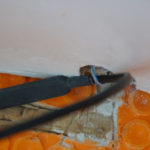
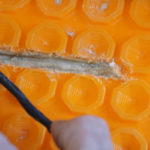
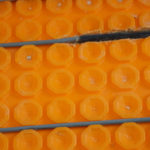
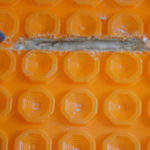
Route the power lead from the floor to the connection box. To ensure the power lead remains at the same level as the heating element, you will need to cut or chisel a channel in the Schluter DITRA-HEAT mat or even the sub-floor.
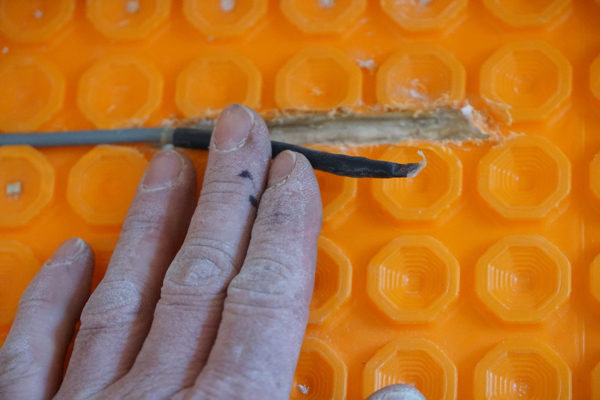
The floor sensors and end of heating wire will most likely sit too high, requiring you to cut a channel in the floor to recess the floor sensor and ensure that it sits at the same height as the heating cables.
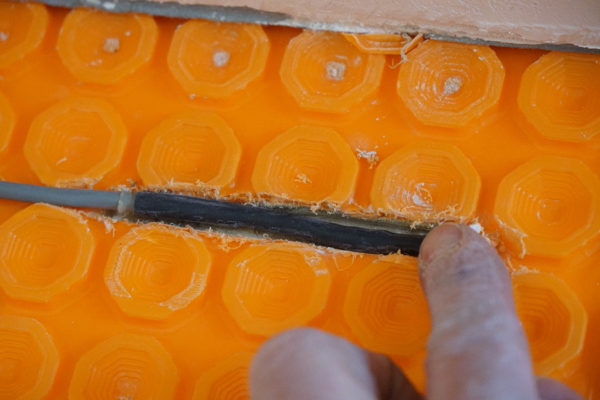
The thermostats also come with two sensor cables to detect the temperature under the floor finish and are used for temperature regulation of the floor surface. Place the floor sensors in different locations, and centered between two cable runs, at a distance of 24” min from the wall. The floor sensor can be glued in place with adhesive or hot glue. Avoid touching or overlapping of the heating wires.

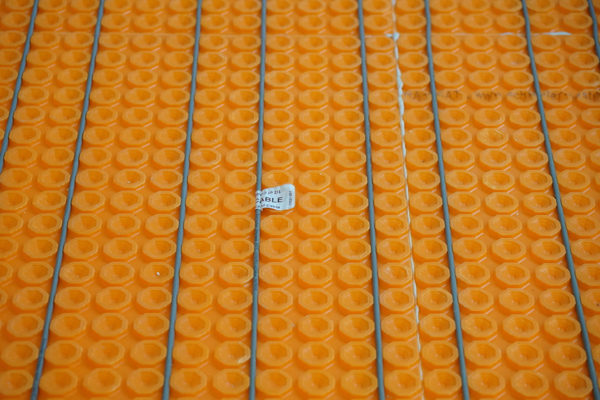
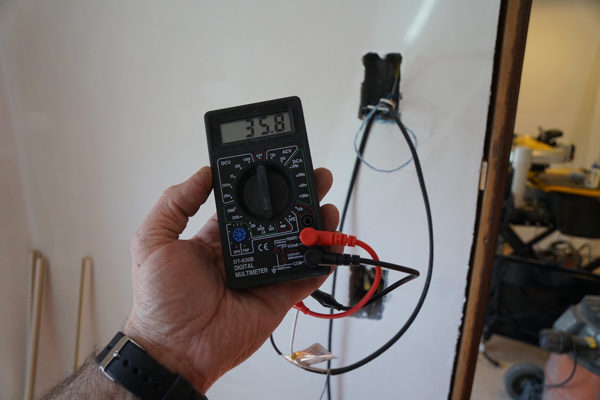
Test the Mats
The Schluter DITRA-HEAT cables were tested at the factory. Testing them prior to install is a critical step and should be done before, during, and after installation. This is important to check for any breaks or damage to the cable.
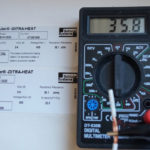
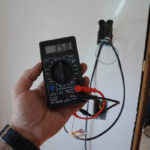
Testing can be done with a digital ohmmeter to ensure the ohms resistance is correct.
Procedure:
- The resistance should be measured between the two conductors without touching the yellow-green wire, which is the ground connection. CONFIRM COLORS
- Checking for resistance between the two conductor wires ensures there is no break in the cold lead conductor and the heat resistance wire. It does not assure you that there is no electrical short in the circuit.
- Place one probe on the black wire. Place the other probe on the yellow (red wire for 240V ). Resistance can vary depending on the ambient temperature and an allowance of +/- 5% from the norm is acceptable.

Radiant Floor Heat Installation Tips
- Take photos of the mat installation before covering over for future remodeling reference.
- Check the resistance of the heating before, during, and after installation to ensure that the heating cable as not been damaged. The value should match the rating label found on the product label and be within the tolerance allowed.
- Do not use staples or other metal fixings.
- Do not cut the heat cable.
- Do not touch, cross or overlap heating cables.
- Dry fit your mat, and use a permanent marker to locate it on the floor. Also mark the cold leads and sensor locations.
- Avoid damaging the heating cable with trowels and other tools.
- Use tape to fix any loose laid wires and the power leads in place.
- Install a metal protection plate at the base of the wall where the cold lead and sensor wires enter the wall, to protect from fasteners.
- The heating cable should have a turn, or u-shape jog in any “straight” runs longer 10-feet.