

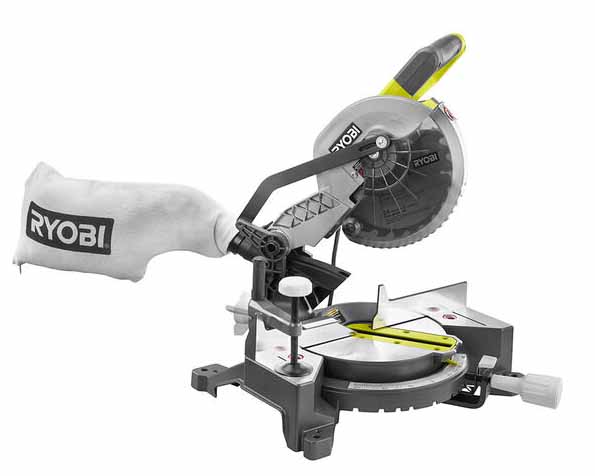
RYOBI 7¼-inch Compound Miter Saw
Every pro carpenter needs a miter saw, of course, and every DIYer will sooner or later want one. But as Rob points out, we don’t always need a big miter saw – that is, something in the 10+-inch category. For most interior trim work and much shop work, a compact 7-ish inch miter saw will do everything that’s needed, and save space to boot. The RYOBI 7¼-inch Compound Miter Saw
is a good example of this class of tool.
I chose to look at the corded version of this saw. I’ve explained previously that cordless tools are often a God-send when you have to bring the tool to the work piece, and your manner of holding and manipulating the tool is dictated by the position of that (often fixed in-place) work piece. But when the work piece is brought to the tool (meaning that the tool is in a fixed location, at least for a while), a corded tool is usually not a problem or hassle to set up. Miter saws, of course, can’t be brought to a work piece, and they usually stay put for at least a day on a jobsite.

Basic specs
The RYOBI 7¼-inch Compound Miter Saw sports these basic features:
- 9 Amp motor spinning at 5,100 RPM
- 1-1/4 in. dust port
- 4-1/4 inch cross cut; 3-inch 45° miter or 45° bevel cuts (see discussion below)
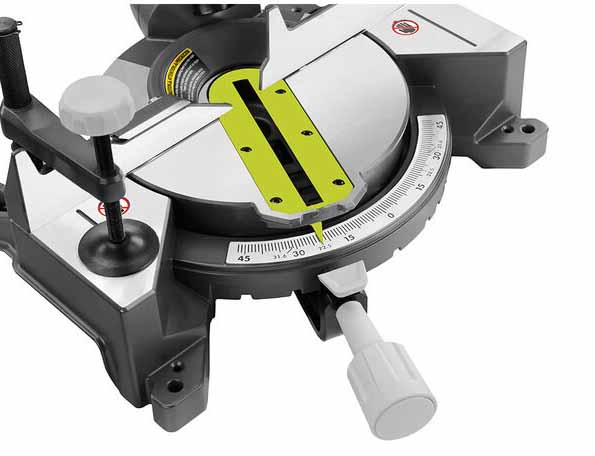
- Miter stops located at 0°, 15°, 22.5°, and 45° left and right
- Adjustable bevel from 0° – 45° with adjustable positive stops at 0° and 45°
- Partial sliding fence (left side)
- Spindle lock
- Extended miter range from 47° left and right
- Machined and cast miter scale
- Lubrication-free
- 3-year manufacturer’s warranty
- Includes: TS1144 7-1/4 in. Miter Saw, 24-tooth Carbide-Tipped blade, blade wrench, dust bag, work clamp, and operator’s manual
- 19 pounds
Note that this model is a single-bevel saw, and not a slider.

Out of the box
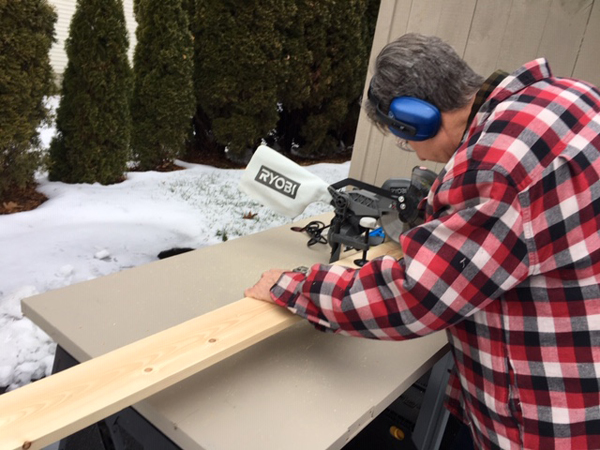
When this saw arrived I was surprised by how small the box it came in was. Once I got the tool out and assembled (almost no assembly was required) I realized that this miter saw was indeed compact; “kinda cute” was what I said to myself. And at less than 20 pounds it was easily transportable; you can carry it with one hand with no problem.
Now the first thing you want to do with any miter saw it to square it up; indeed this is the first step that the included manual suggests. You want to make sure that the rotating table is flat with the side table areas of the base, that the blade is square to the fence, plumb, and that the 45-degree miter and bevel stops are true. The manual tells you how to do all but the first, and these latter calibrations required only a very slight adjustment to one of them. The first item though —the flatness of the entire table area — isn’t mentioned because there’s no way to adjust it. And wouldn’t you know, this is the one thing that wasn’t perfect with this particular saw out of the box.
The left side table was .010 thousands low from the rotating table, and the right side table .012 thousands low. To put this in perspective, 1/8-inch is .125 thousands, and a piece of copy paper is .004 thousands. So we’re talking about a very small deviation from flat, but it was just enough so that a calibrated straight edge would rock ever so slightly when laid across the entire table area.

Wood tolerances
Now the previous RYOBI miter saw that I reviewed was absolutely perfect out of the box, so I was a little surprised. But I know as well as anyone that slight imperfections in manufacturing are just a fact of life. I could have returned this saw of course, but I realized that 1) there was an easy fix, and 2) it really didn’t matter anyway.
1) The easy fix was simply to put a strip of duct tape on either side table. Once I did that the entire table was dead flat.
2) That little deviation from flat is unimportant in the way a miter saw is used in real life. For rough work it’s obviously irrelevant. For finish work you’re either working on paint-grade or stain-grade material. Paint-grade seams are caulked, while stain-grade miters are usually cut slightly (very slightly) over-sized and sanded for a perfect join-up. This is particularly important when you consider how often doors and even windows are out of plumb, and how seldom corners are at a true 90-degrees. So one-tenth of one-eighth of an inch low isn’t going to make a difference for most carpenters. (I realize that some shop-based cabinet makers may have things so dialed in that they glue up directly from the saw, and thus they demand absolute perfection. They are a rarity.)
I think this whole issue can be summed up in the words of a machinist friend. “Wood tolerances!”, he scoffed, when I mentioned the slight out-of-flatness. Meaning that a few thousands in a material that expands and contracts daily and is cut with a saw blade is hardly anything to mention…especially to a guy who deals in sub-thousands tolerances in his work.
Cutting
A miter saw like this is a pretty straight-forward tool. I look primarily at two things when using it.
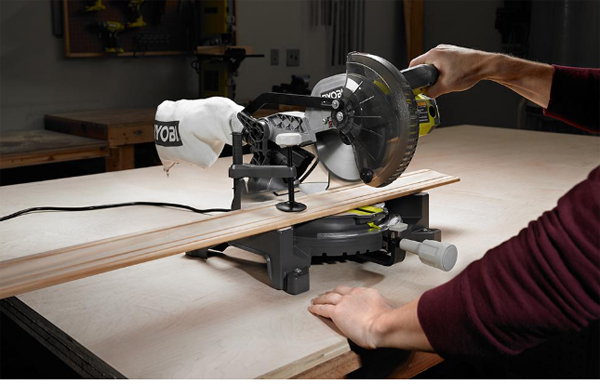
Ease of use. The RYOBI 7¼-inch Compound Miter Saw is easy to use. All the miter and bevel adjustments are made as is usual on miter saws. The handle is easy and intuitive to use. The hold-down works quite well (see the photograph of it holding a long piece of pine by itself—not the recommended practice, but I did it to make the point). The only thing that takes any getting used to is the trigger lock-out, or what shooters think of as the “safety”. It has a slight learning curve, but by the time you’ve used it a half-dozen times it becomes second nature.
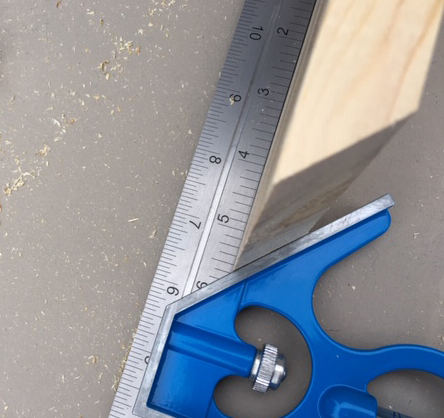

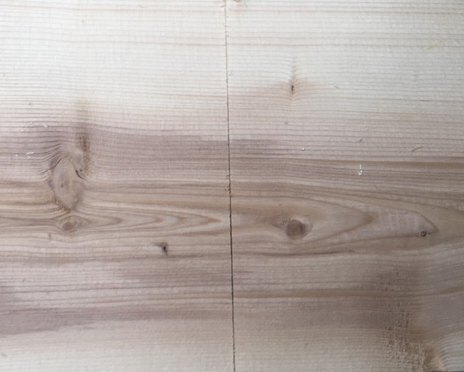
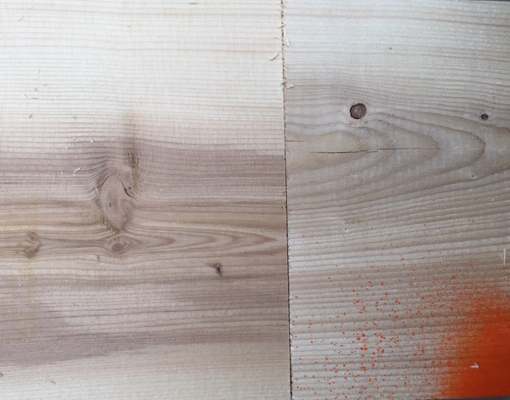
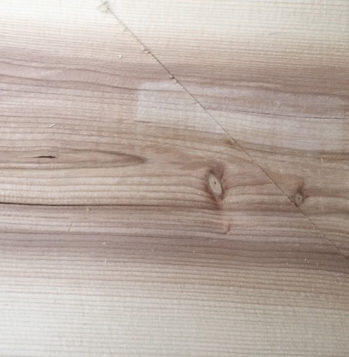
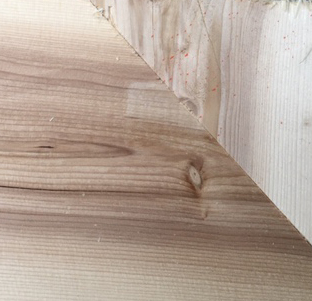
Cutting accuracy. Once the saw is squared up, the question is, “Does it cut accurately?” This one does. I used the “flip” method to look at a straight cut and a 45-degree miter cut. The photos below show that the seam is tight on both cuts even after “flipping” the cut piece (look at the grain to see which photograph shows the cut side, and which shows the flipped side). The somewhat ragged cut is the result of the supplied 24-tooth blade; since this size miter saw is probably destined for trim work, I see a 60-tooth finish blade in its future. To evaluate bevel accuracy, see the photo showing the beveled 45-degree edge tight against a combination square. This saw is accurate!


Notes on cutting capacity. The manual specs the cross cut capacity at 1½-inch x 4¼ -inch. This doesn’t mean that higher work pieces can’t be cut; it just means that at 4 ¼-inches of cross cut the maximum height if the work piece—in order to be completely cut through—is 1½-inches. Similarly for the 45° miter and 45° bevel cut capacities mentioned in the above specs. The higher the work piece, the less the maximum length of cut. For reference, this saw will cross cut a 4×4 with height to spare.


Using a miter saw
Miter saws (using “miter saw” with its generic meaning) come is four flavors. A “chop” saw will only cross cut and the blade doesn’t slide. A “miter” saw (using the term with its non-generic meaning) will cross cut and miter (cut vertically at up to 45 degrees, usually both left and right). A “compound miter” saw will both cross cut and bevel cut; there are two versions: a single-bevel compound miter saw, and a double-bevel one. Single bevel saws will bevel only in one direction (this saw is an example) while a double-bevel miter saw will bevel on both the left and right. (A single-bevel compound miter saw can make all the same cuts that a double-bevel one can, but it necessitates turning and flipping the work piece.) A “sliding miter” saw has the blade mounted on sliding bars and can make longer cross, miter, and/or bevel cuts.
Using a compound miter saw to make compound (that is, both miter and bevel) cuts can be a highly skilled operation. A change in the angle of one cut often necessitates a change in the other. One of the main uses for a compound miter saw is to cut crown molding, and the angle of the miter and the bevel at corners depends on the angle of the molding relative to the walls and ceiling. The most common crown molding has a 52° ceiling angle and a 38° wall angle, and RYOBI has helpfully included instructions on cutting inside and outside corners with this molding, as well as a table of other cut settings. If you’re new to all this, make sure you practice on scrap pieces first, because there’s definitely a learning curve (not to mention that corners are seldom exactly 90°)!
Bottom line
The RYOBI 7¼-inch Compound Miter Saw is a nice little unit, especially for the money. If you don’t need sliding capability, it will serve your needs well. It’s light enough to be easily transportable and hassle-free to set up. $129 at Home Depot, and while you’re there pick up a good 60-tooth blade for it!