Acorn Roof Finial
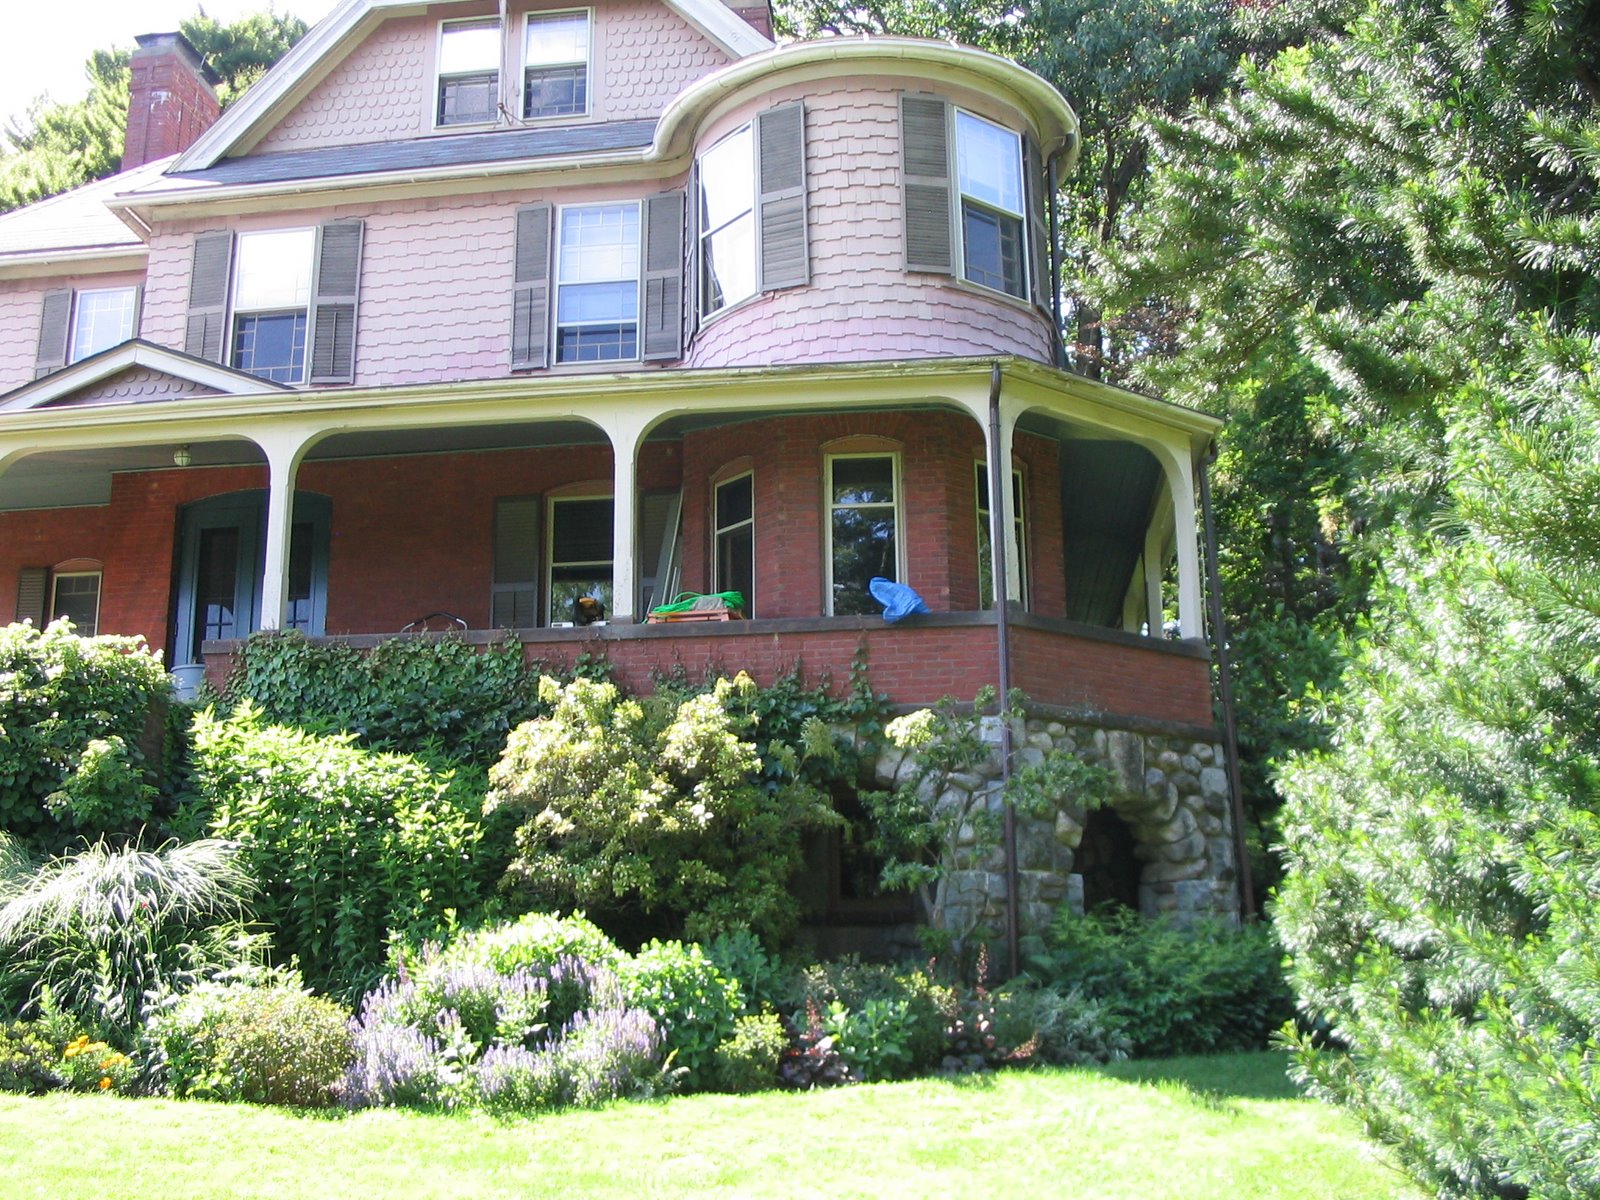
I worked on this Nashawtuc Road home back in 2008 when we replaced the front porch floor and installed a unique drainage system.
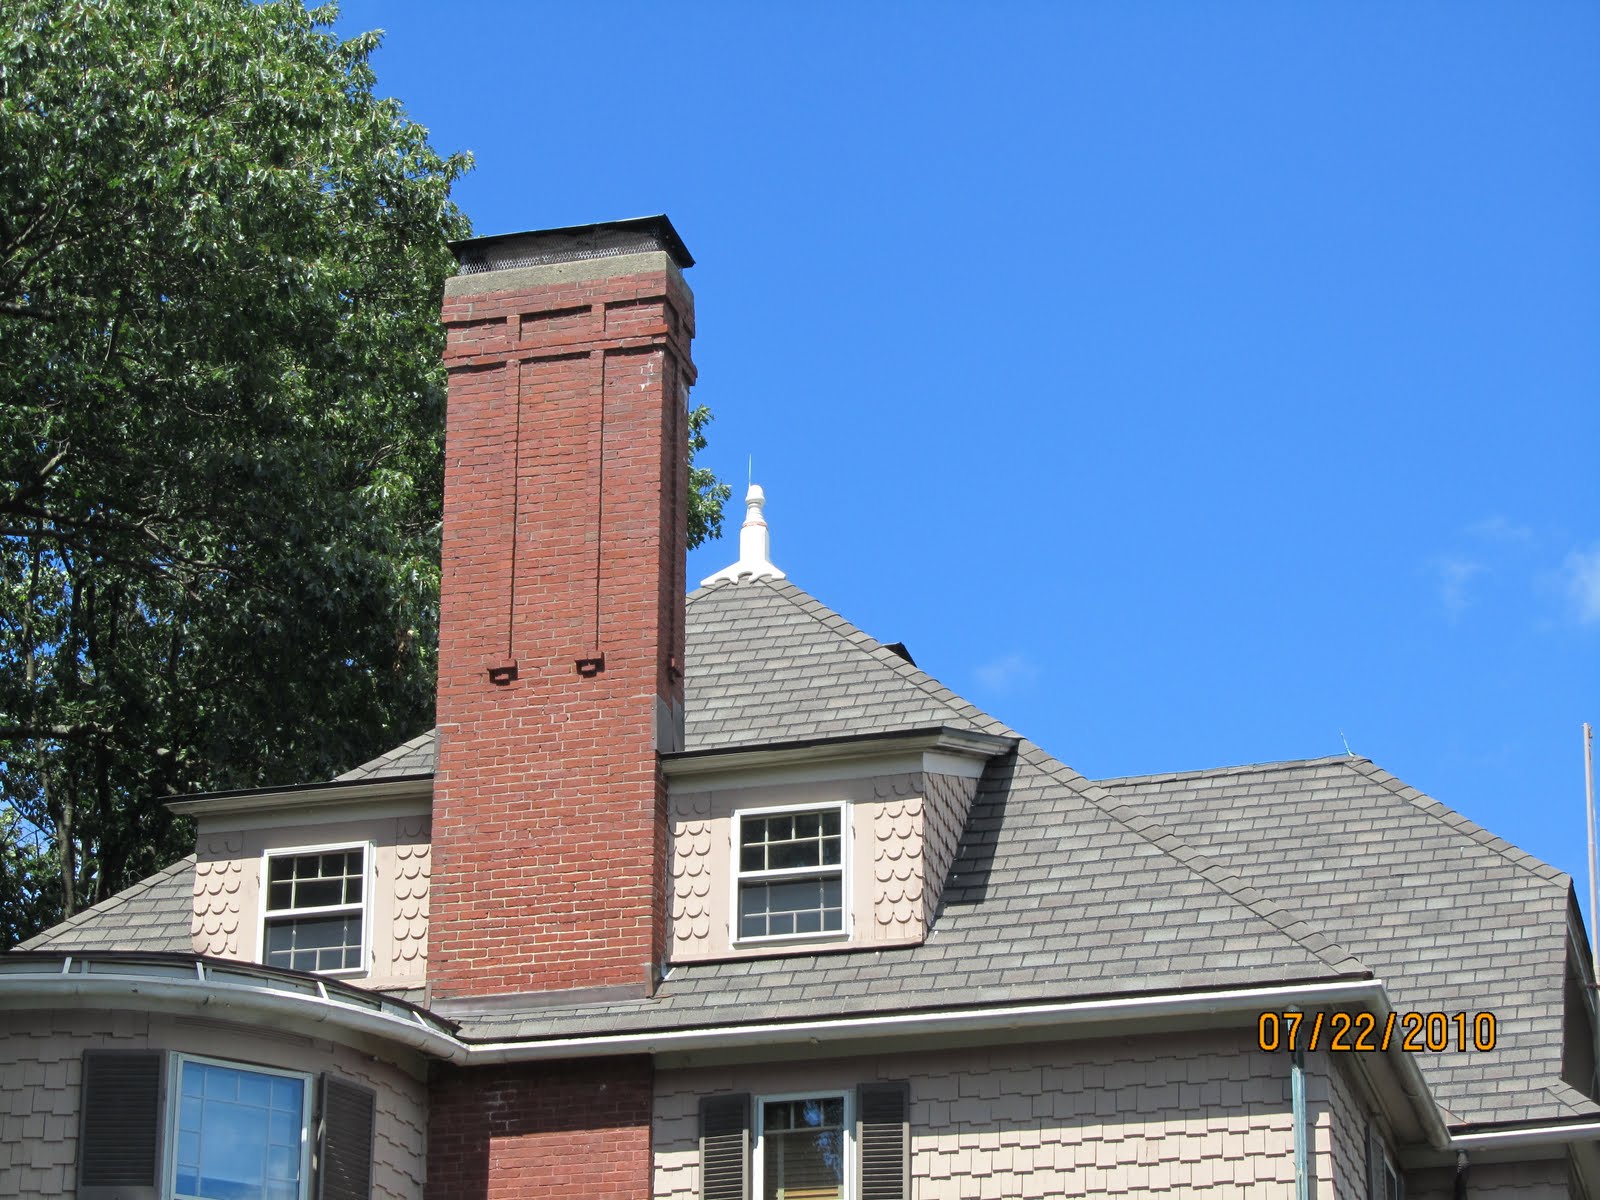
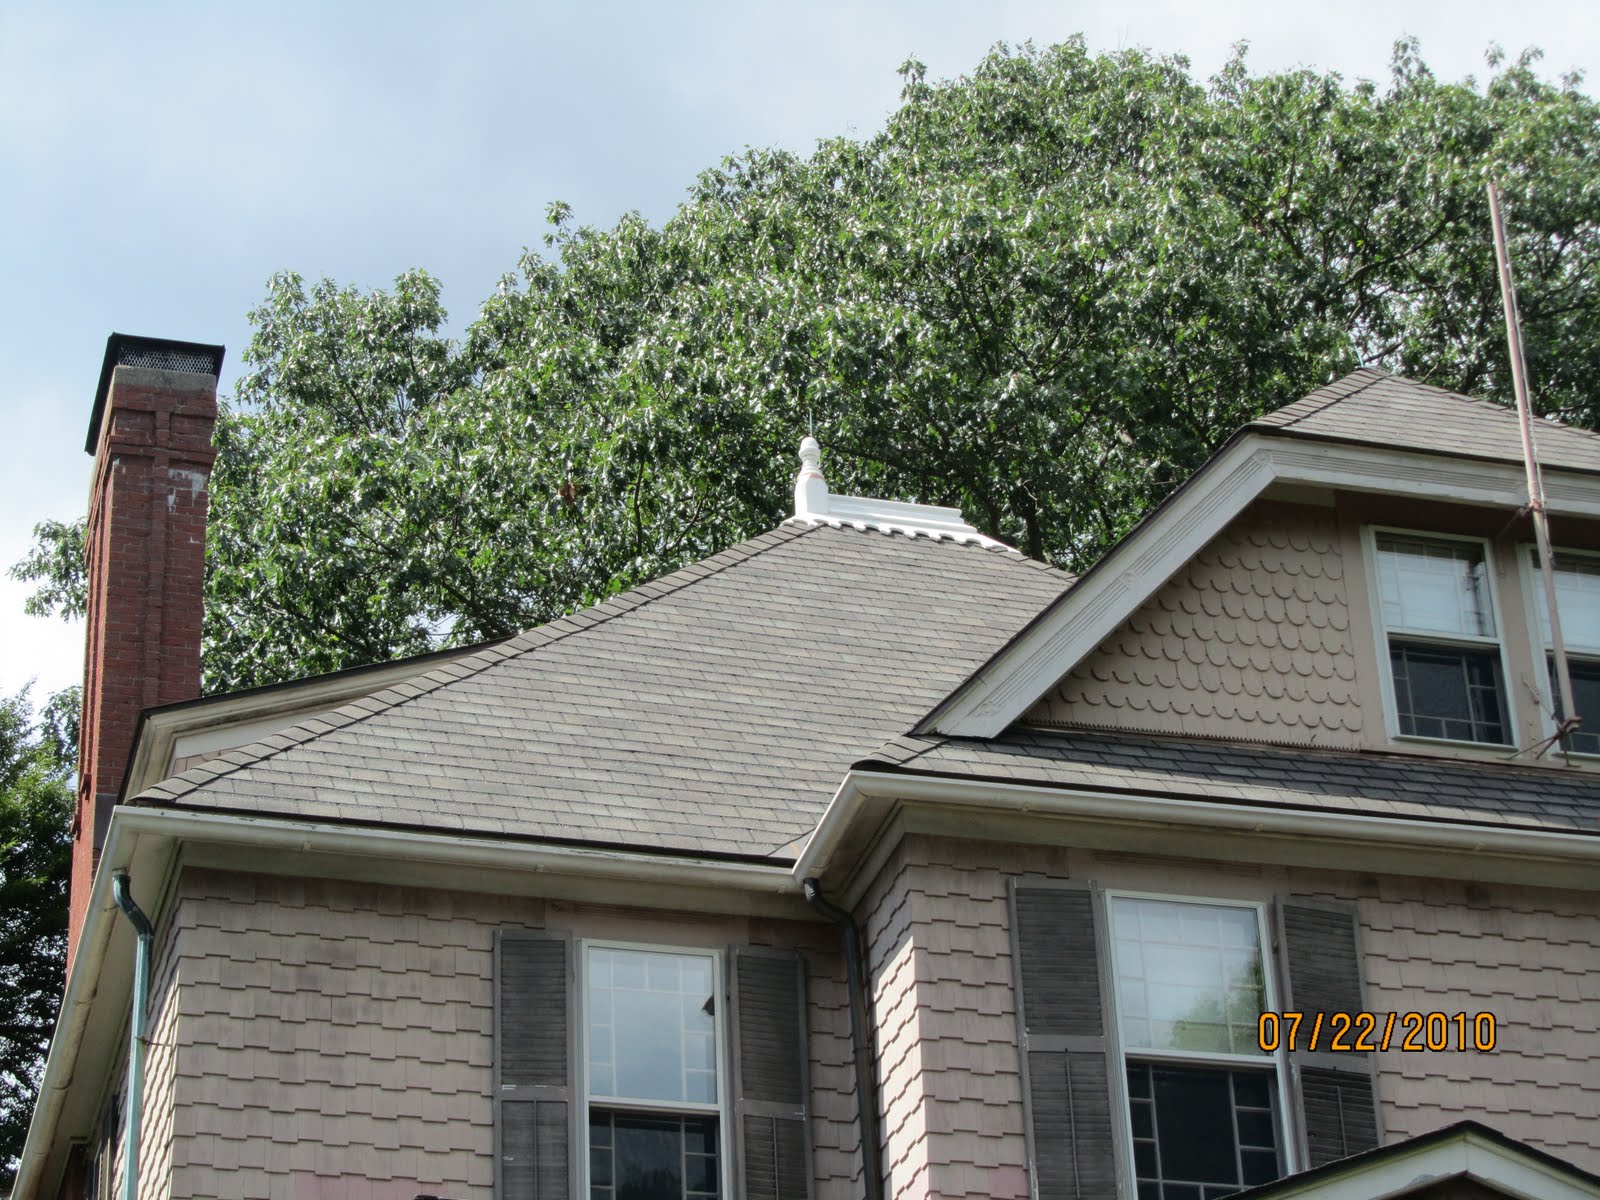
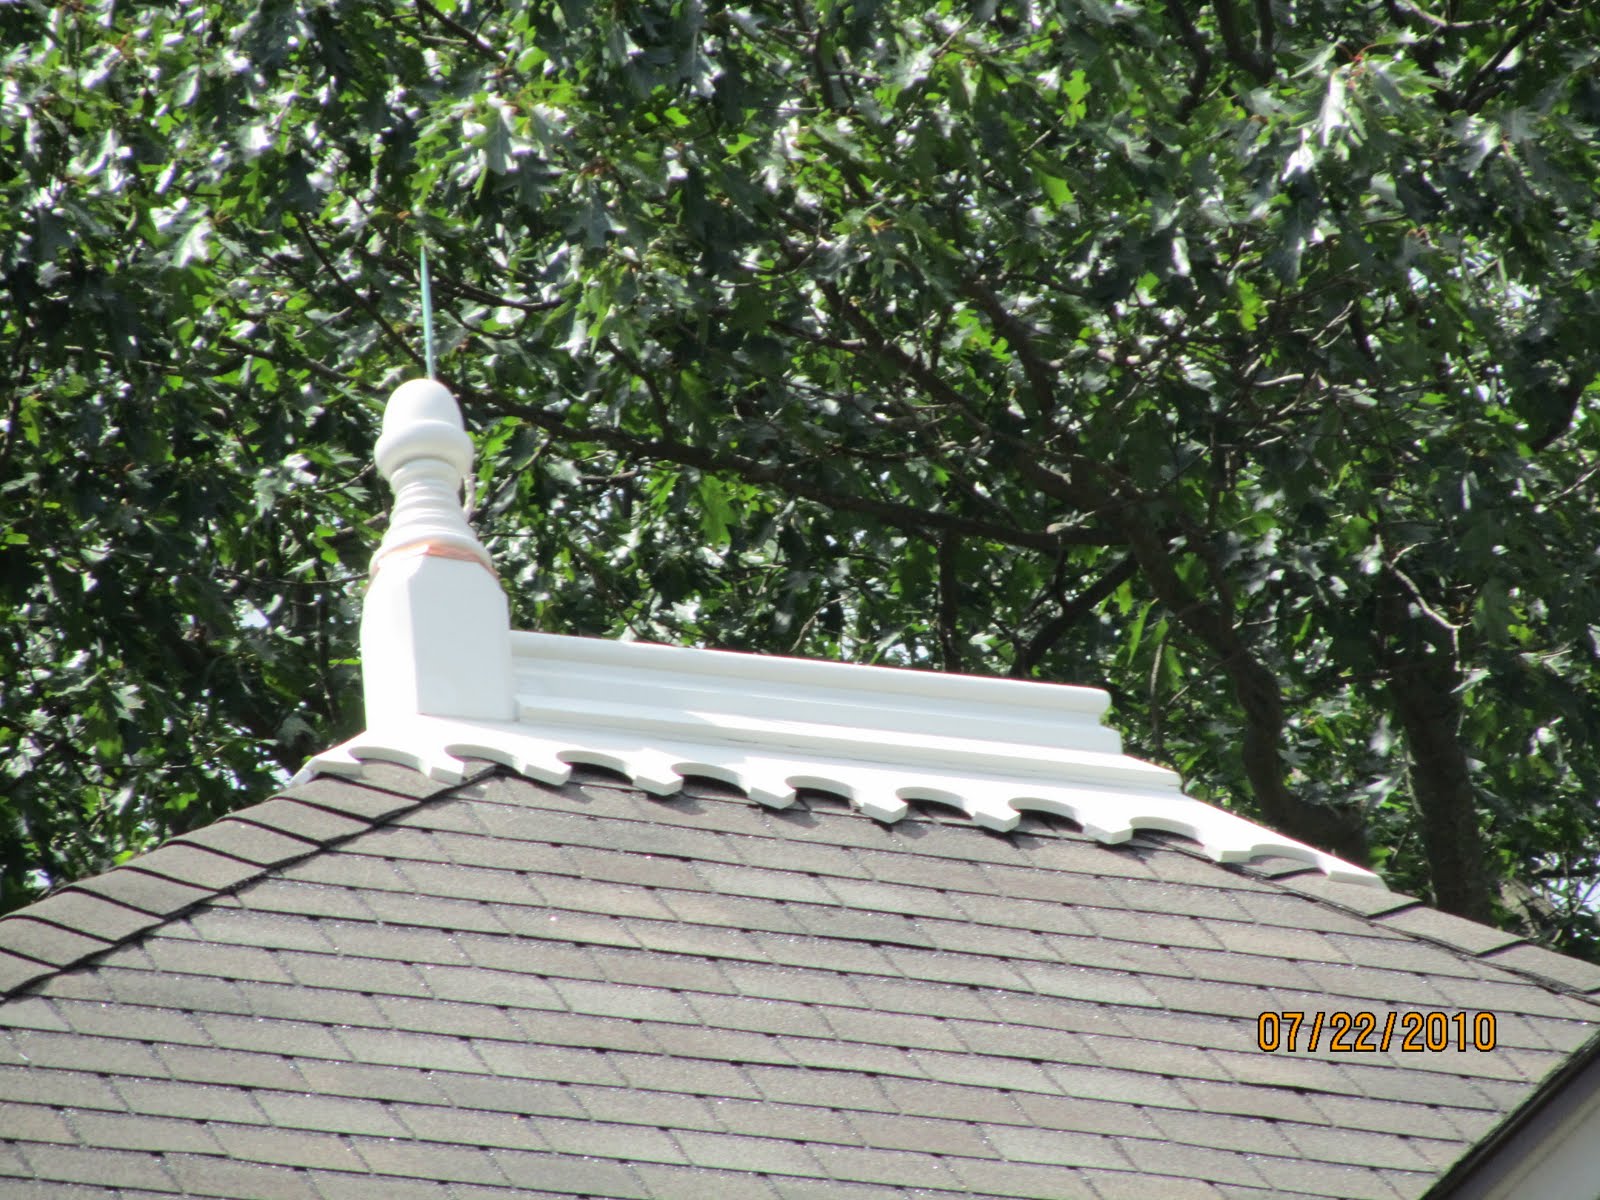
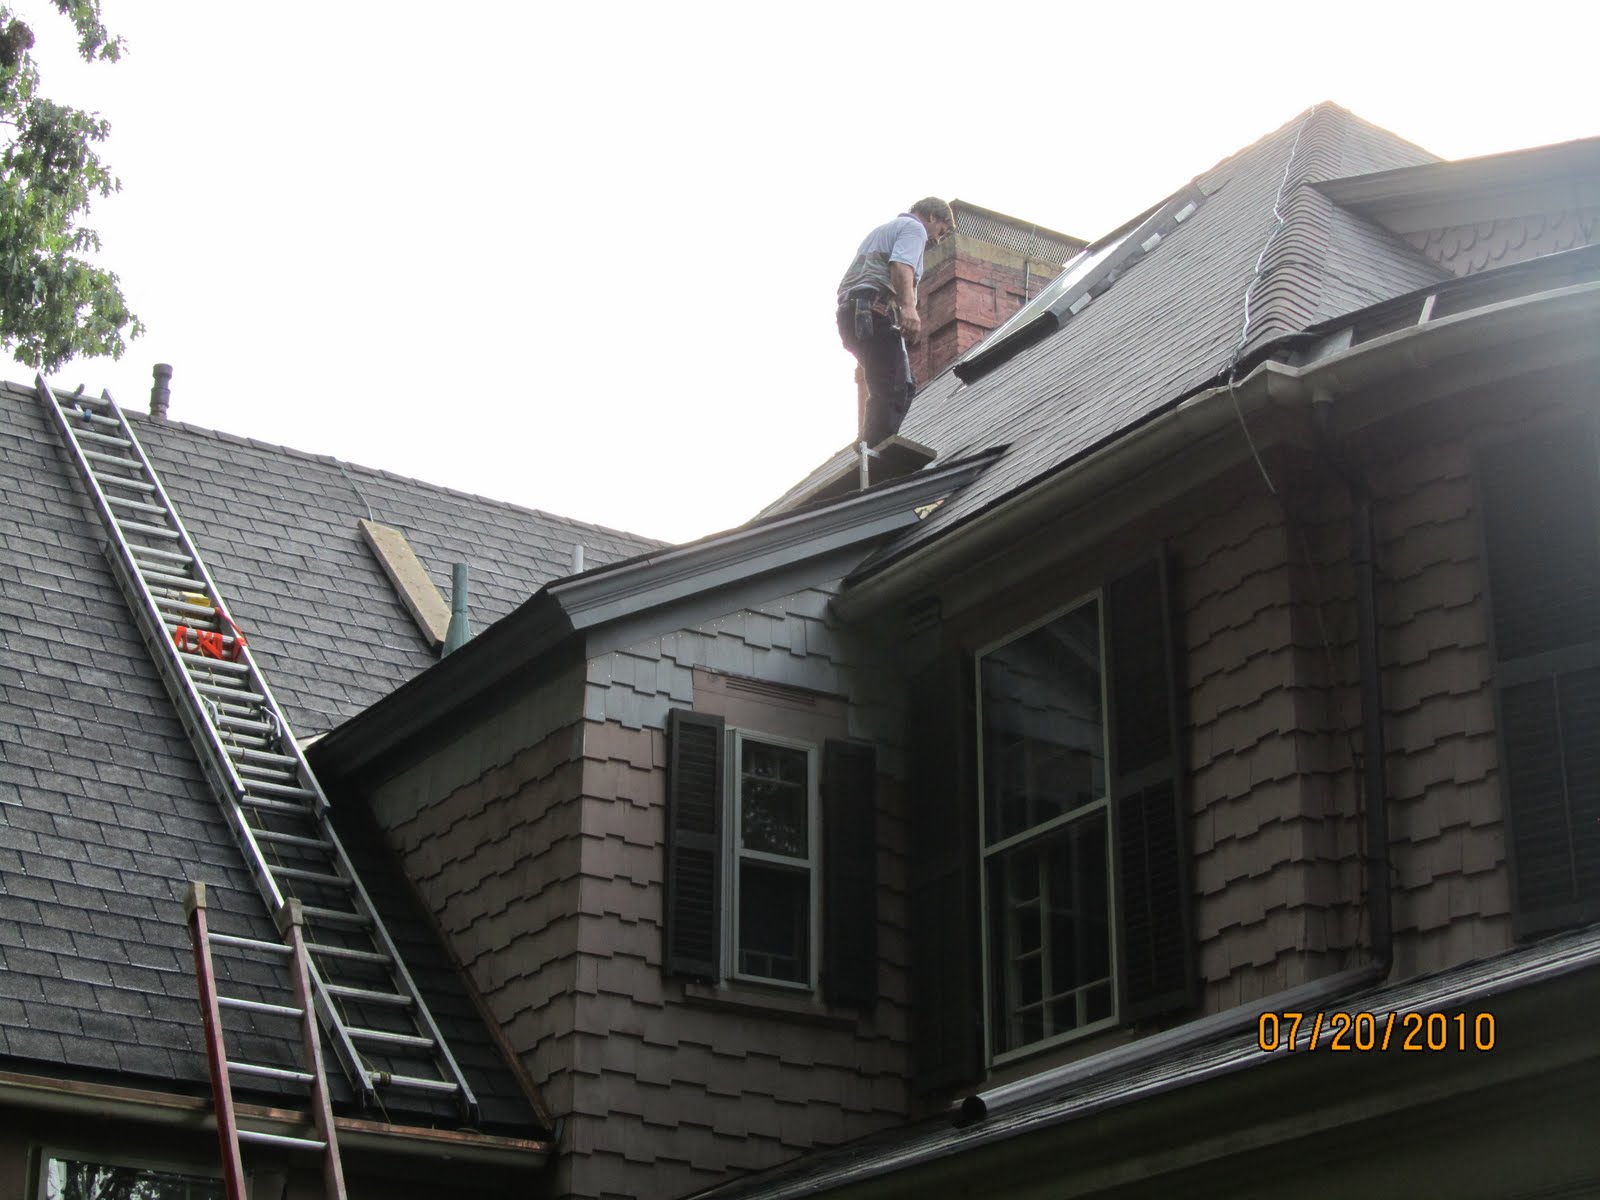
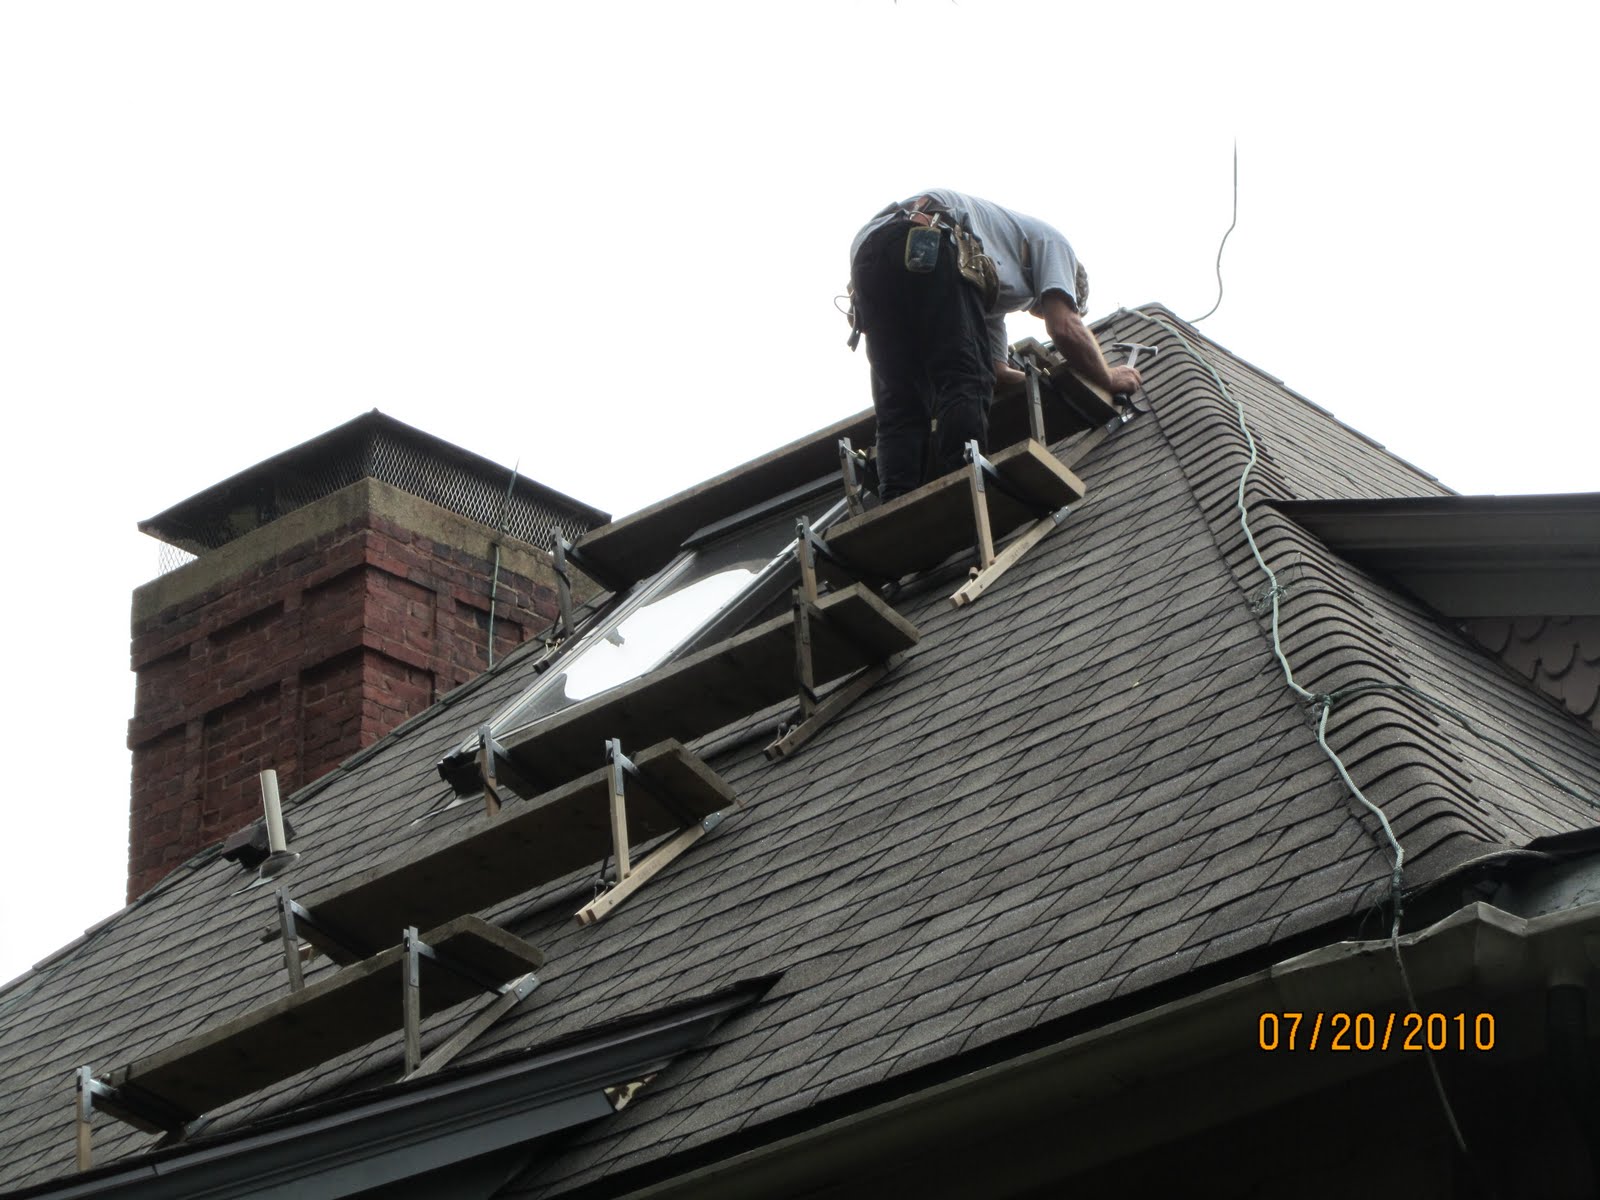
Recently the homeowner had the roof replaced. At the peak of the house’s hip roof sat a beautiful acorn shaped finial. This finial had been repaired many times over the past 100 years and was now a candidate for replacement. This finial is not easy to get to so the roofers took it down when re-roofing. This article is how we went about replacing an acorn roof finial.
The homeowner called me and asked if I would be willing to make him a new one. Unfortunately I do not have a BEFORE picture to show you. Trust me that it is a magnificent house and the finial was icing on the cake.
This homeowner is one of the best “old house” stewards I have ever met. We agonized about which materials to use and in the end opted for what we hope will be the best for aesthetics and longevity.
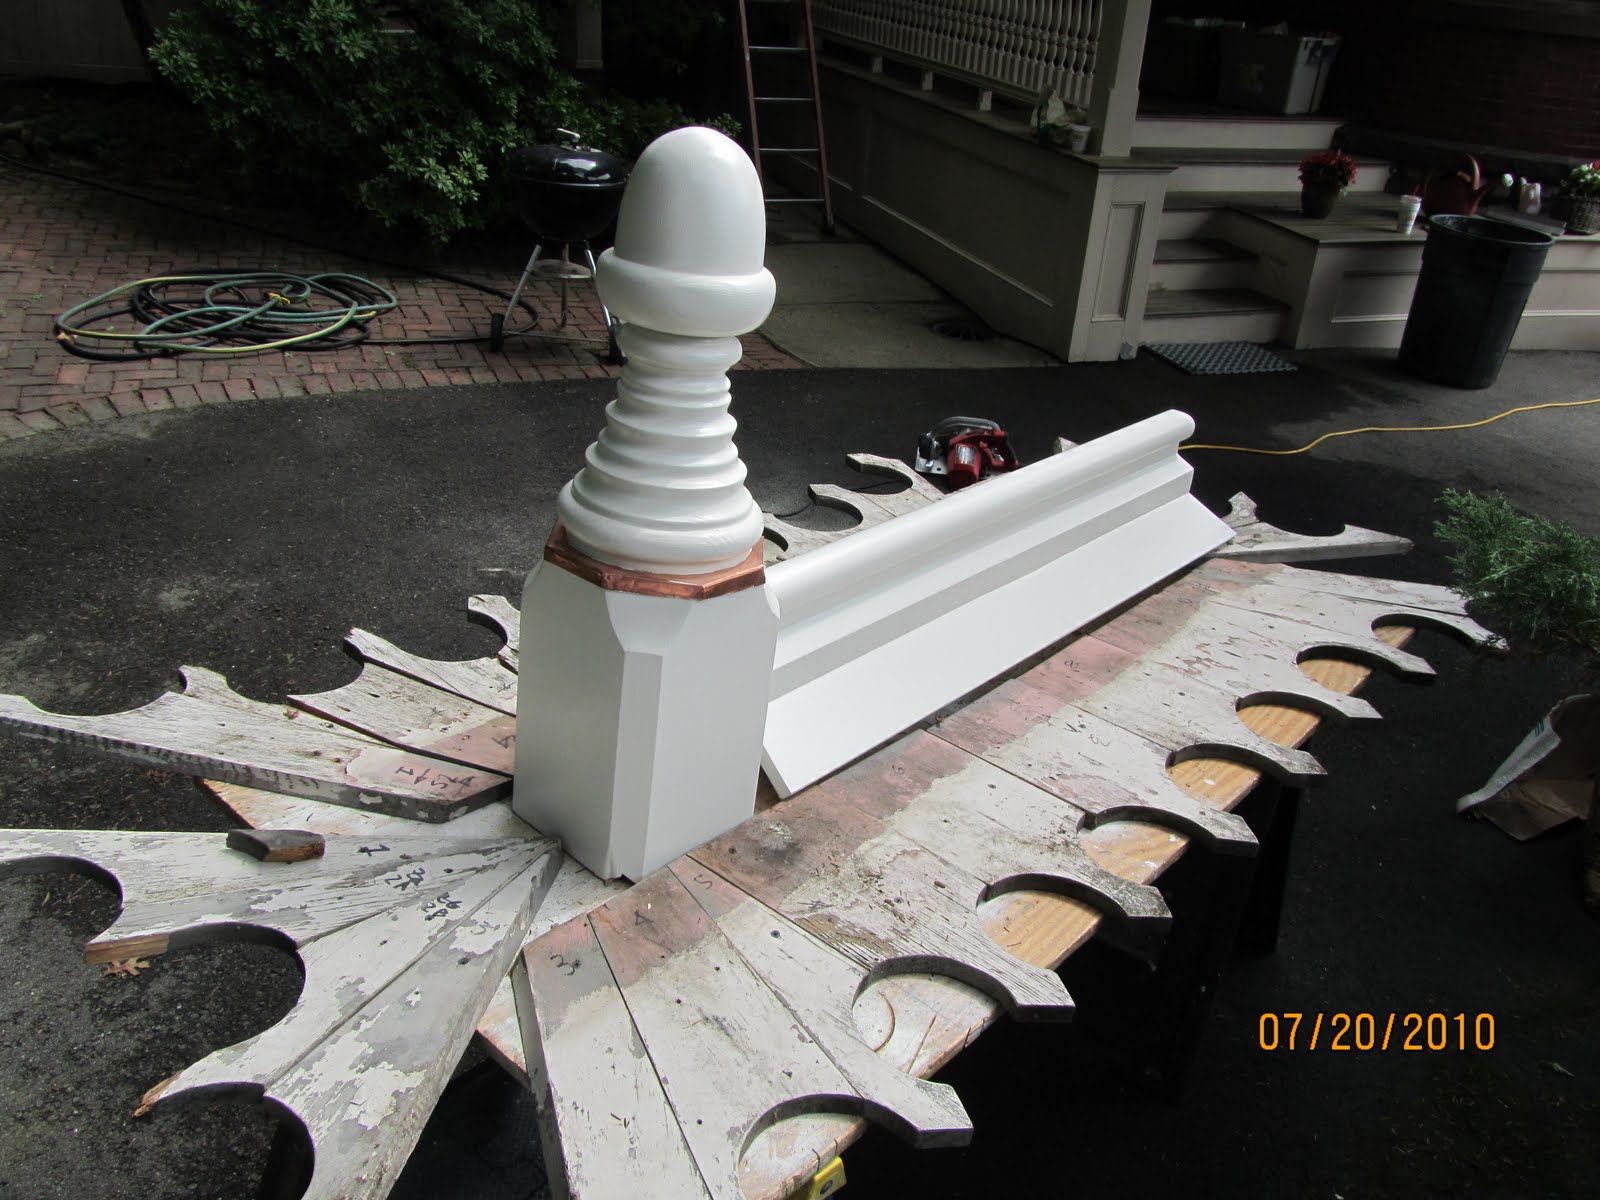
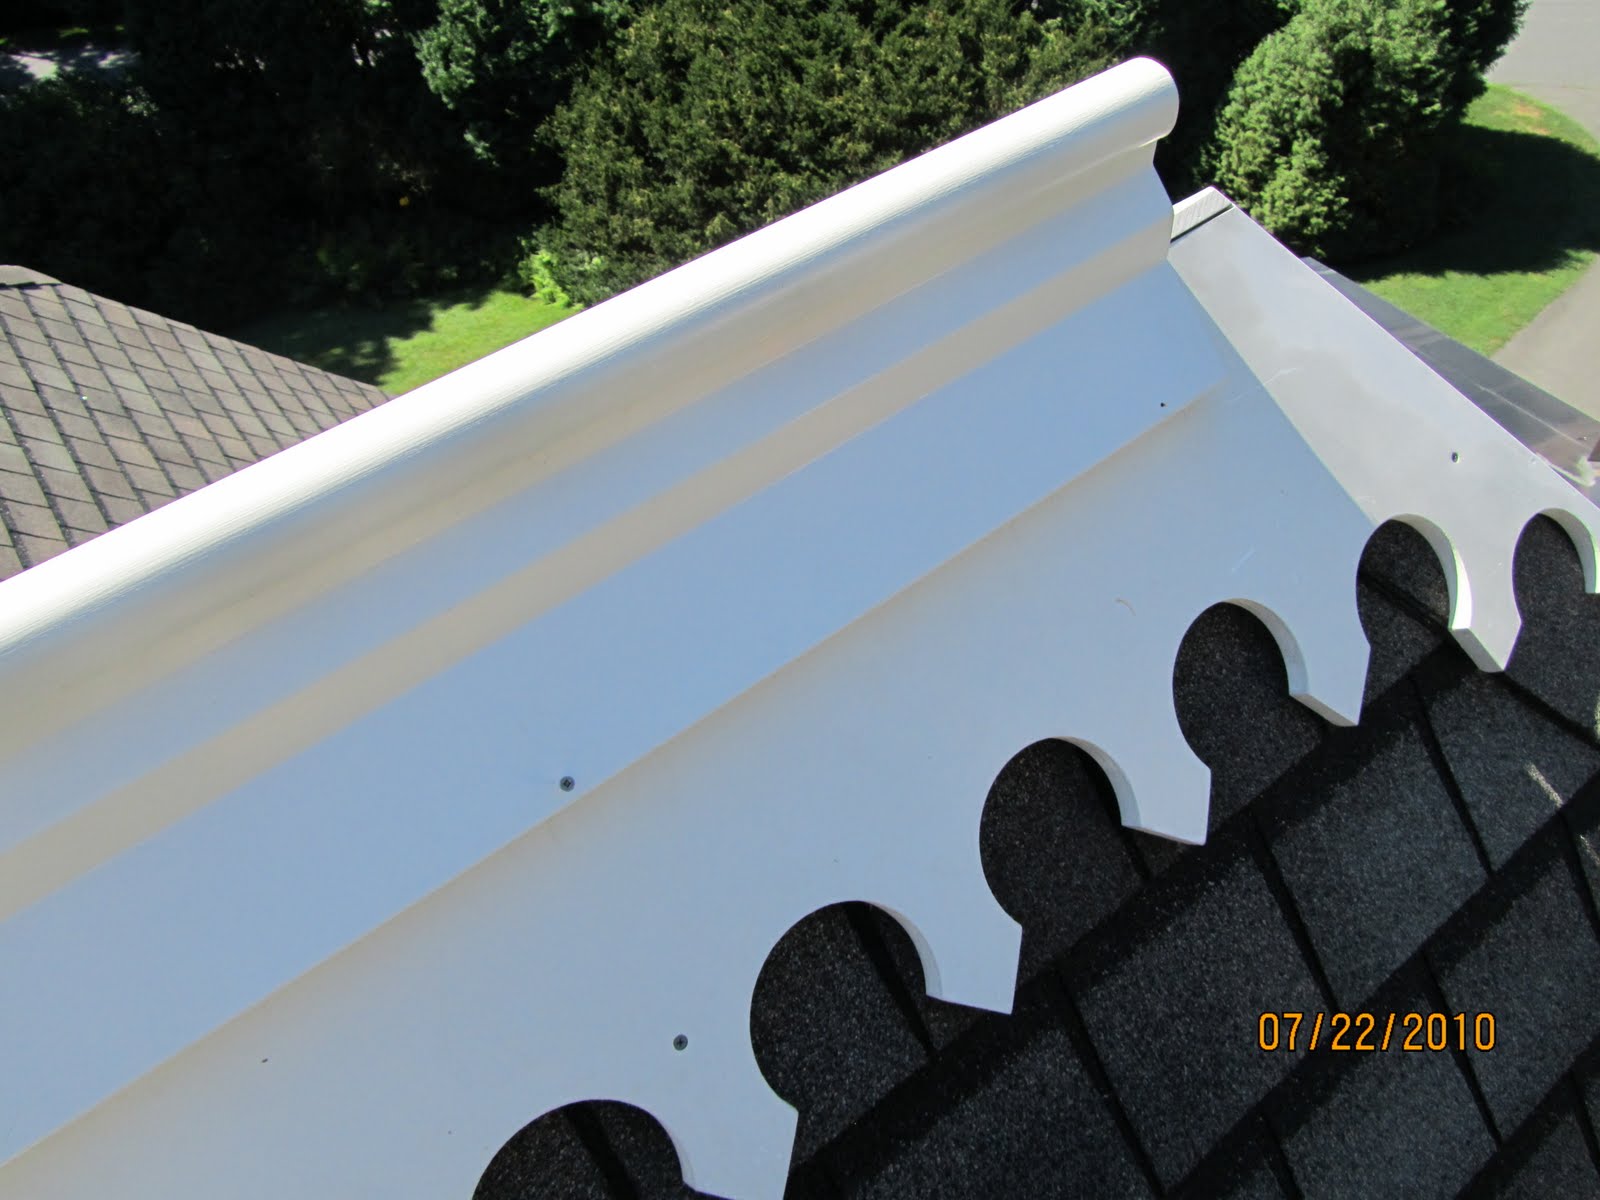
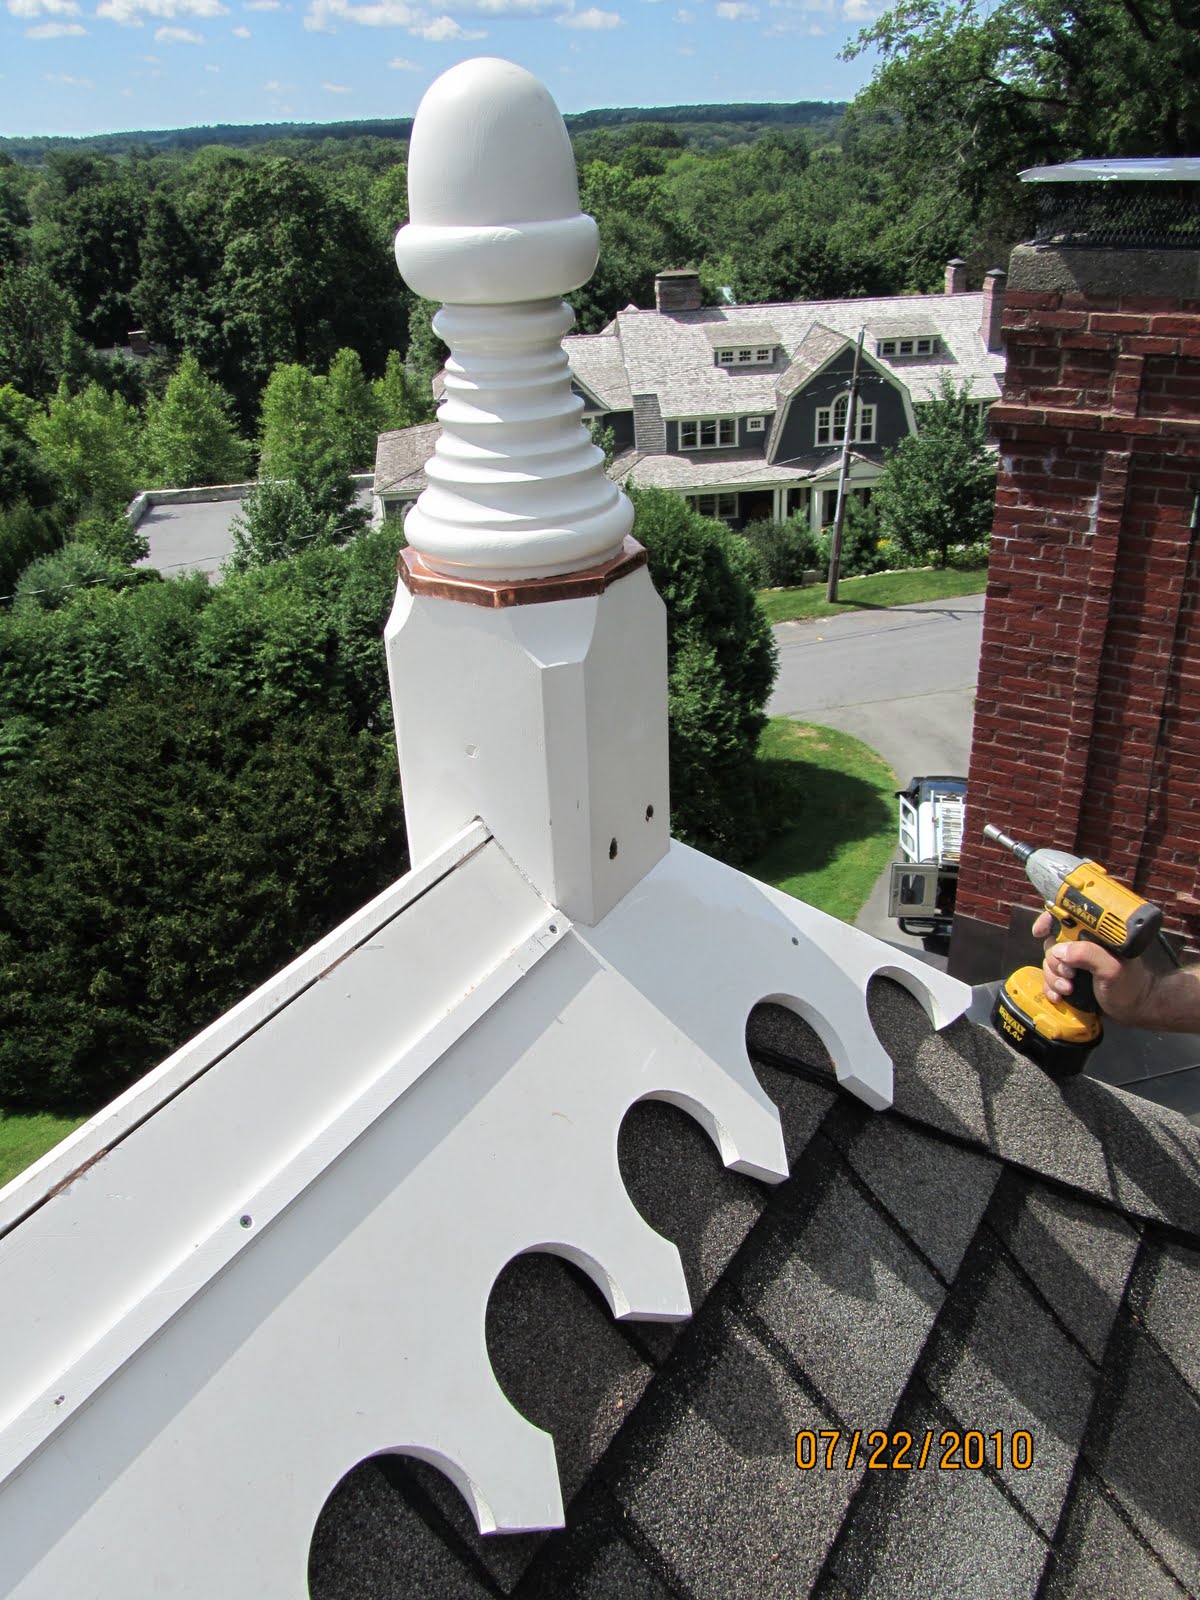
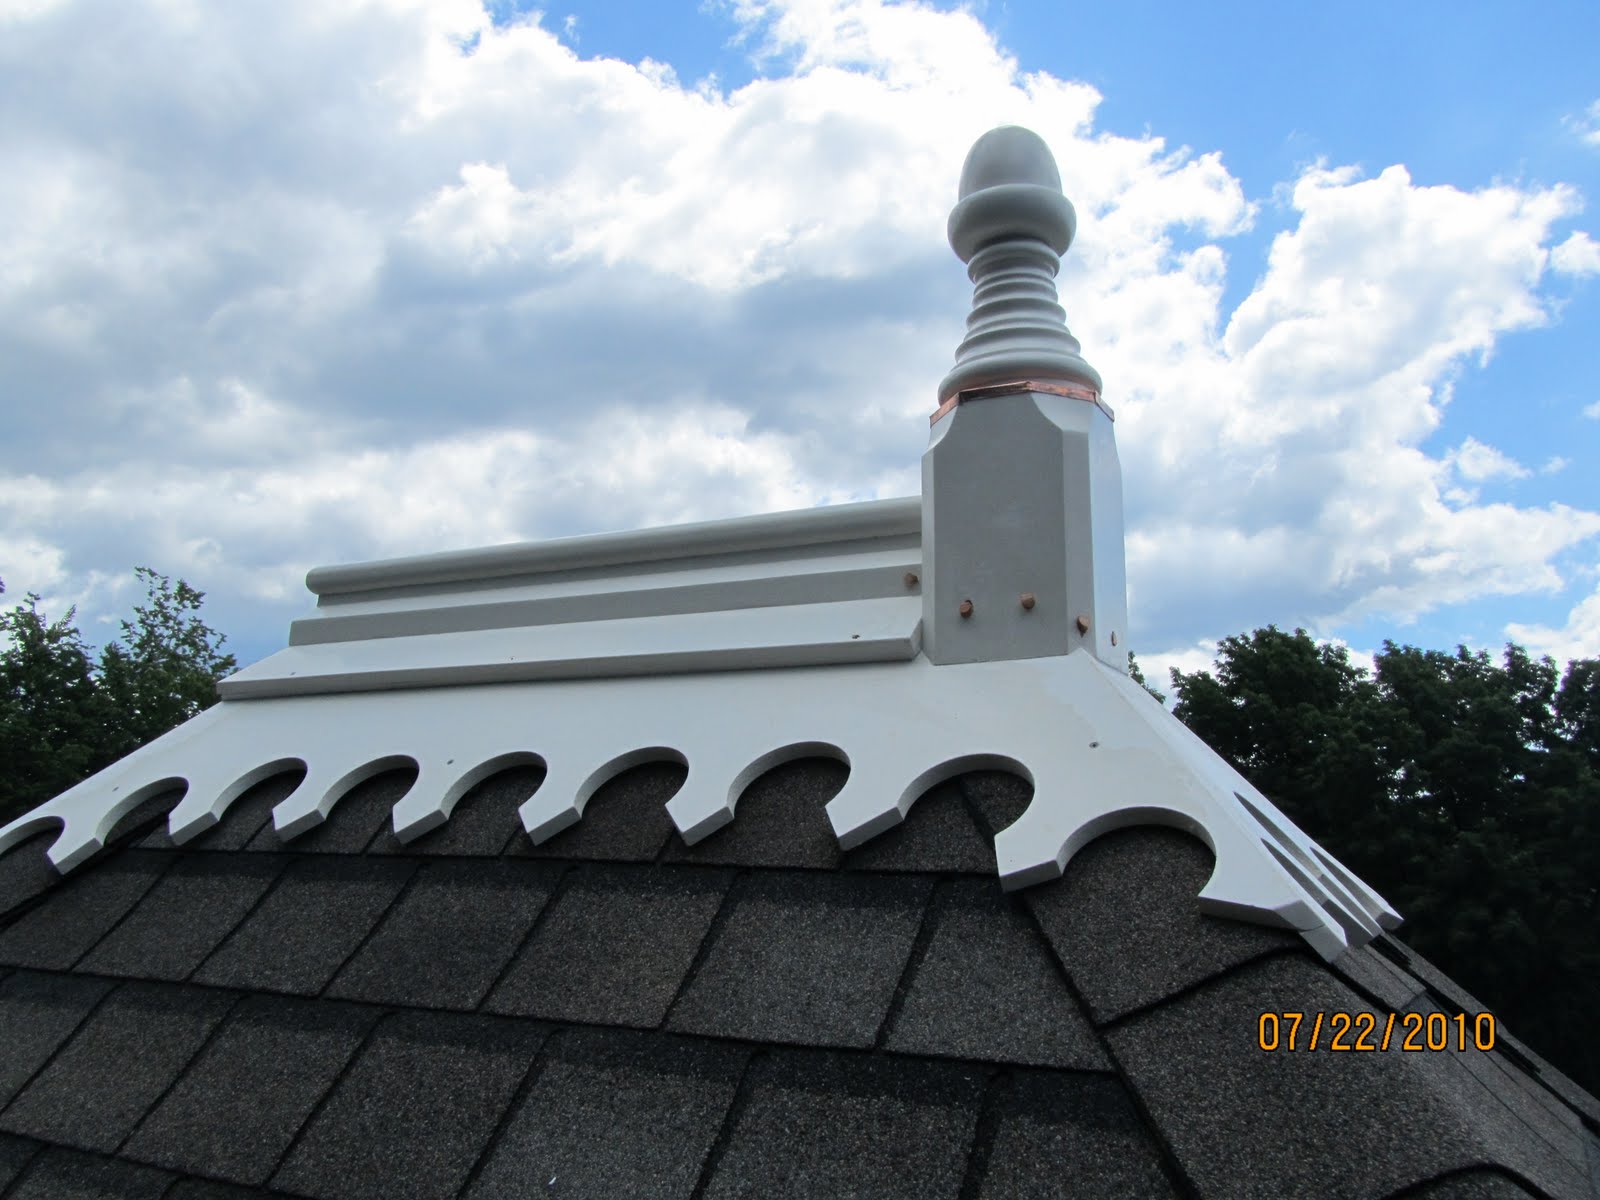
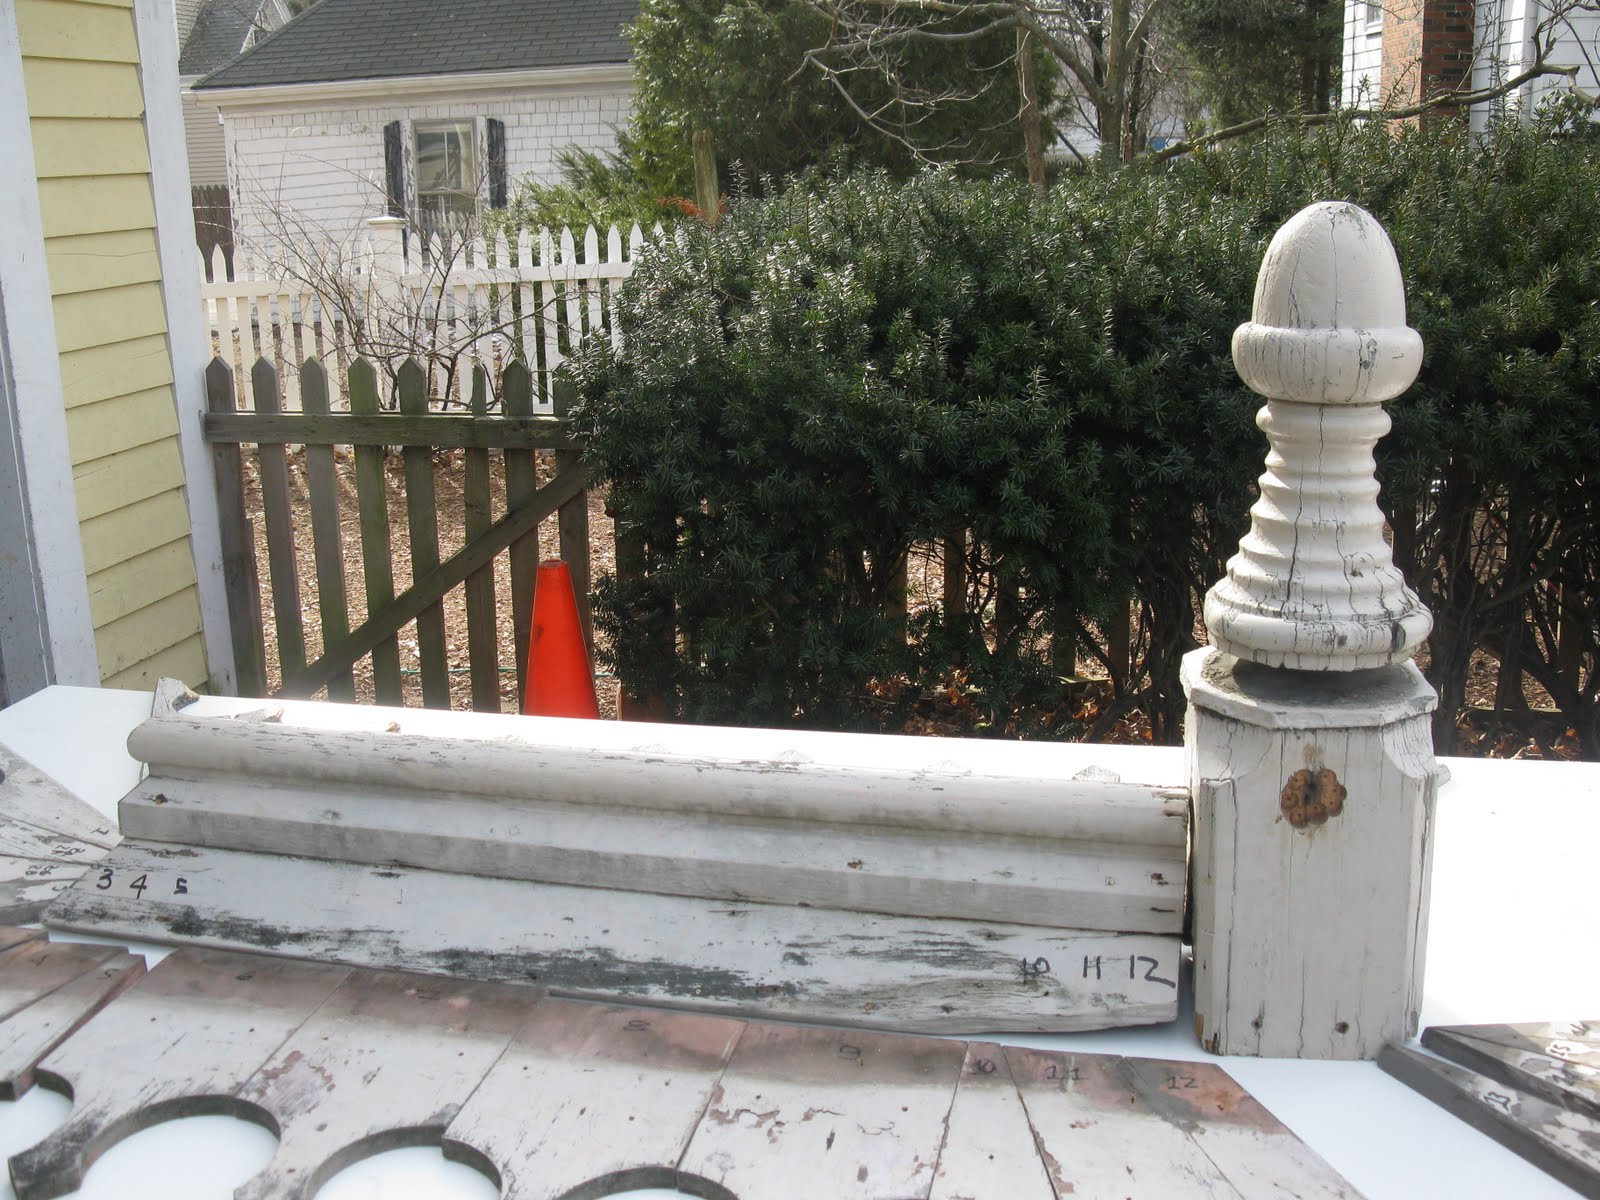
The roof top finial is in the shape of an Acorn. It also has an elaborate tail that sits on the roof ridge behind it, and fancy scroll skirting that sits on each side of the roof. [Acorn finial below and tail pictured to the left]
What is a Finial?
It is in simple terms the final means finish or the end of something. In architecture, a finial is a sculptured ornament, often in the shape of a leaf or flower, at the top of a buildings.
I was interested in what the acorn symbolized and did a brief search on it. Here’s what I found:
Acorns appear only on adult trees, and are often a symbol of patience and the fruition of long, hard labor. The oak tree is extremely hardy and many cultures have chosen the acorn to represent strength. It is also considered to be an emblem of luck, prosperity, youthfulness and power.
The oak tree and acorns have long been associated with many gods and goddesses. The acorn is the Celtic symbol for Zeus and the Roman symbol for Jupiter. Many Celtic and Roman goddesses, including Artemis and Diana, were frequently carved wearing acorn necklaces.
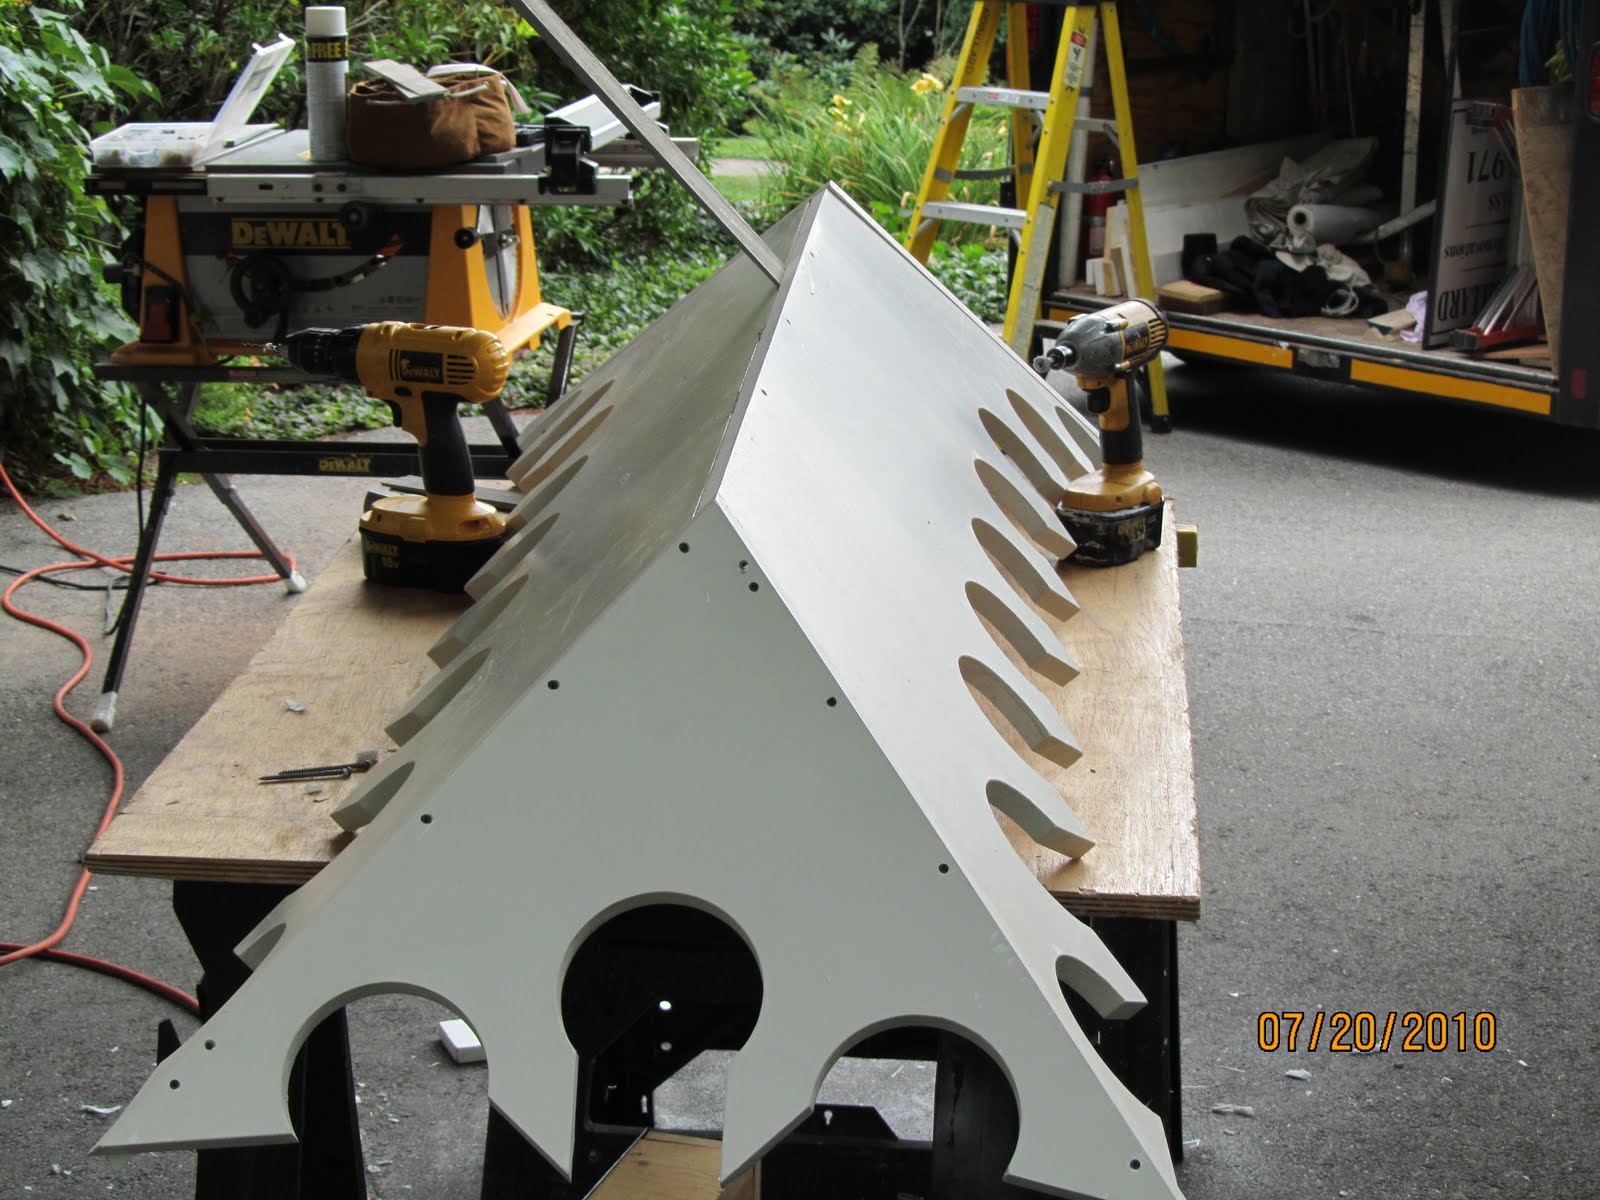
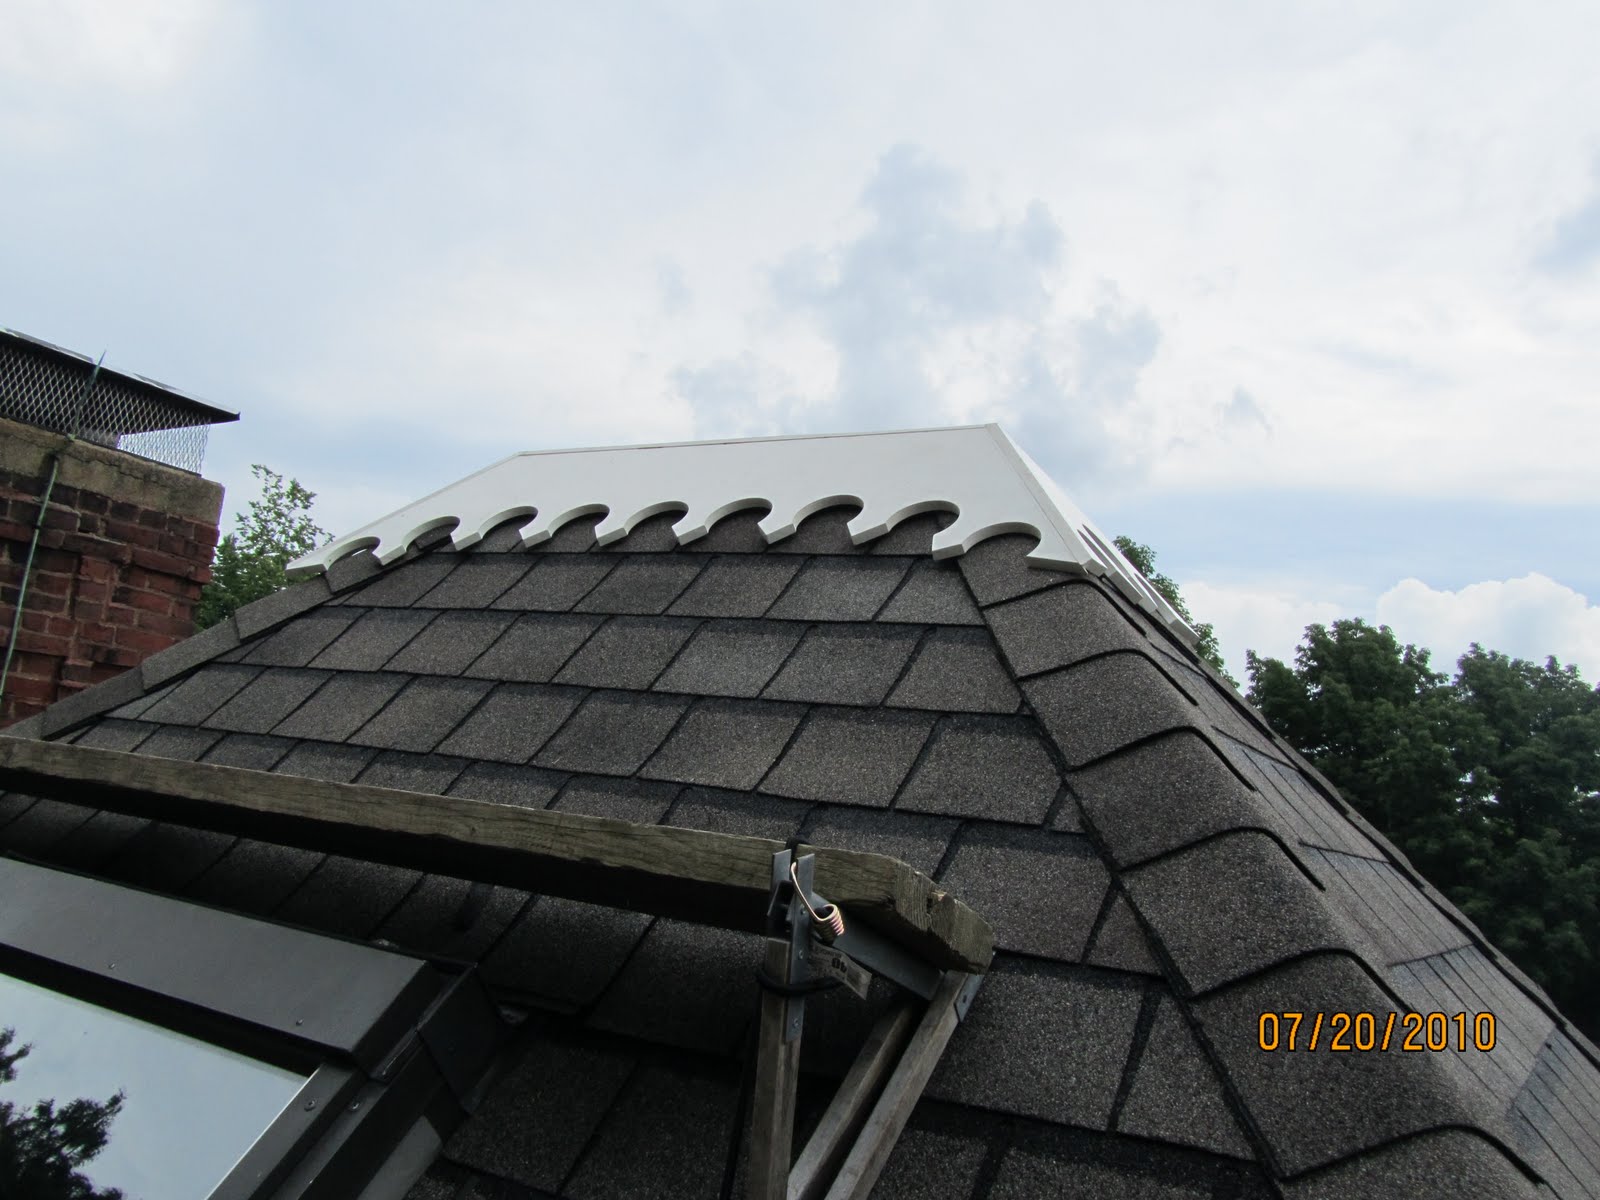
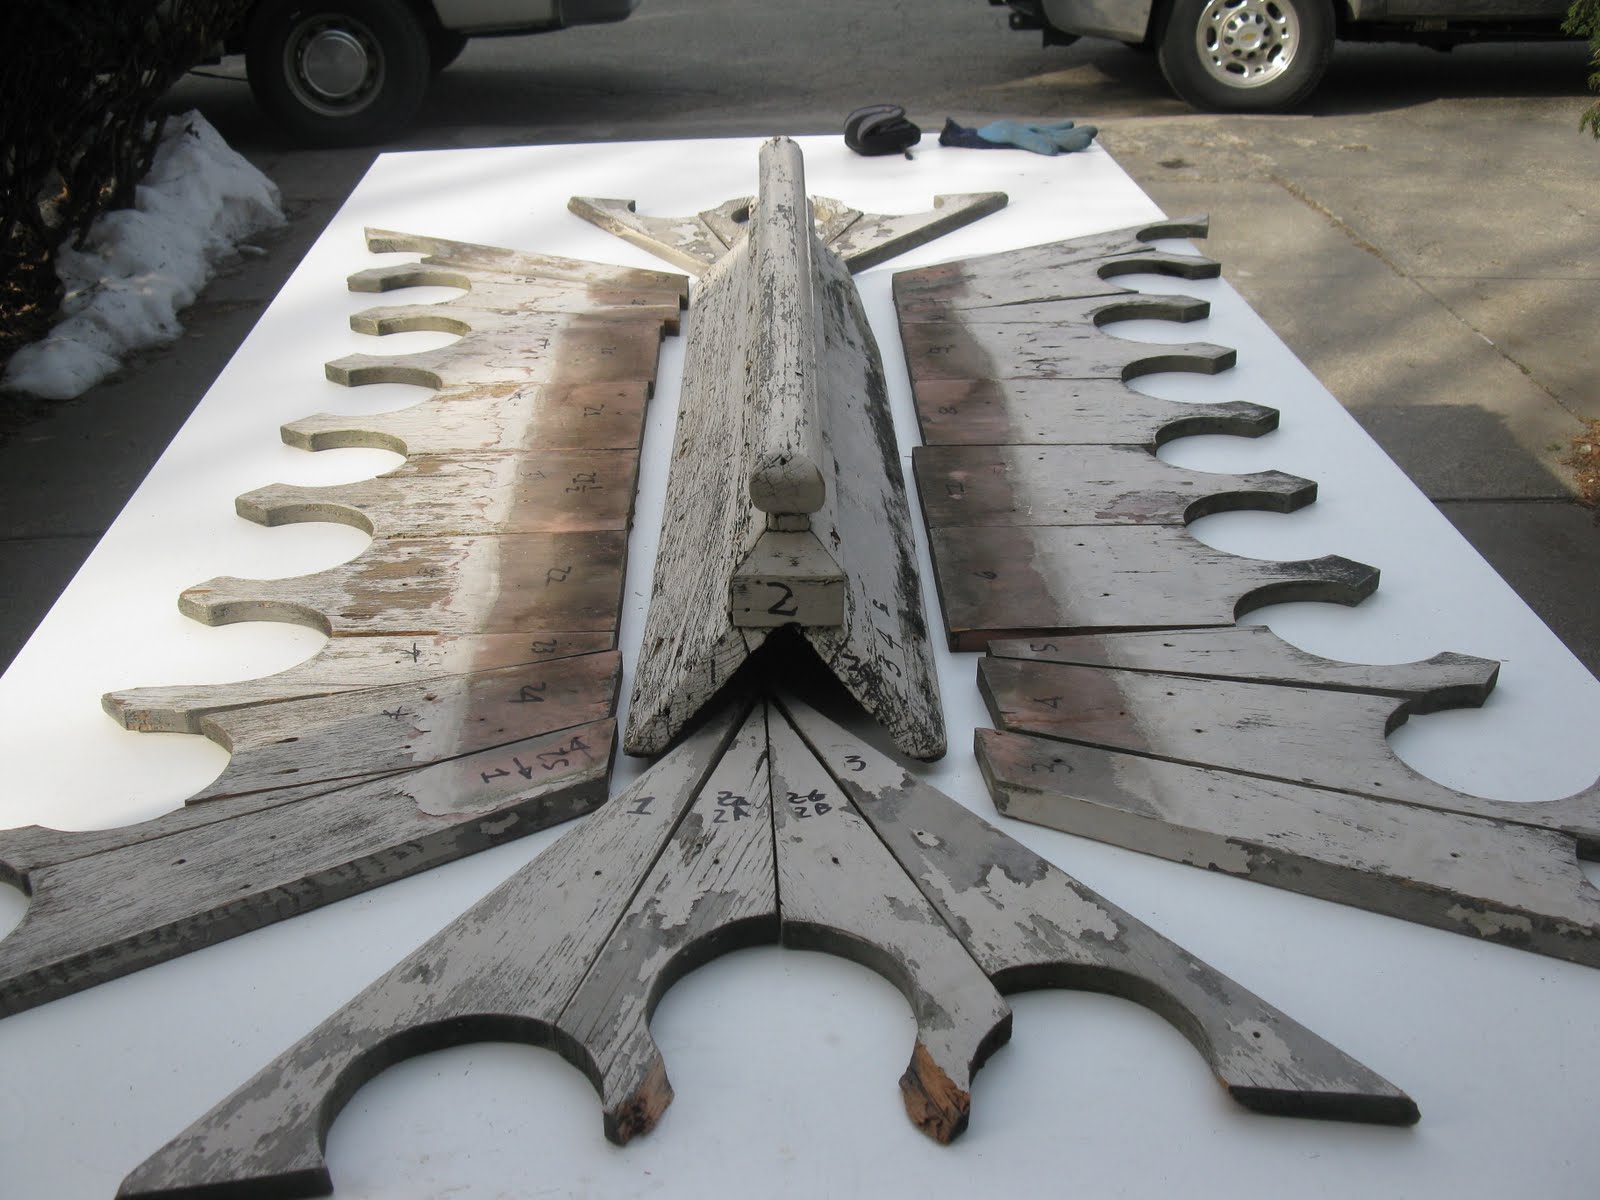
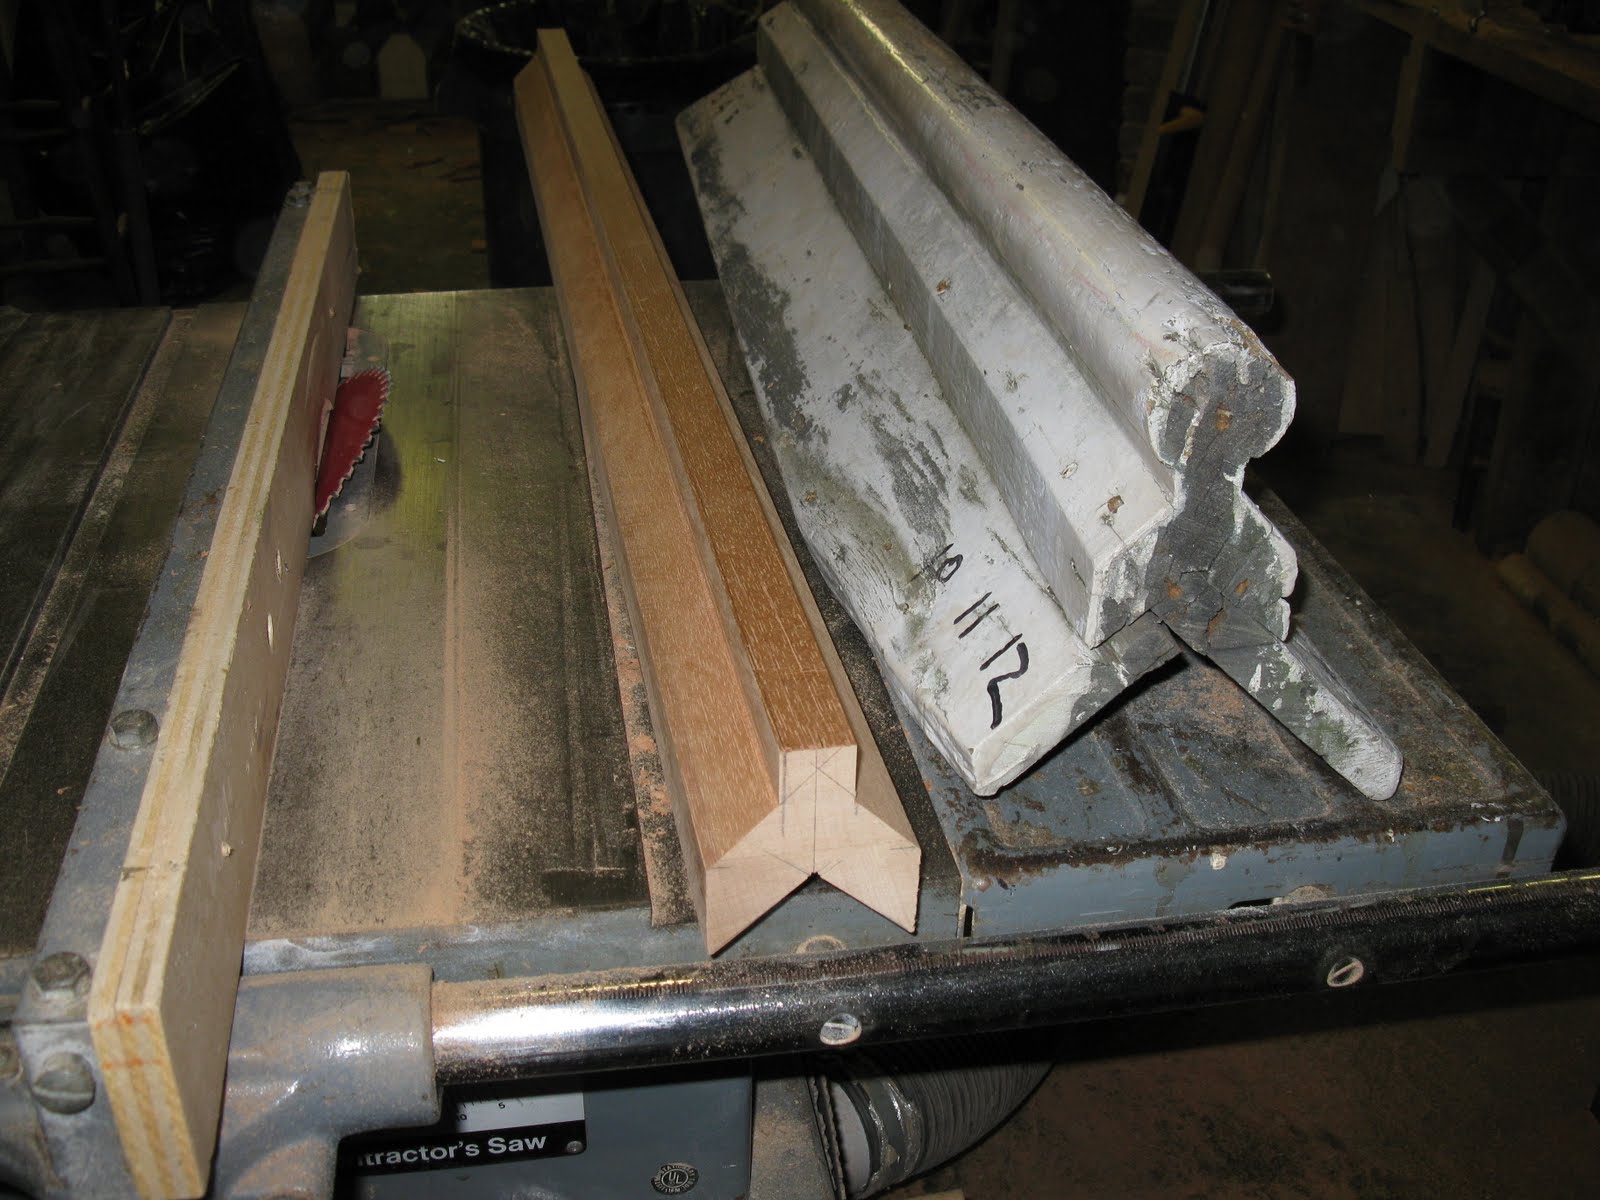
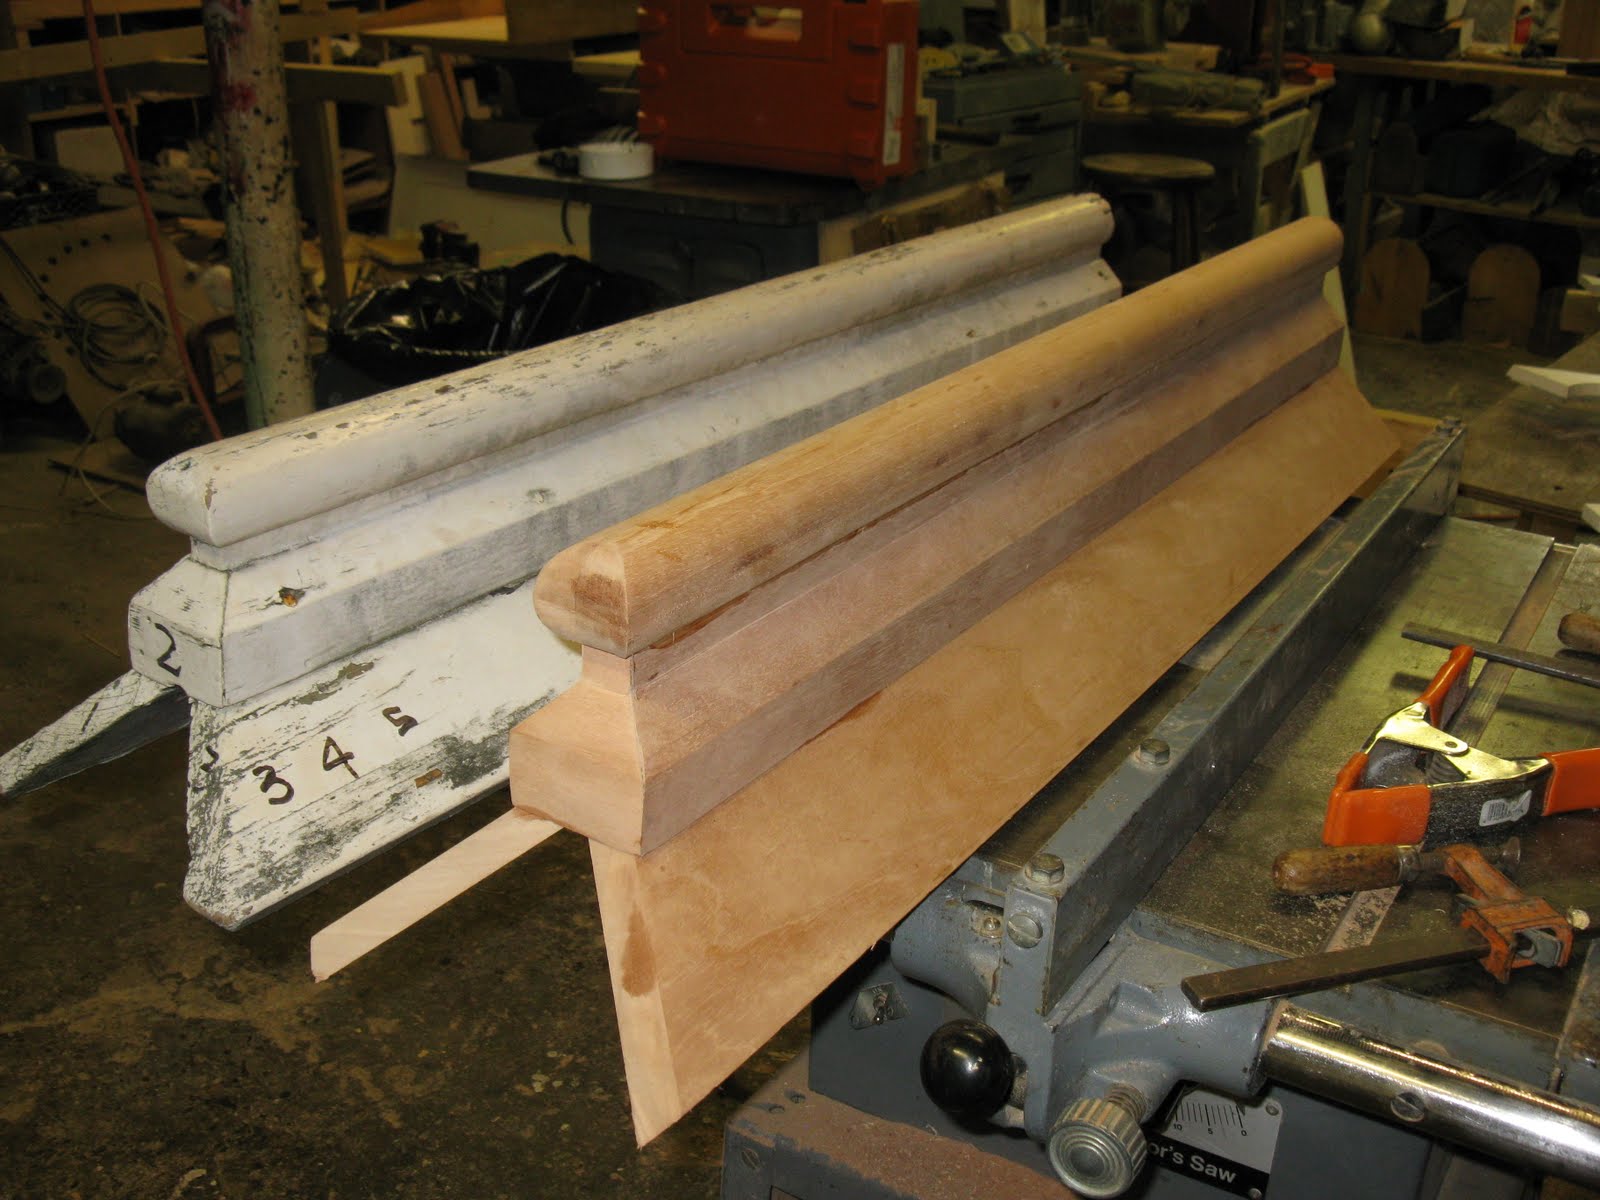
Below is the finial tail and skirting laid out on a table and numbered. When installed on the roof the skirting lays on the pitched roof and the tail sits on the roof peak or ridge.
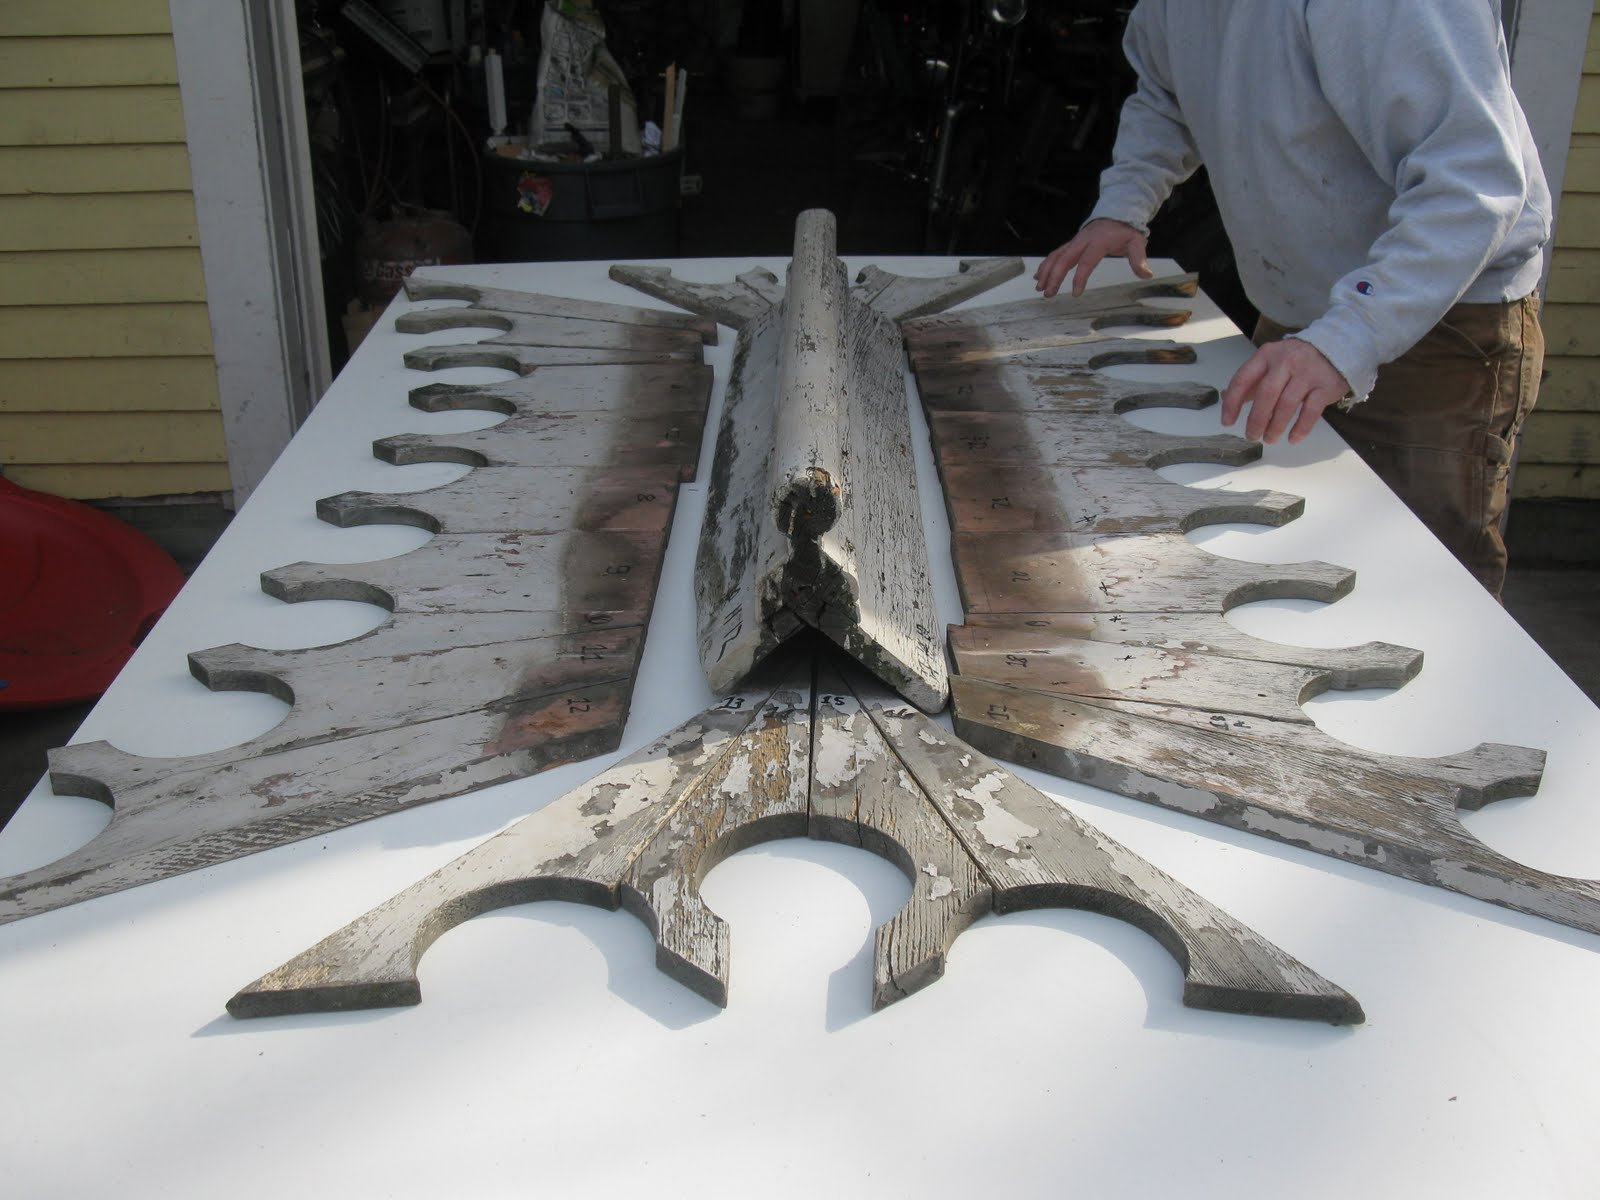
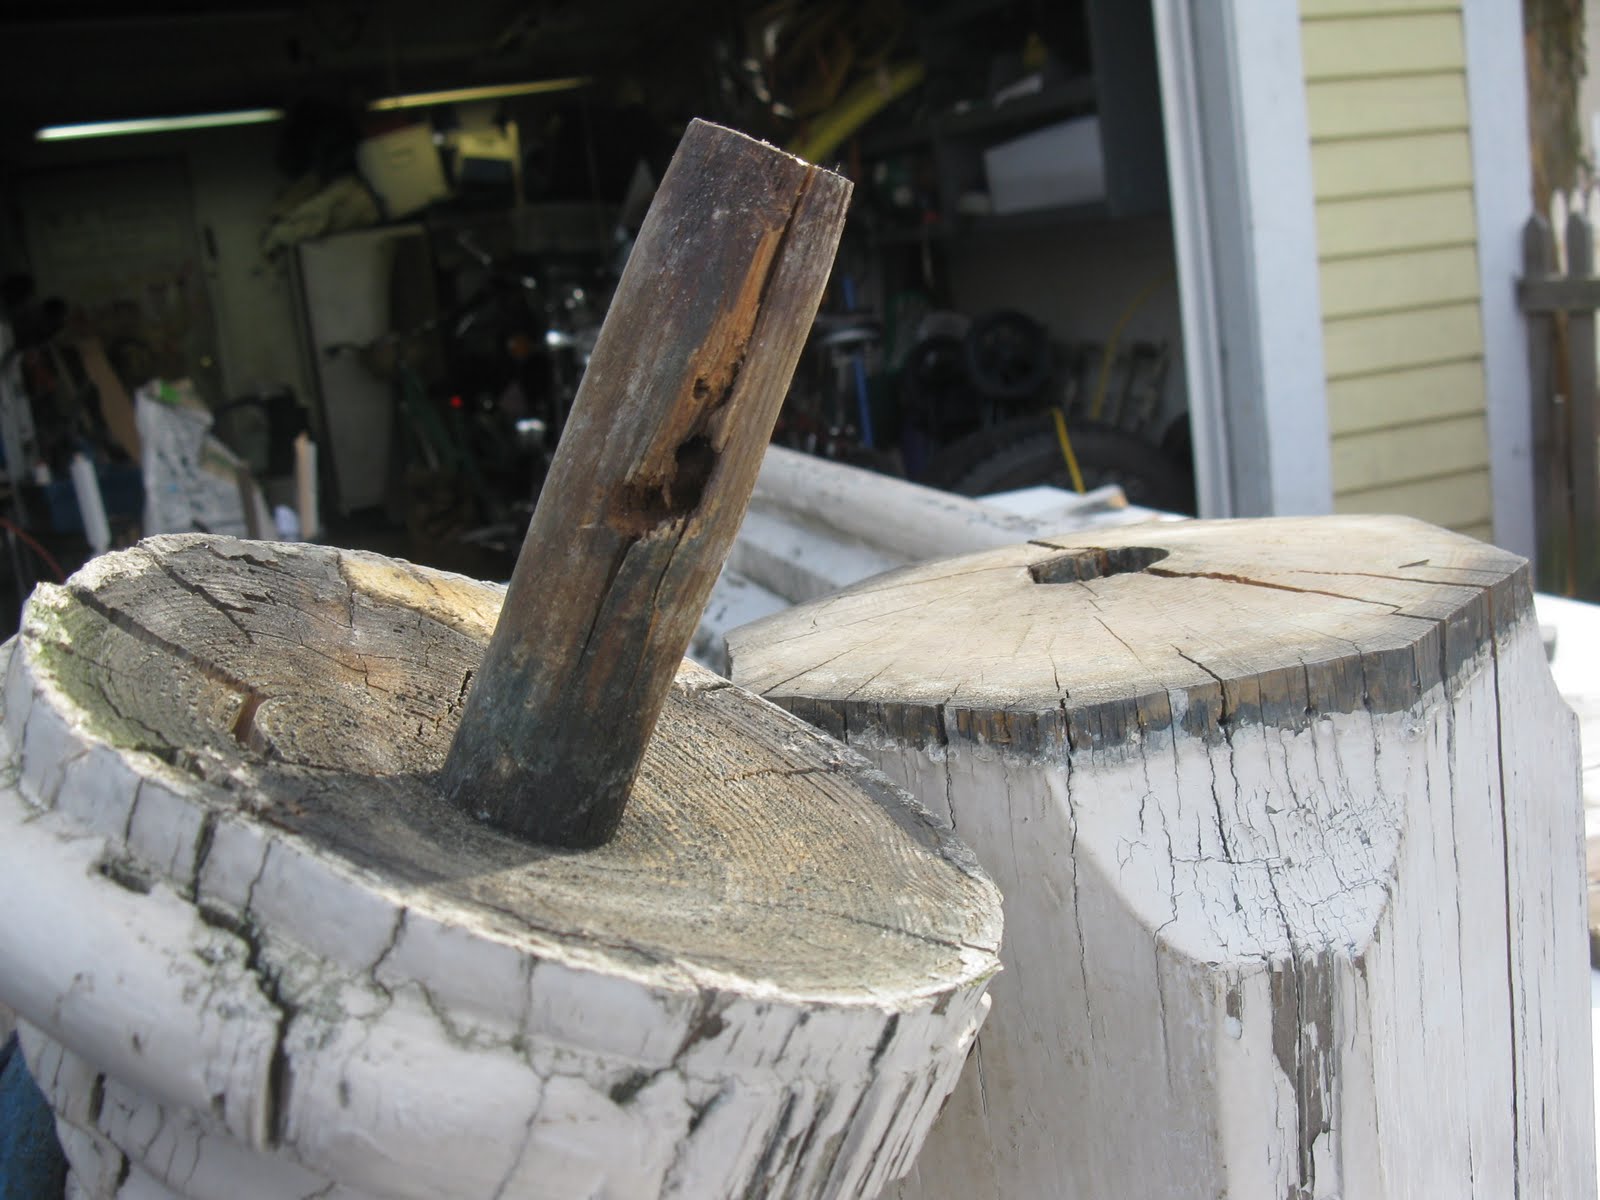
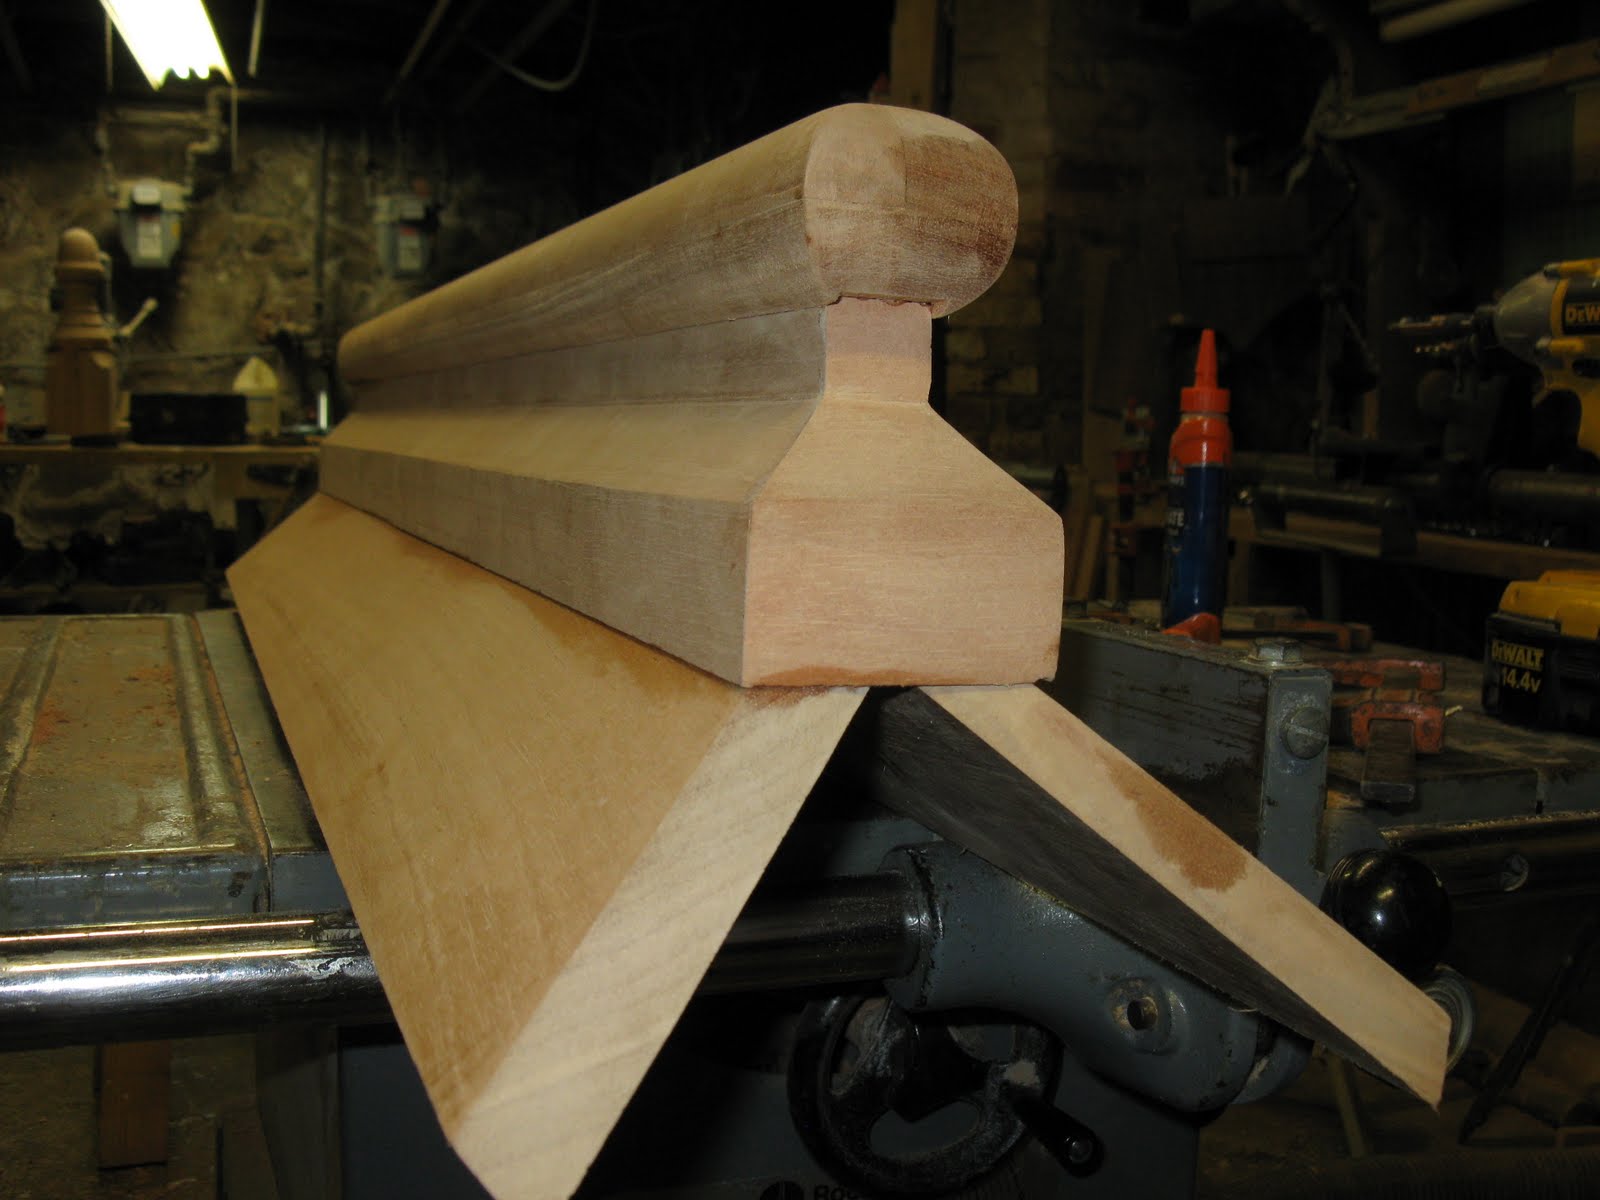
The end view of the finial tail.
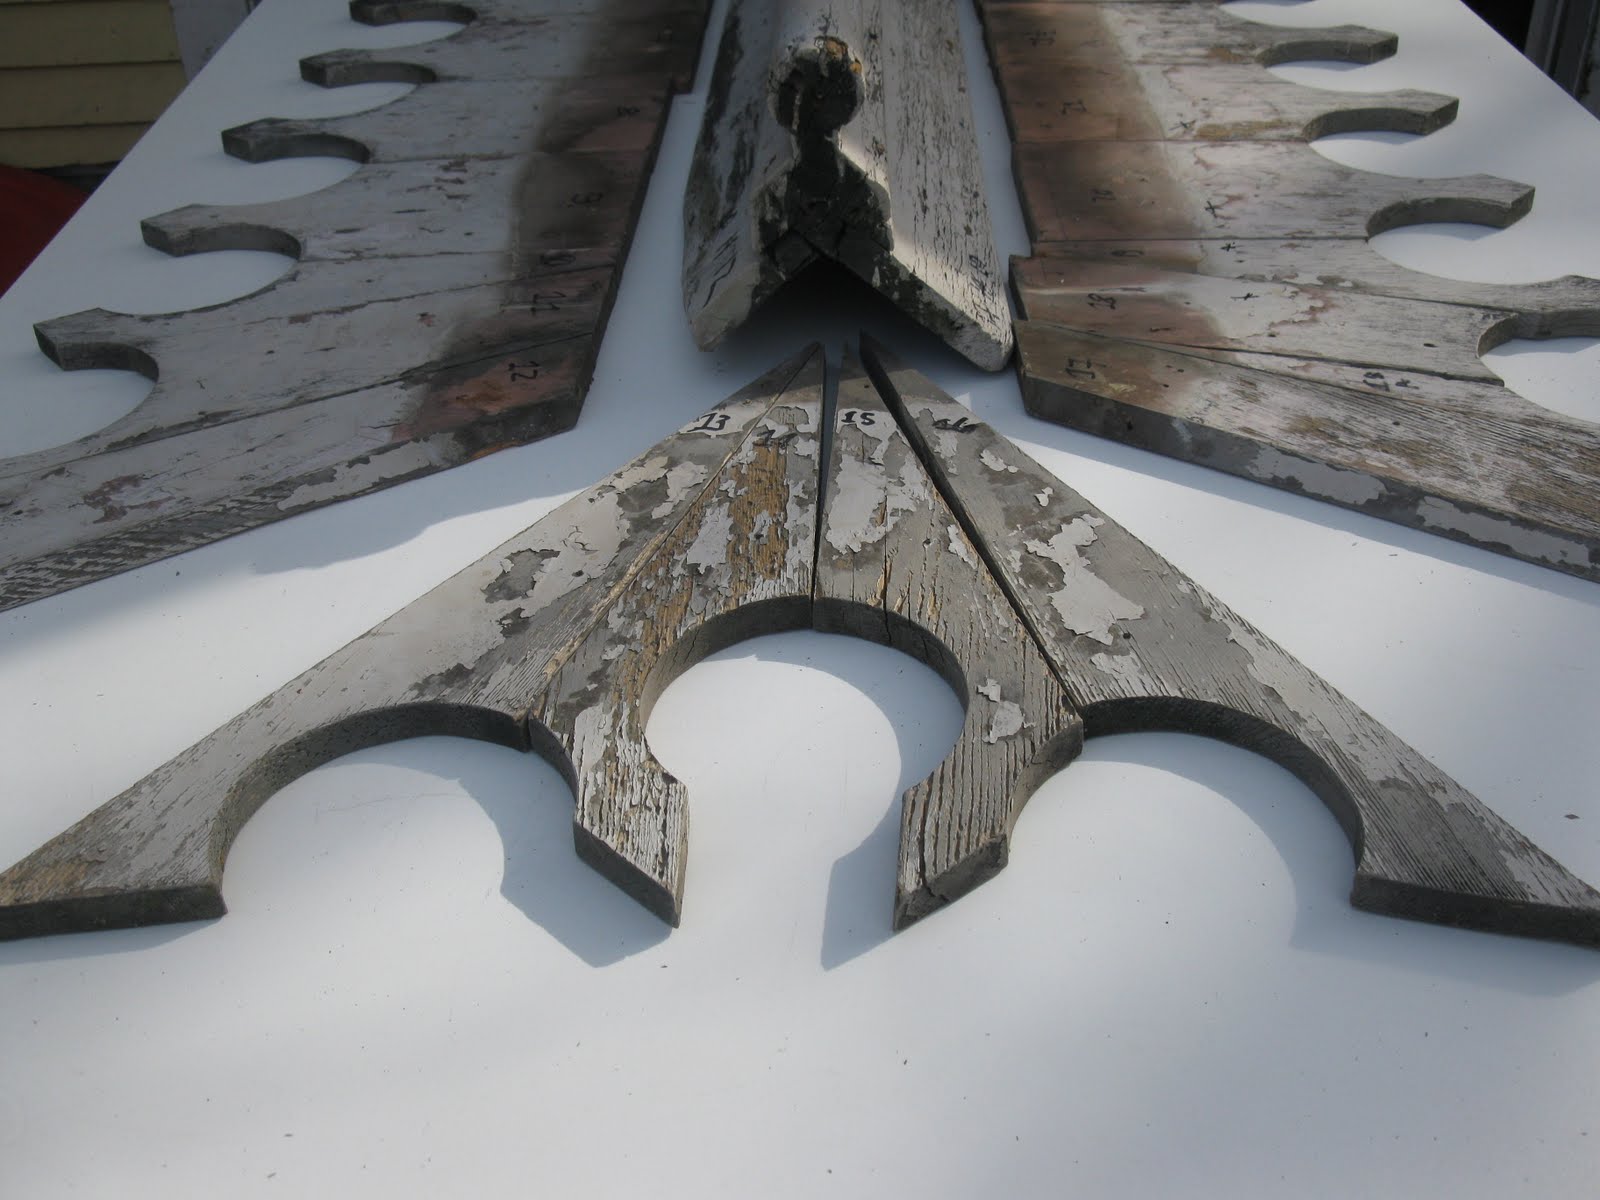
Close up of tail. This is a solid piece of wood. The 45 degree angled boards cover the decorative scroll skirting and provide weather / water coverage to the scroll skirt fasteners.
Below: end scroll / skirts, that sit on the hip side of the roof.
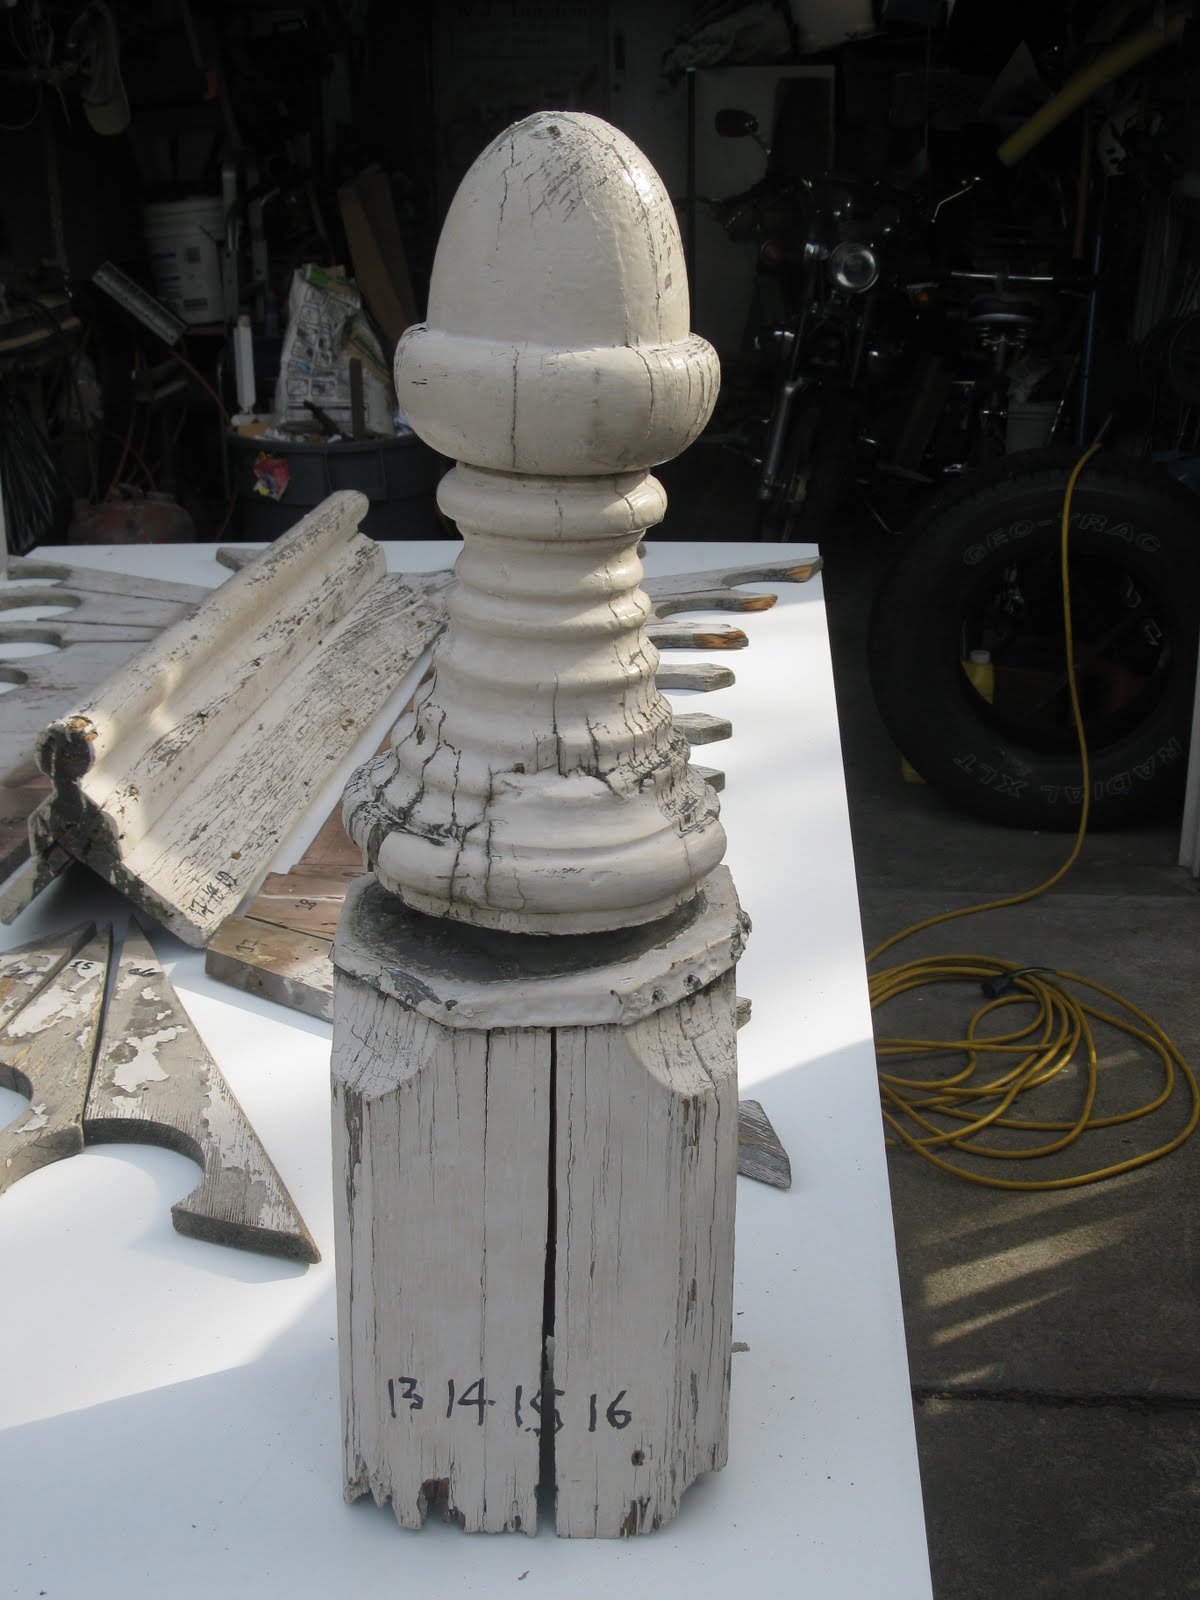
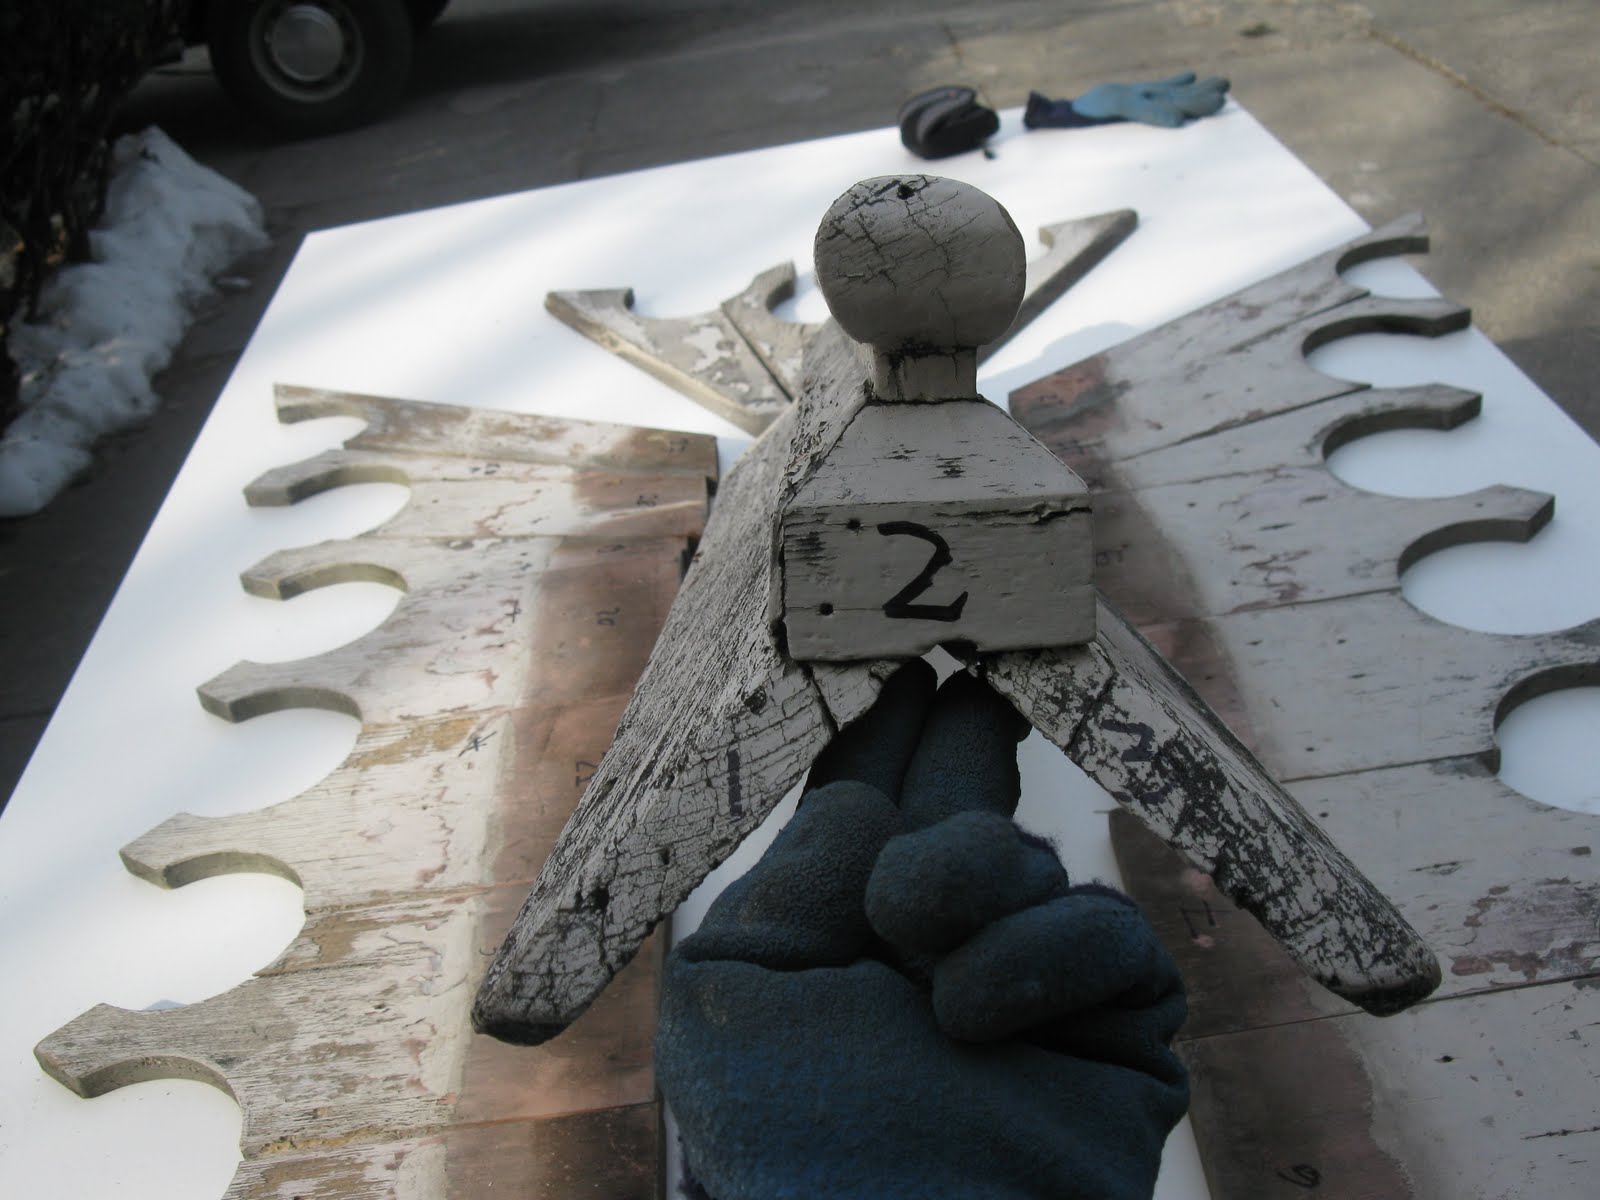
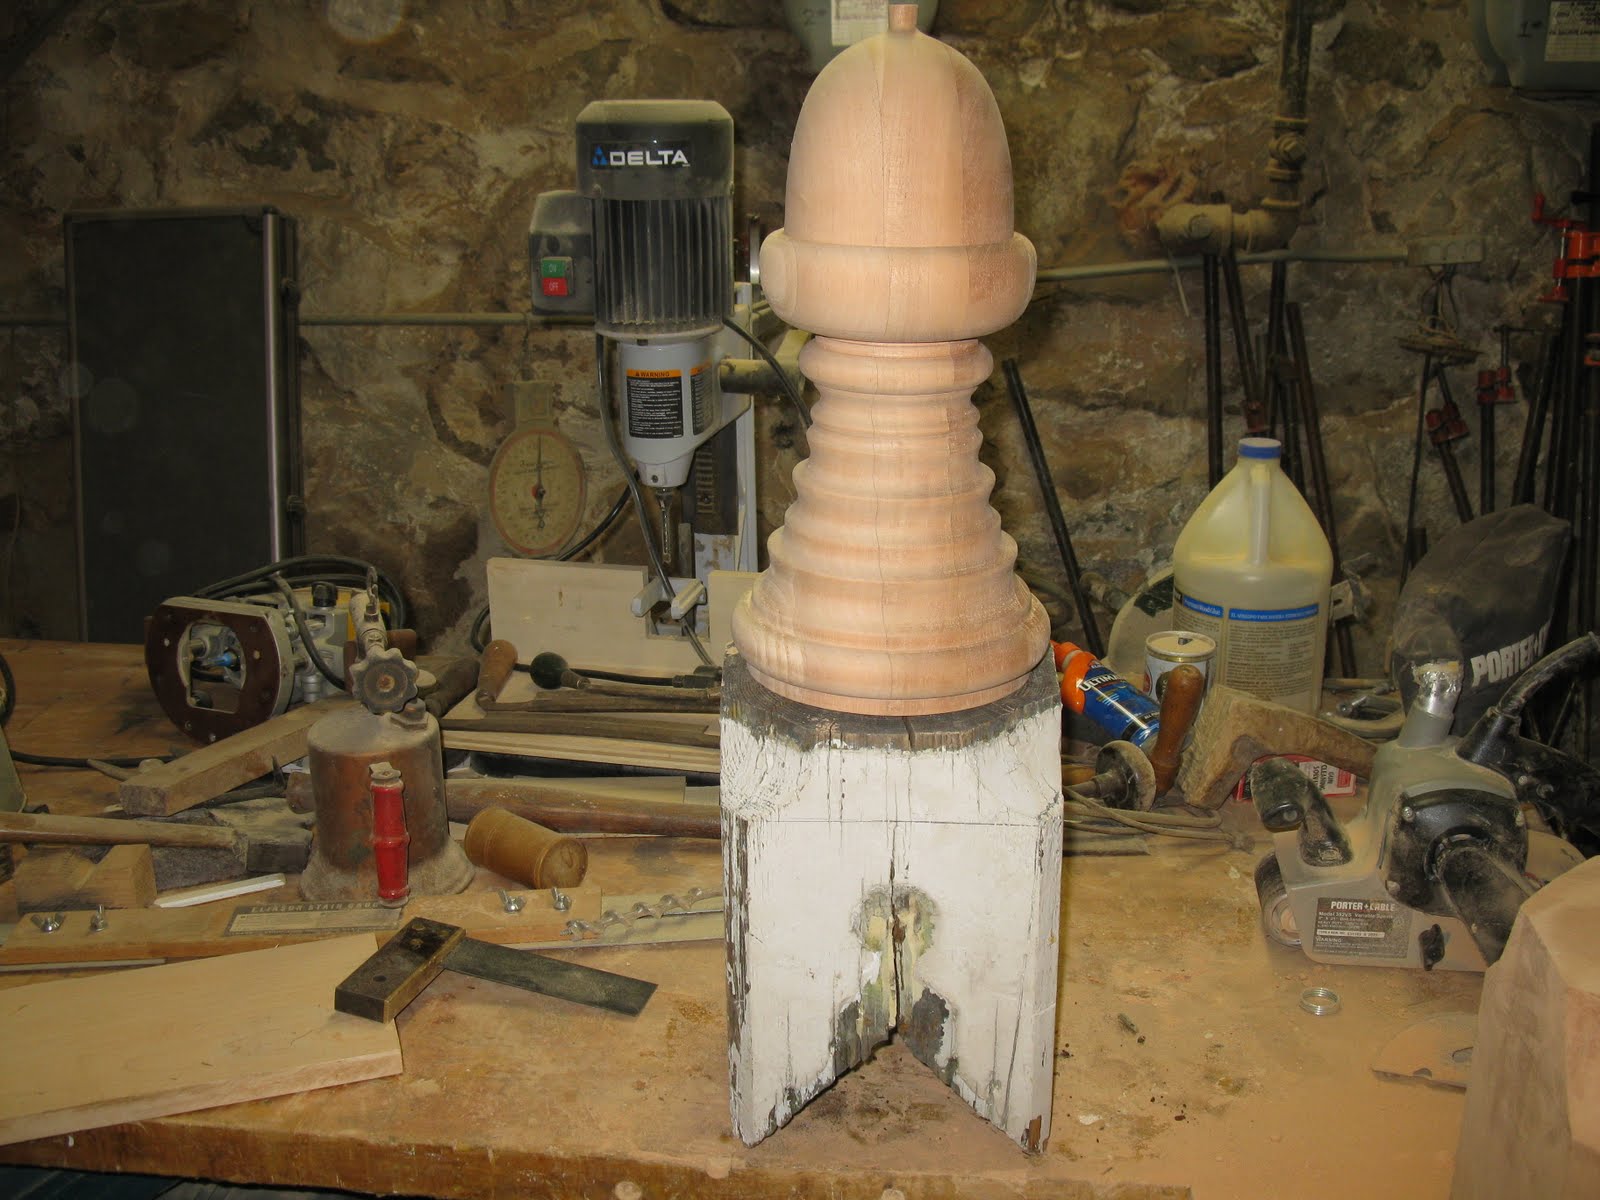
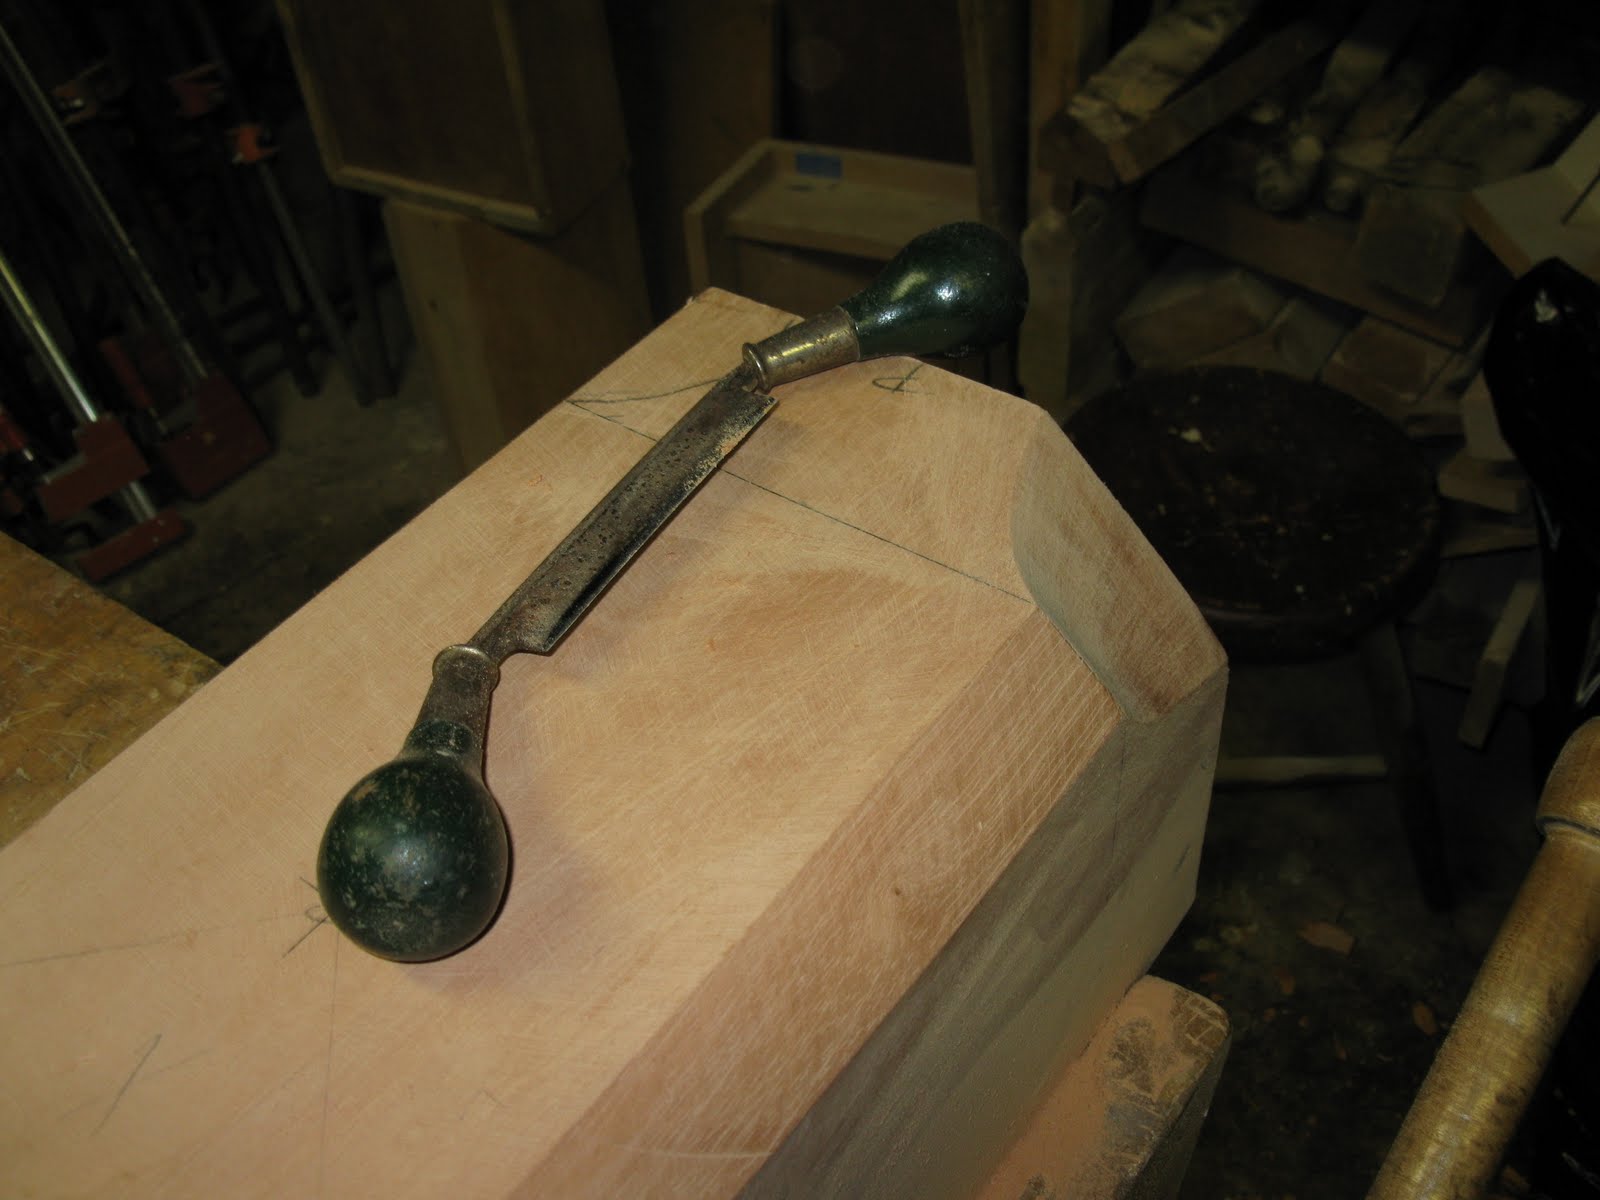
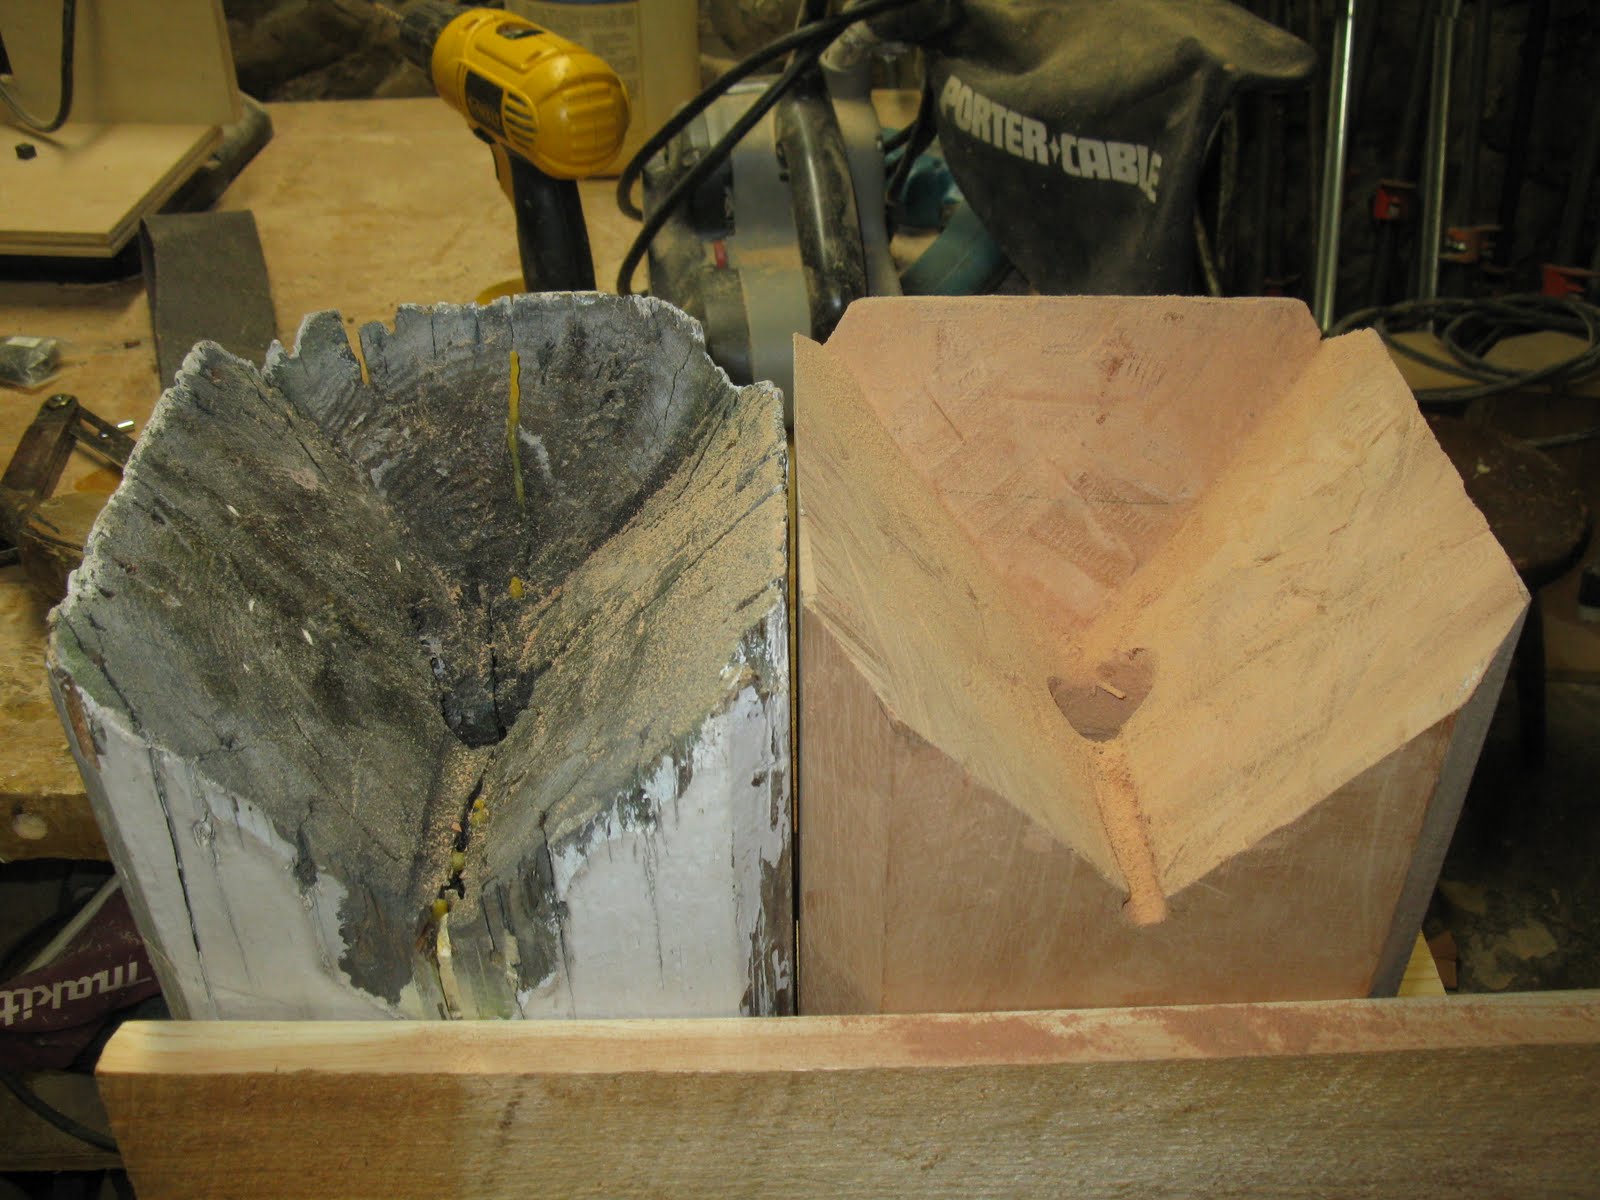
This is the bottom of the acorn base. It was hand cut and chiseled to fit snug on top of the hip roofs 3 sided edge.
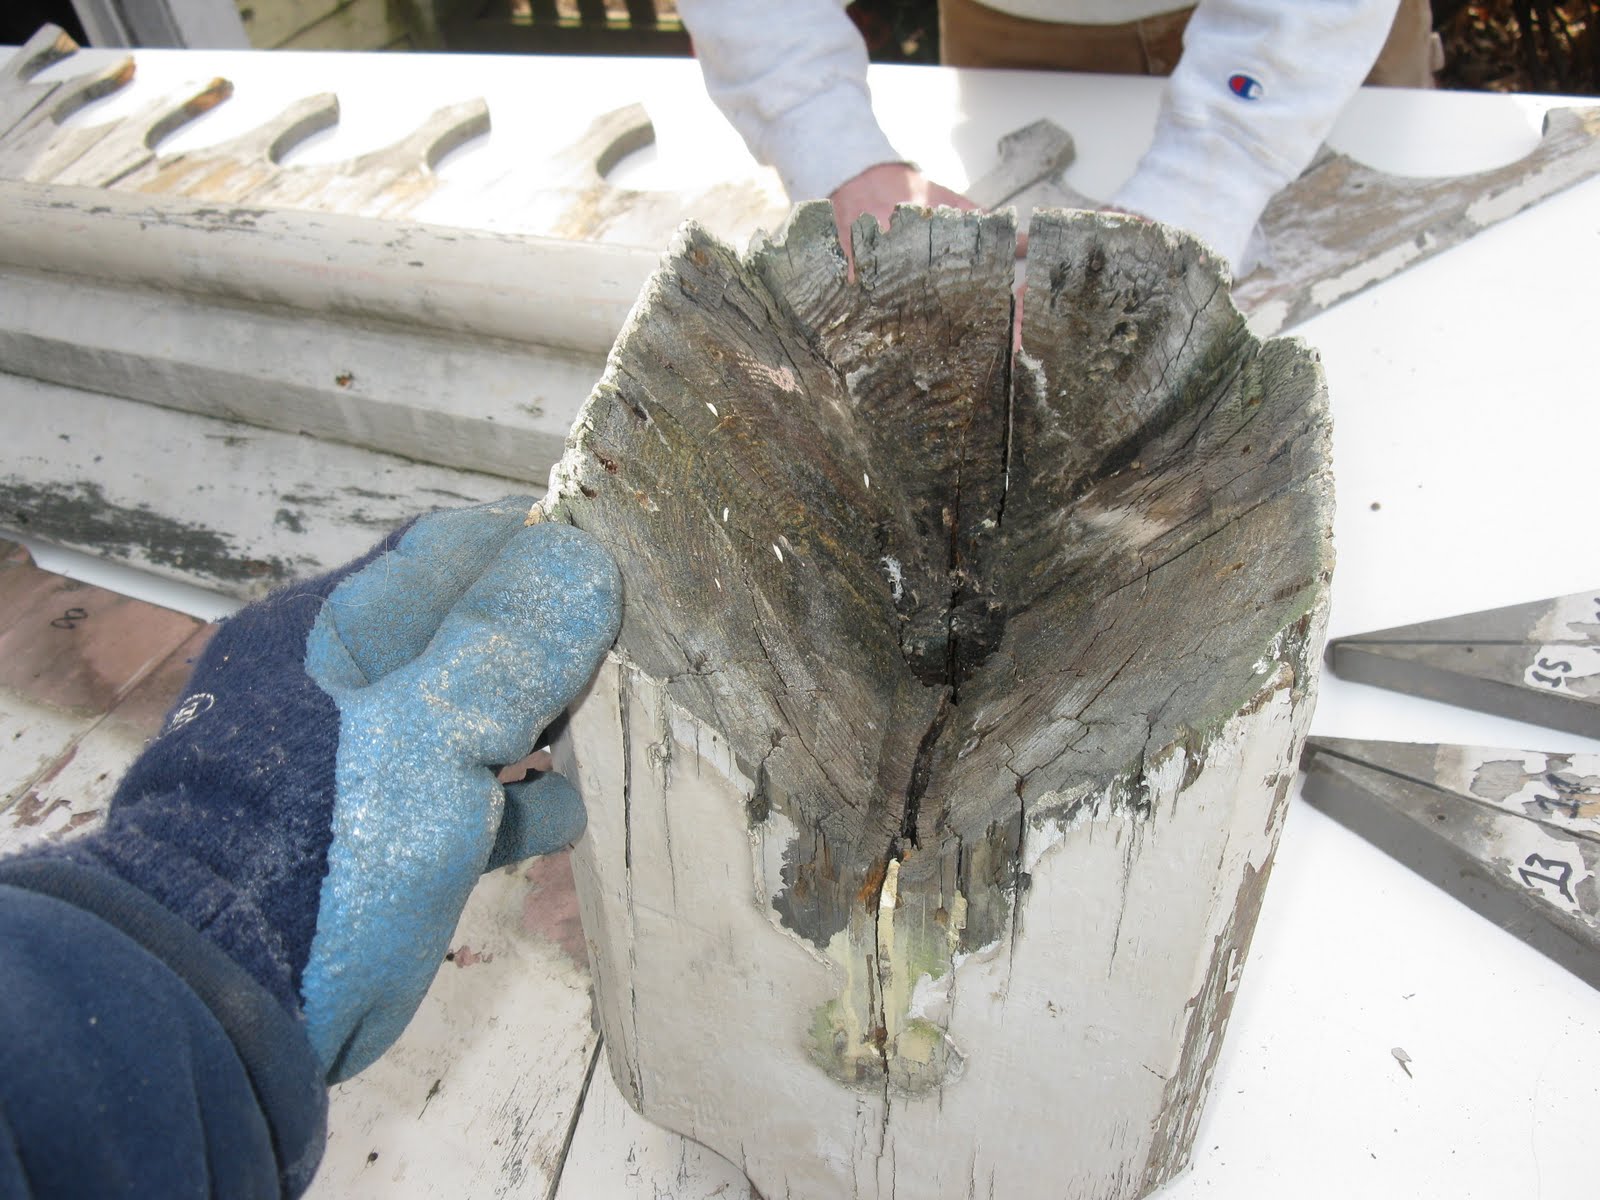
The acorn finial was made of one solid piece of wood. The dowel at the bottom of it is part of this same piece of wood.
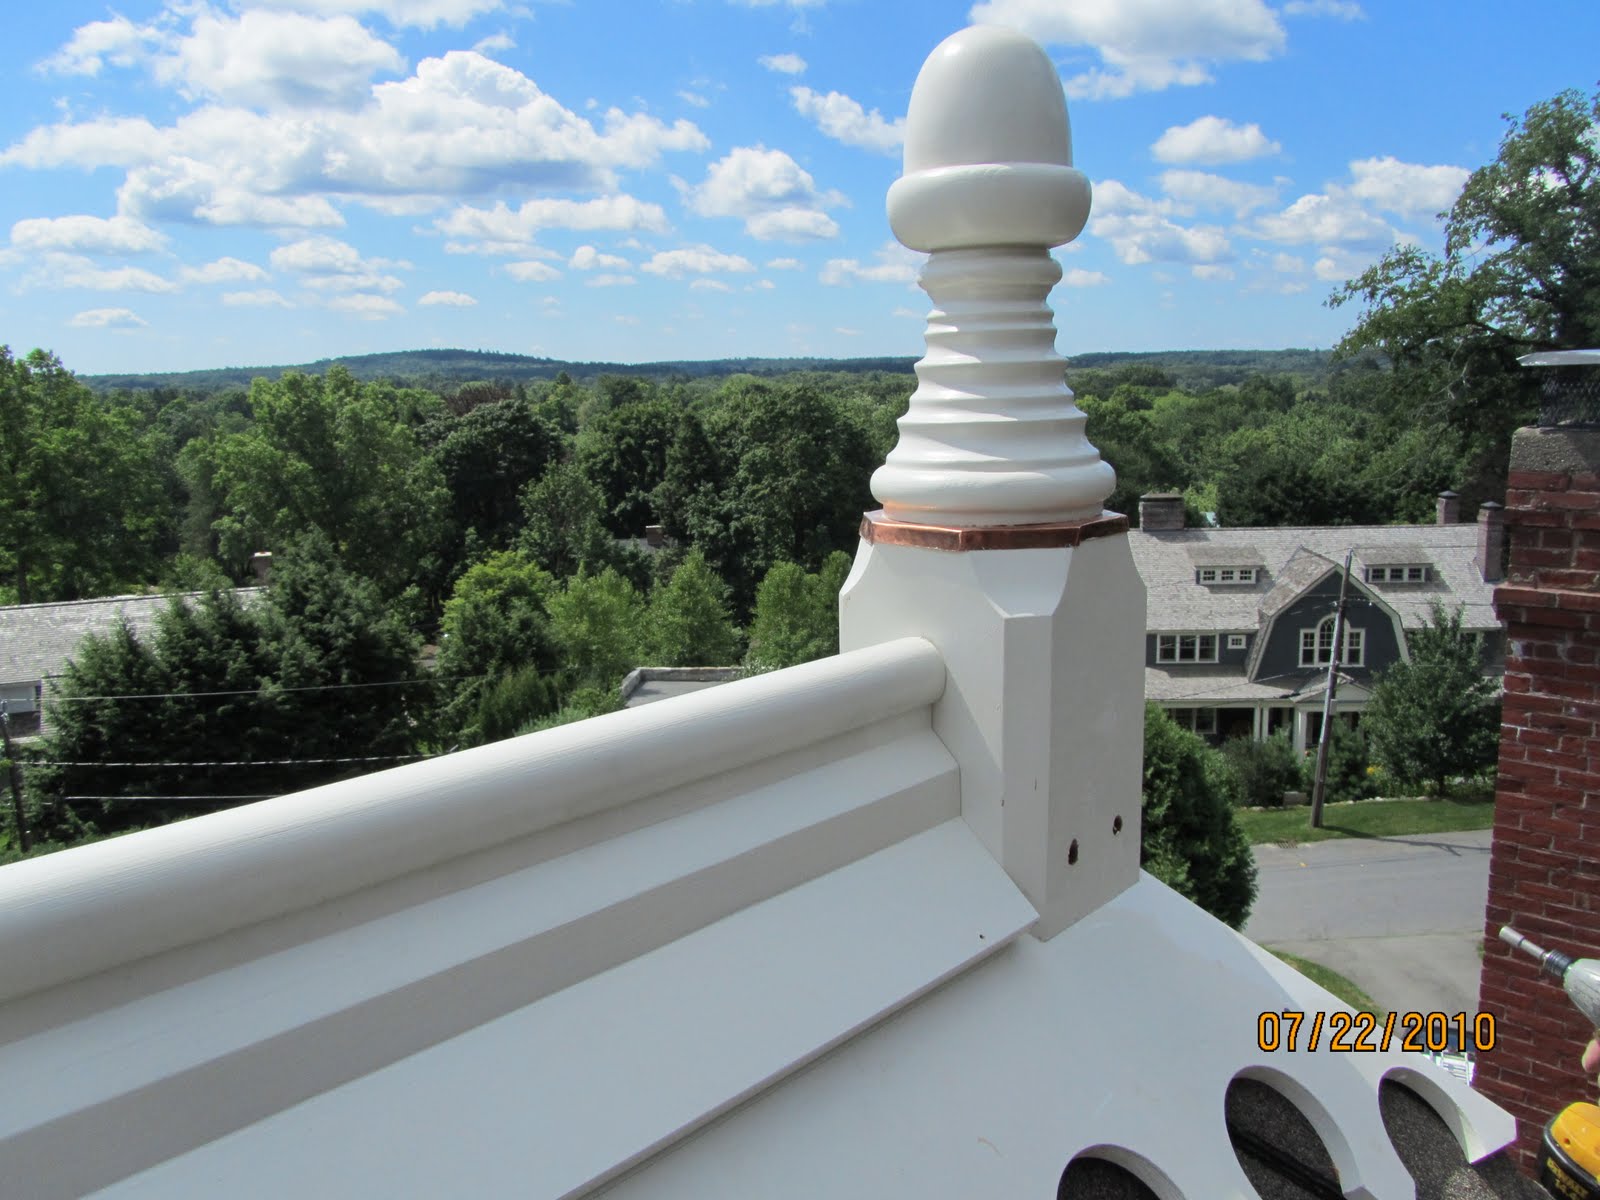
The dowel slid into a solid base and was locked in with two old fashioned nails through the base sides. A copper cap sat on the base in between the acorn finial to protect the end grain from water.
If you look closely the original carpenter curved the top of the base and made the bottom of the acorn concave. This allowed the two to fit snug together as well as shed water.
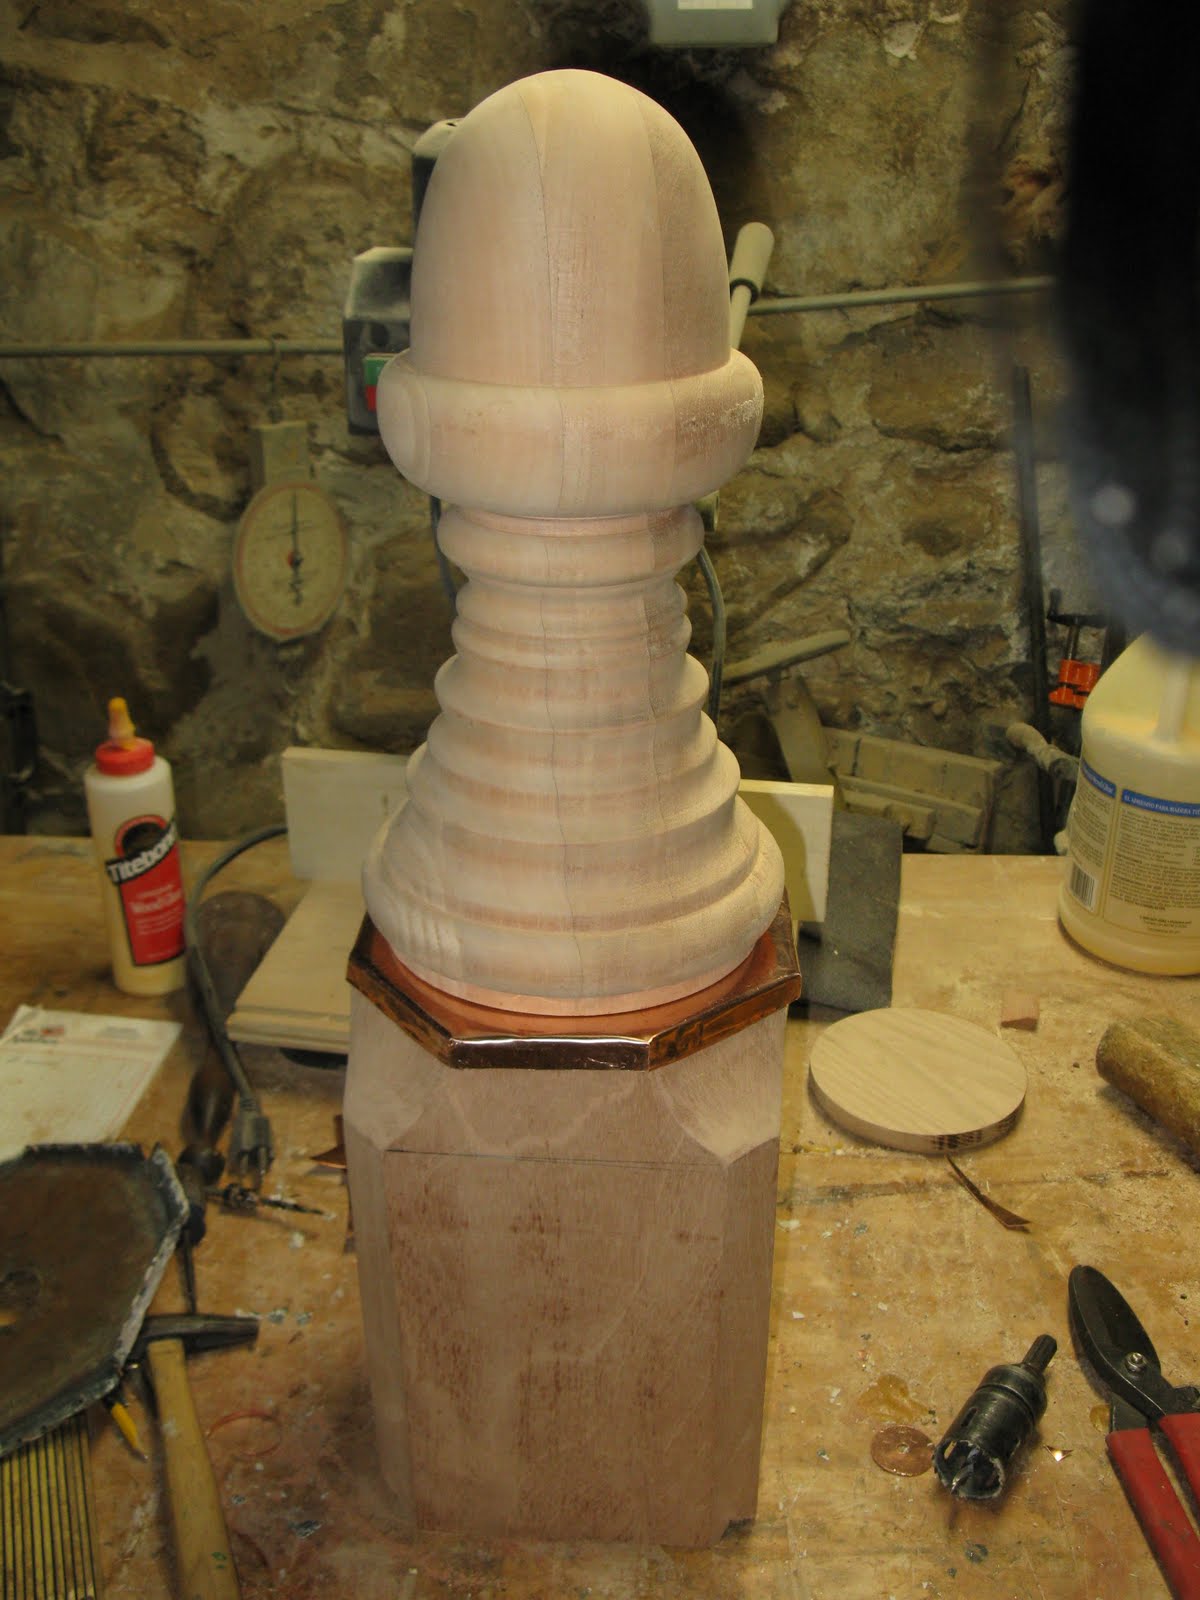
The entire assembly laid out.

Side view. Look closely at the turnings under the acorn. There is a lot of detail on this baby!
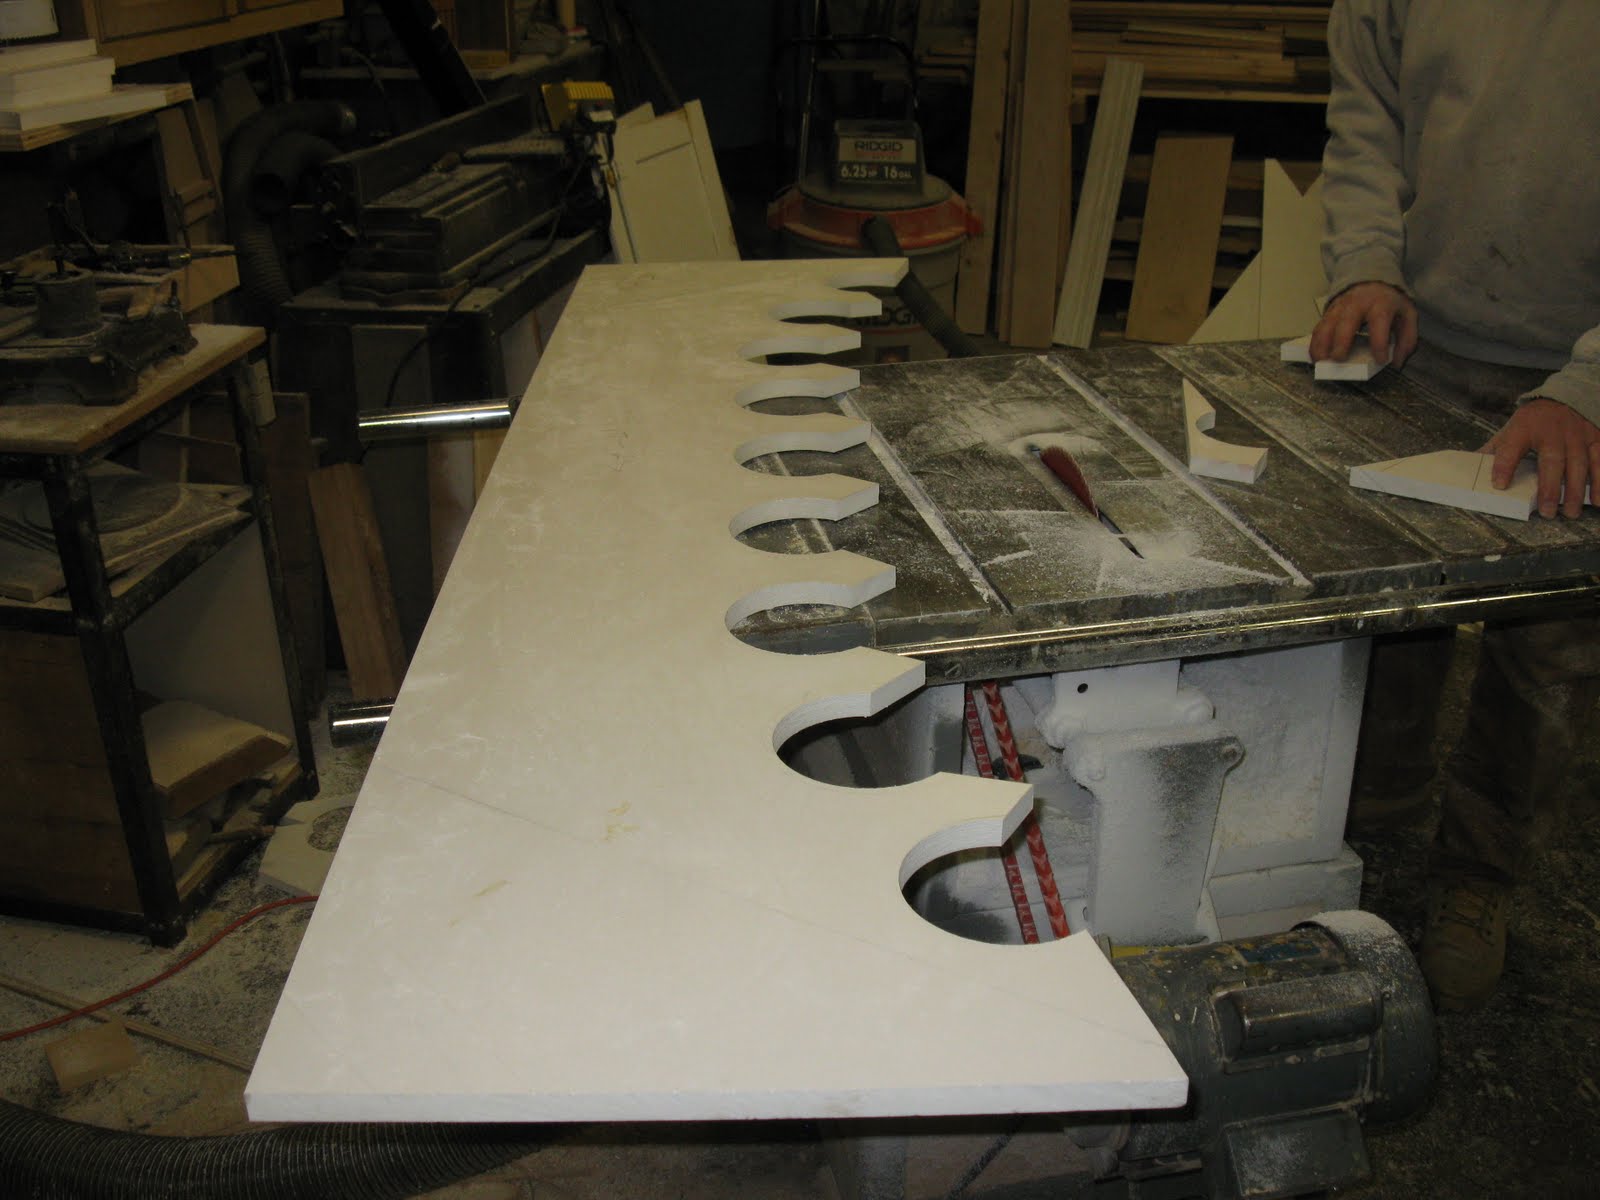
We had decided to make the scroll skirts out of one piece of material. PVC Azek was the winner of this choice because it takes the most beating on the roof.
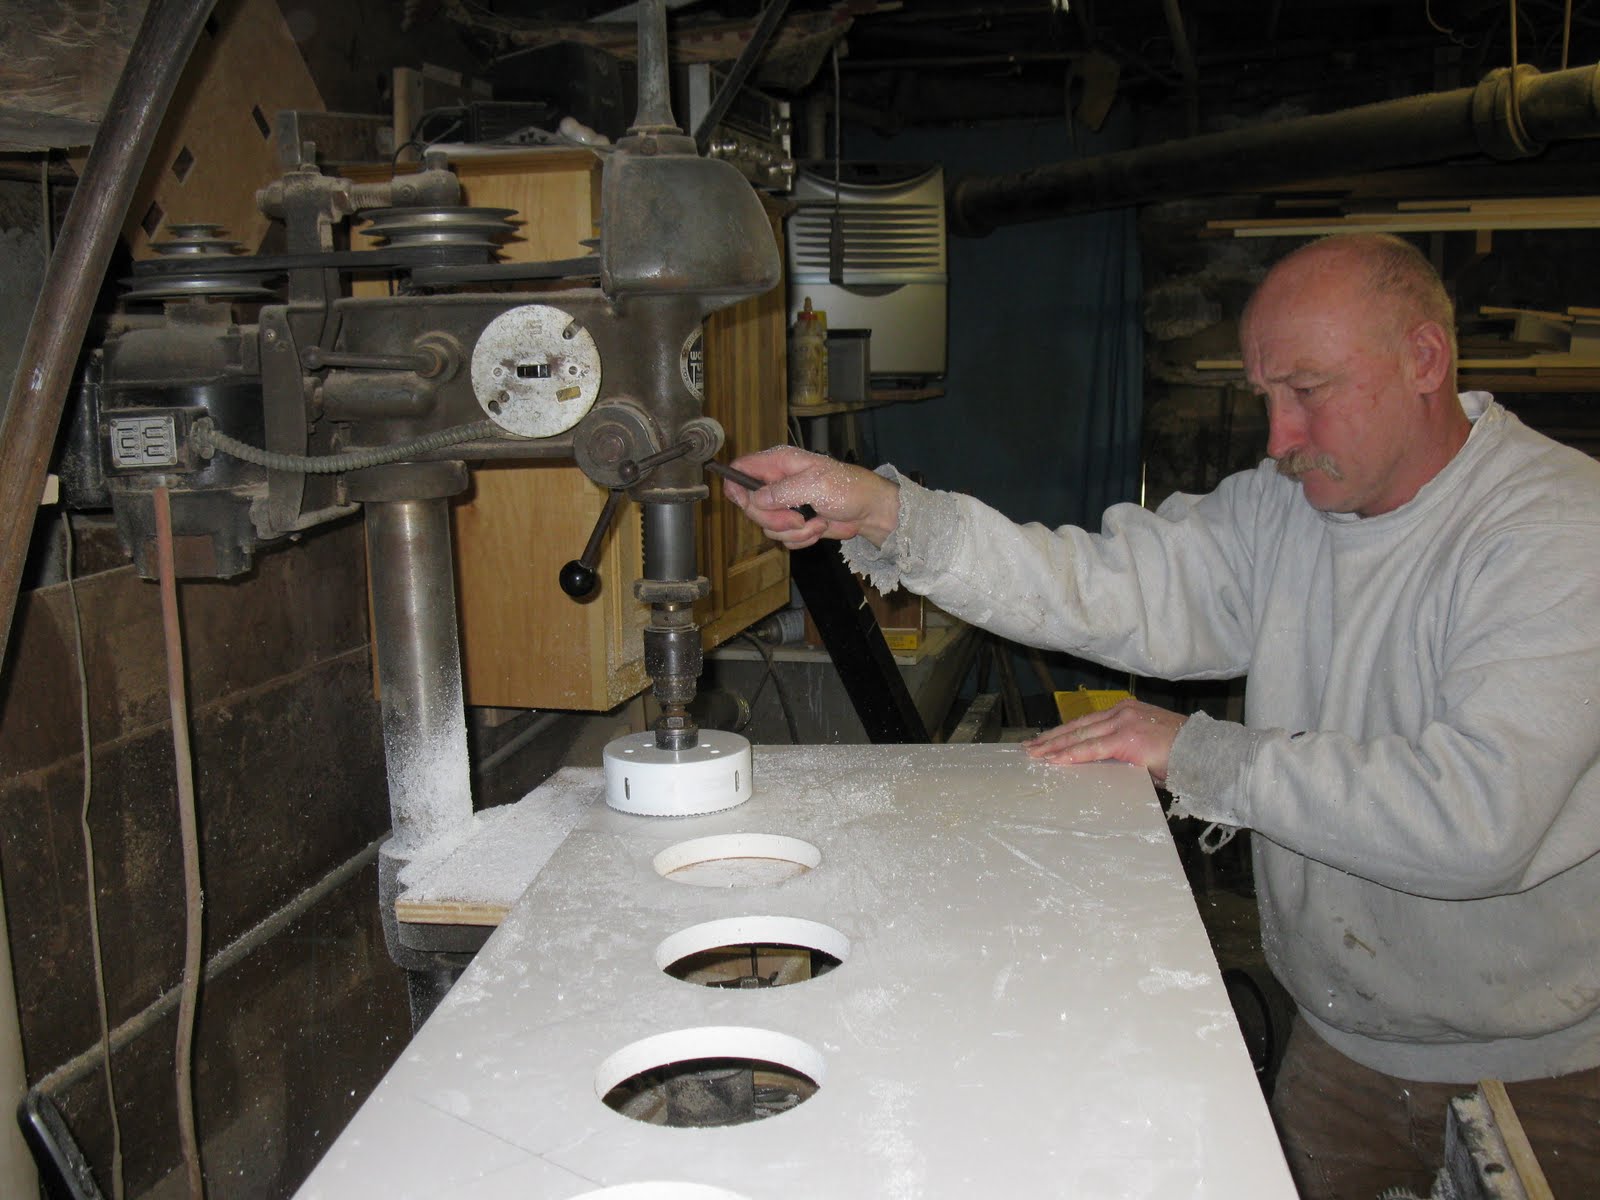
The Acorn finial, base and tail will be made out of Spanish Cedar. To make the curves we used a 5″ hole saw in the drill press.
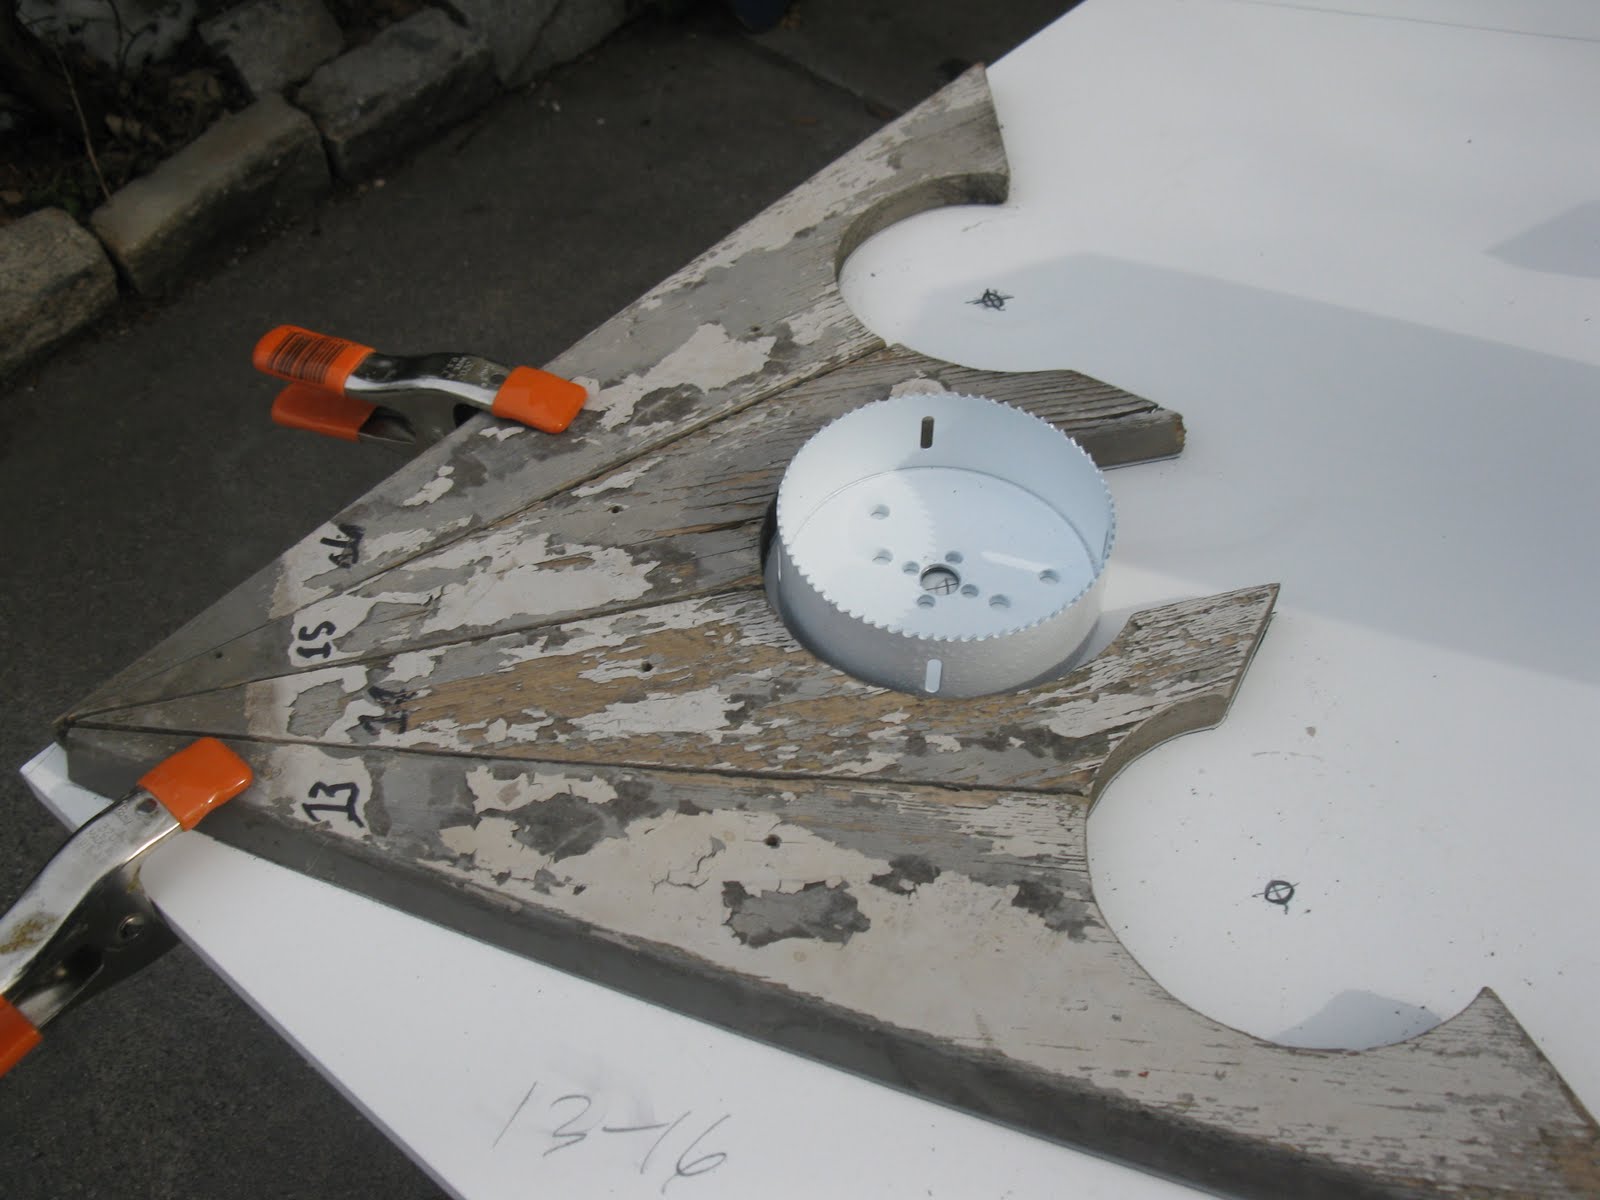
Bill Langton drilling the holes that will define the scroll skirting in his shop.
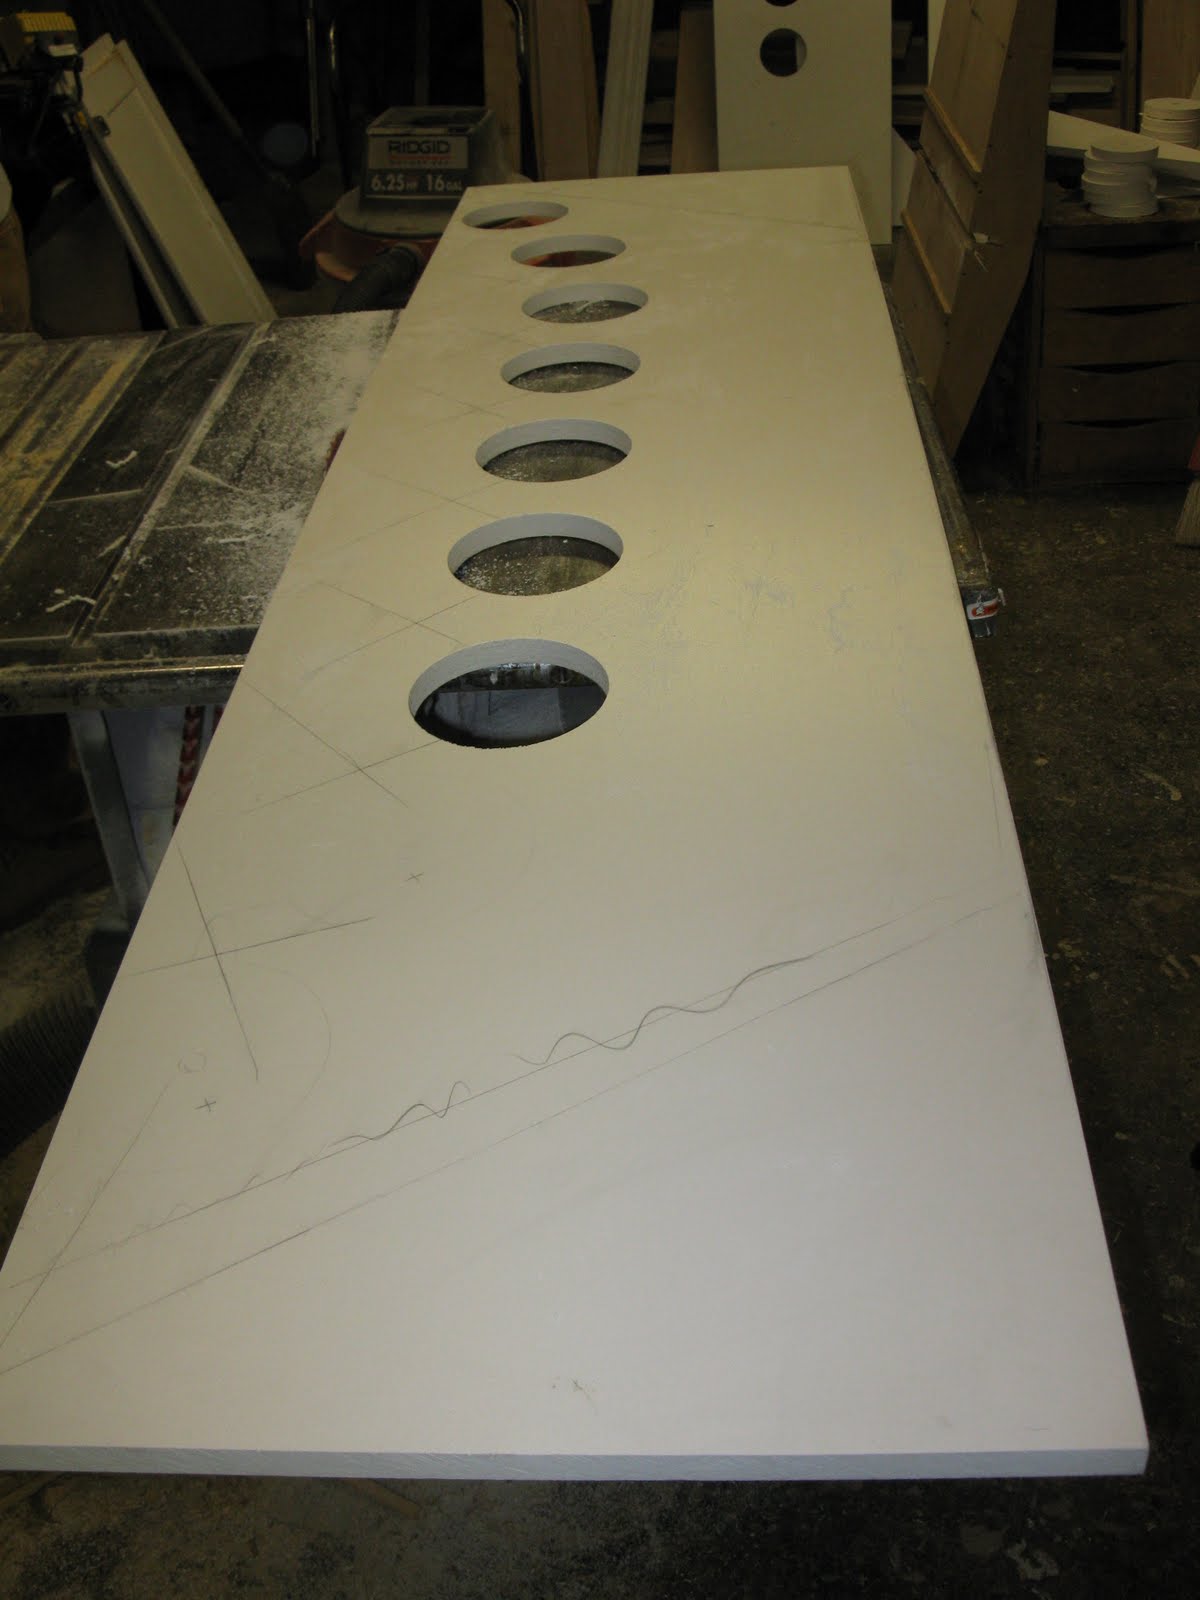
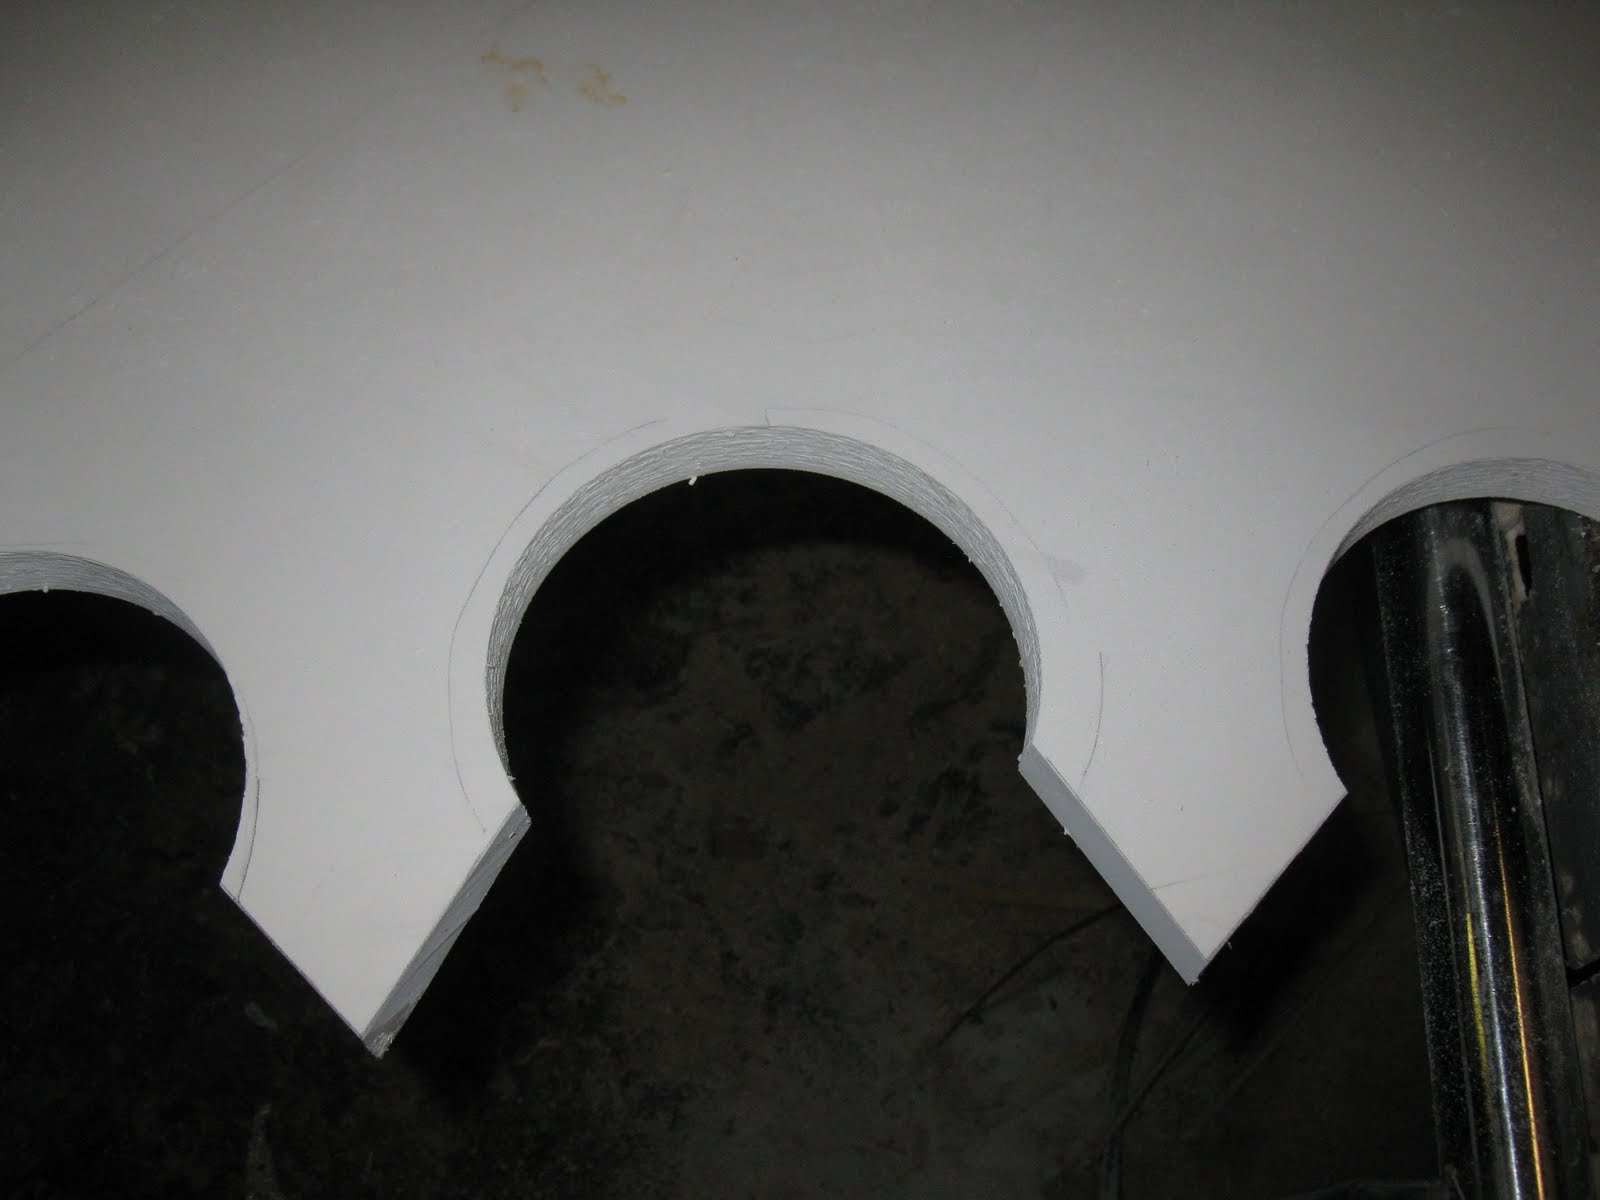
Holes complete – does not look like a scroll skirt does it? If you click to enlarge the picture you will see what looks like “X’s” Once we cut these lines the skirt points will be defined.
The acorn finial will be a fun project to make on the lathe.

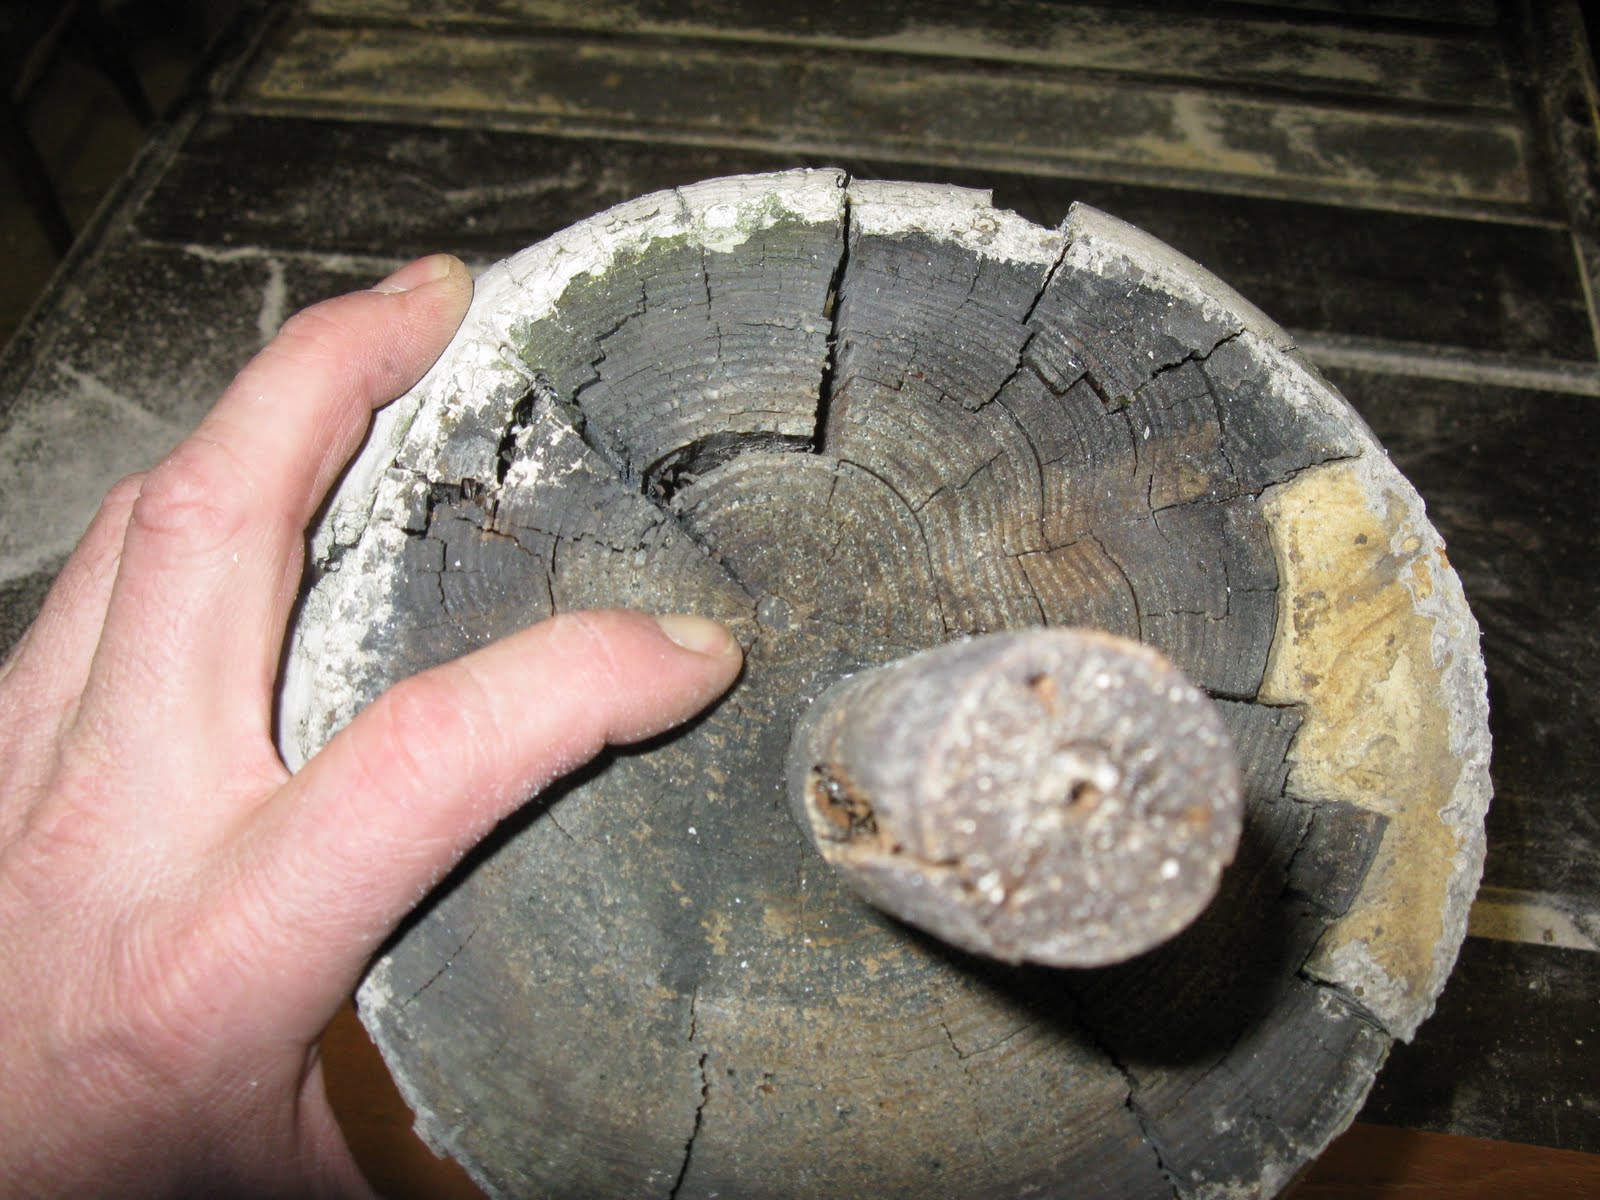
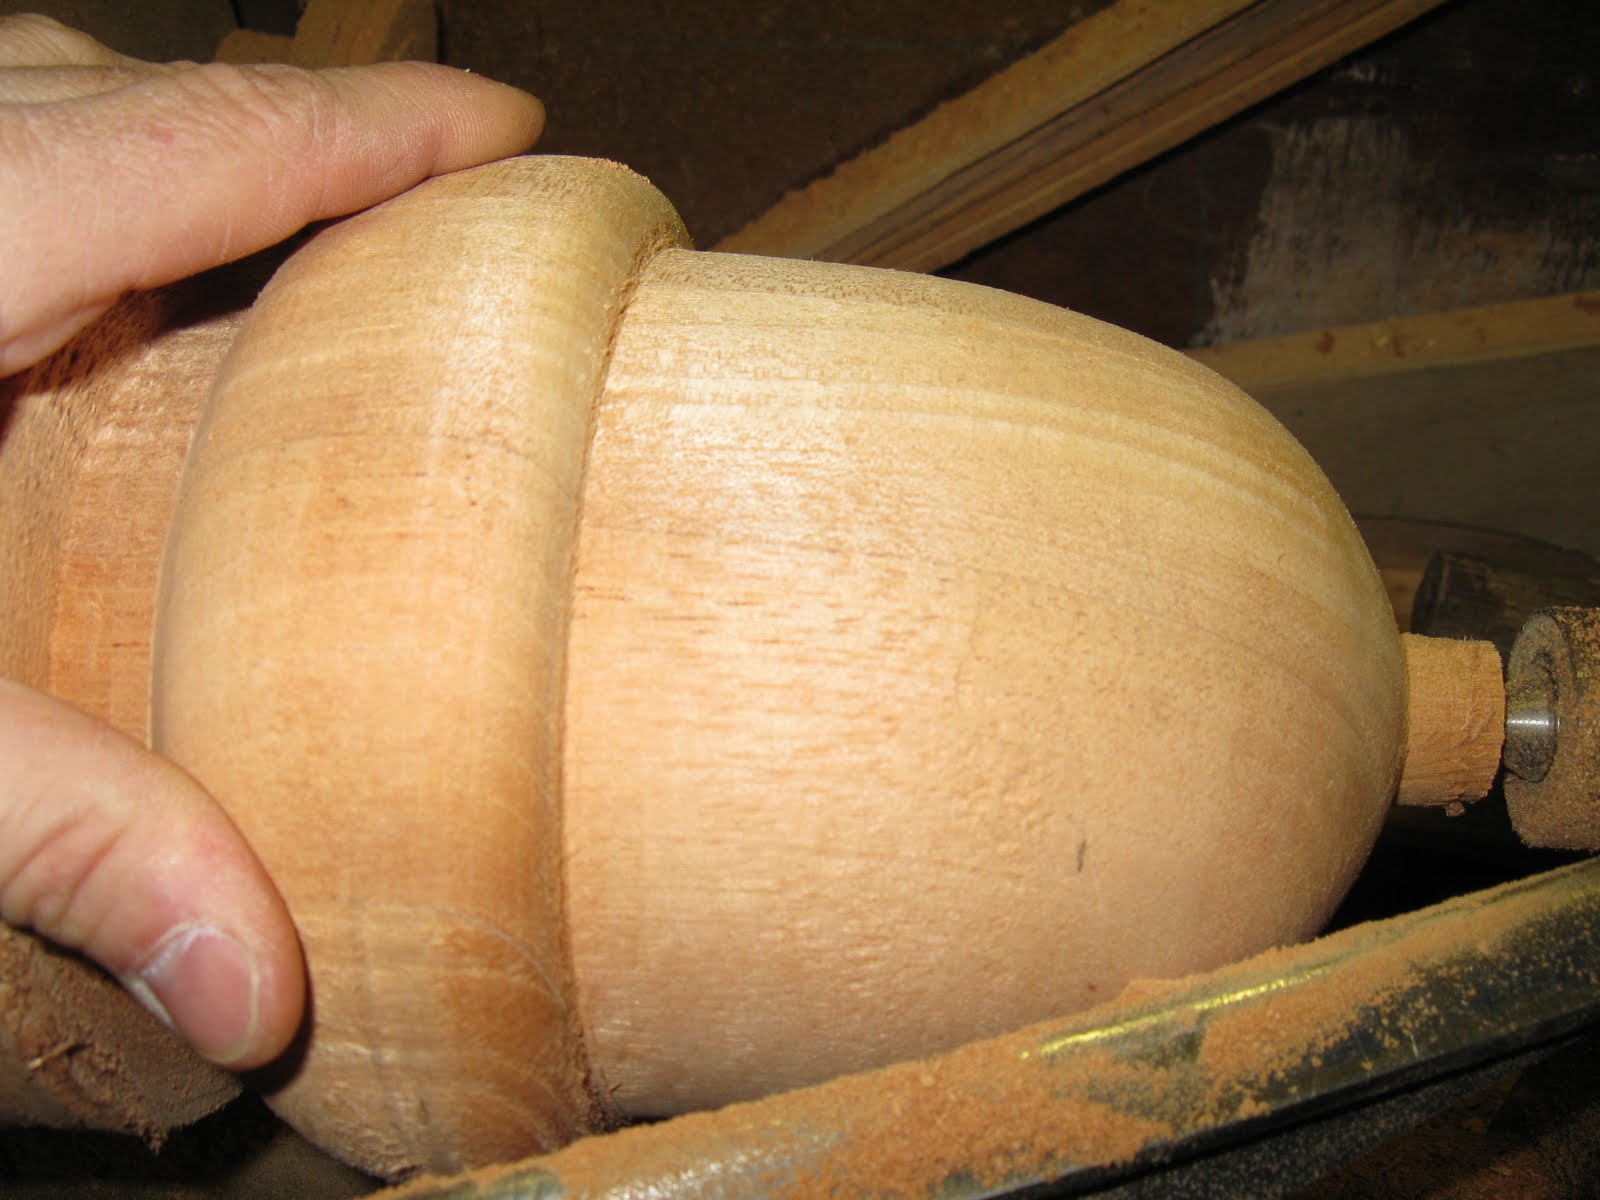
Below: the dowel is actually part of the chunk of wood that makes up the acorn finial. If you look closely at my forefinger you can see the “heartwood” or center of the tree.
End skirts cut and awaiting edge bevels and final sanding.

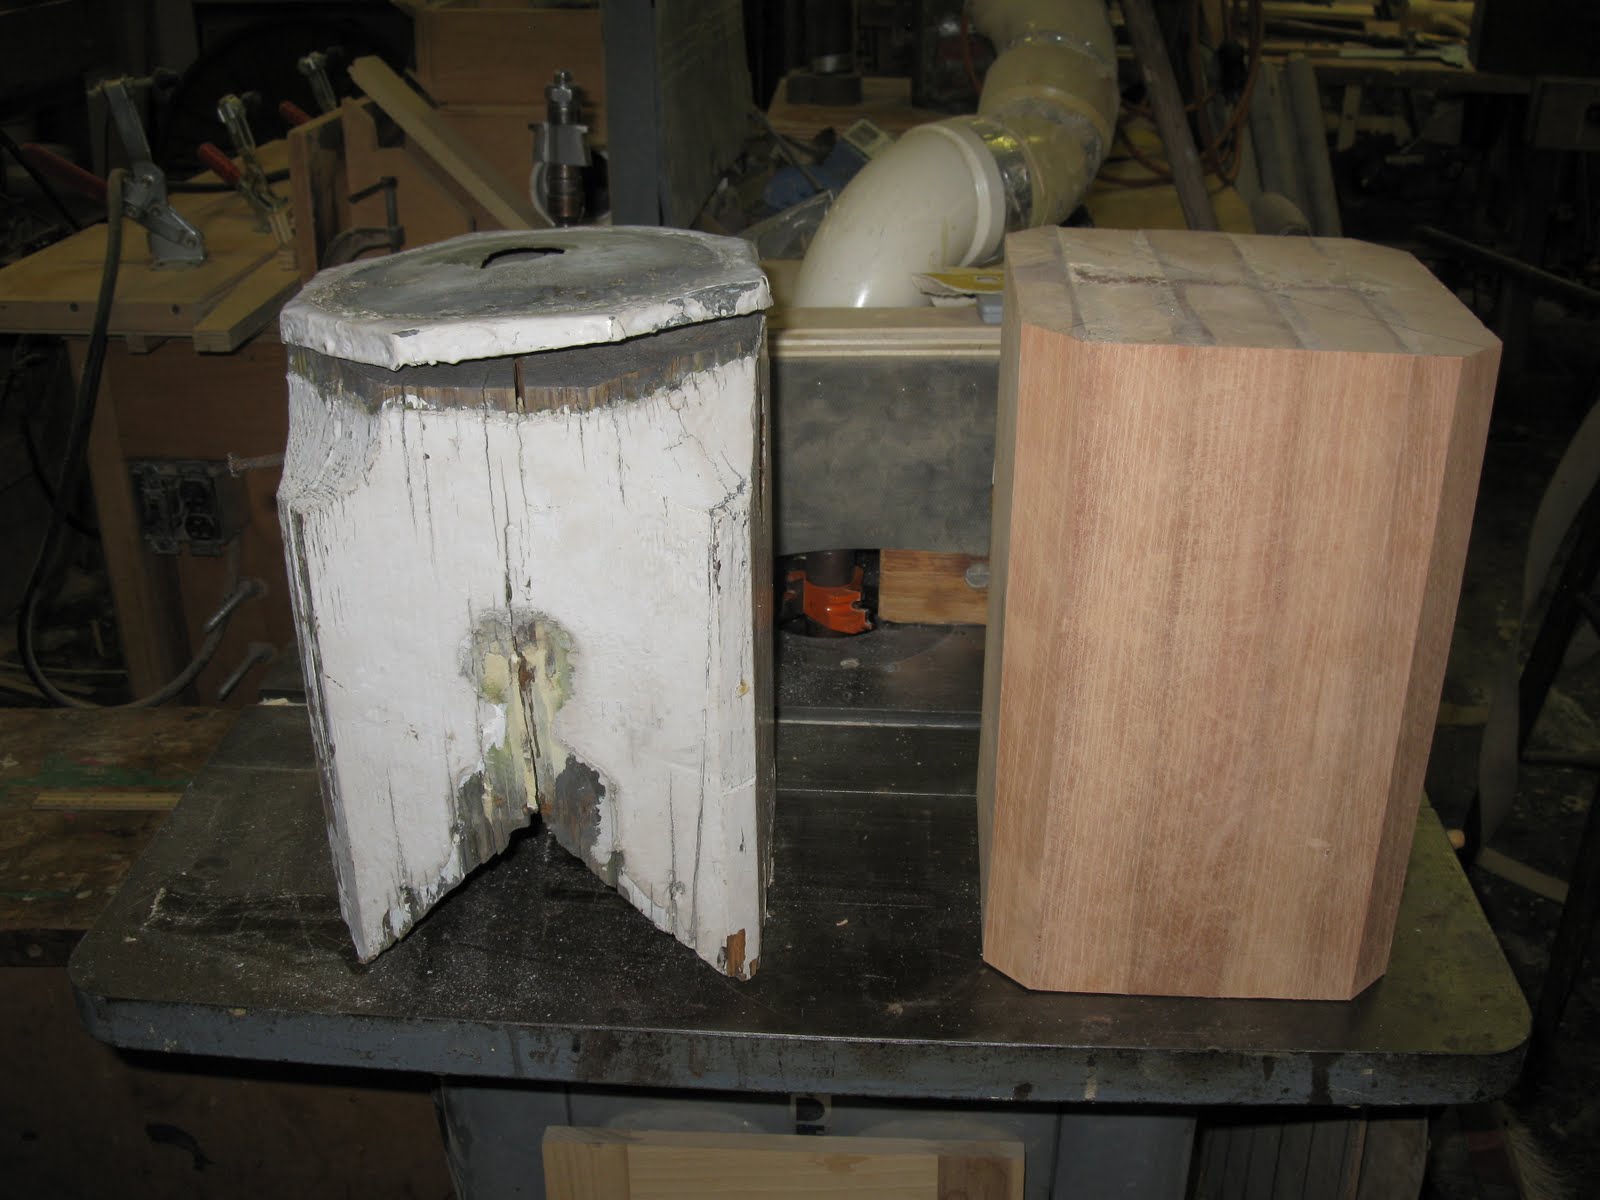
A few days ago we ripped 8/4″ Spanish Cedar to size and glued together several boards to make two blocks of wood. One block will make the acorn finial and the other will make it’s base.

If you look at the block of woods end you will see a circle. The circle represents the finial base which is the largest diameter needed. 45 degree cuts were made on the block to assist in making this fit in the lathe as well as make it easier to make round.

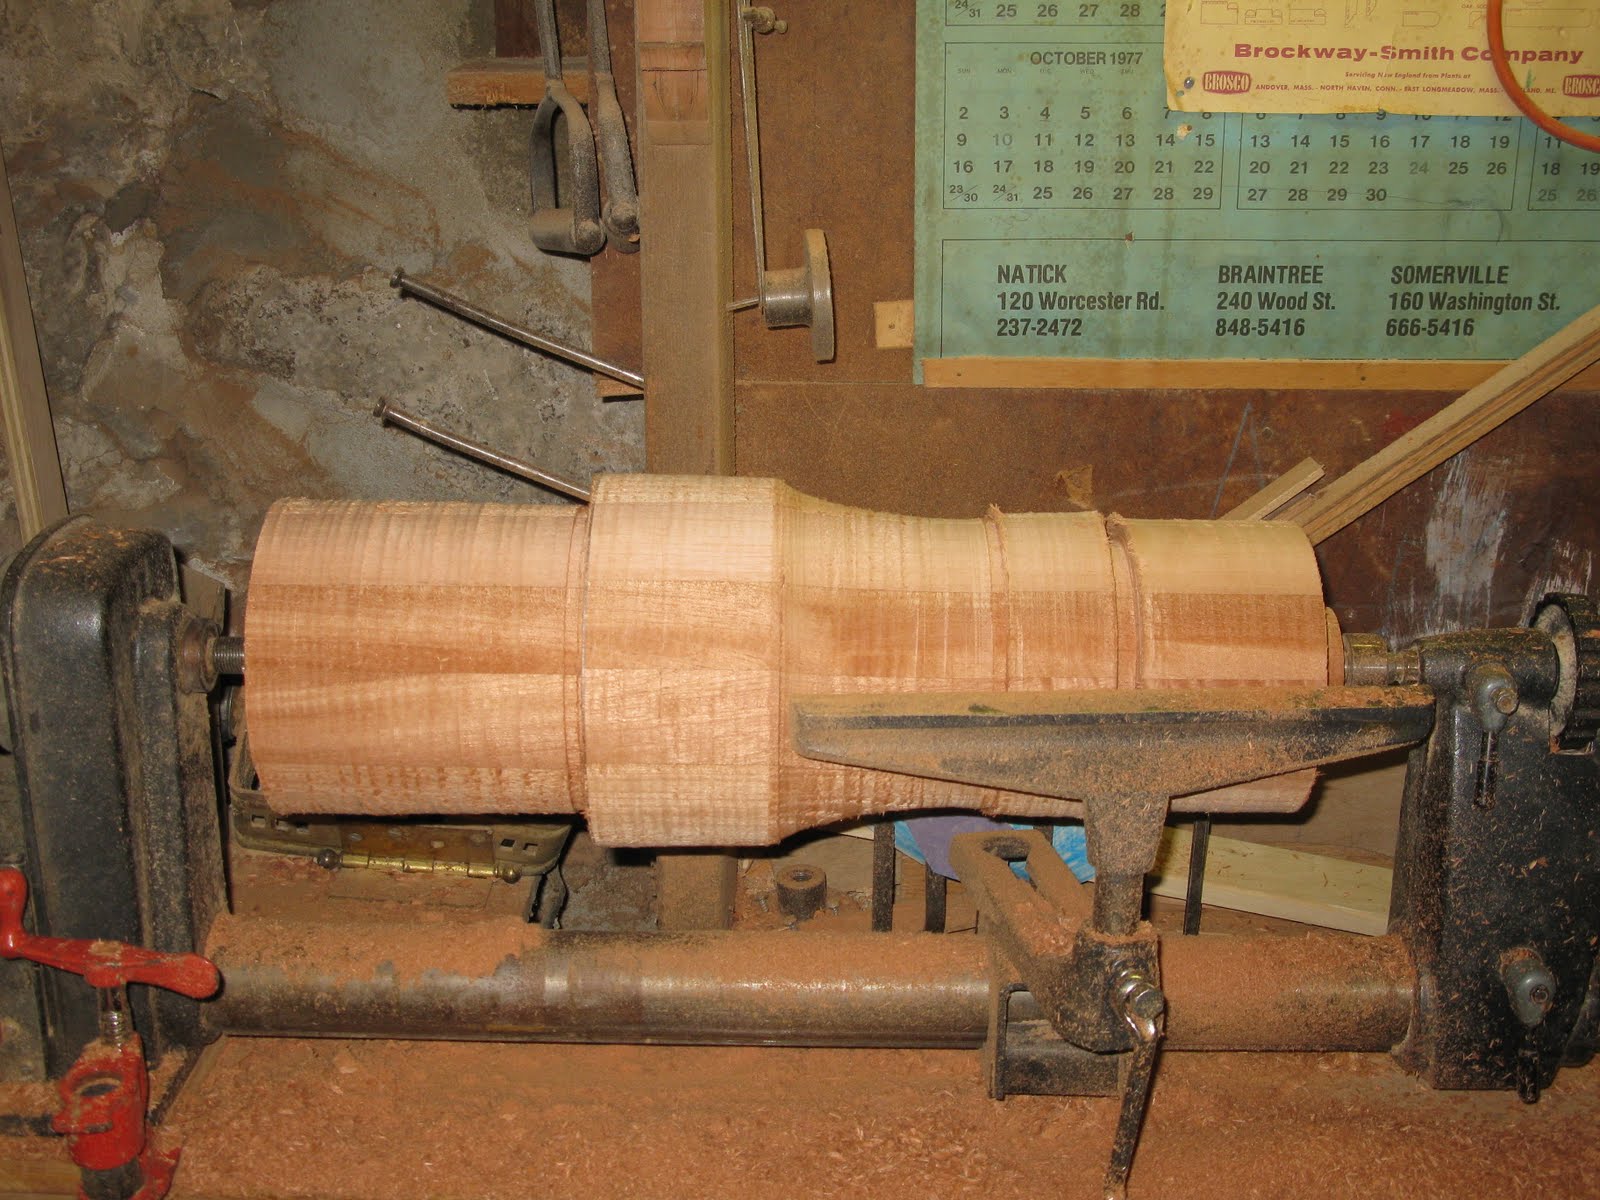
Fitted in the lathe in Bill Langton’s shop.
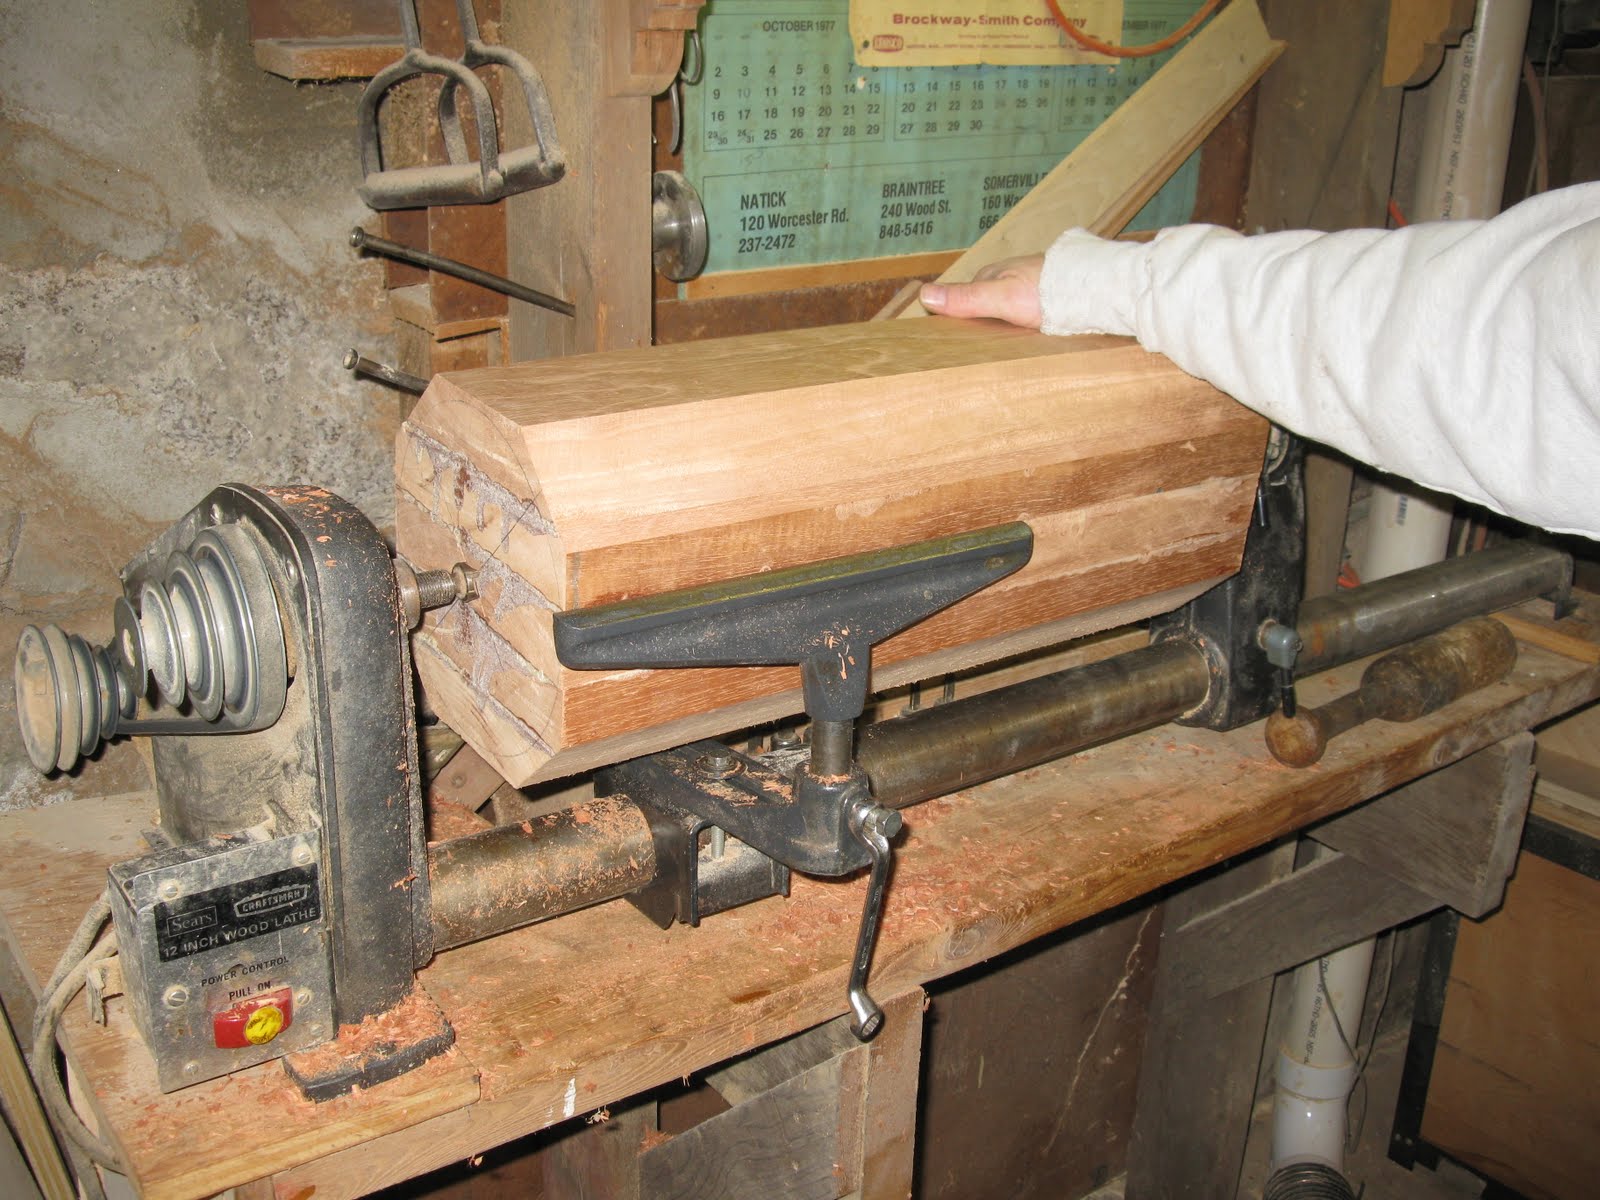
The block was roughed into a round shape. It’s important to get the shape round and to try to keep the piece balanced in the lathe. Bill worked back back and forth as he continued to remove material.
Some of the tools that were used: included a 3/4″ Roughing Gouge, 1/4″ Spindle Gouge, 1/2″ Spindle Gouge, 3/8″ Bowl Gouge, 3/4″ Skew, 1/4″ Diamond Parting Tool, 1/2″ Round Nose Scraper, and 1″ Square End Scraper.
Many of these tools were very old and had been refurbished by Bill. He also added new oak handmade handles. I had fun playing with these old tools ~ nothing beats the feel of the old fashioned steel!
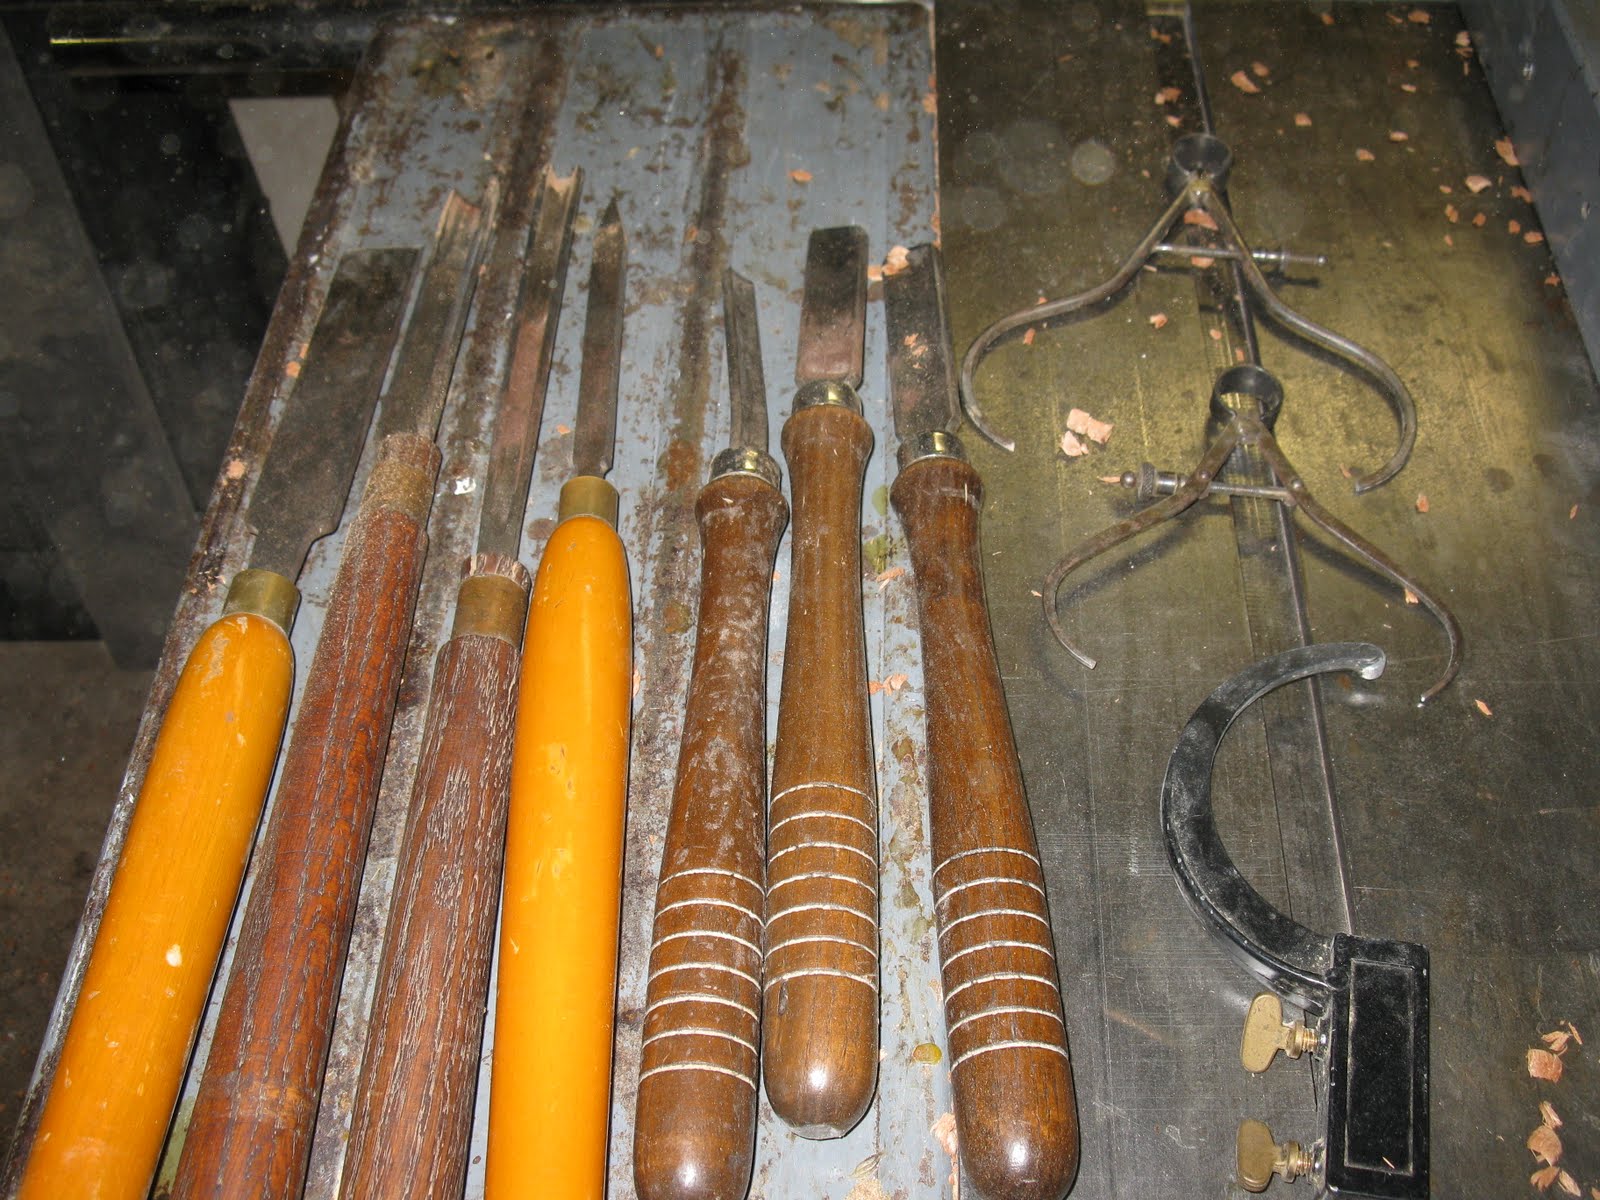
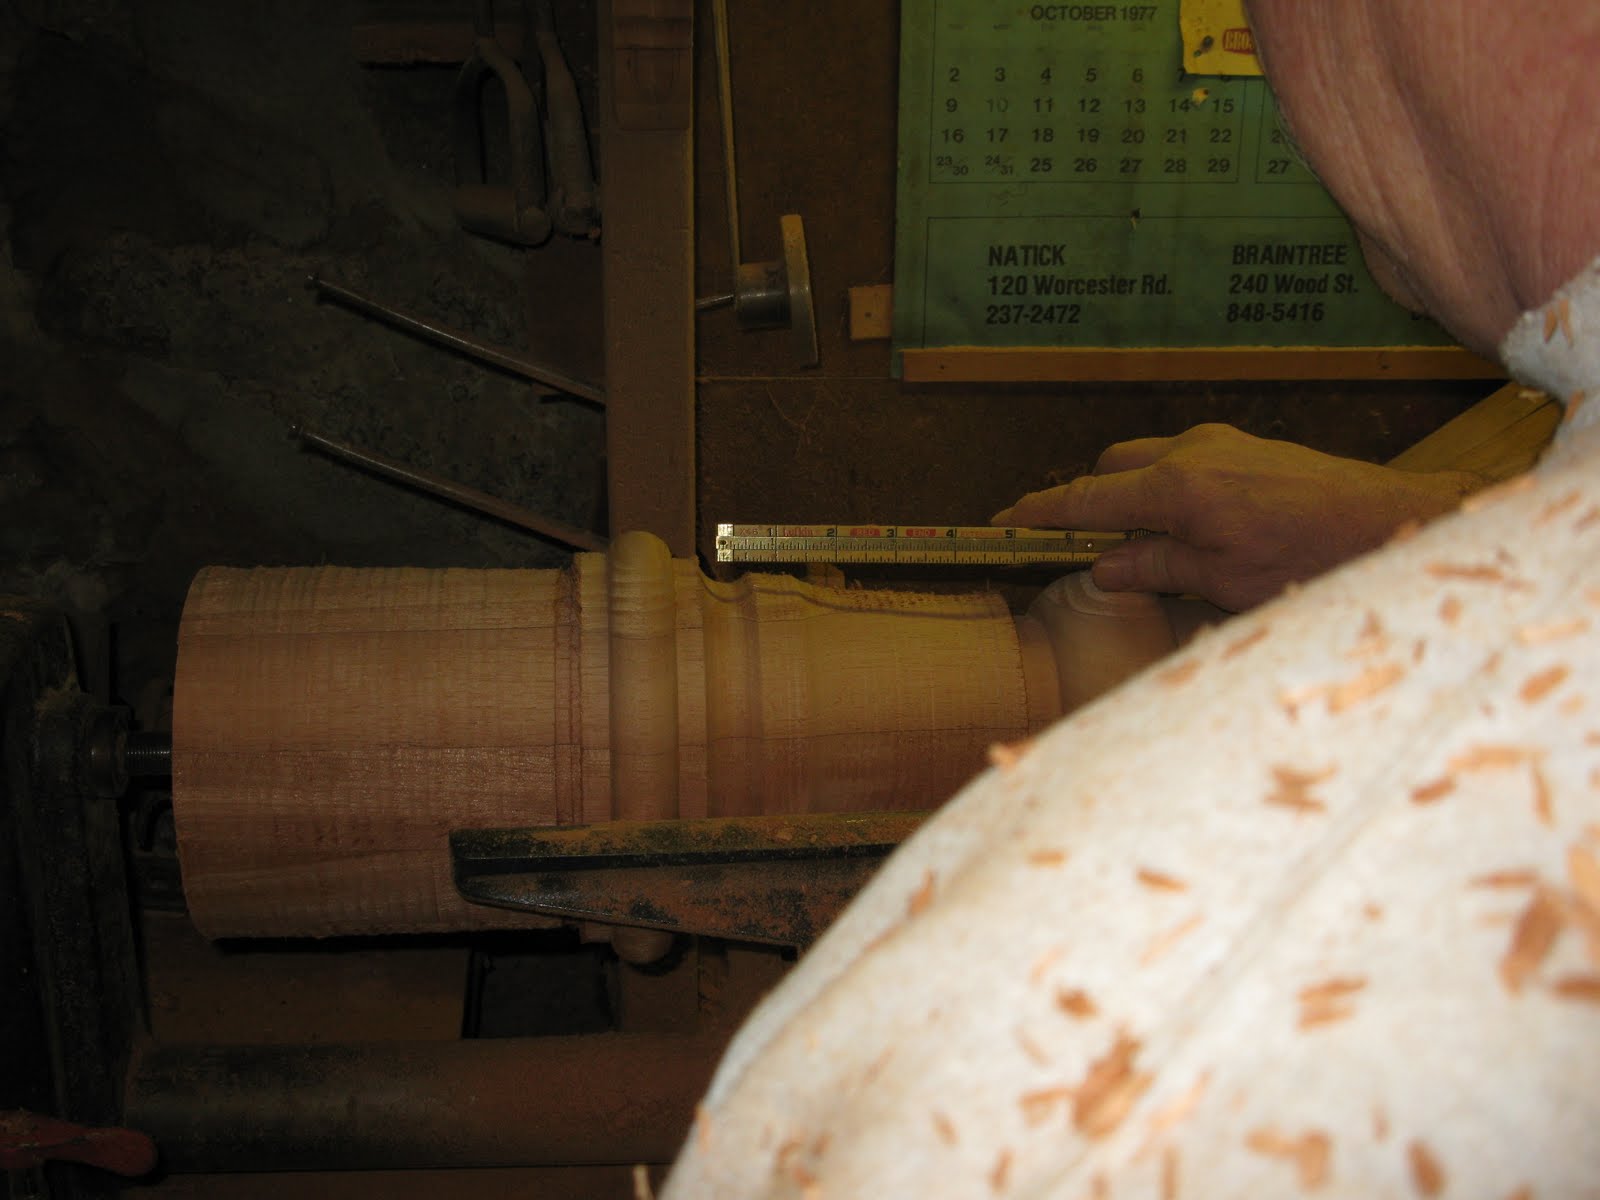
The calipers helped us duplicate the turnings.
Bill roughing the block with a gouge tool.
Bill carving and using the calipers to ensure we make the turning the same size. This is where the block was laid out for each detail and brought down to individual shapes.
A little early but still your able to get the picture.
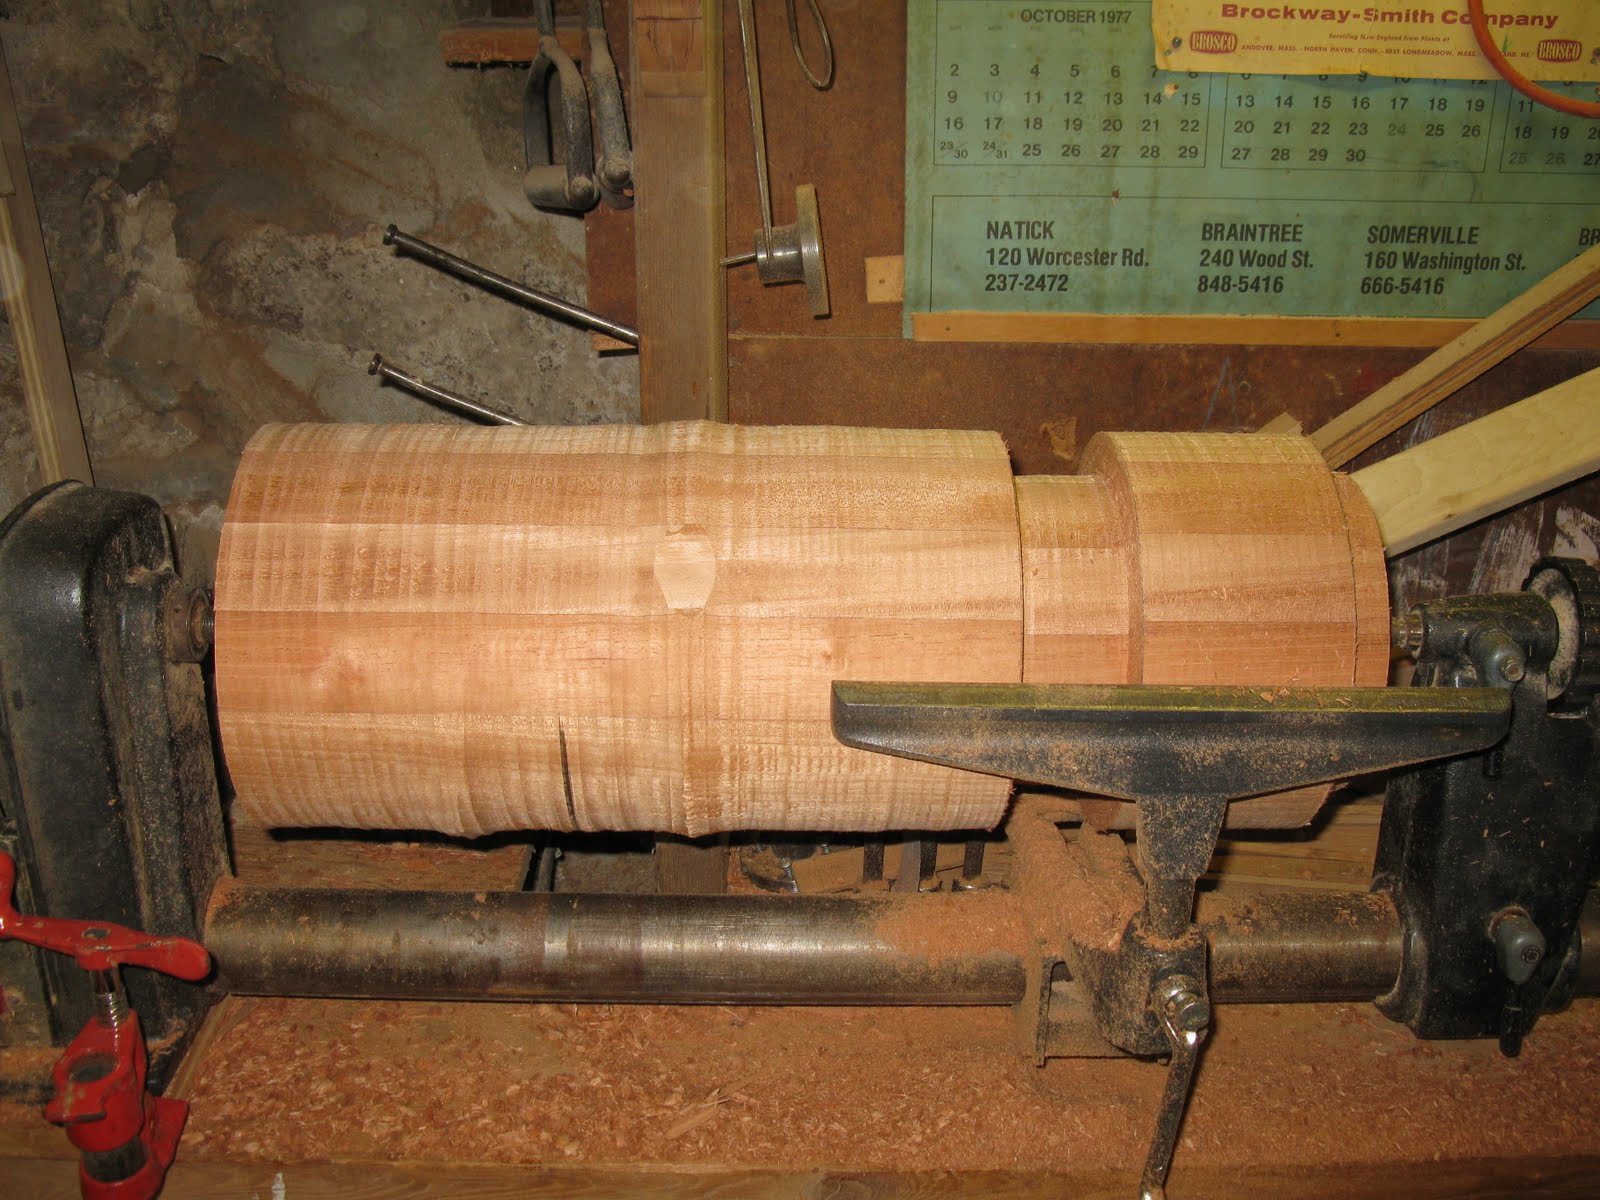
The block is roughed down to it’s approximate size before turning the specific details.
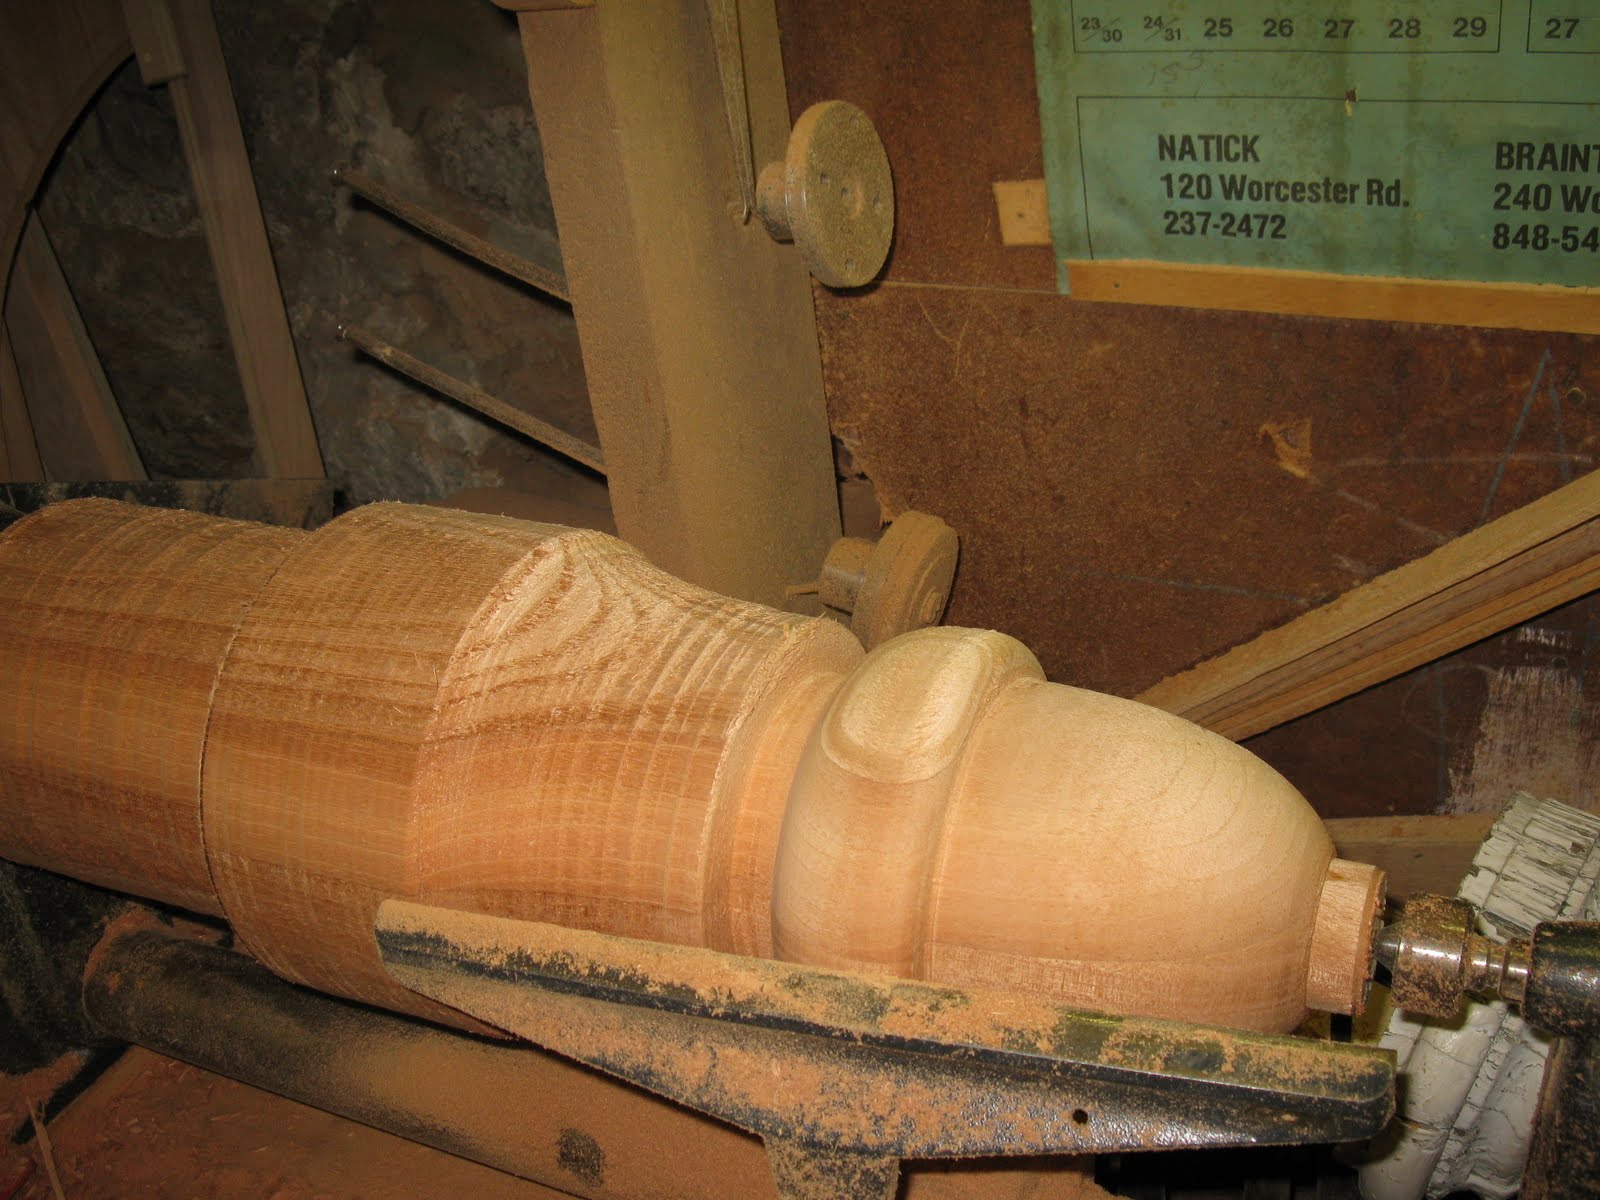
The acorn finial top starts to take shape.
Checking the layout.
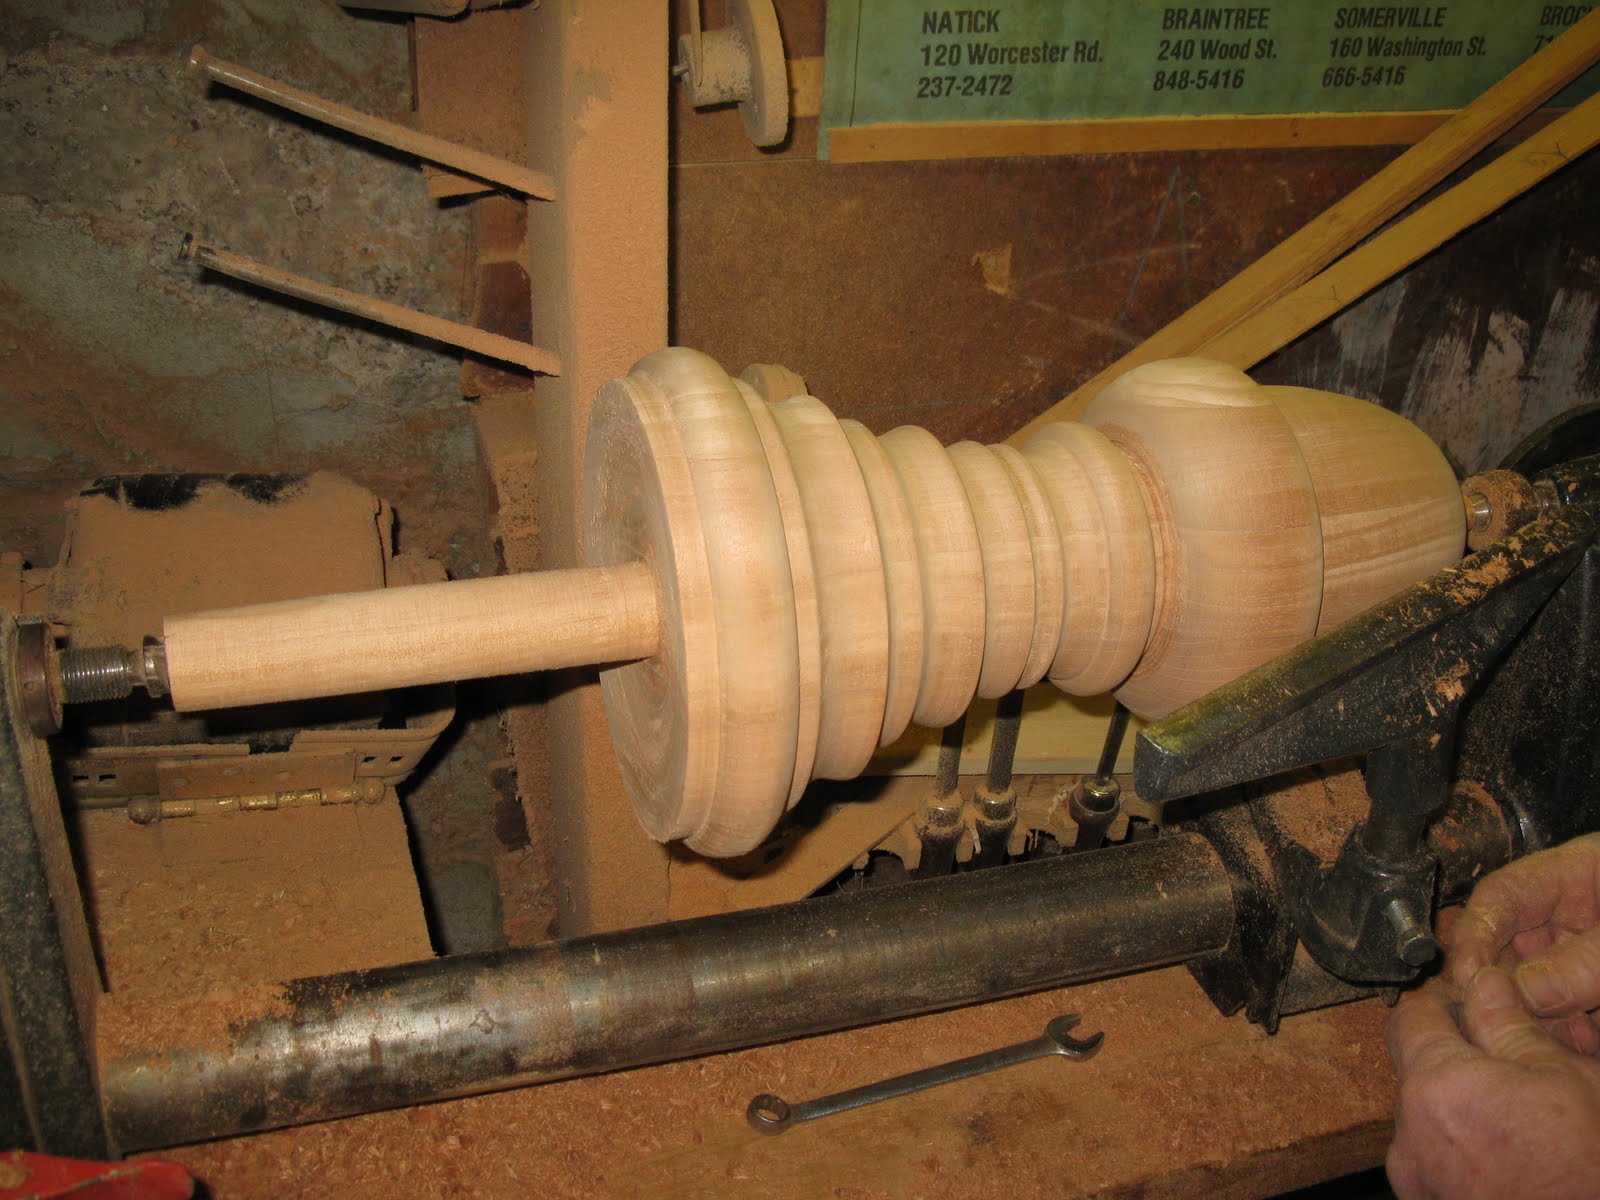
The turning is really starting to take shape.
The acorn shaped. It was sanded right in the lathe ~ which is easier than on the bench top. Later when we were finished turning I used a hand saw to cut off the tip of the acorn and then sanded it smooth.
The dowel, on the left, was the last thing to be turned.
Done!
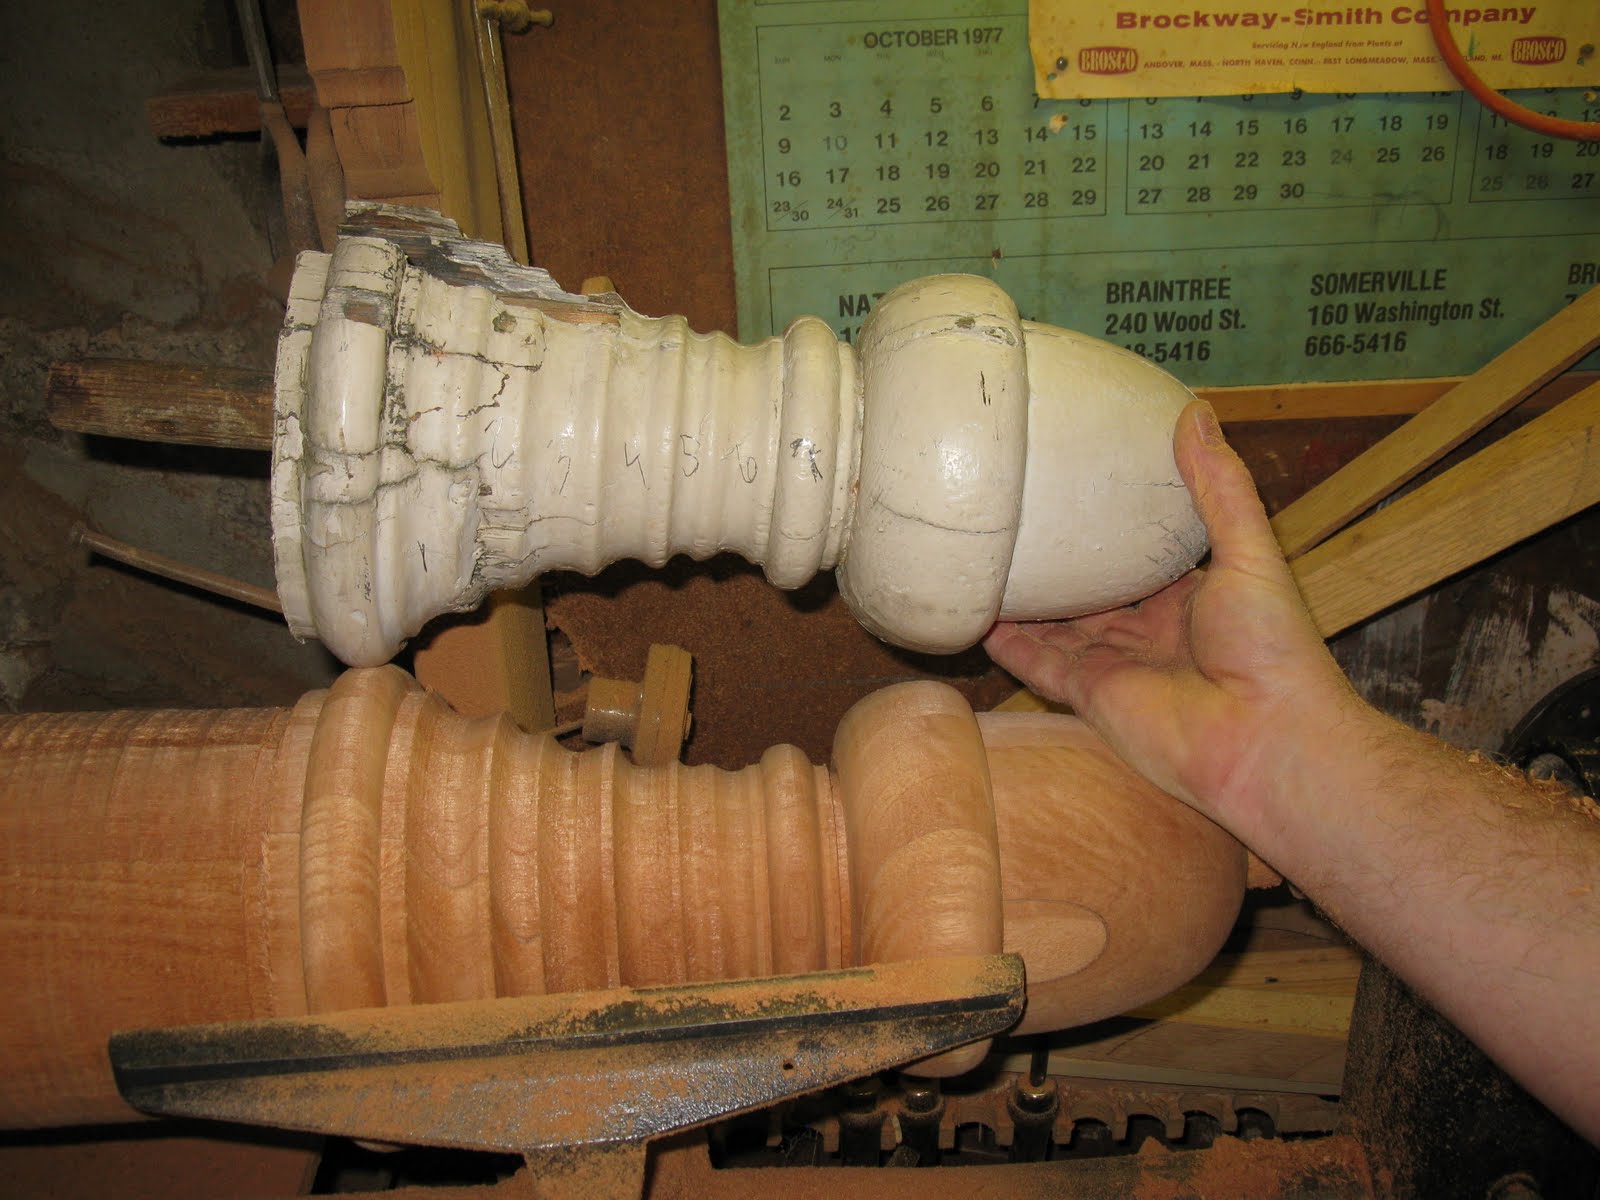
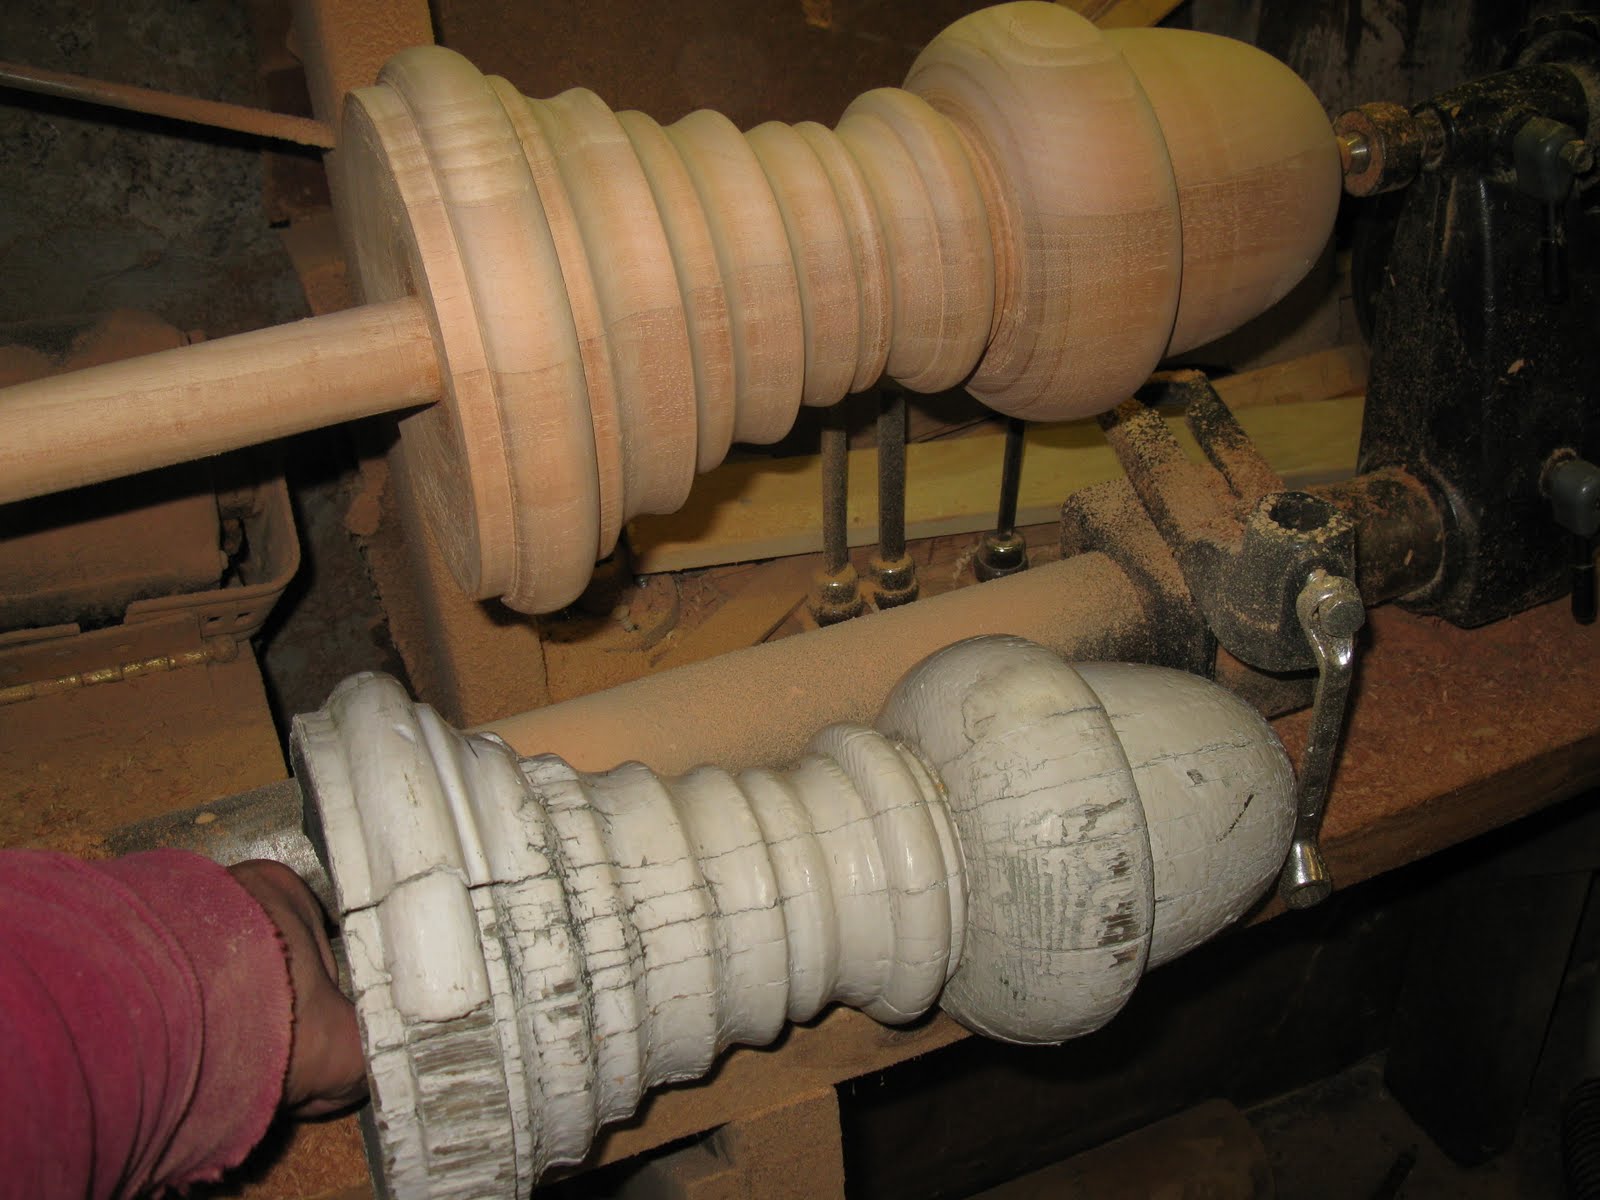
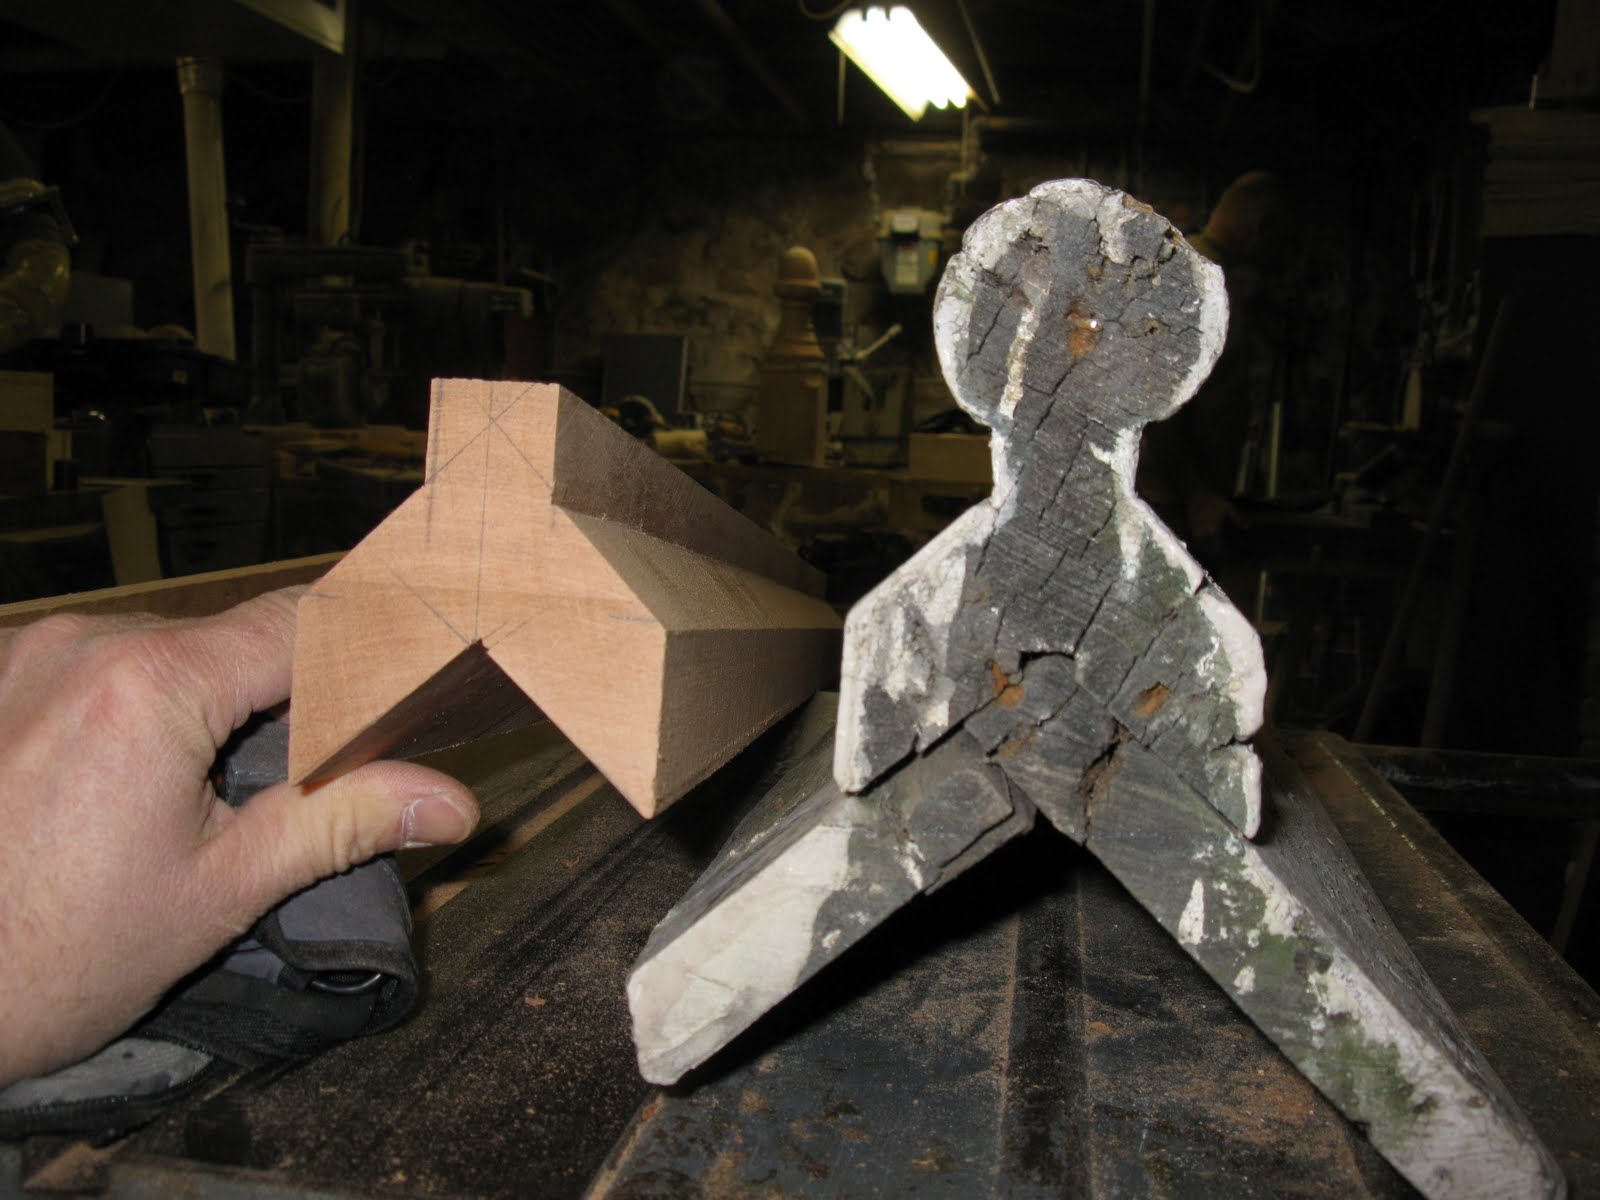
New acorn finial next to the old.
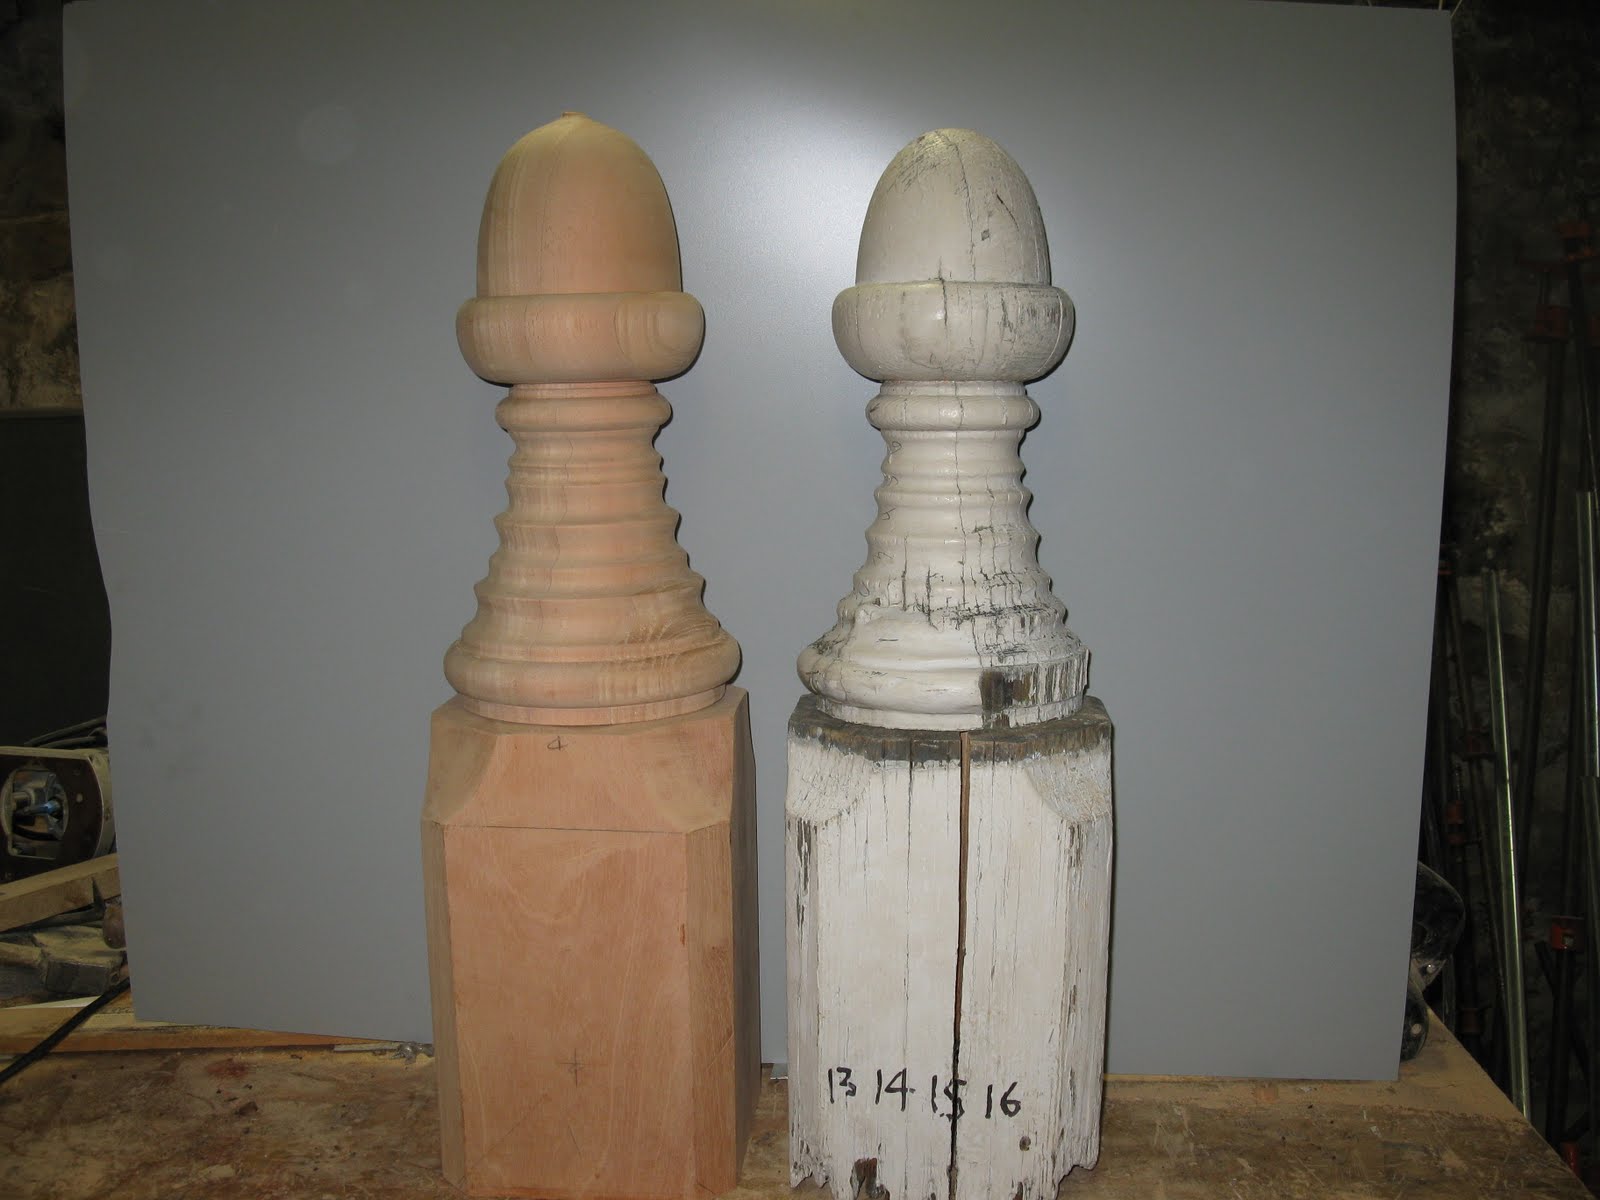
New and old. In the next post I will detail the work performed on the finial tail and skirting.
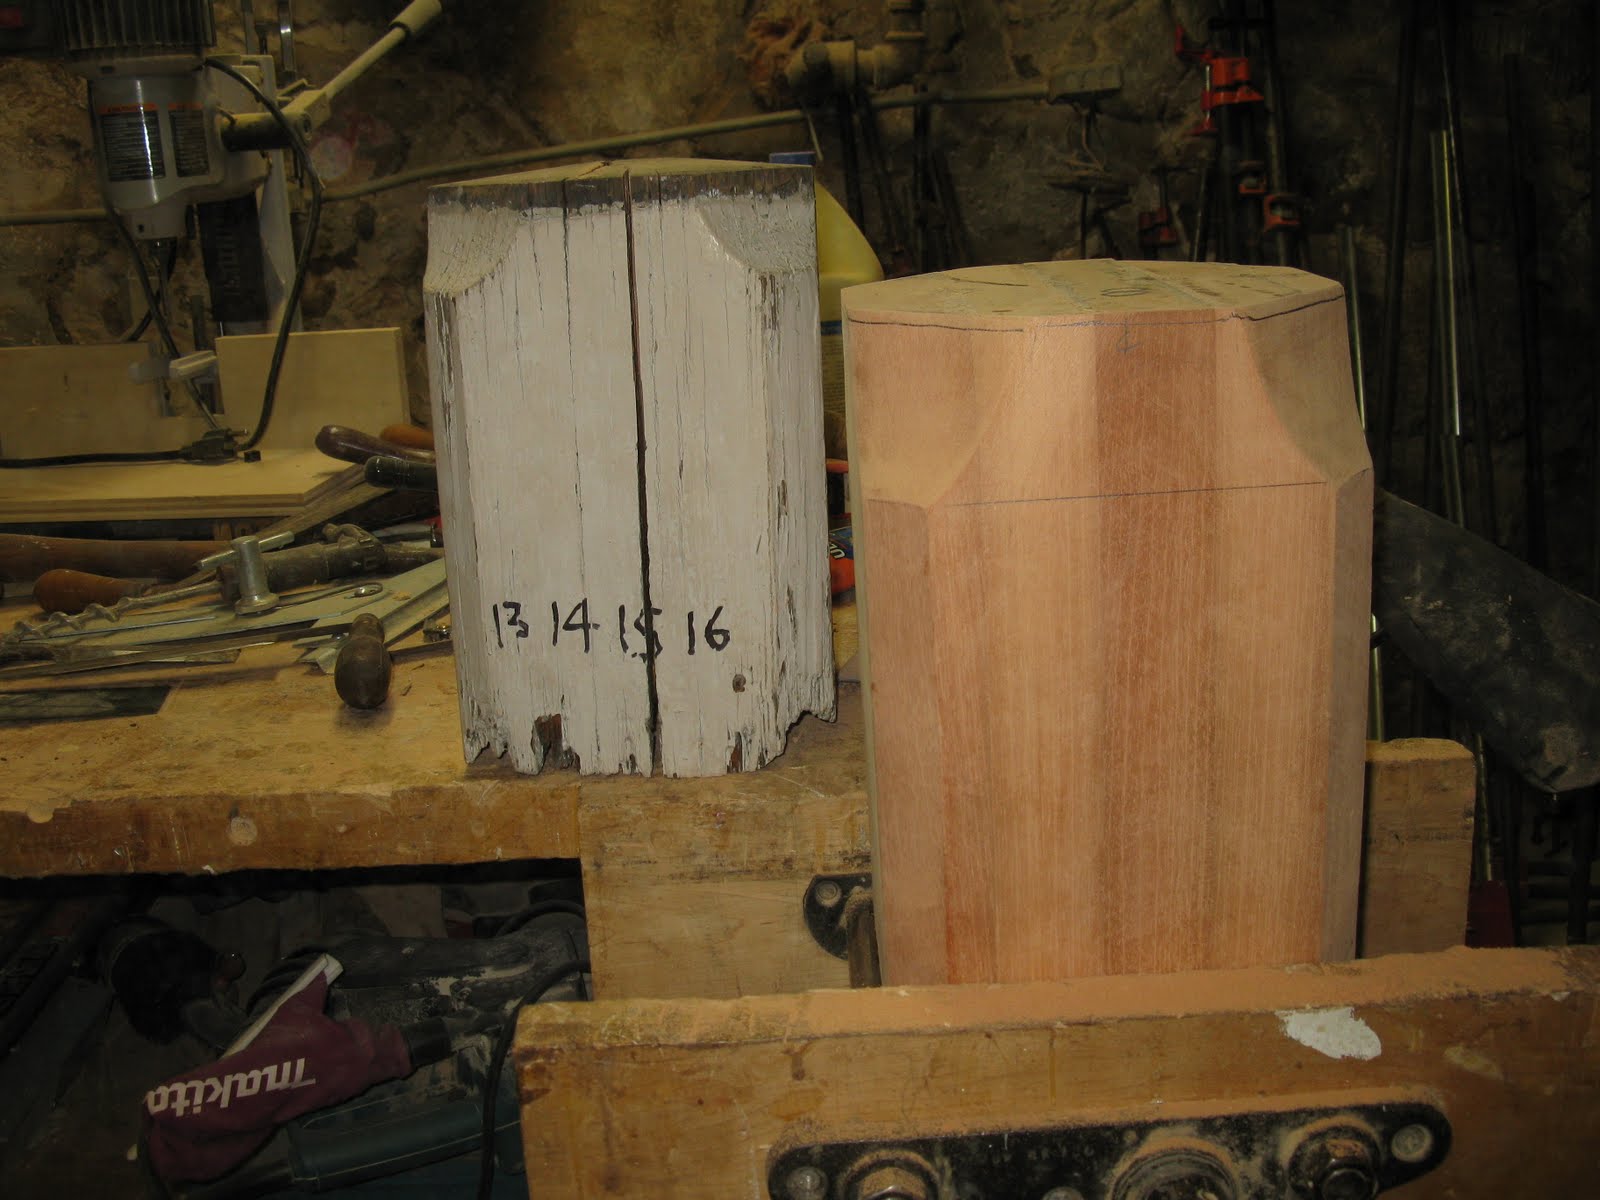
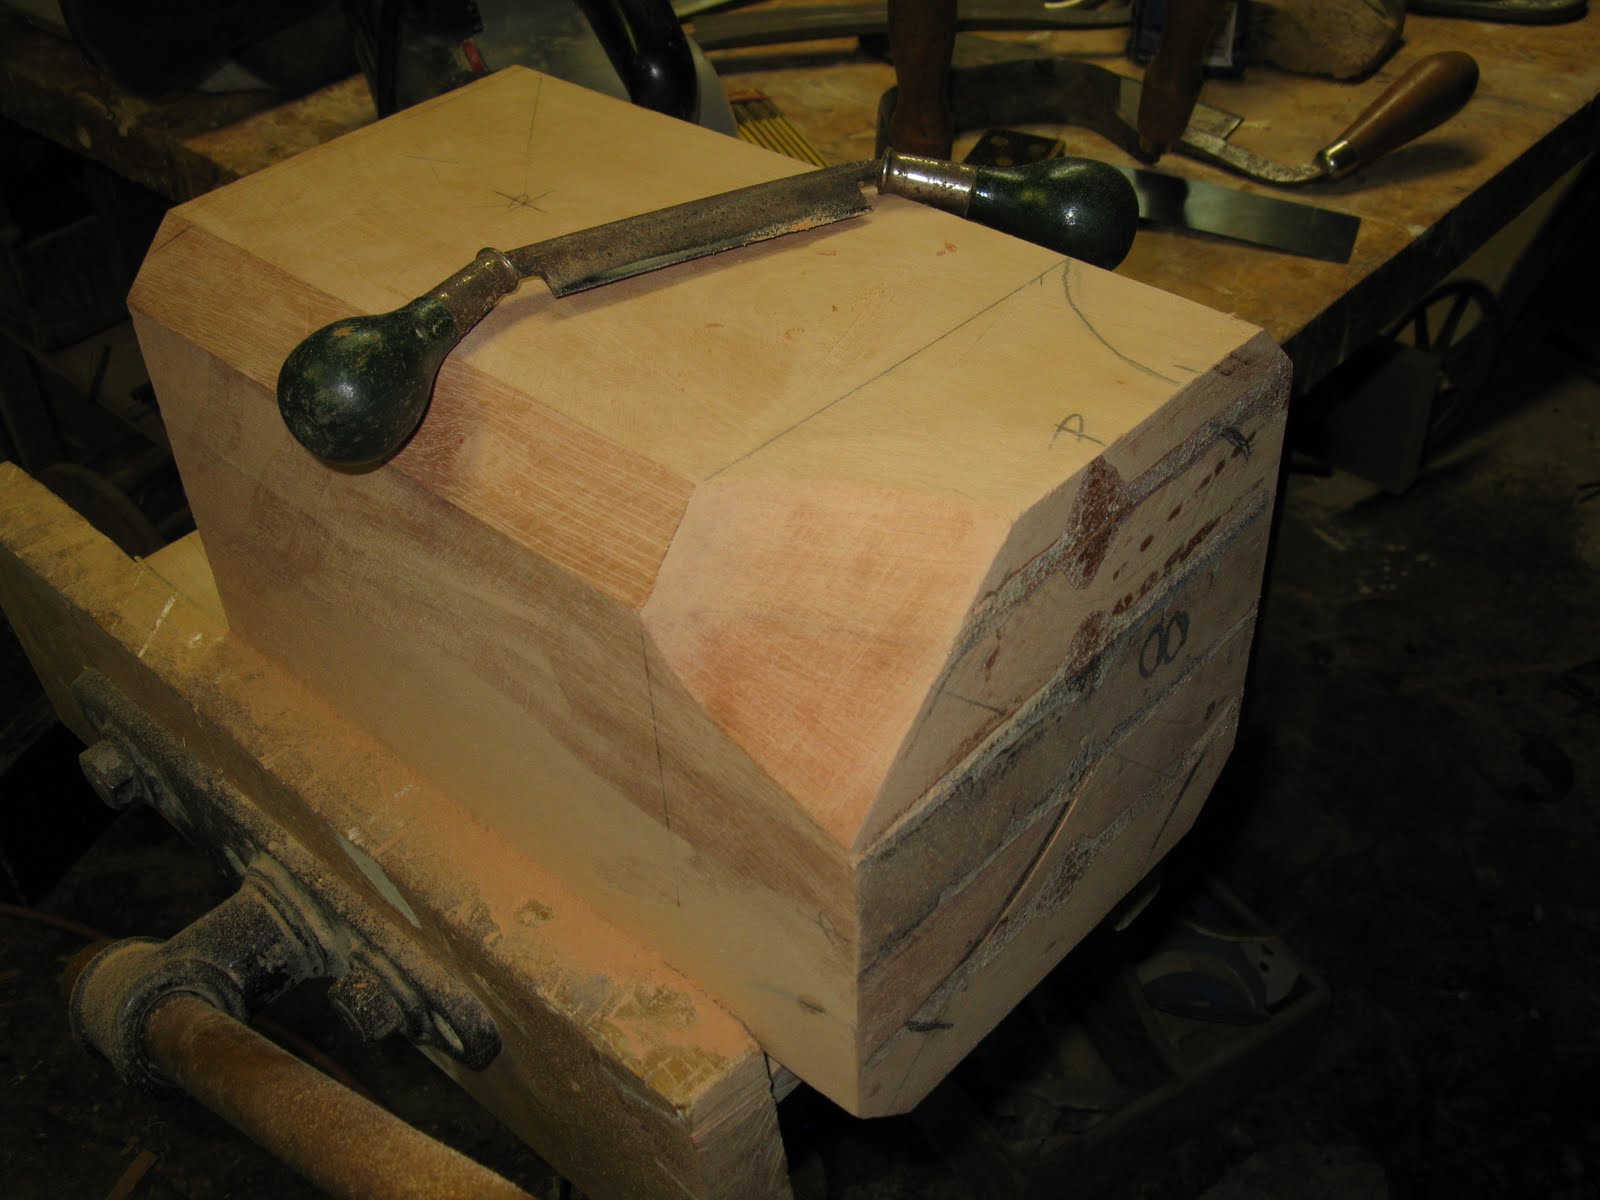
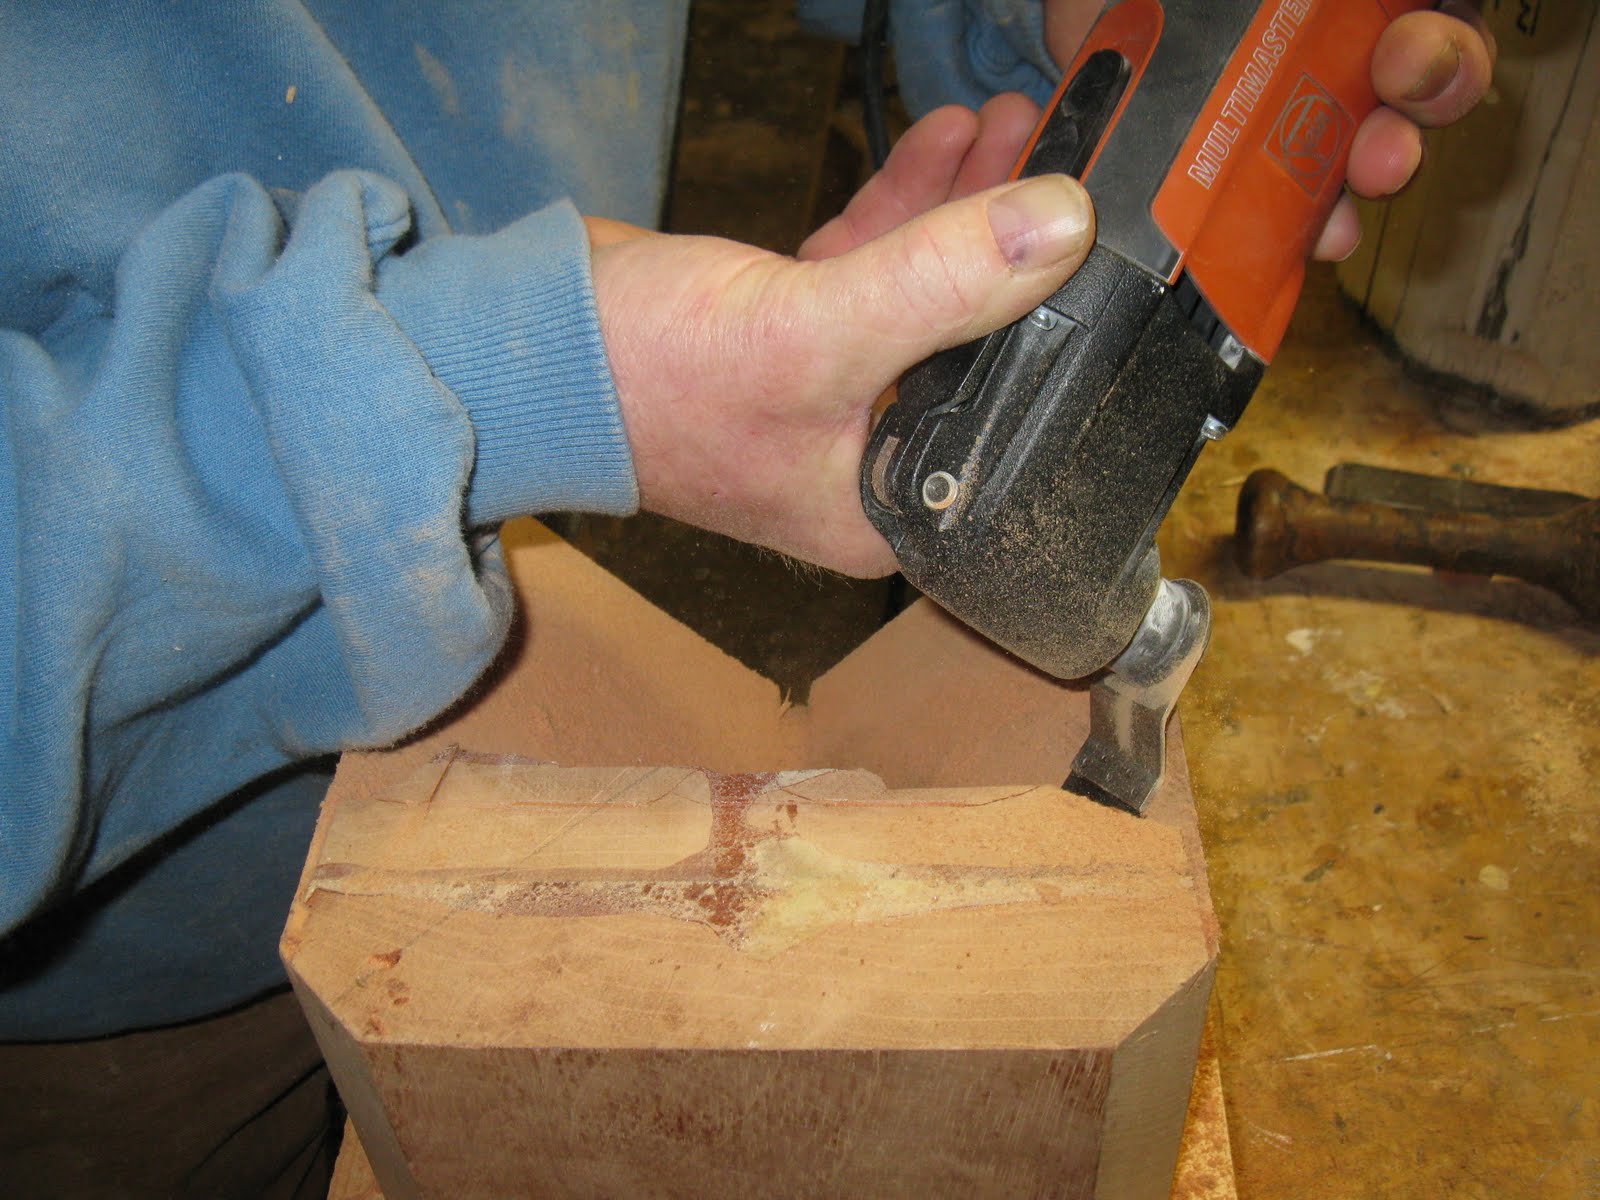
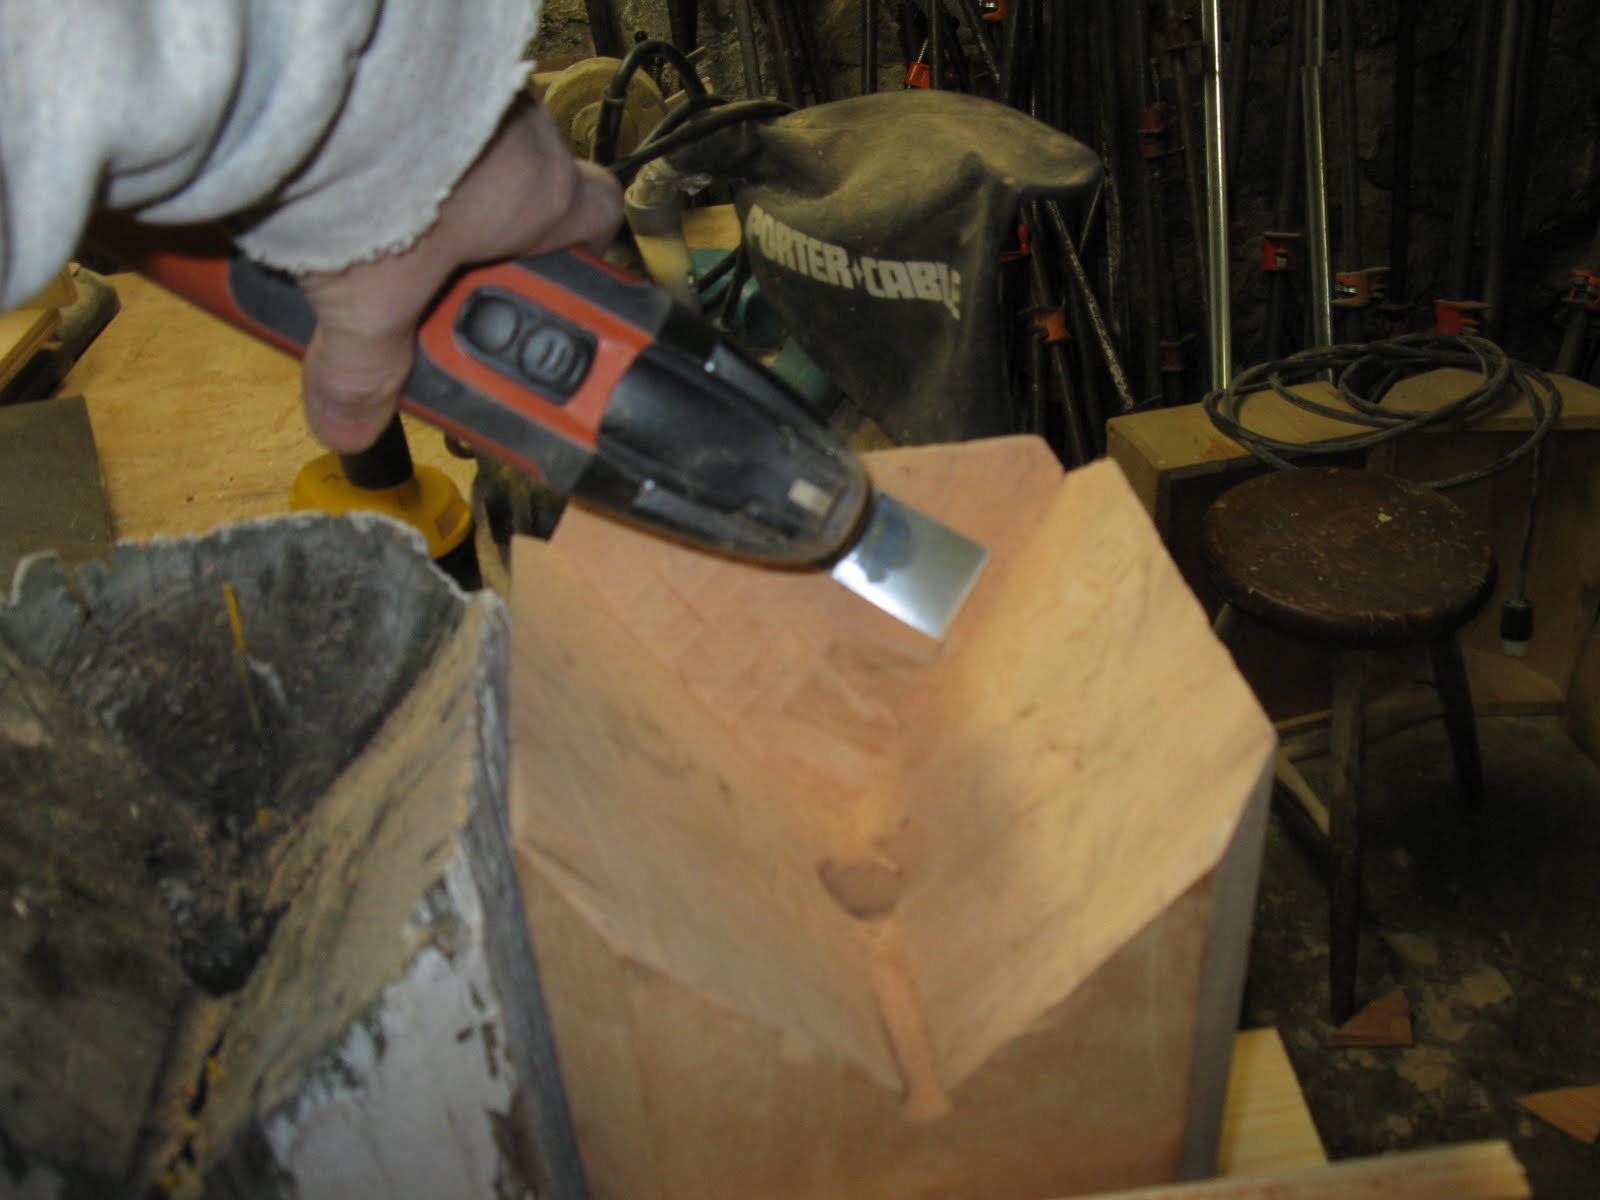
This chunk of Spanish Cedar was used to duplicate the acorn finial’s base. The base has a cut out that allows it to sit on top of the hip roof ridge.
In order to duplicate the block we decided it was best to hand carve the 4 curves.
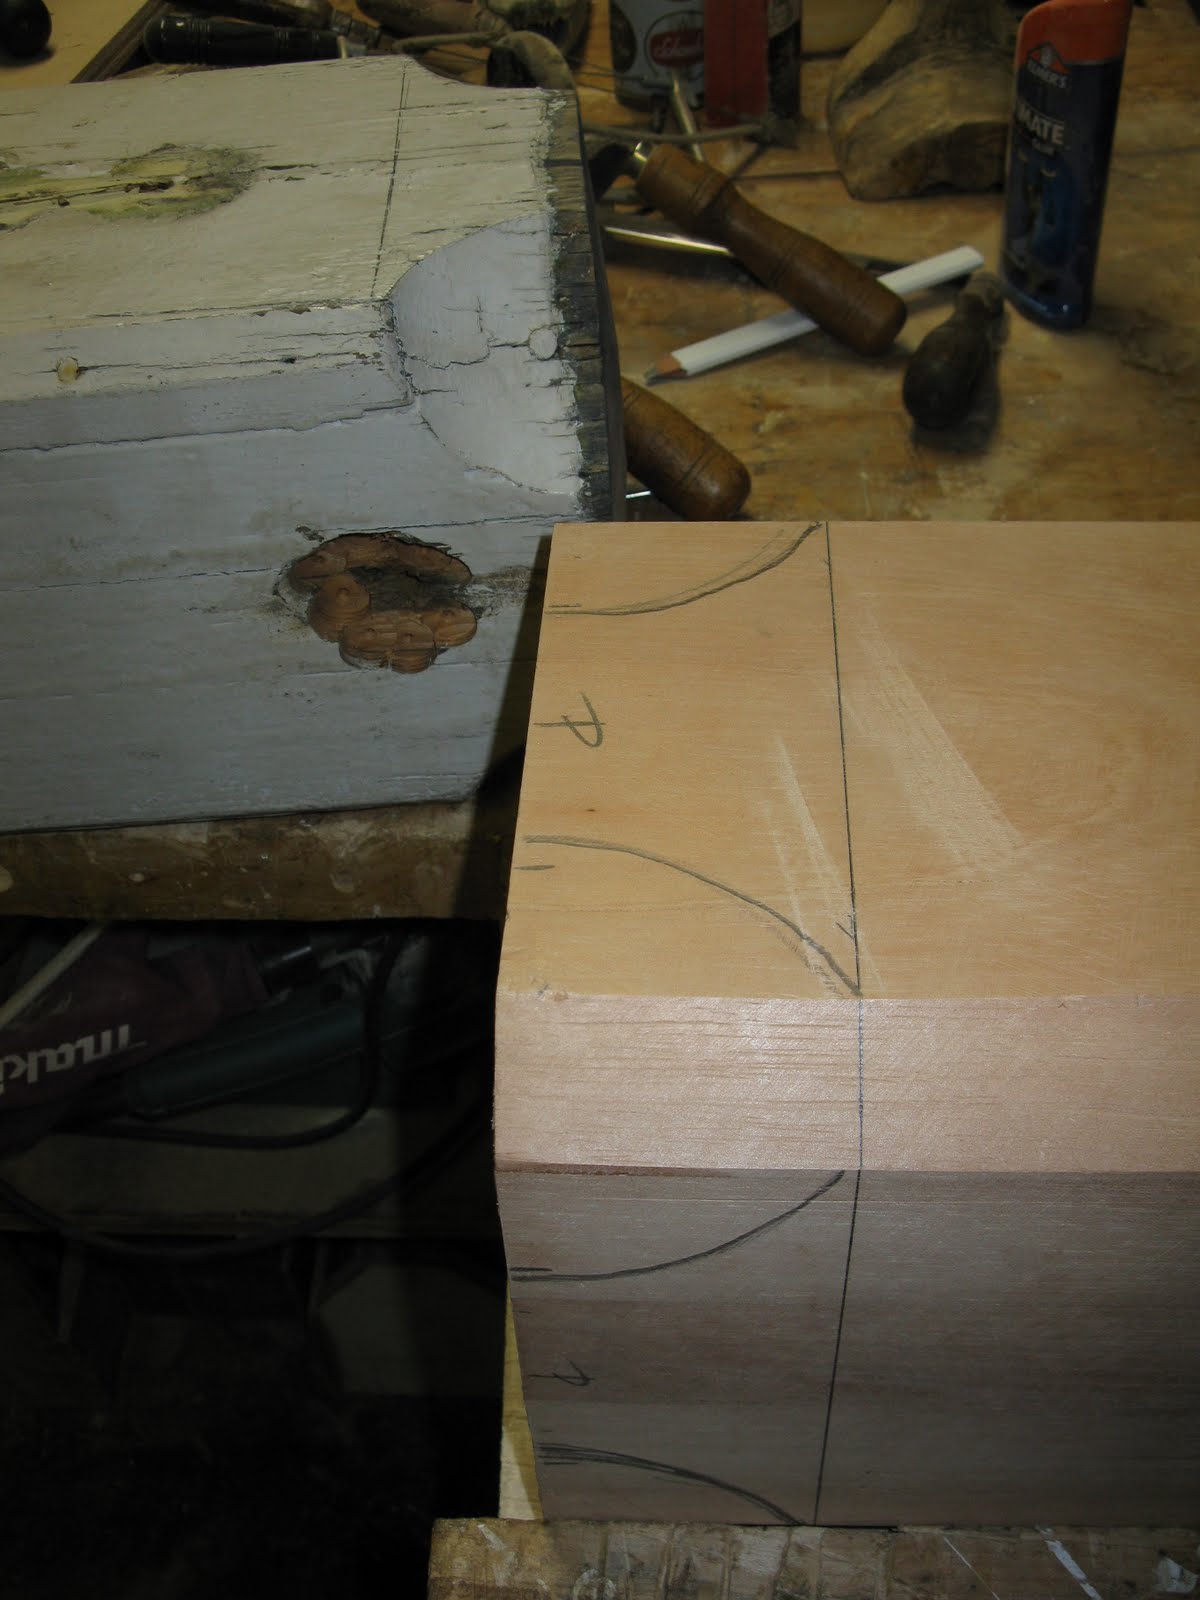
Lines duplicating the curves were carefully laid out.
1×5 Spanish Cedar boards fit under this tail to cover the scroll skirting.
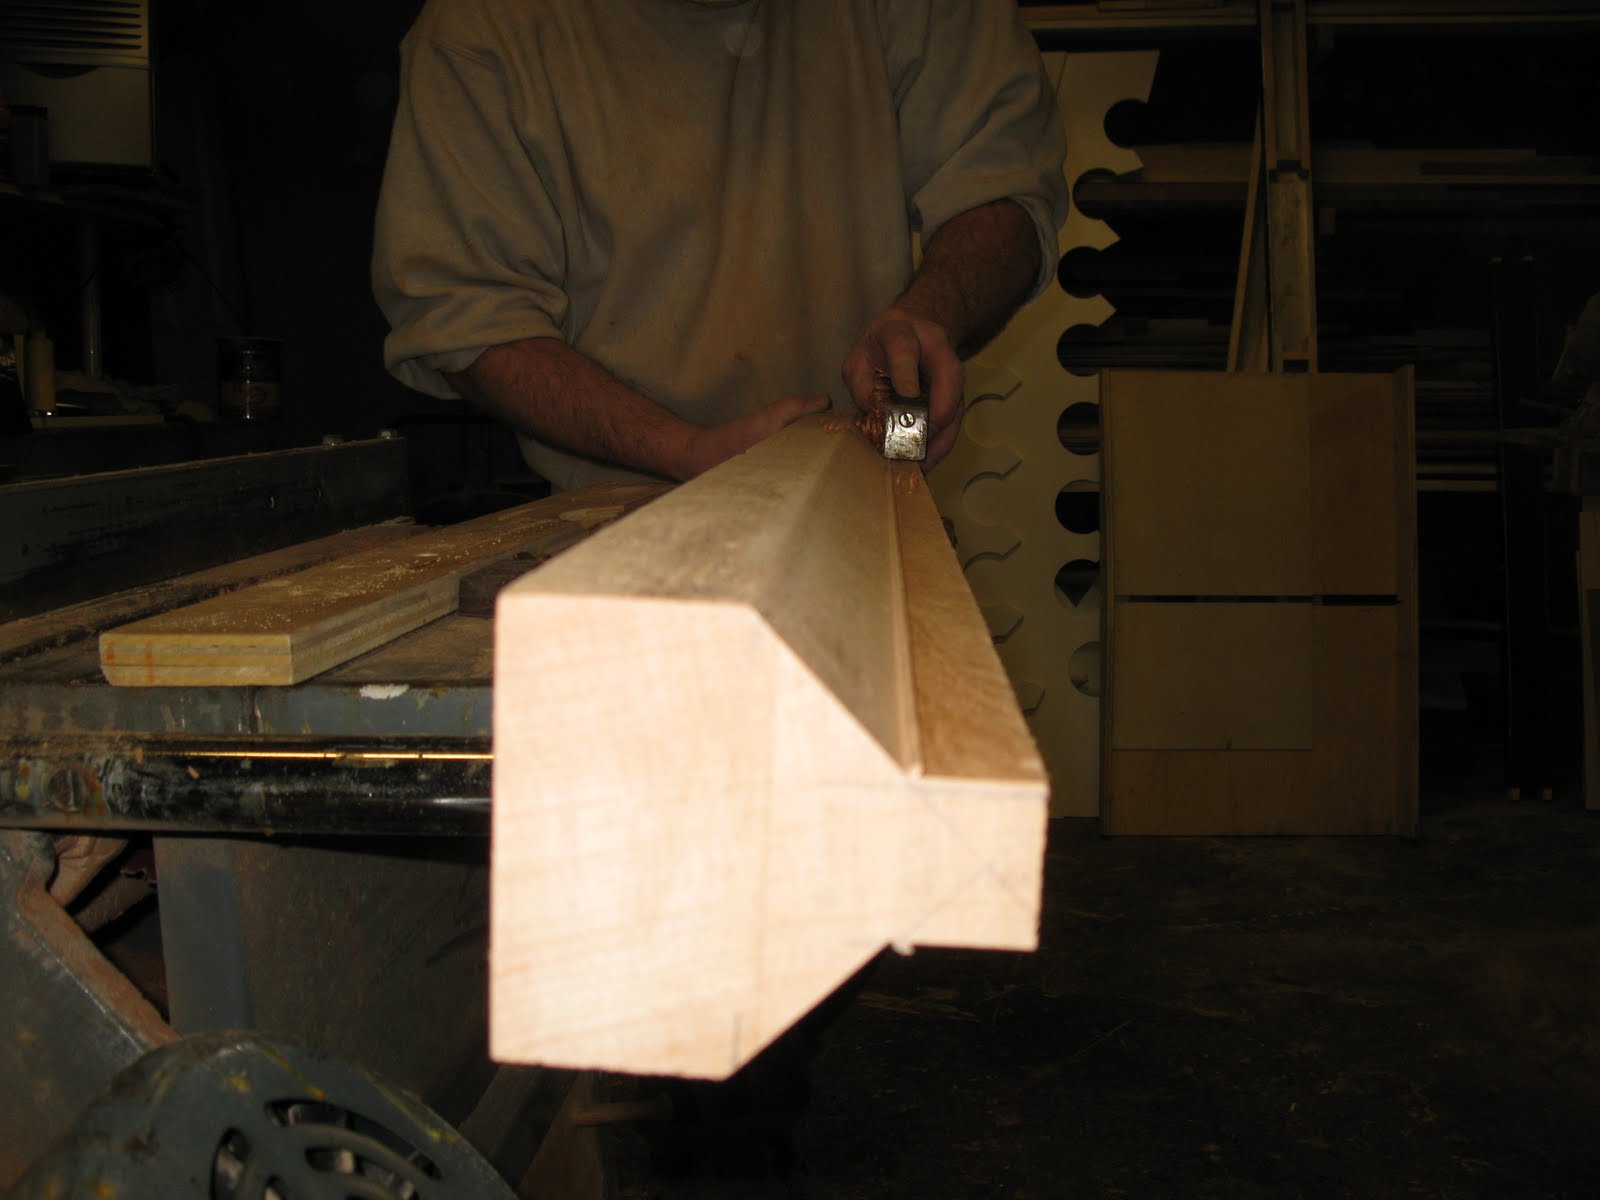
I’m using my new FEIN MultiMaster 250 Q to make the tricky hip roof cut out of the bottom of the finial base. This new tool made quick work of and easily cut back the material at the angle I needed.

The cut is angles on three sides.
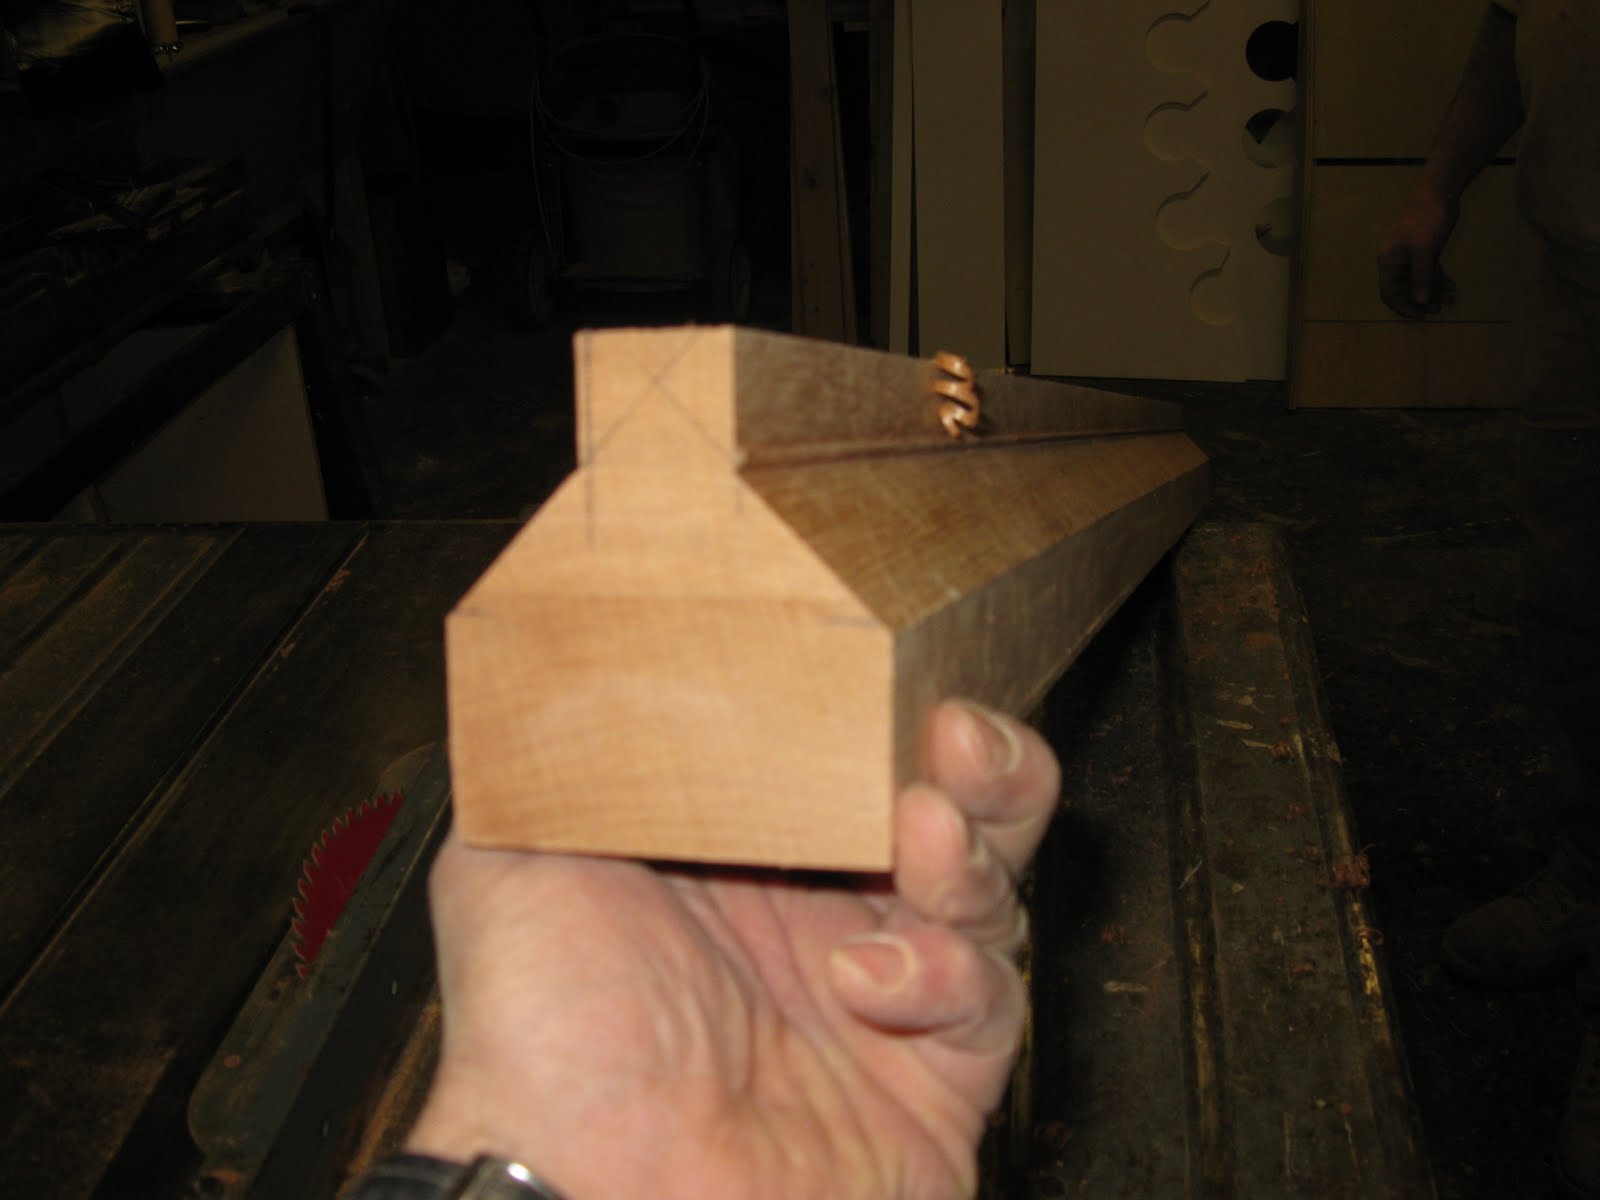
Just about finished. These angles mirror the slope of the homes roofs.
Mirror image!
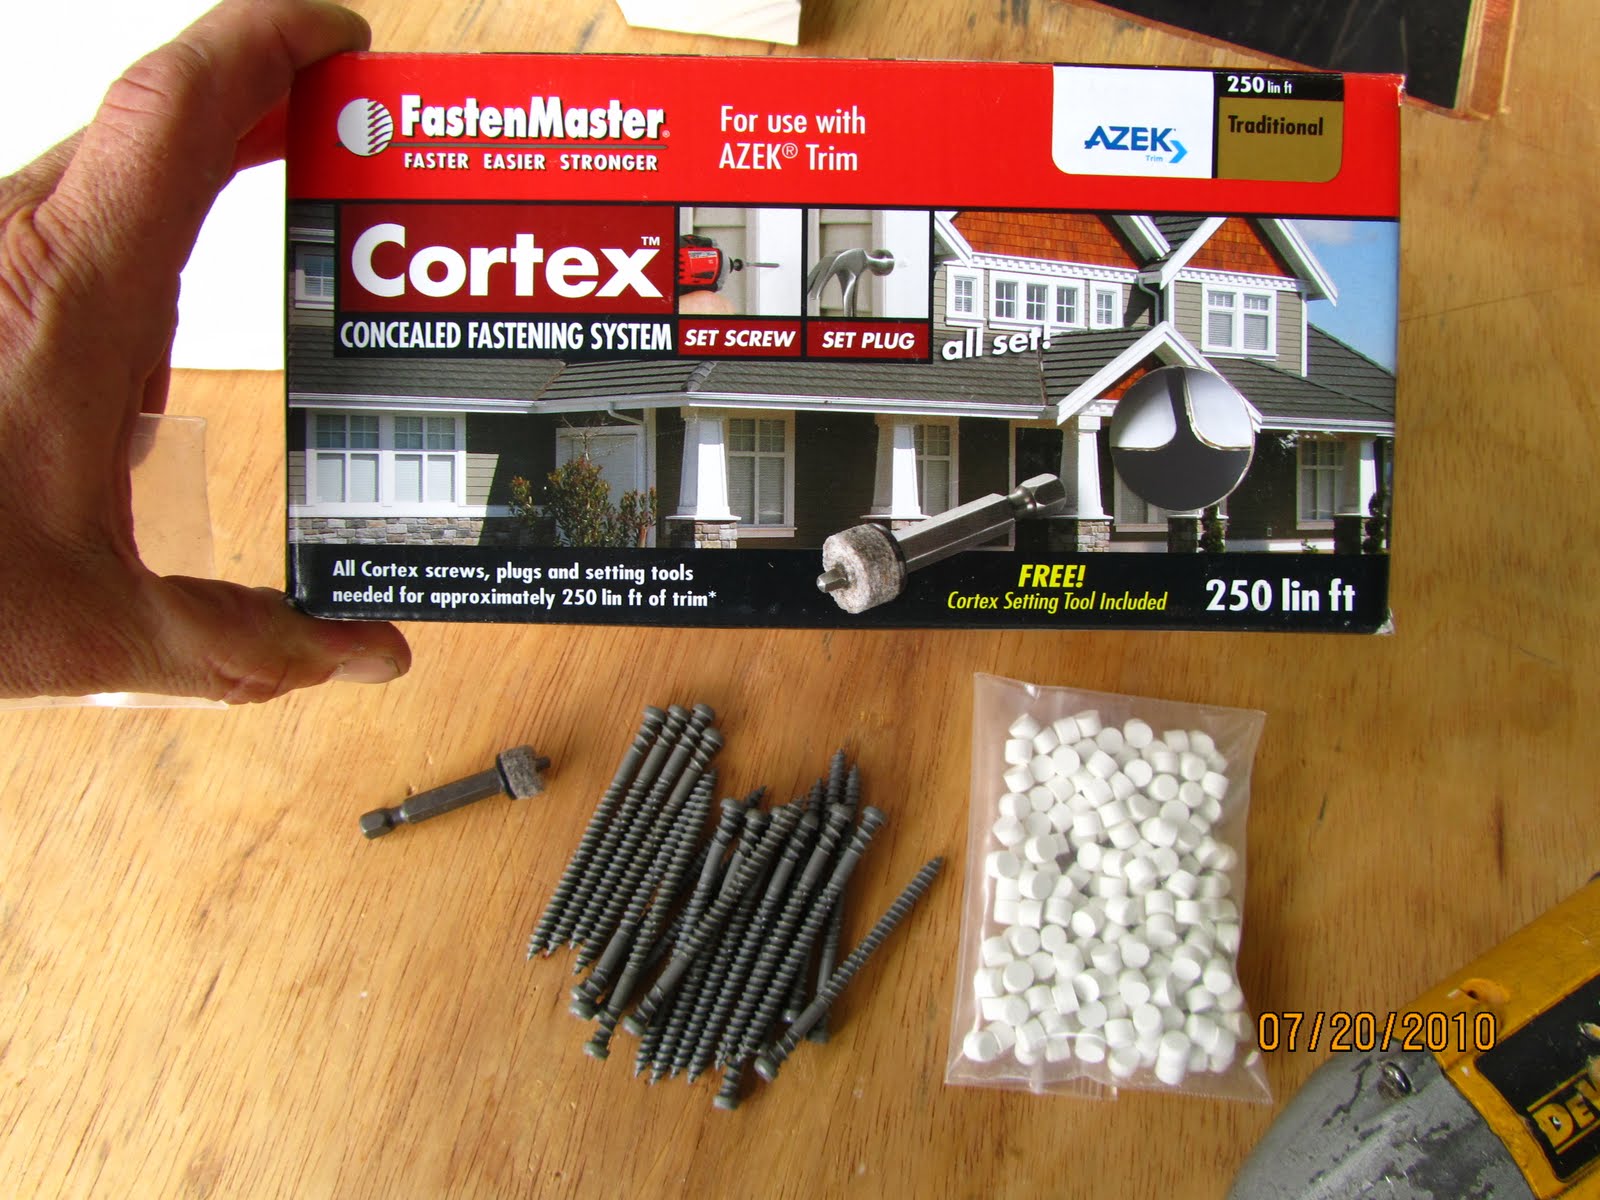
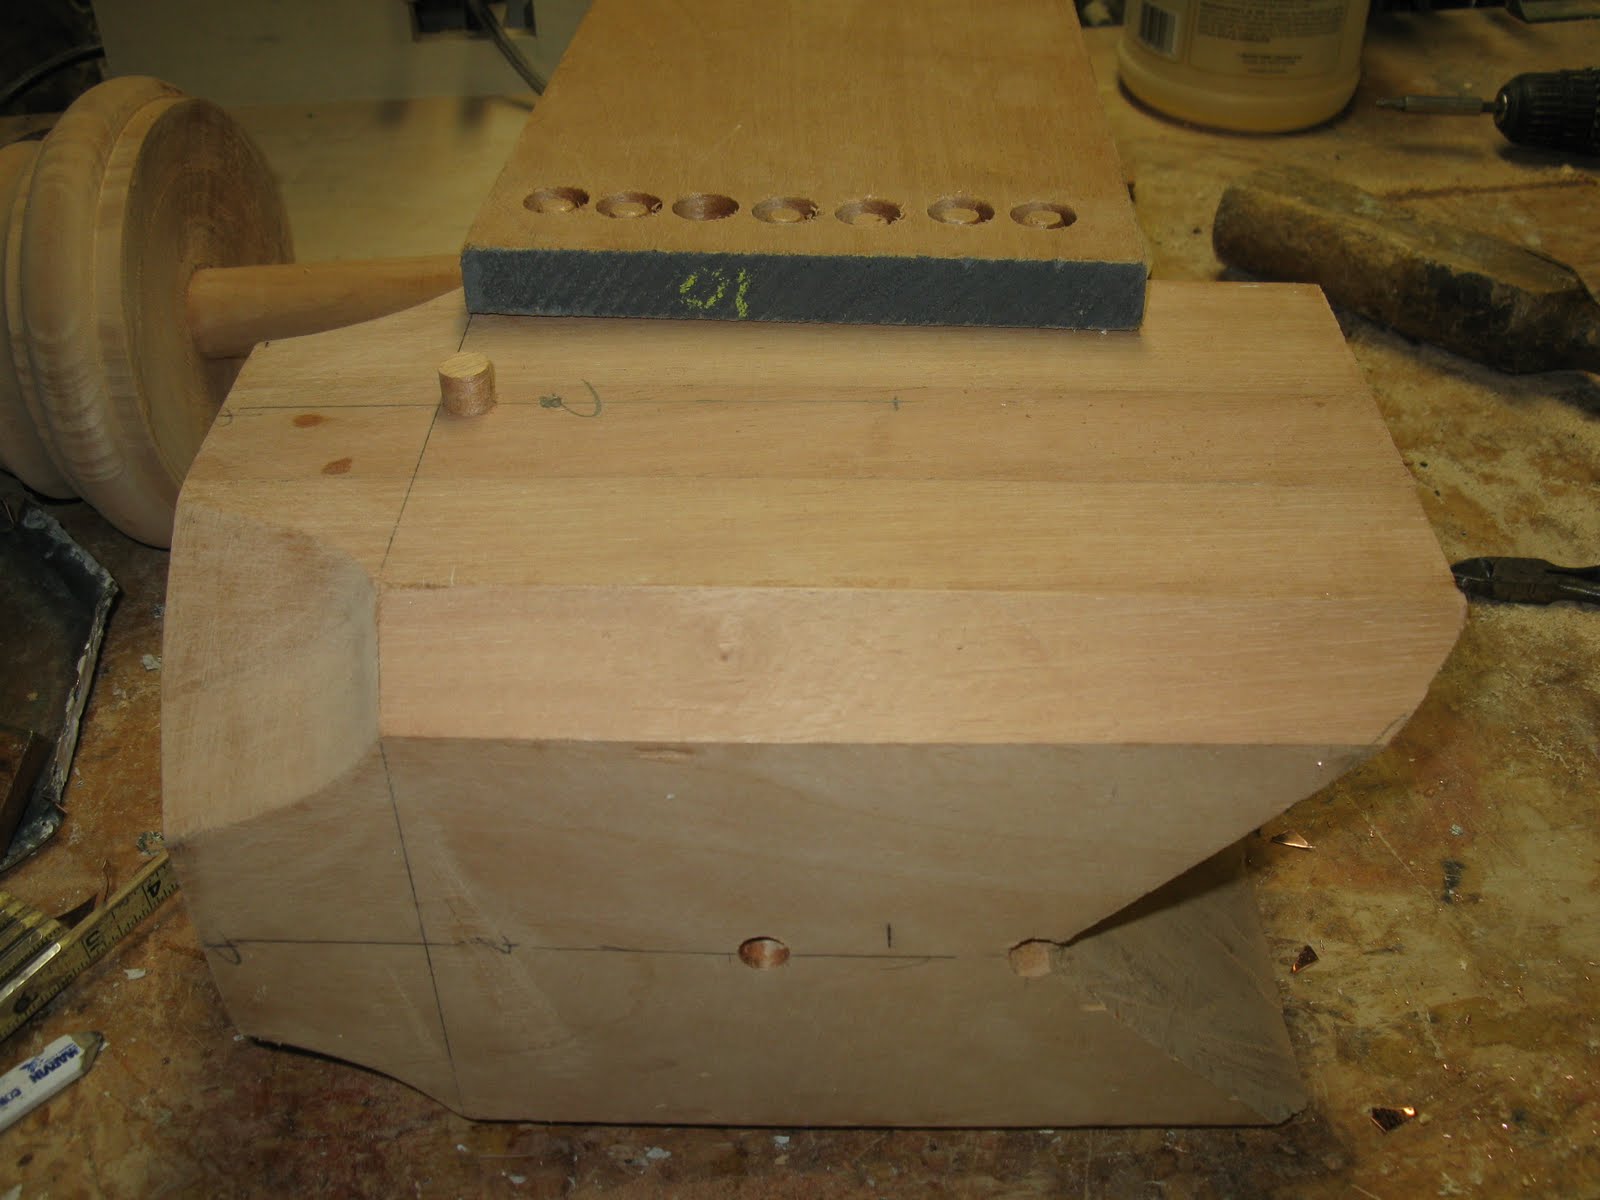
We plan on using a polyurethane glue to attach the finial into the base but it never hurts to a
mechanical fastener. I will probably add two 4″ screws through the base and into the finial ‘s dowel.
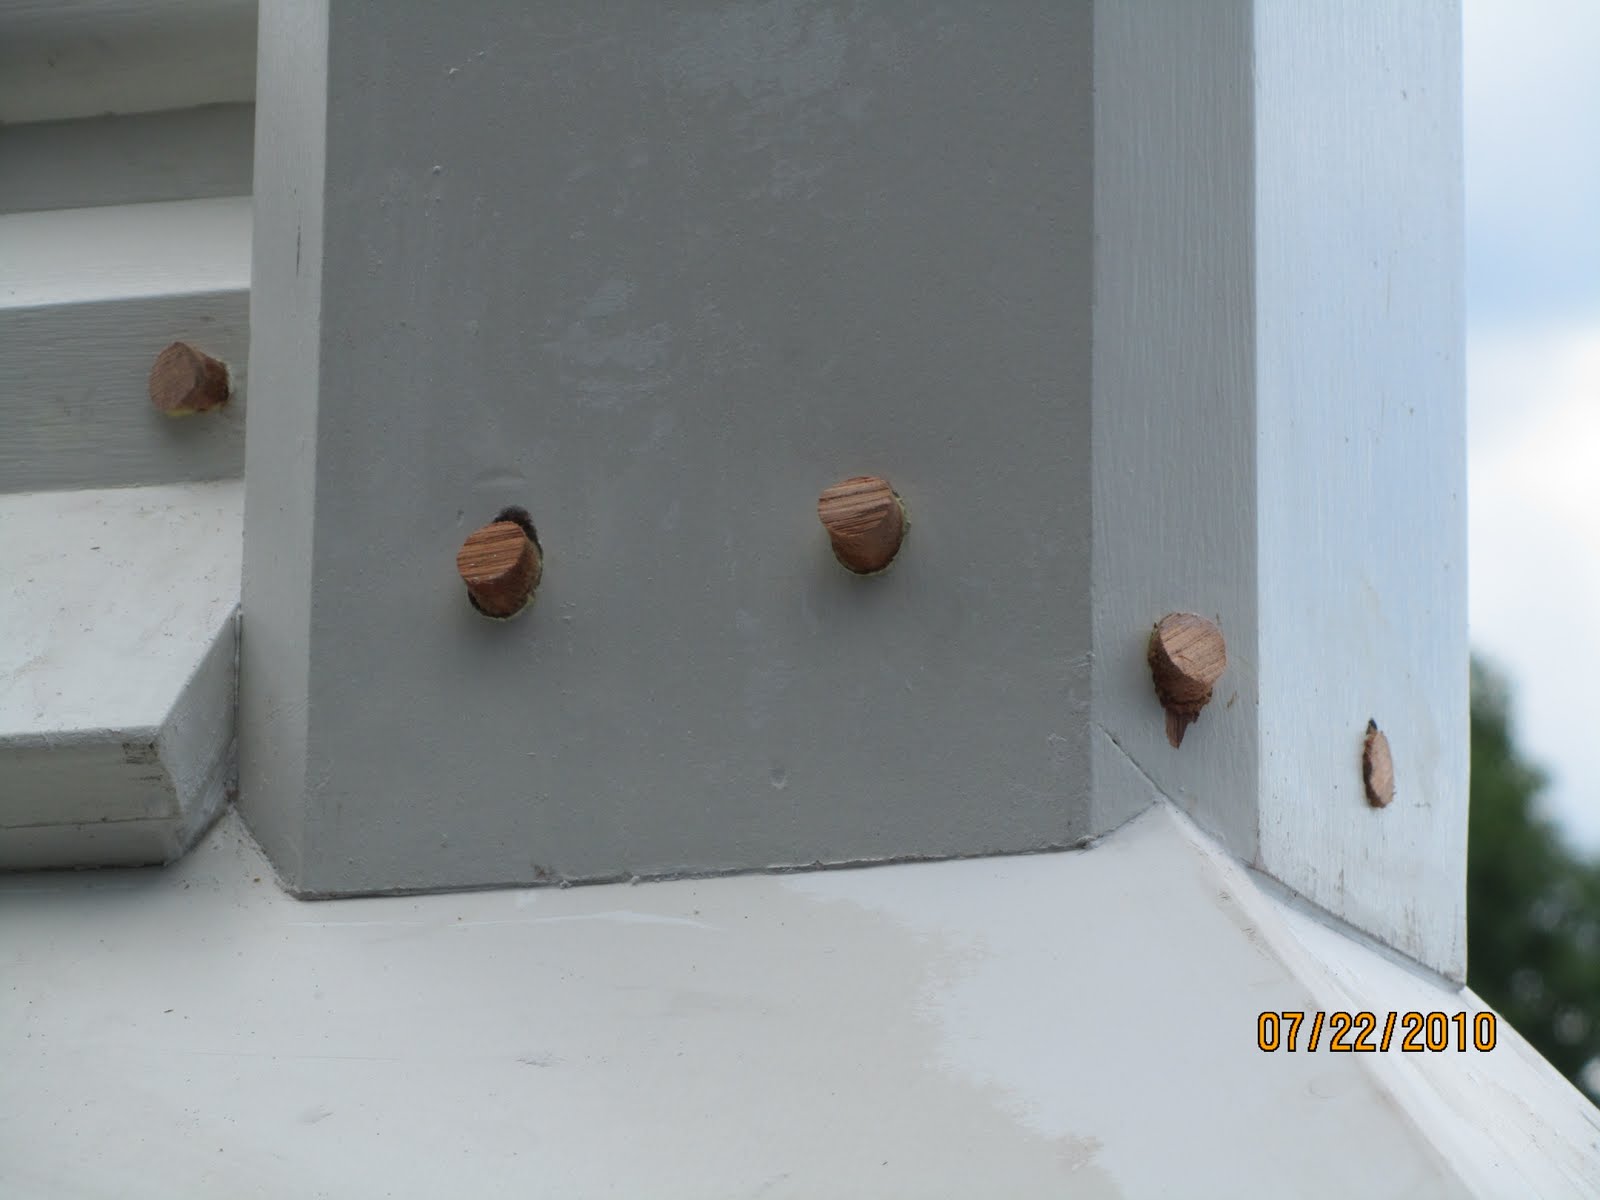
The plug below will hide the screw head, be cut flushed, sanded and disappear after painting.
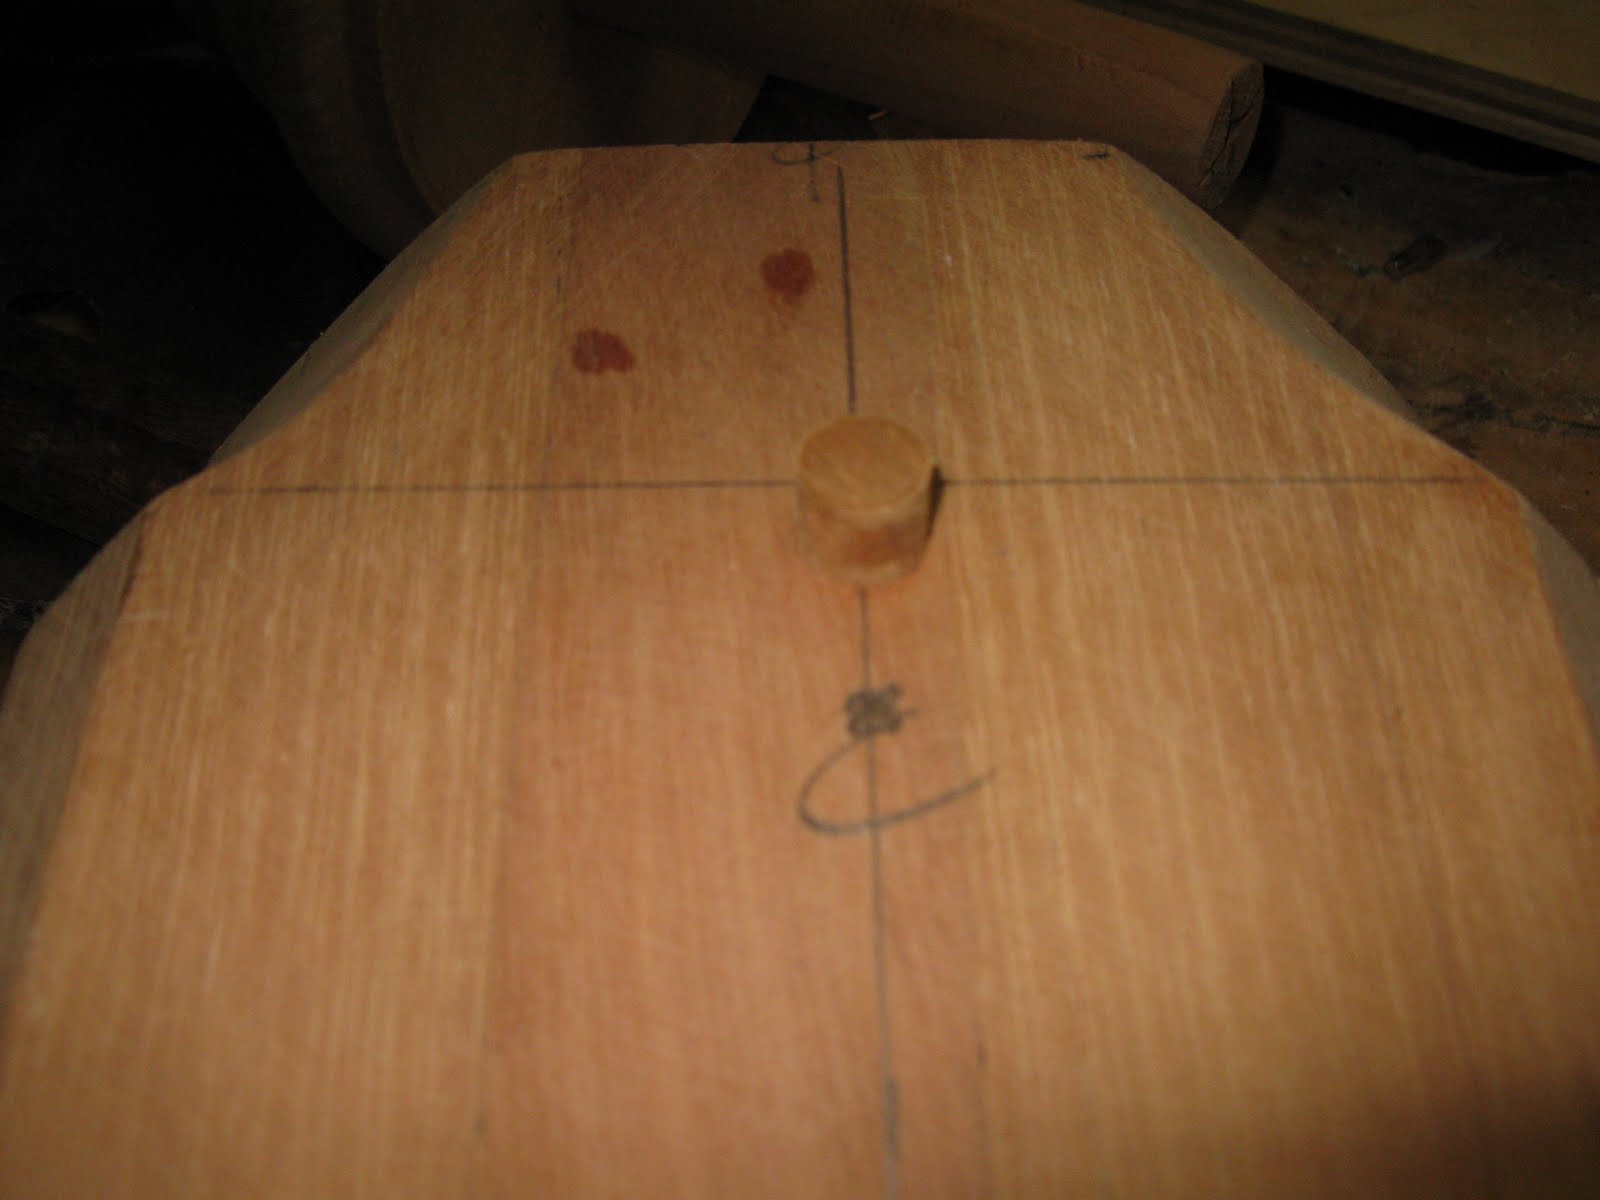
Photo showing location of both screw holes. I will sand and prime all edged before gluing and screwing the finial in place.
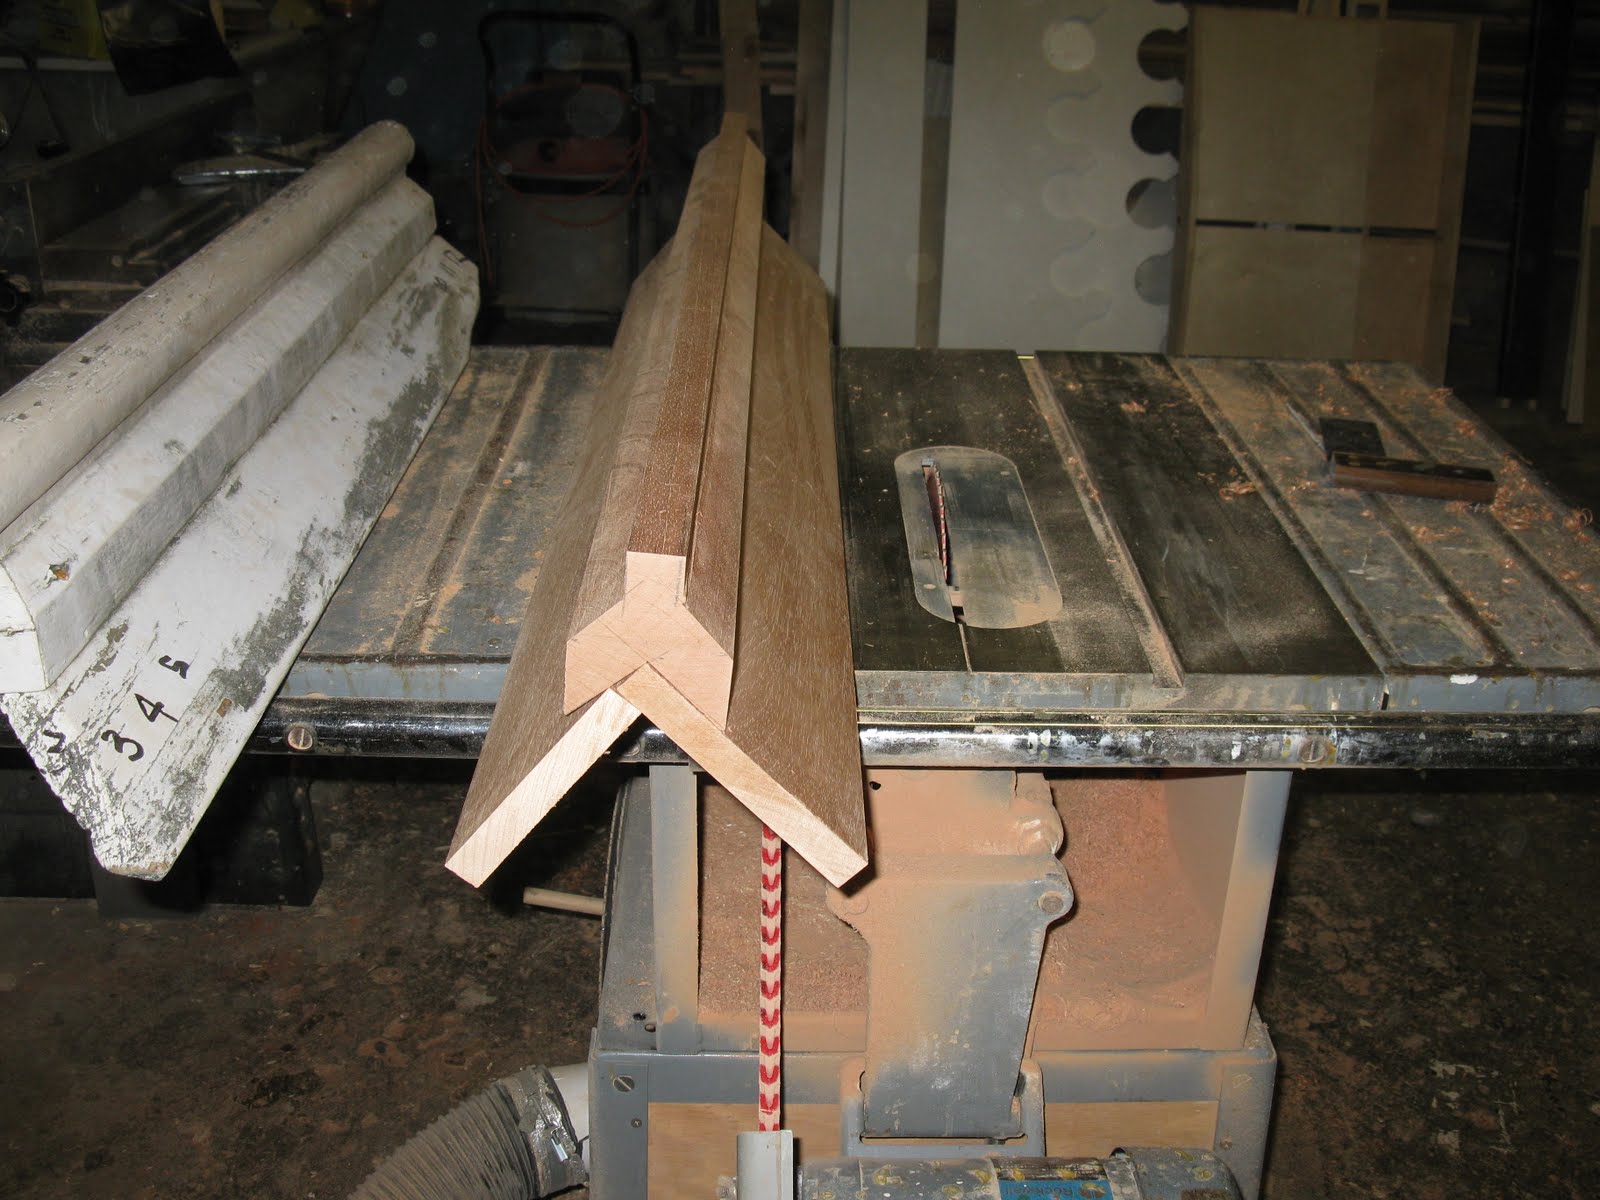
This is the “tail” that follows the finial and rides along the roof’s ridge line. We made it out of two pieces in order to be able to match the old dimensions.

Poly glue and screws make the attachment.
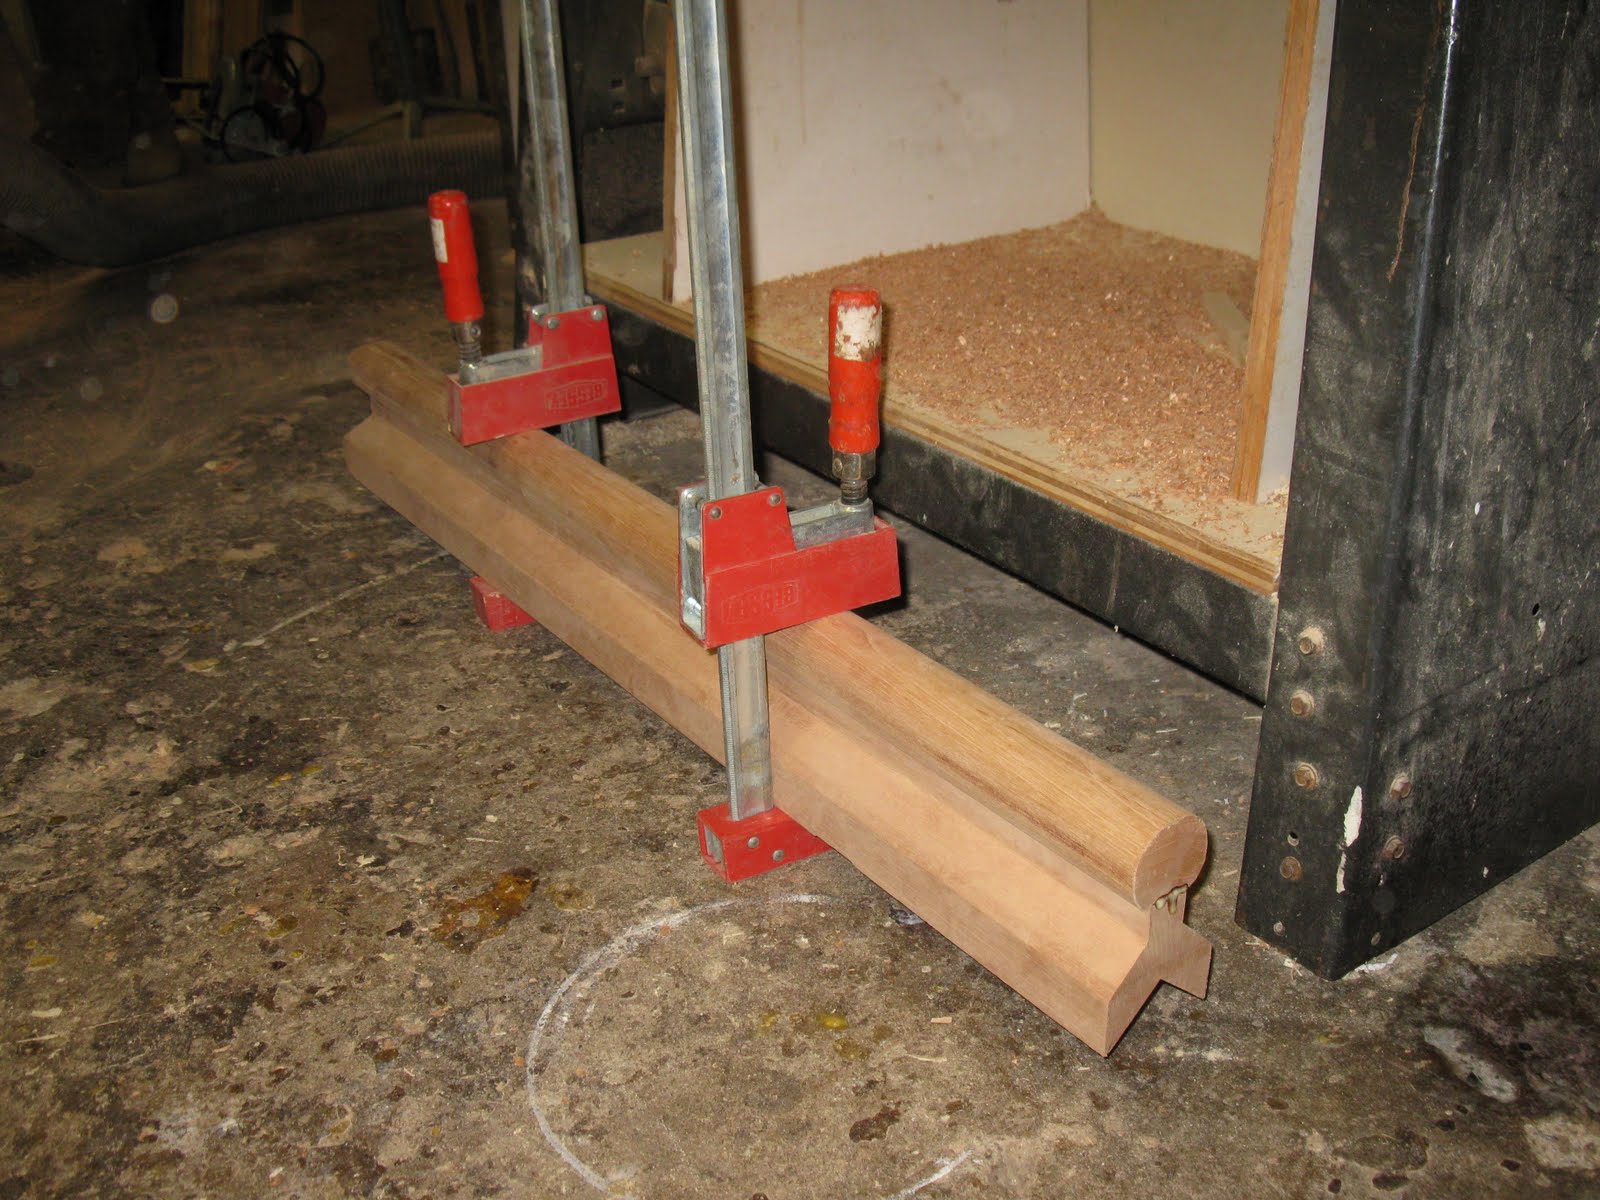
The overlapping boards are glued and screwed to the bottom of the tail.
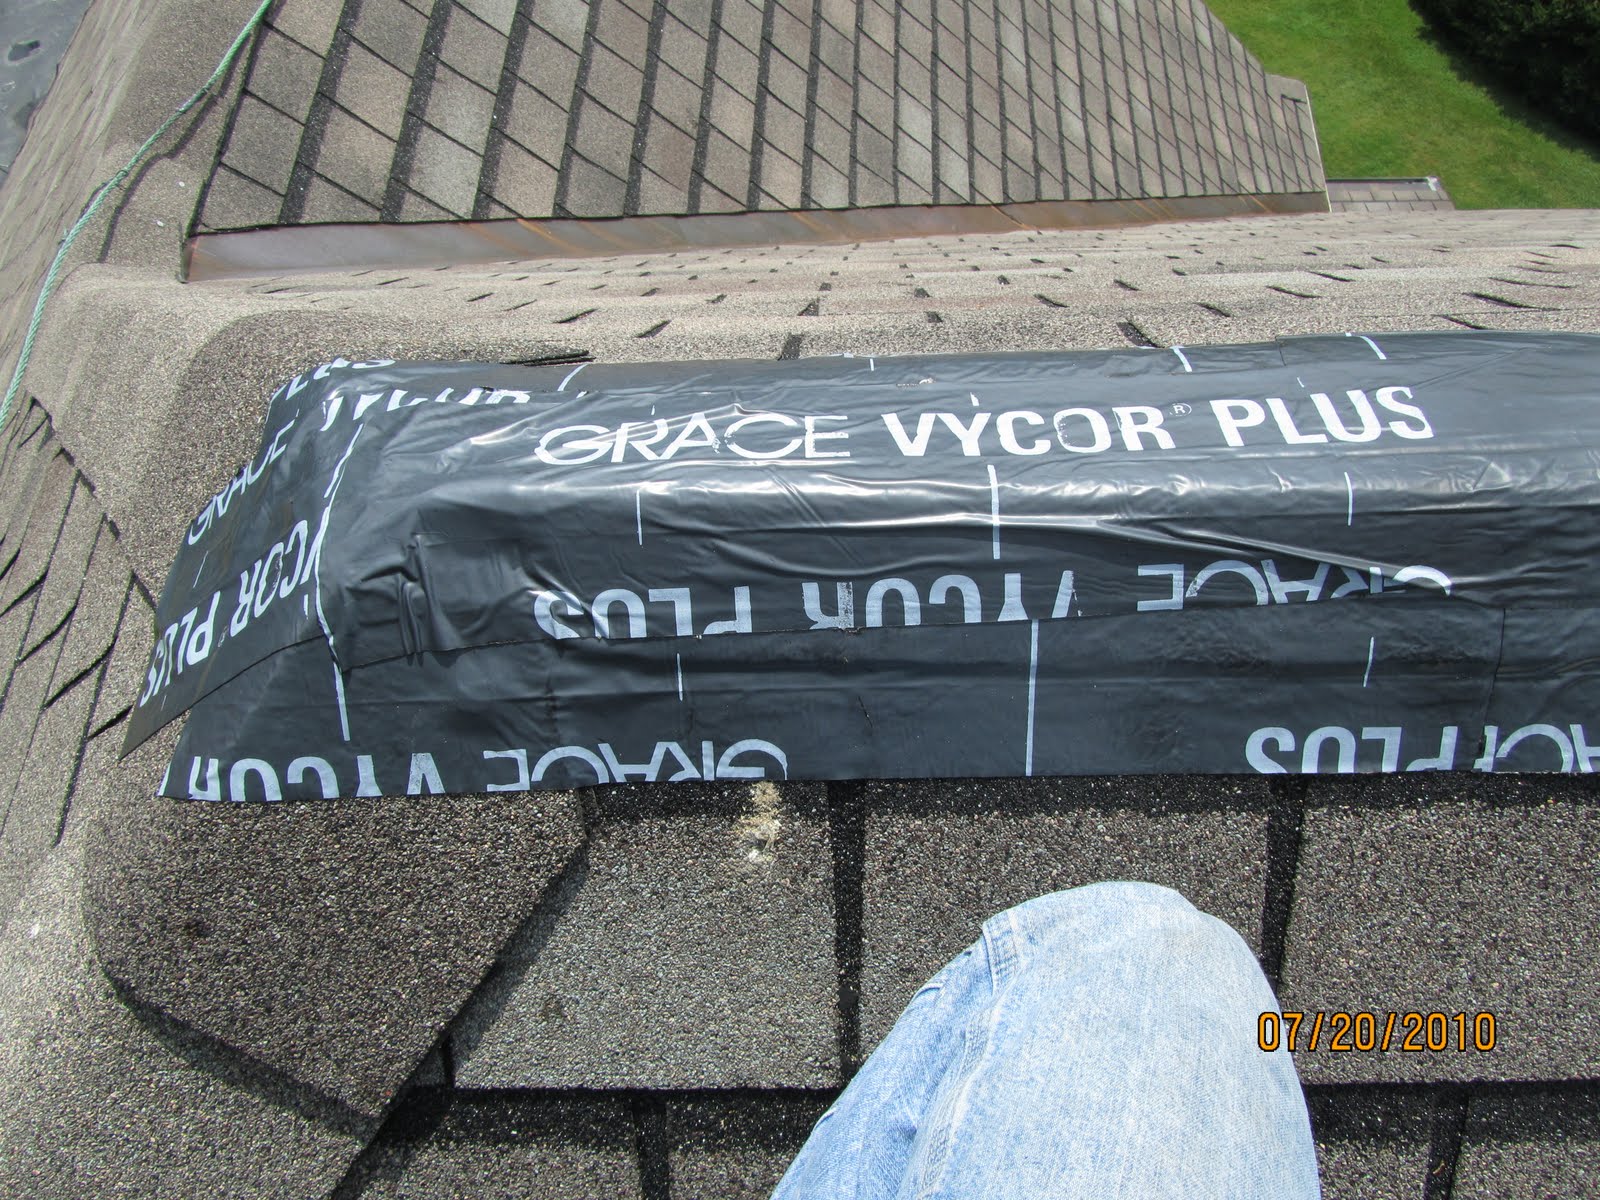
These two boards overlap and cover the seams and fasteners of the decorative scroll work that is installed on the roofs surface below. [See top photo for an idea on this]
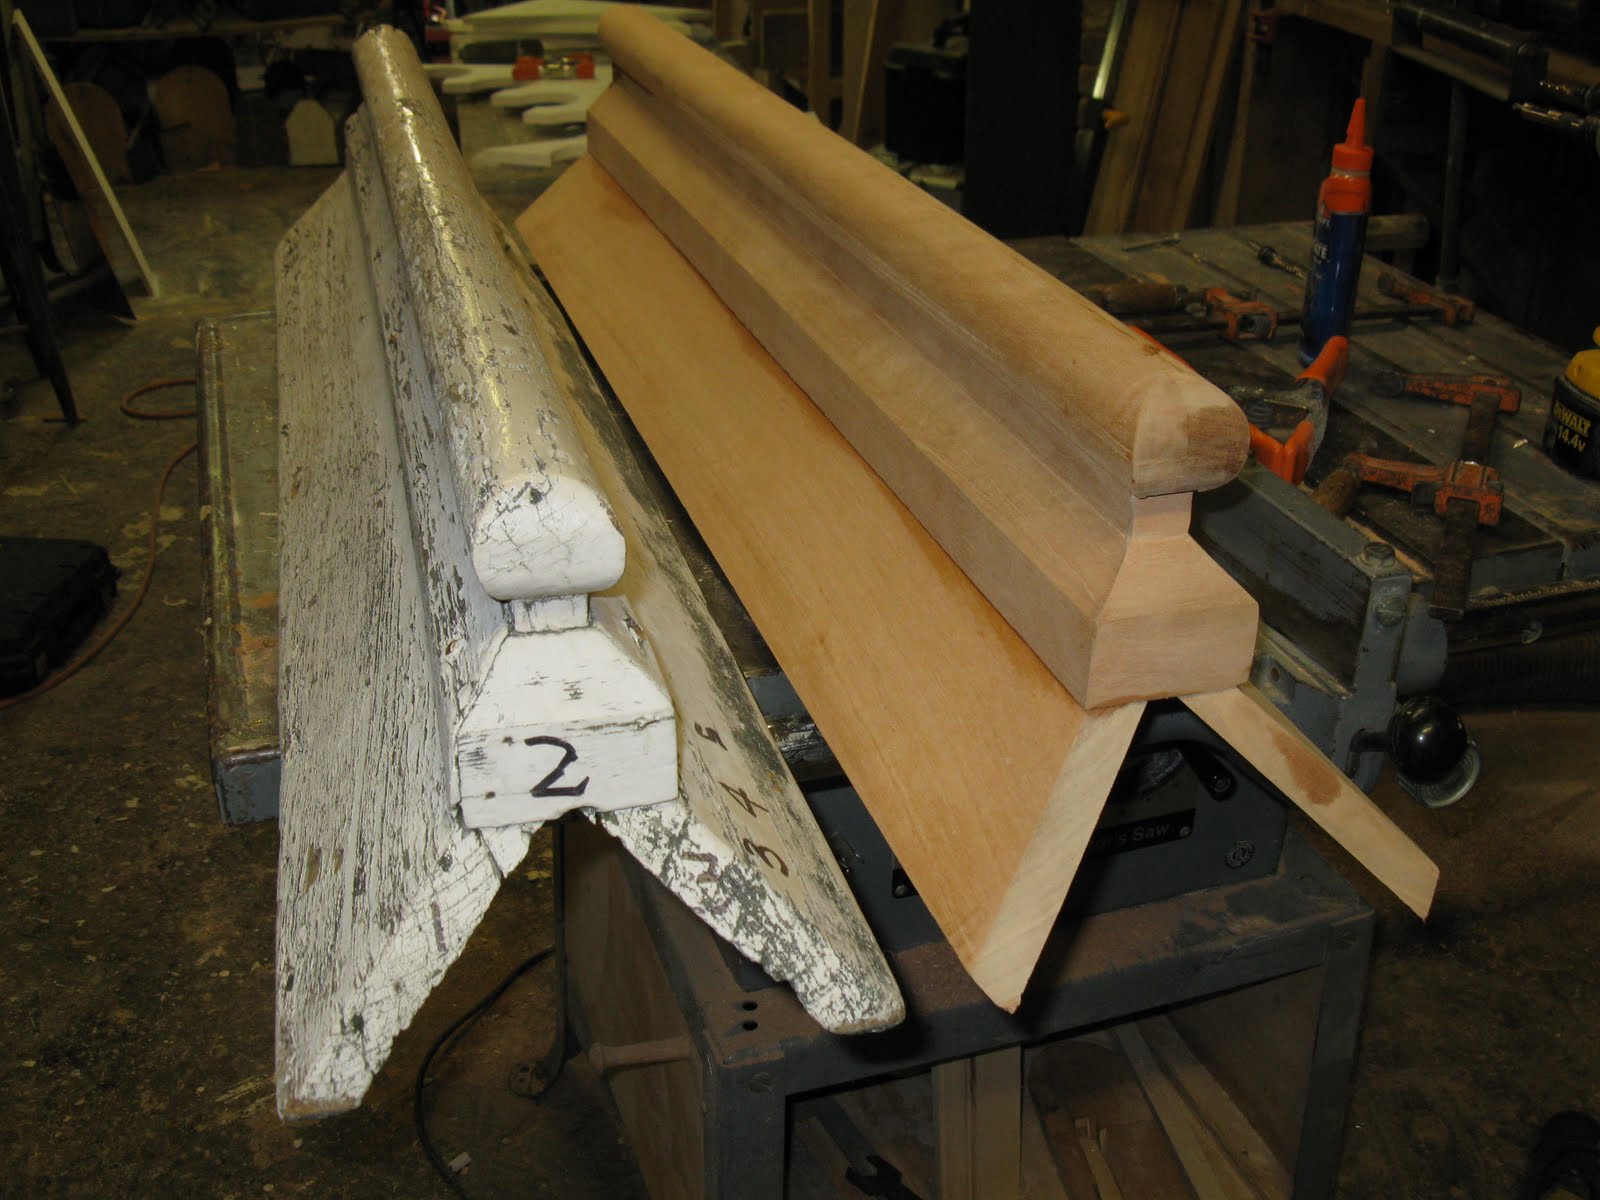
Both old wood and new Spanish Cedar tail side by side.
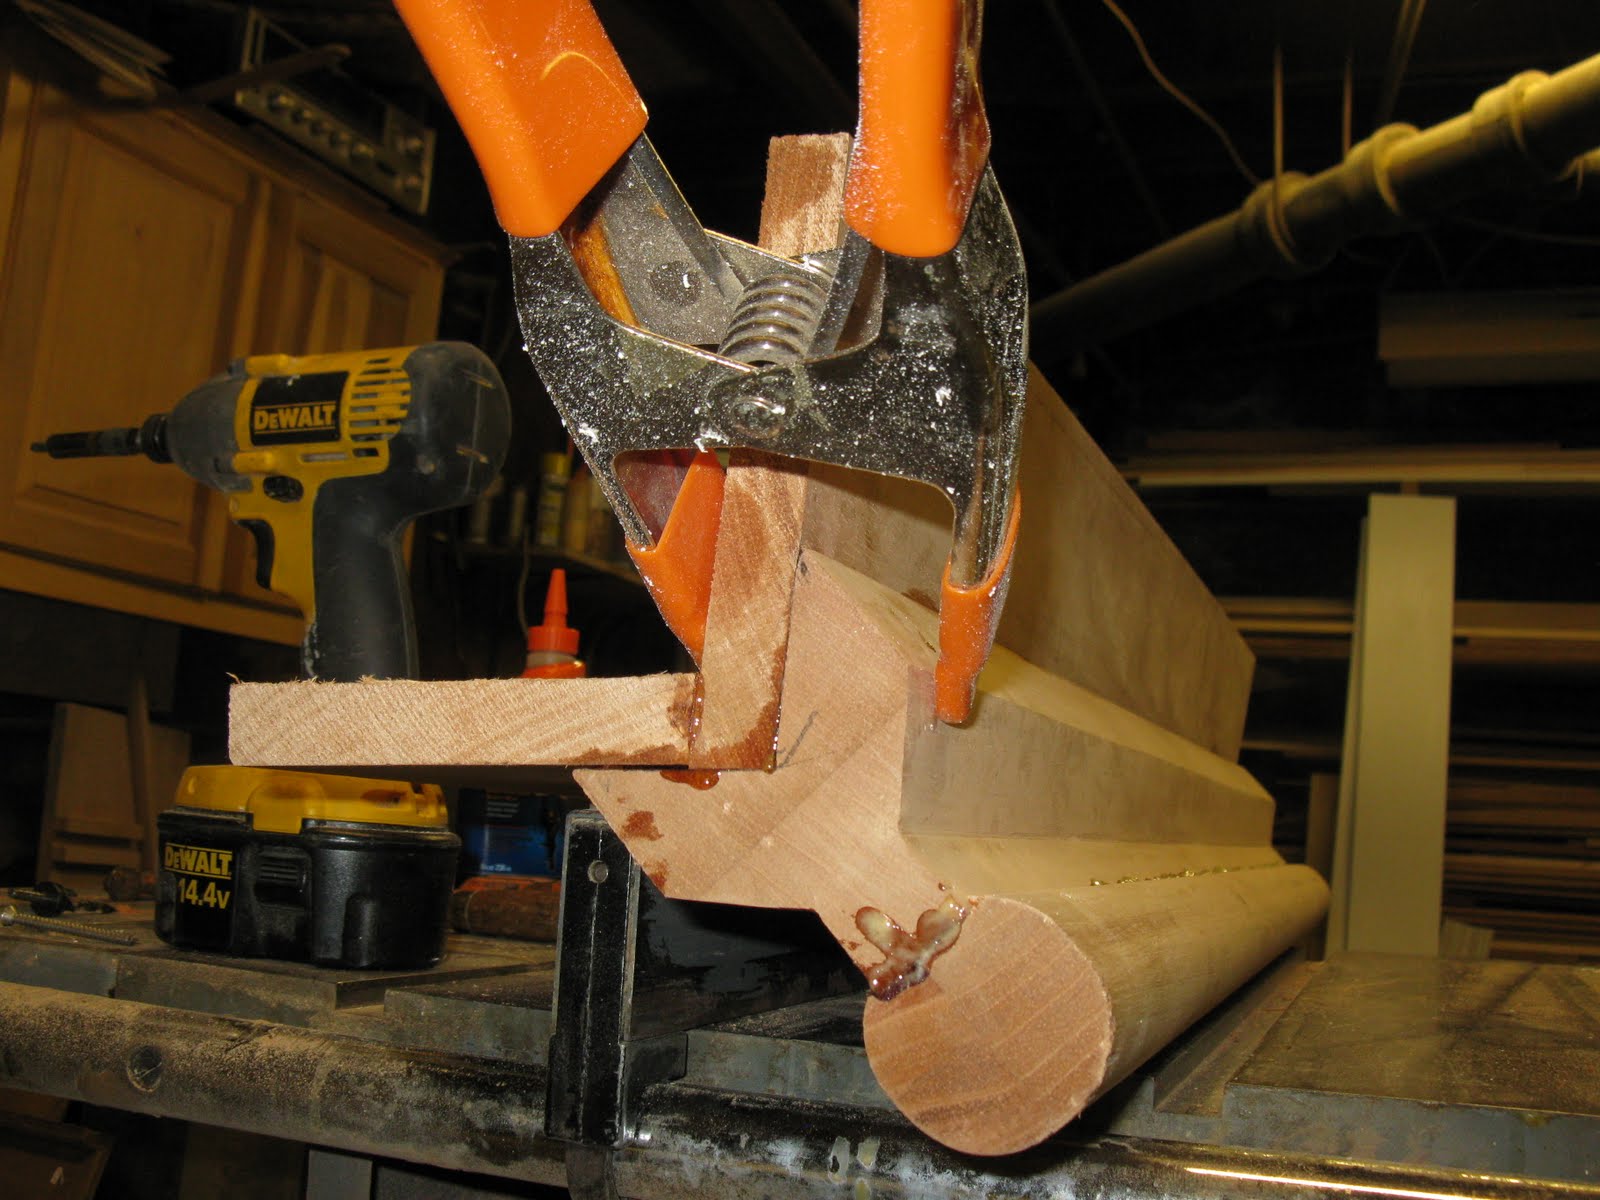
The “upside down V” of these two boards looks like they meet at 90 degrees but don’t. Their edges were beveled to allow them to match the roof pitch and mate the underside of the tail detail.
Ready for sanding and paint.
The old finial and base were separated with a copper cap to protect the base’s end grain from moisture damage.

A new cap was fashioned out of copper sheet stock.
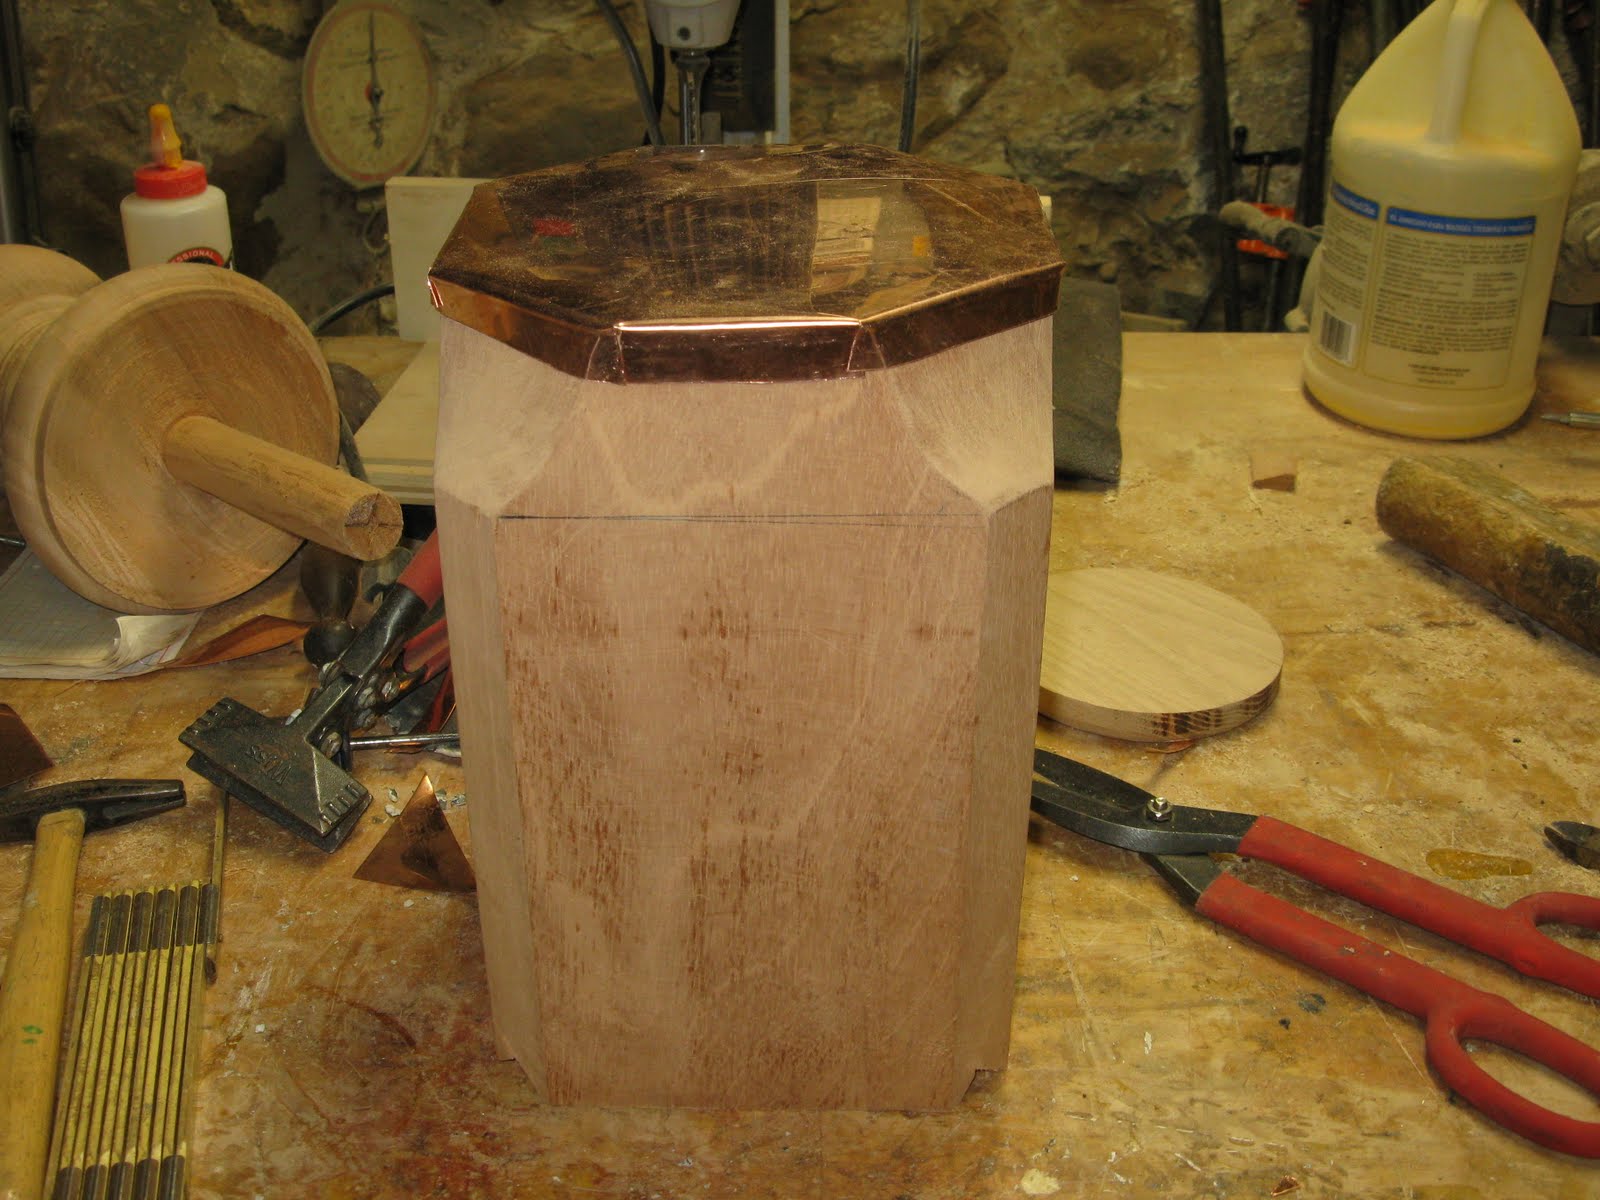
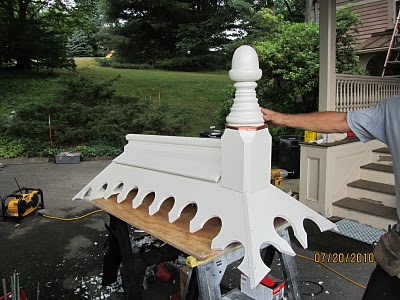
Finished…. and ready for paint.


A cortex pvc plug then fills the hole. The beauty of the cortex plug is that it is made from the same pvc material and will expand and contract at the same rate.