Replacing A Window Sill

Replacing a Rotted Sill Nosing
Often times the first part of a wood window to rot is the sill nosing. Luckily this nosing is a removable and replaceable part of the window. With many window manufacturers replacing a window sill is a viable option as opposed to replacing the window or to using a slew of wood filler.
Use Insect and Rot Resistant Wood
When replacing window nosing on wood windows I like to use 2×4 cedar. Cedar is well known for it’s insect and rot repelling abilities and is easy to work on the table saw.
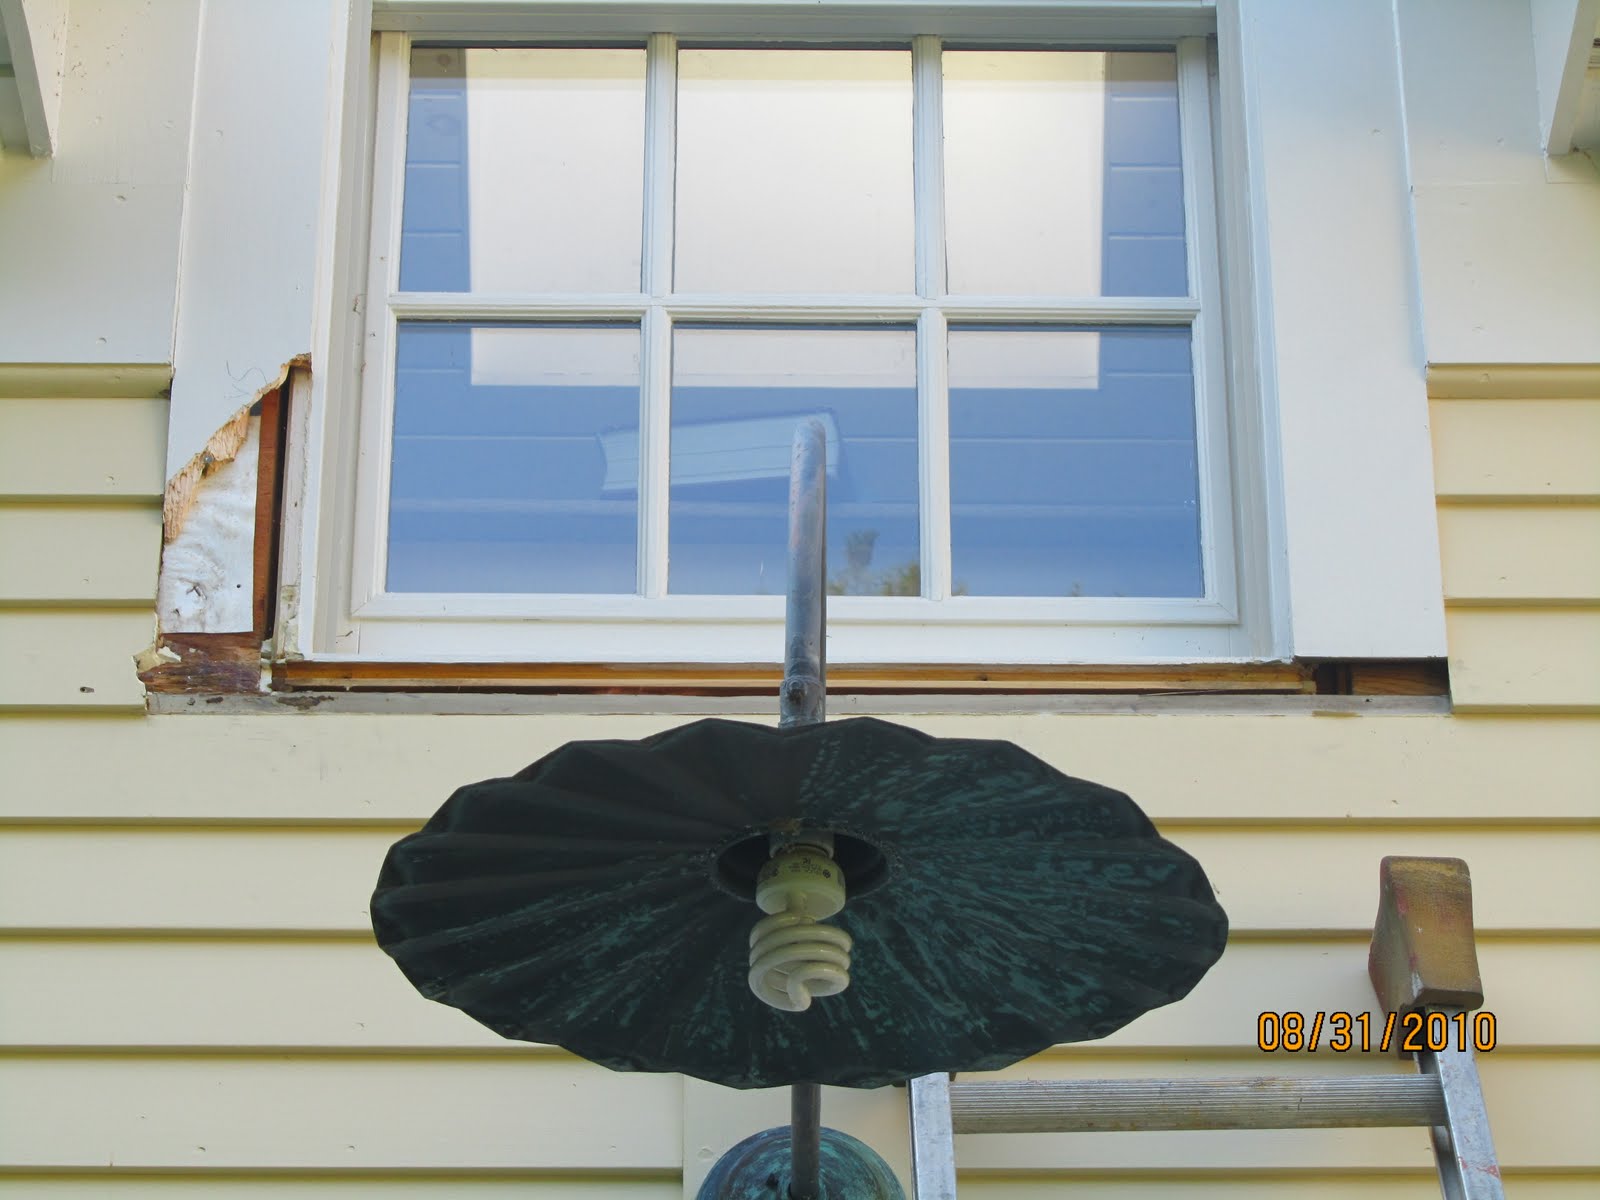
Remove the Old Sill
The first step in replacing a rotted window sill nosing is to remove the old one. I use a utility knife to score the seams and cut through the years of paint and caulking before attempting to pry it away from the window.
Using a combination of a scraper blade and pry way I pry the nosing off. It is usually held on with 6 nails.
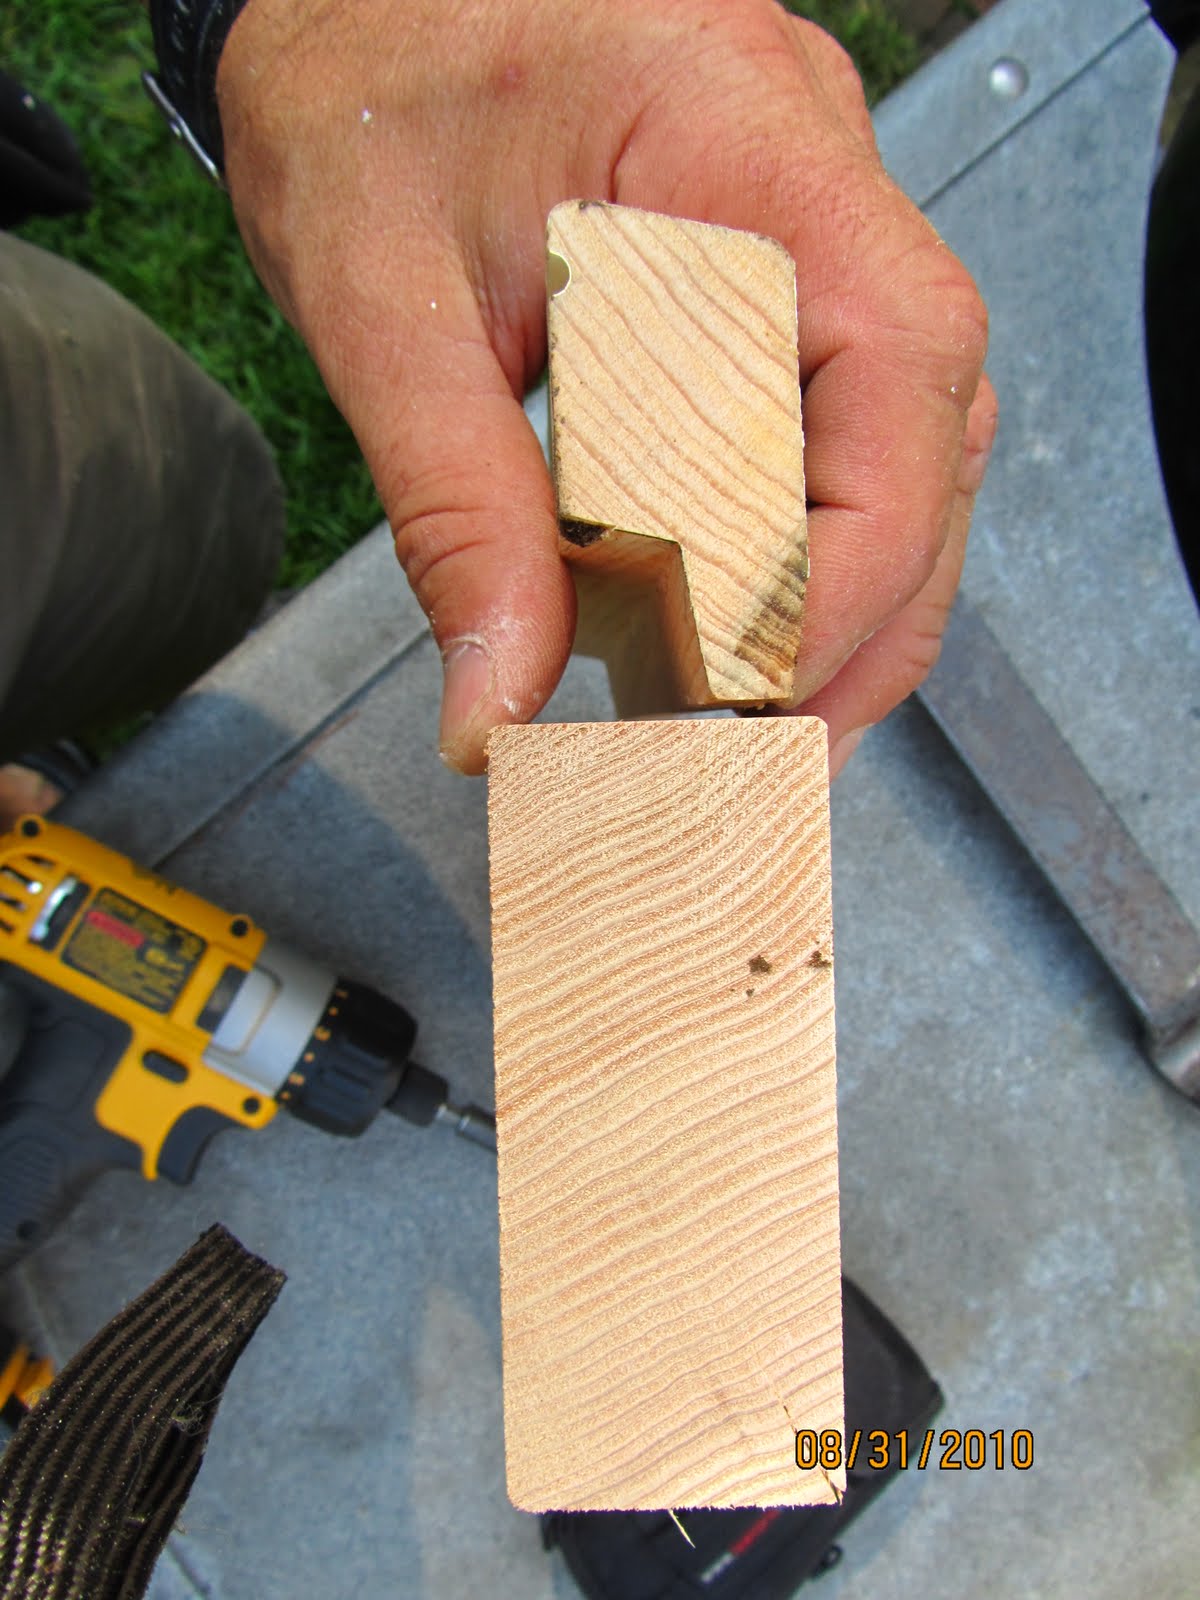
Once the old nosing is removed I cut it on my miter saw to create a rot free profile. I then use this profile to make a new sill out of 2×4 cedar.
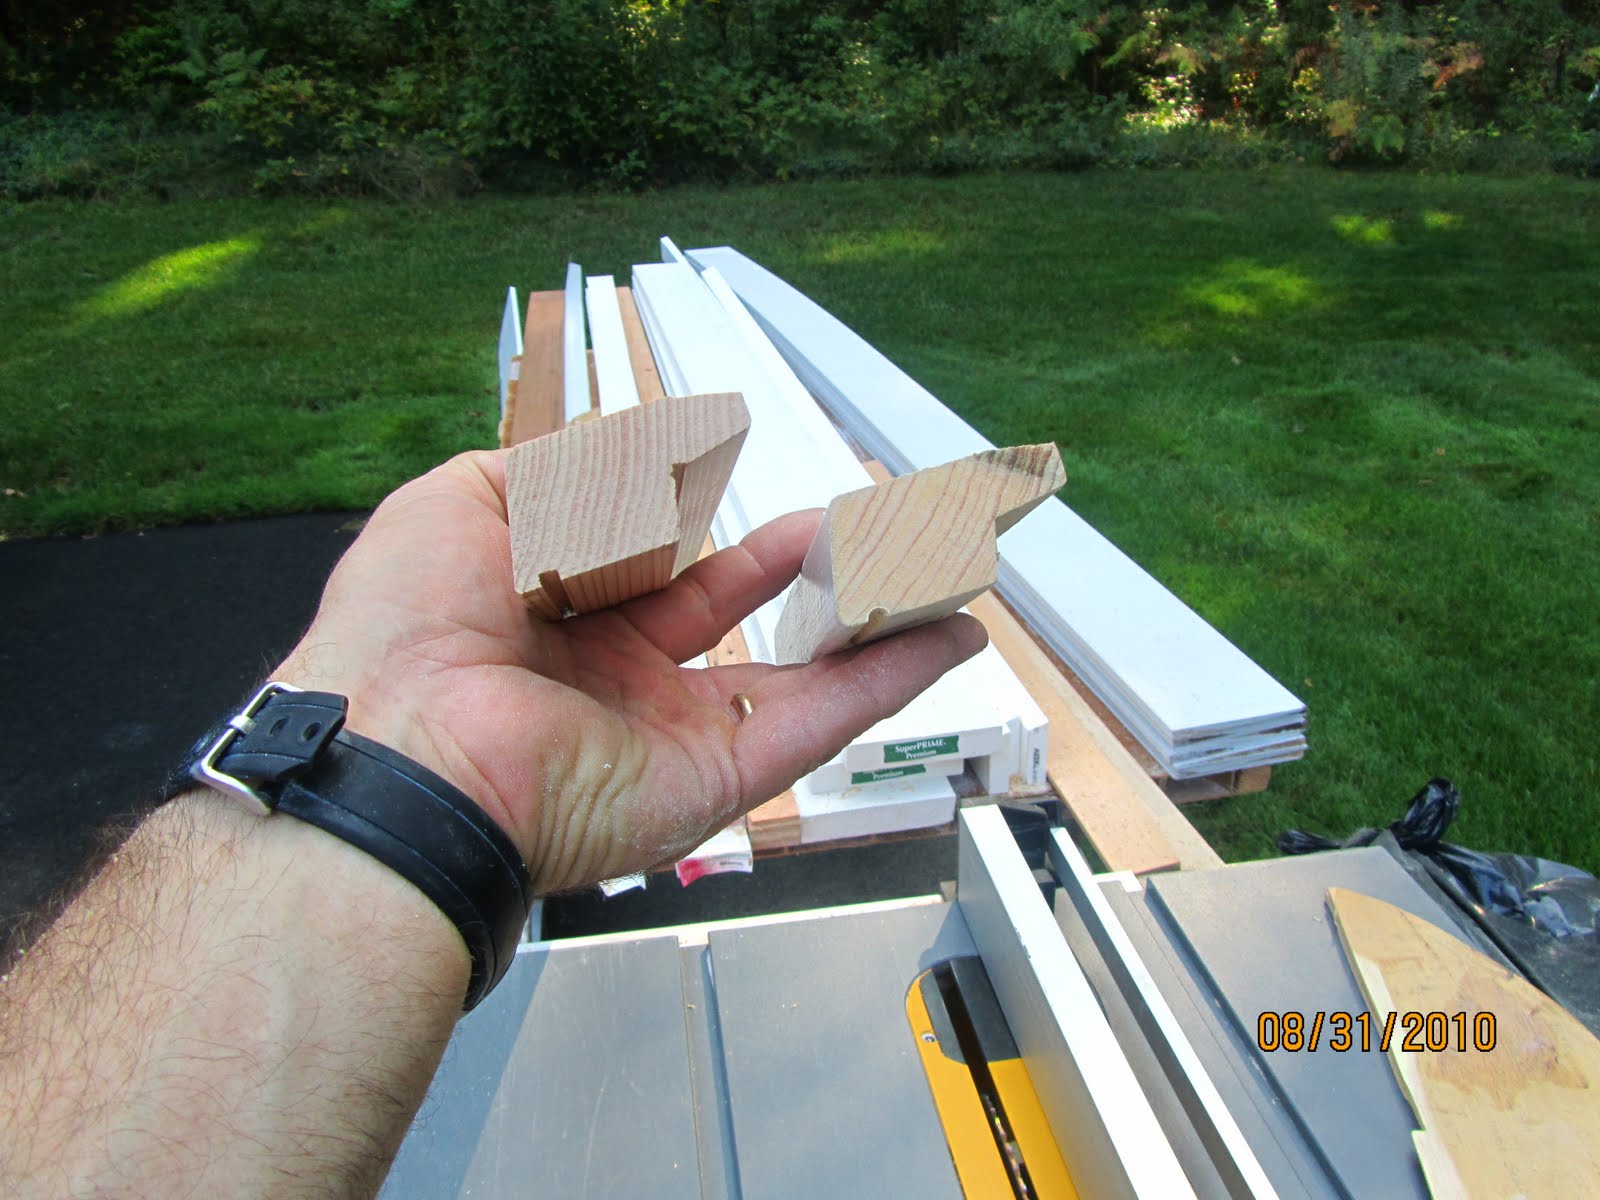
New nosing on left, old profile on right. the nosing fits into a groove in the window sill frame.

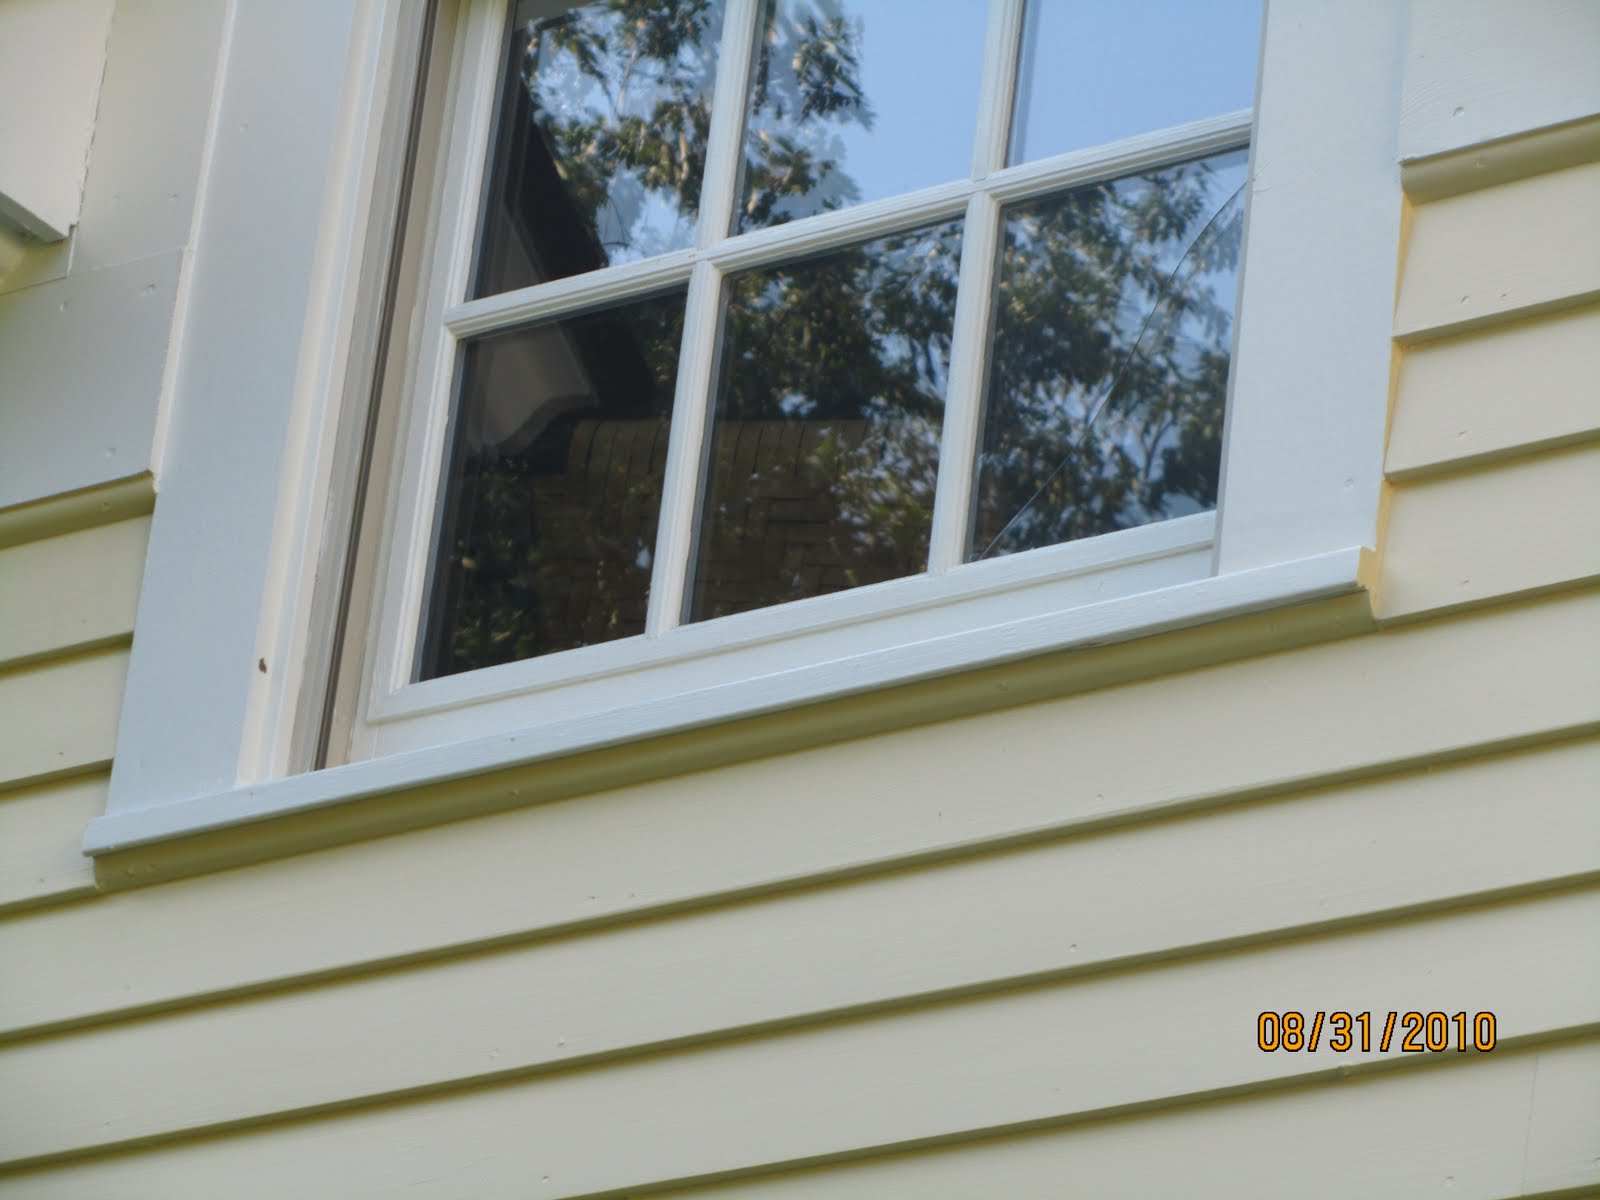
Once the sill nosing is made and sanded I prime the back, sides and bottom edges. when the paint is dry I pre-drill 4 to 6 holes and then apply the new sill with a little caulking in the groove and 16 penny, galvanized finish nails.


If you enjoyed this post, make sure you subscribe to my RSS feed!