
Repairing a Exterior Louvered Shutter – Wood Rot
Shutters are considered low-hanging fruit when it comes to adding a splash of color or curb appeal to a home. There are a few types of exterior window shutters: panel, louvered, board & batten, Bermuda and combination shutter styles. In this article, repairing a window shutter we will show you how to replace the middle rail in a louvered shutter and save you a few bucks in the process.

Repair vs. Replacement
I get asked this question a lot and here is the answer. The answer lies somewhere between show much rot is there and how much time will it take to repair.
If your a DIY-er its almost always worth fixing them to save money, but if your paying a carpenter $50.00-75.00 an hour it’s a much different story.
Repairing a shutter in decent shape can also save a lot of time prepping and painting.
If the shutter is not a high quality shutter, i.e., not made from Cedar, and doesn’t have quality joinery [see below] then I would have a carpenter devote no more than one hour to the repair.
If the repair is more then an hour, consider replacement shutters. Here’s a breakdown of louver shutter costs from my supplier, per shutter:
- $100.00 Boston Layout Primed Basswood or Pine
- $ 155.00 Cedar fixed louvered shutter, primed, screw and dowel
- $ 200+ Custom Cedar fixed louver w/ mortise and tenon joinery
Shutter Materials
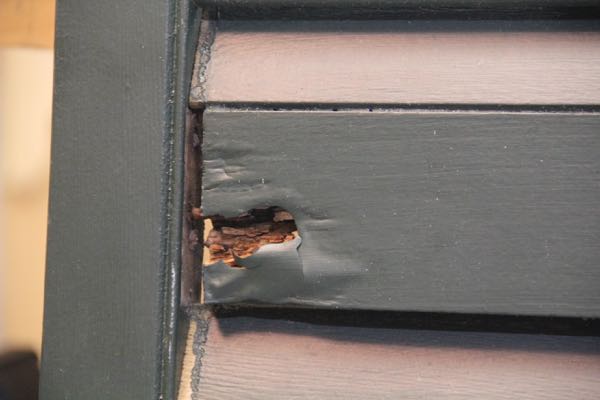
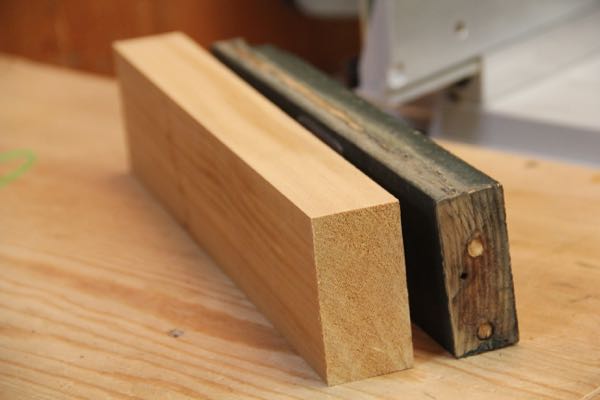
Before getting into this repair lets talk materials. This particular shutter pictured is either pine or Basswood and our repair will outlast the shutter, which will rot again somewhere else. I can repair this shutter and one other in 1-hour.
That leads us to the discussion, what is the BEST shutter material?
When replacing shutters we always try to get the client to purchase shutters made from vertical grain Western Red Cedar from the Pacific Northwestern United States and Canada. We also advise against purchasing shutters that have been constructed with finger-joint joiner.
Shutter Joinery
A quality shutter, will always have mortise and tenon joinery. Mortise and tenon joints are strong, durable and stand the test of time. Quality shutter manufacturers will use mortise and tenon joints at the connecting rails and shutter stiles.
Our shutter, is not high quality, it was constructed with a screw and wood dowel connecting the vertical sale rail to the middle connecting rail. Priming All Material is Key
Shutters should come from the factory pre-primed. With cedar shutters, always use a stain blocking oil based primer and two quality top coats.
How To Repair An Exterior Window Shutter
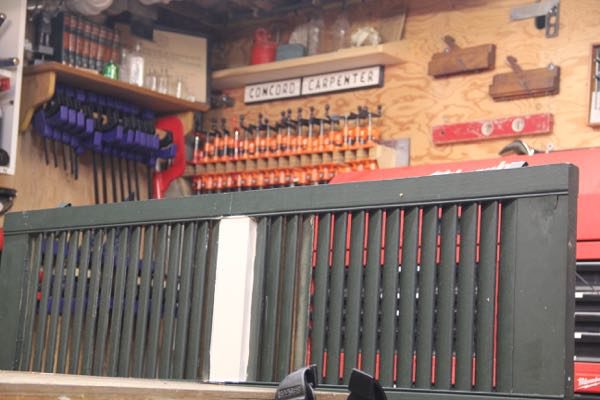
This shutter has rot in the middle connecting rail, so we’ll focus on replacing that rail. The client asked us to make this repair with the plan to purchase cedar shutters in the Spring.
Items Needed:
- Table saw
- Miter or hand saw
- Screwdriver
- Drill
- 3/16 drillbit
- Screws
- Wood plugs
- Exterior glue
- Wood plugs
- Countersink and wood plug cutter
- Brush, primer, paint and related supplies
Exposing the Connecting Screw
To remove the middle connecting rail you need to locate the fasteners which run through the shutter styles [long rails]
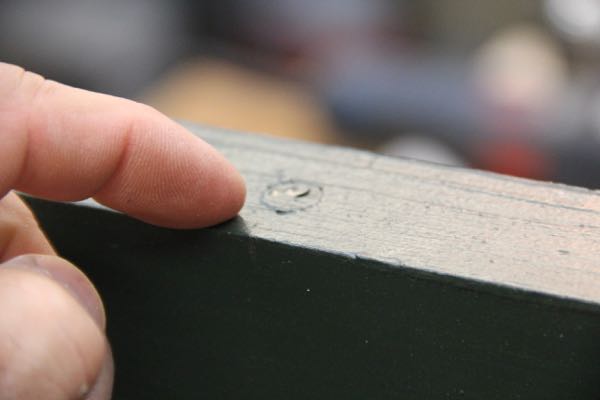
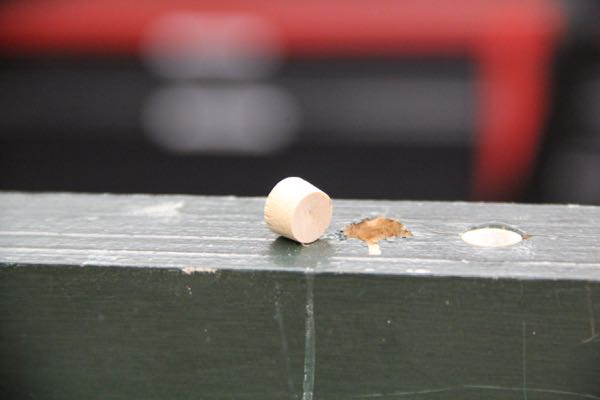
On this shutter, one screw was exposed and the other had a wood plug protecting and hiding it.
In order to get the wood plug out, and expose the screw, I took a 3/16″ drill bit and drilled out the plug. The drilling simply creates an opening for you to use a screw driver, utility knife or nail punch to pry out the plug.
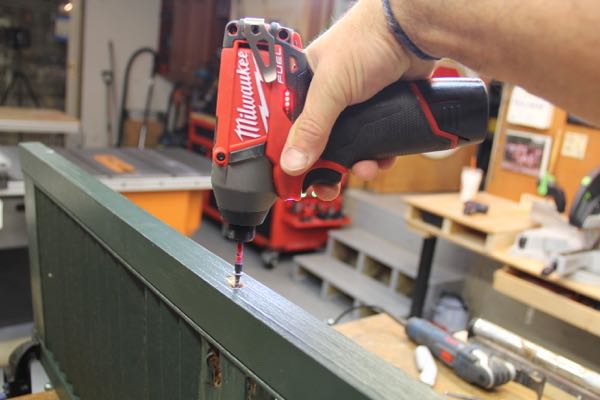
Once the plug was removed, I used a cordless screwdriver to back out the screw fastening the style to the middle rail. do this on both sides.
Making the New Middle Rail
I used a 2×6 cedar board to make the replacement middle rail. I like cedar for its insect and weather resistance, and it’s always a good rot replacement wood.
A table saw is the best tool to size the new cedar board. On the table saw, I cut a clean edge on one side and then set the saw to cut the cedar board the exact width of the rotted bard. I then flipped the board on its side and rip it to the same thickness.
TIP: I don’t measure here, I simply place the old board against the saw blade and slide the saw fence to the board. Once the saw fence gently touches the board I secure the fence and cut into the cedar.
I then cut the cedar board length on a miter saw, squaring one edge first and then measuring and making the final cut.
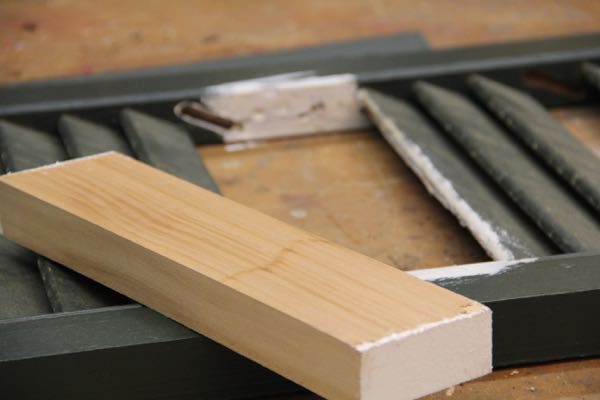
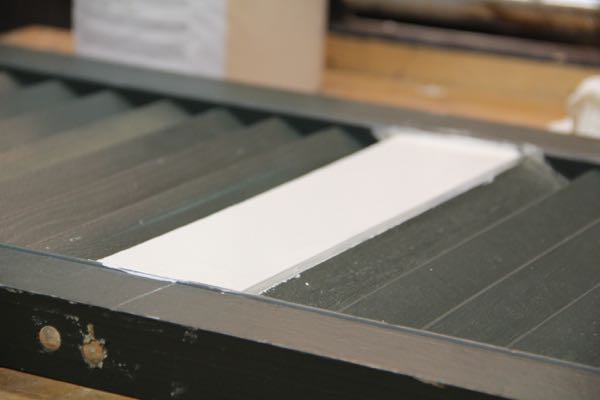
Priming End Grain
I primed the exposed wood on the style rails as well as the ingrain on the middle board. End grain wicks moisture faster than any other part of the board. This is why the middle rail rotted in the first place. By sealing and back priming all wood trim you are giving it a chance to endure the elements by slowing water infiltration. Read: Sealing Wood End-grain
Fasten the Middle Rail In Place
The old dowels that used to be in this location had long since failed so I decided I would use two screws on each side. I reused the old screw hole and then spaced out a new location. Pre-drilling and countersinking the hole to accept a wood plug is the best way to fill this hole.
TIP: A wood clamp can be useful for holding the middle rail in place.
Wood plugs look and weather better than wood putty. If your looking to make a long term repair purchase a countersink bit and a wood plug cutter designed to fit into the counter sunk hole.
Read my article how to make and install wood plugs here.
I use exterior wood glue, coat the plug and tap it in gently with a hammer. The plugs are tapered slightly for a snug fit. Try to get them flush.
Paint Preparation
I then use sand paper to “break the edges [round them over] and clean all flat surfaces. A coat of primer and two coats of finish paint finish off this repair.