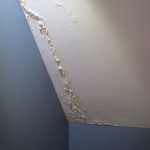
Repairing Ice Dam Damage

Scrape and Sand
Let the mud set until it hardens and then use the joint knife to scrape off any ridges or other roughness in the surface. Use the putty knife to scrape off ridges and high spots. Wipe the area with a clean, damp rag or sponge to remove the scraping and sanding dust before coating it again with mud.
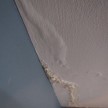
Apply a second coat of mud, in a perpendicular direction to the first coat, buttering the surface as before. Concentrate on filling in the deepest parts of the damage and keeping a lighter coat around the edges.
Don’t let high points develop in the overall surface, try to keep it consistent with the surrounding level. Reverse direction with each new coat to help in keeping the repair level.
The last coat can be lightly sanded with 220.
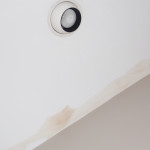
Sealing the Stained Area
I was unsure on the proper advice for sealing in stains so I reached out to Mark O’Lalor from O’Lalor Painting. Mark advised me that he does not apply a primer/sealer, Zinsser® “Binz” or otherwise until his entire repair work is done.
Once the drywall compound is applied, Mark wipes the surfaces down and primes with regular primer and then coat the areas where the stains were with a Shellac Based sealer. Mark says, “priming is one of the most important things you can do, aside from being sure the surface is clean, to ensure a lasting job.”
Primers are special coatings designed to bond to bare surfaces creating a sound foundation for finish paint.
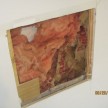
A sealer is a special primer is used for blocking problem stains like smoke, grease, rust, and water damage.
Prime, caulk seams and paint
Remove dirt and vacuum all the dust. Washing surfaces to remove oils from the human hand, ambient dust in the interior and exterior environment, oil rich cooking vapor, candle wax vapor and of course dust from construction all contribute to create a barrier between the applied paint and the surface in question.
These substances all need to be washed off to ensure proper adhesion prior to priming and painting.