Pre-installing Picture Frame Trim Using a Kreg Jig
I get a lot of comments on IG about us installing preassembled trim. Getting window trim miters tight can be a task even for the best carpenters, especially with older plaster or uneven walls. That task gets even more difficult when you’re installing picture frame miters.

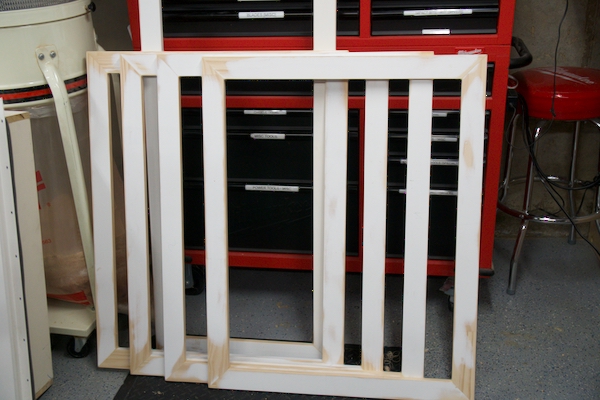
Over the years of I’ve had the opportunity to both install picture frame mitered trim in place, once piece at a time, as well as pre-assemble it. I don’t have to tell you that pre-assembling is always way more accurate and results in tighter, nicer miters as well as a more professional-looking product. I try to pre-assemble trim when I can and use a Kreg jig with pocket screws to get it done!
Pre-Assembling Trim
Pre assembling trim starts with measuring the window or door jamb that you’re installing it on to. I measure the inside jamb to jamb measurements [Width X Length] and then add them for my reveal. In carpentry, a reveal is a feature resembling a rabbet but constructed of separate pieces of wood. It is seen at the edge of a door or window, where the face molding is set back.
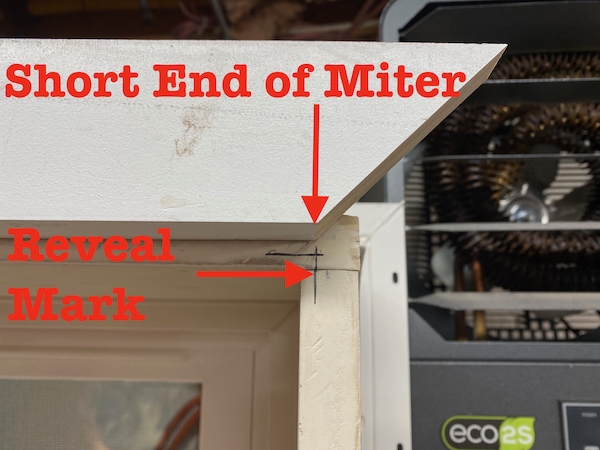

The standard reveal for window molding and door trim is 3/16 to 1/4-in., but this can be adjusted a little if needed. A combination square works well for marking reveals. Knowing this, I make my picture frame trim 1/4 inch bigger on the width and height of that jamb to jamb measurement. I mark my reveals onto the window jambs and double-check that measurement.
Measure, Mark, and Cut All At Same Time
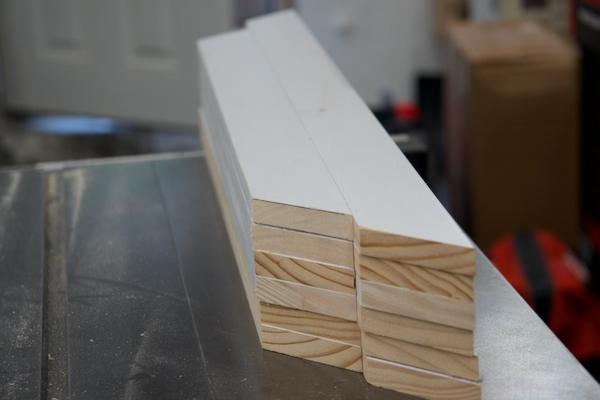
I measure all of my windows, make a stock list and then head to the shop or assembly table. Pre-assembling trim works best with ¾ or larger trim but can be done with thinner as well. If needed, I rip my trim to size and then miter cut all the trim to length. Remember when cutting the trim to length, you are measuring and cutting from the short end of the two miters. The short ends need to line up with the reveal marks To be efficient, I cut all of my stock at one time, and label it.
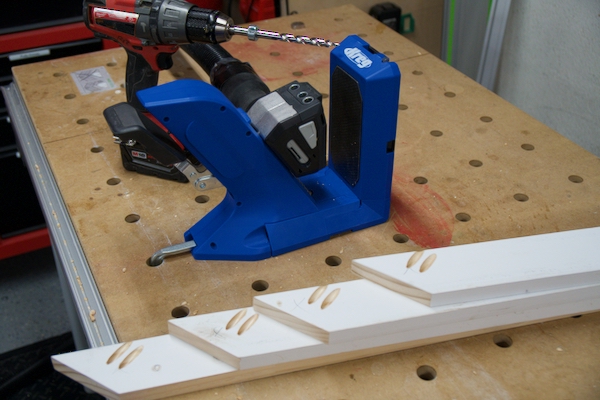
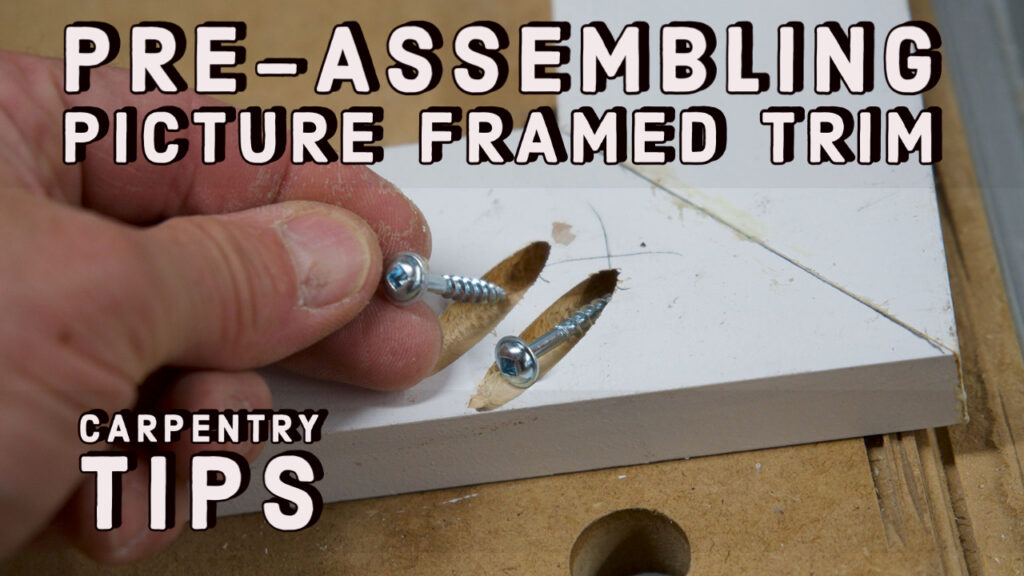
Use Kreg Jig To Make Pocket Holes
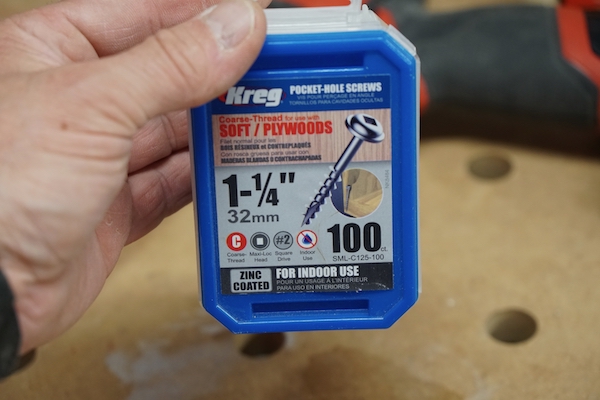
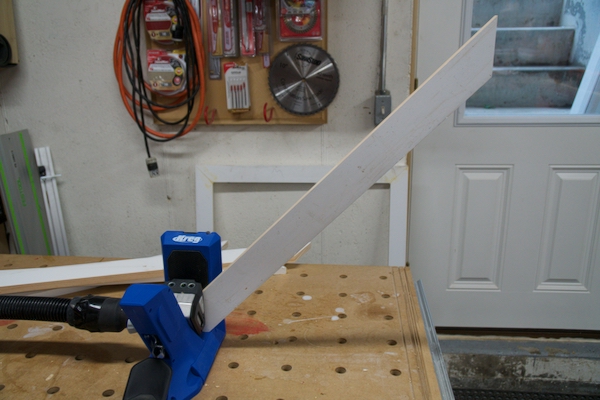
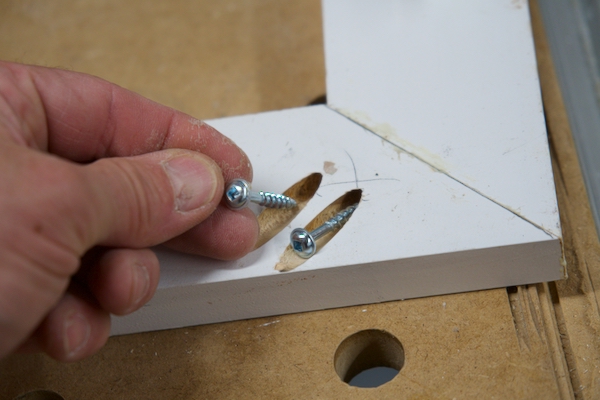
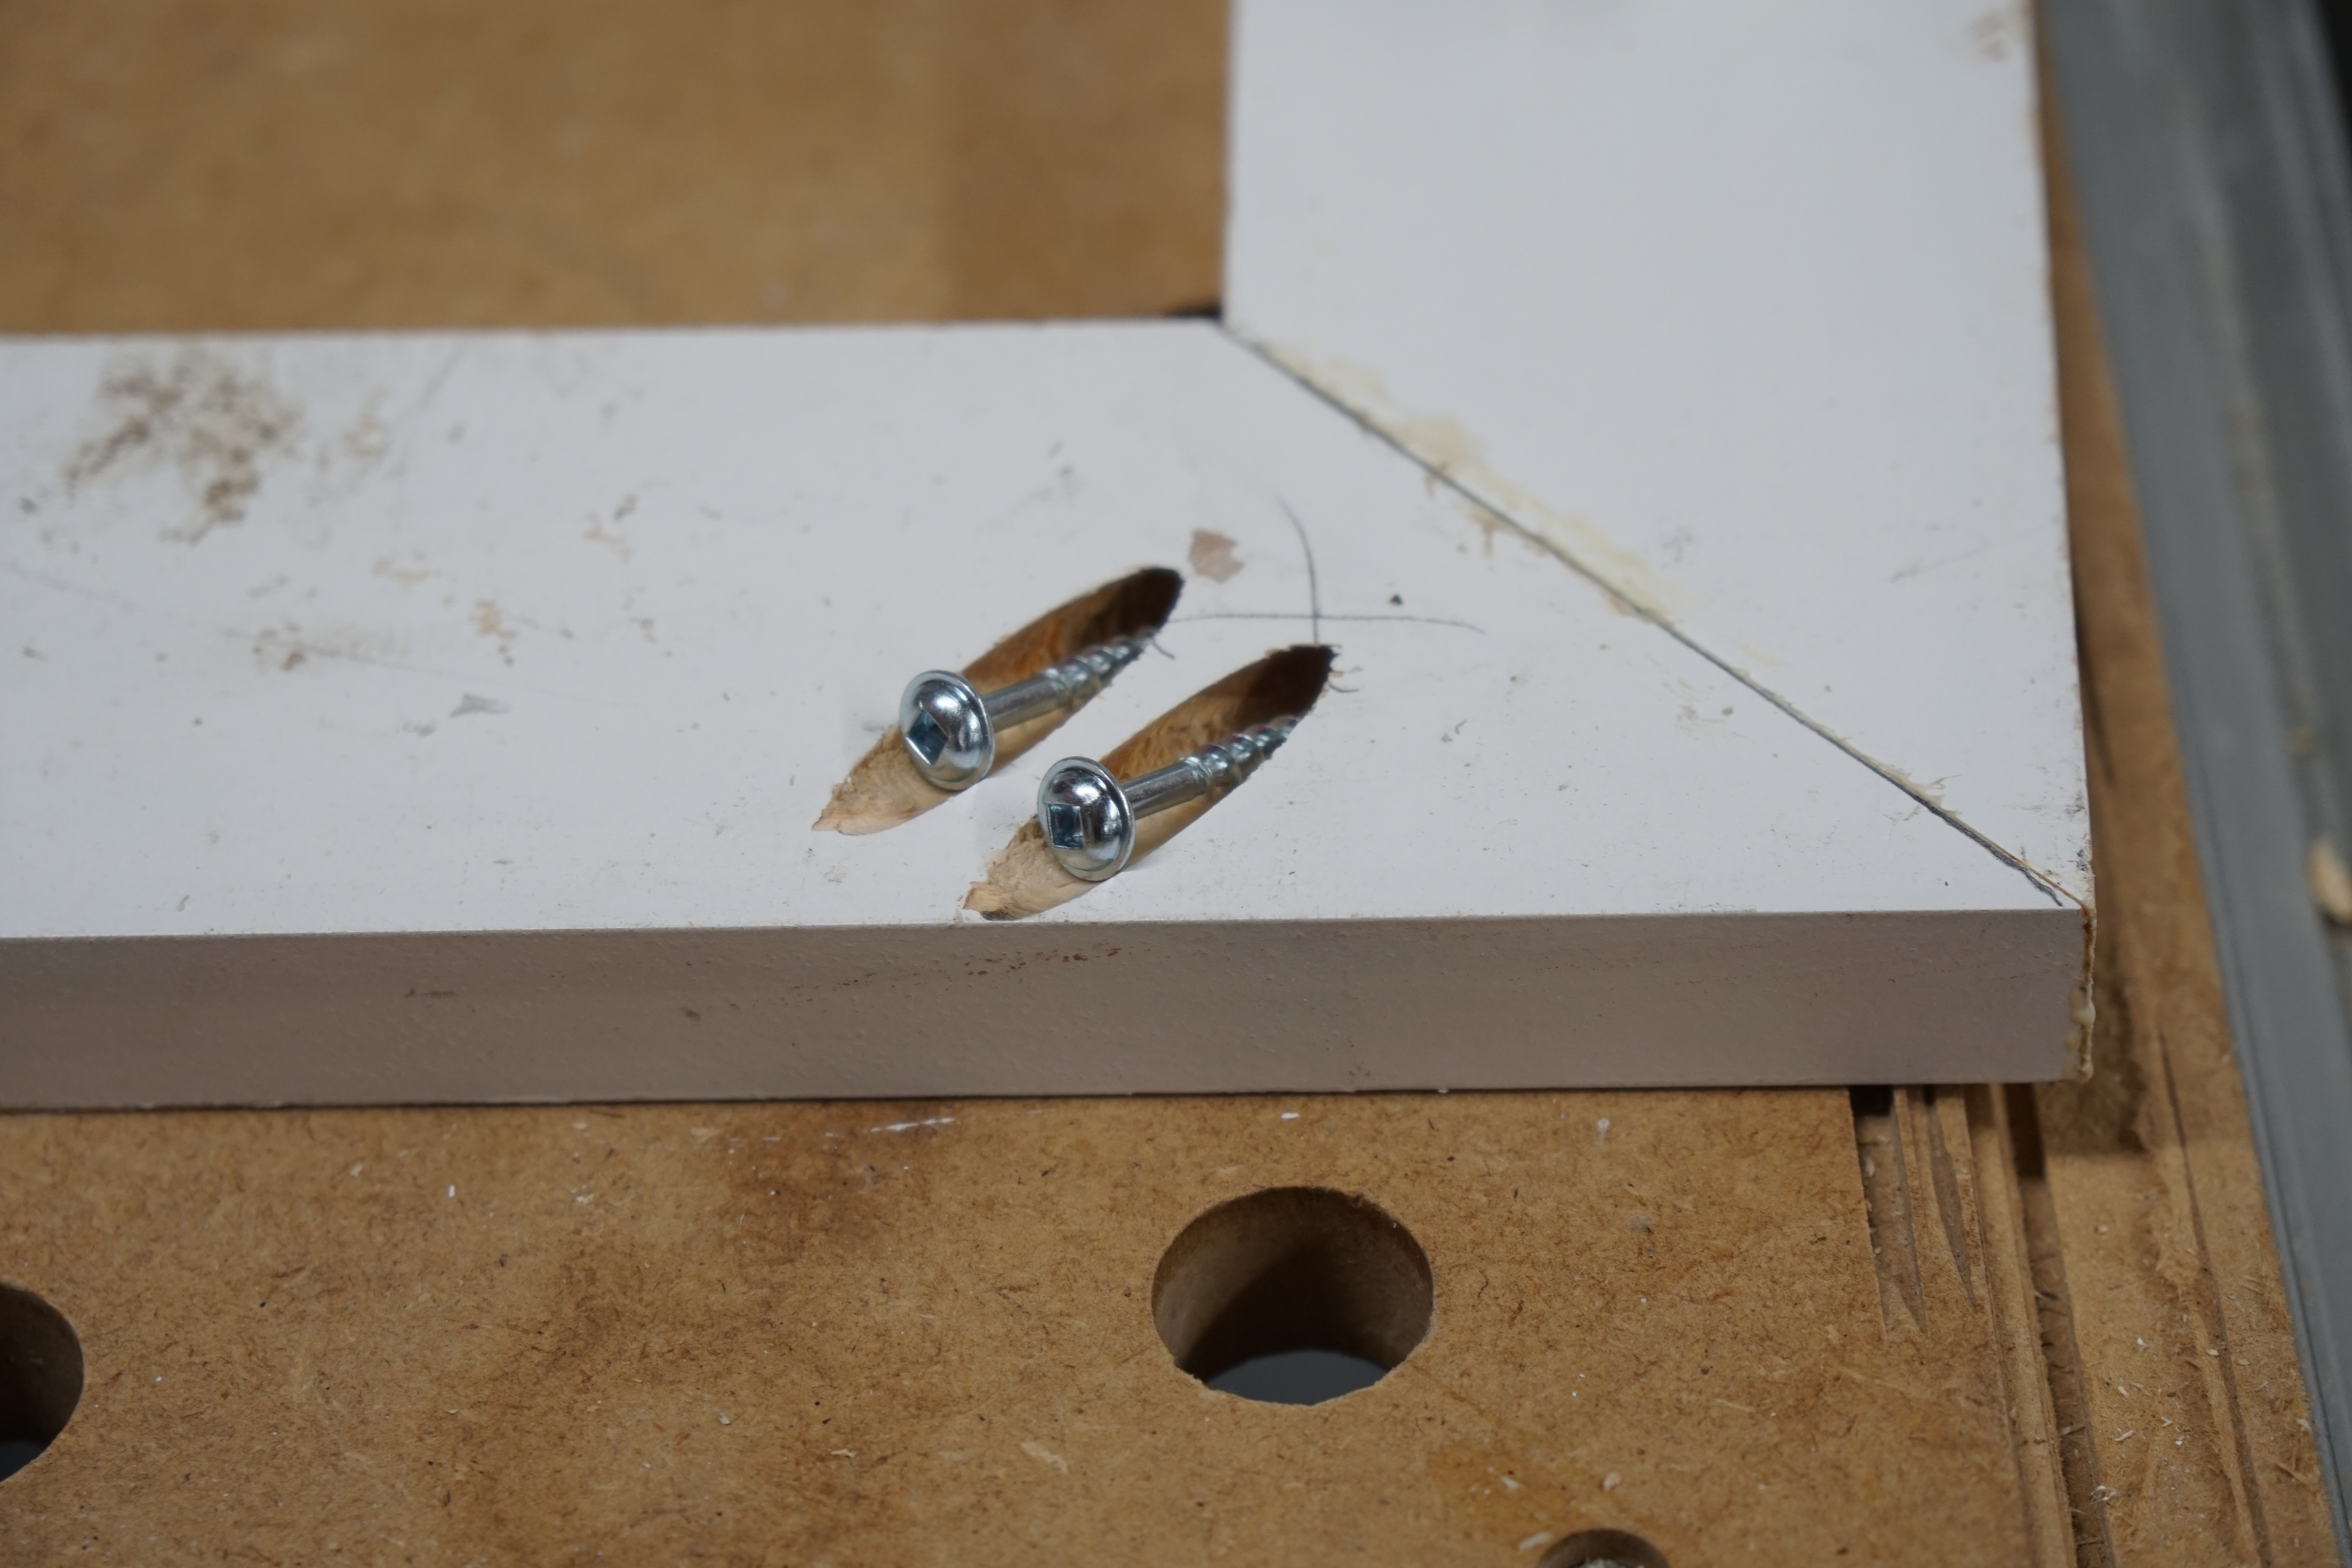
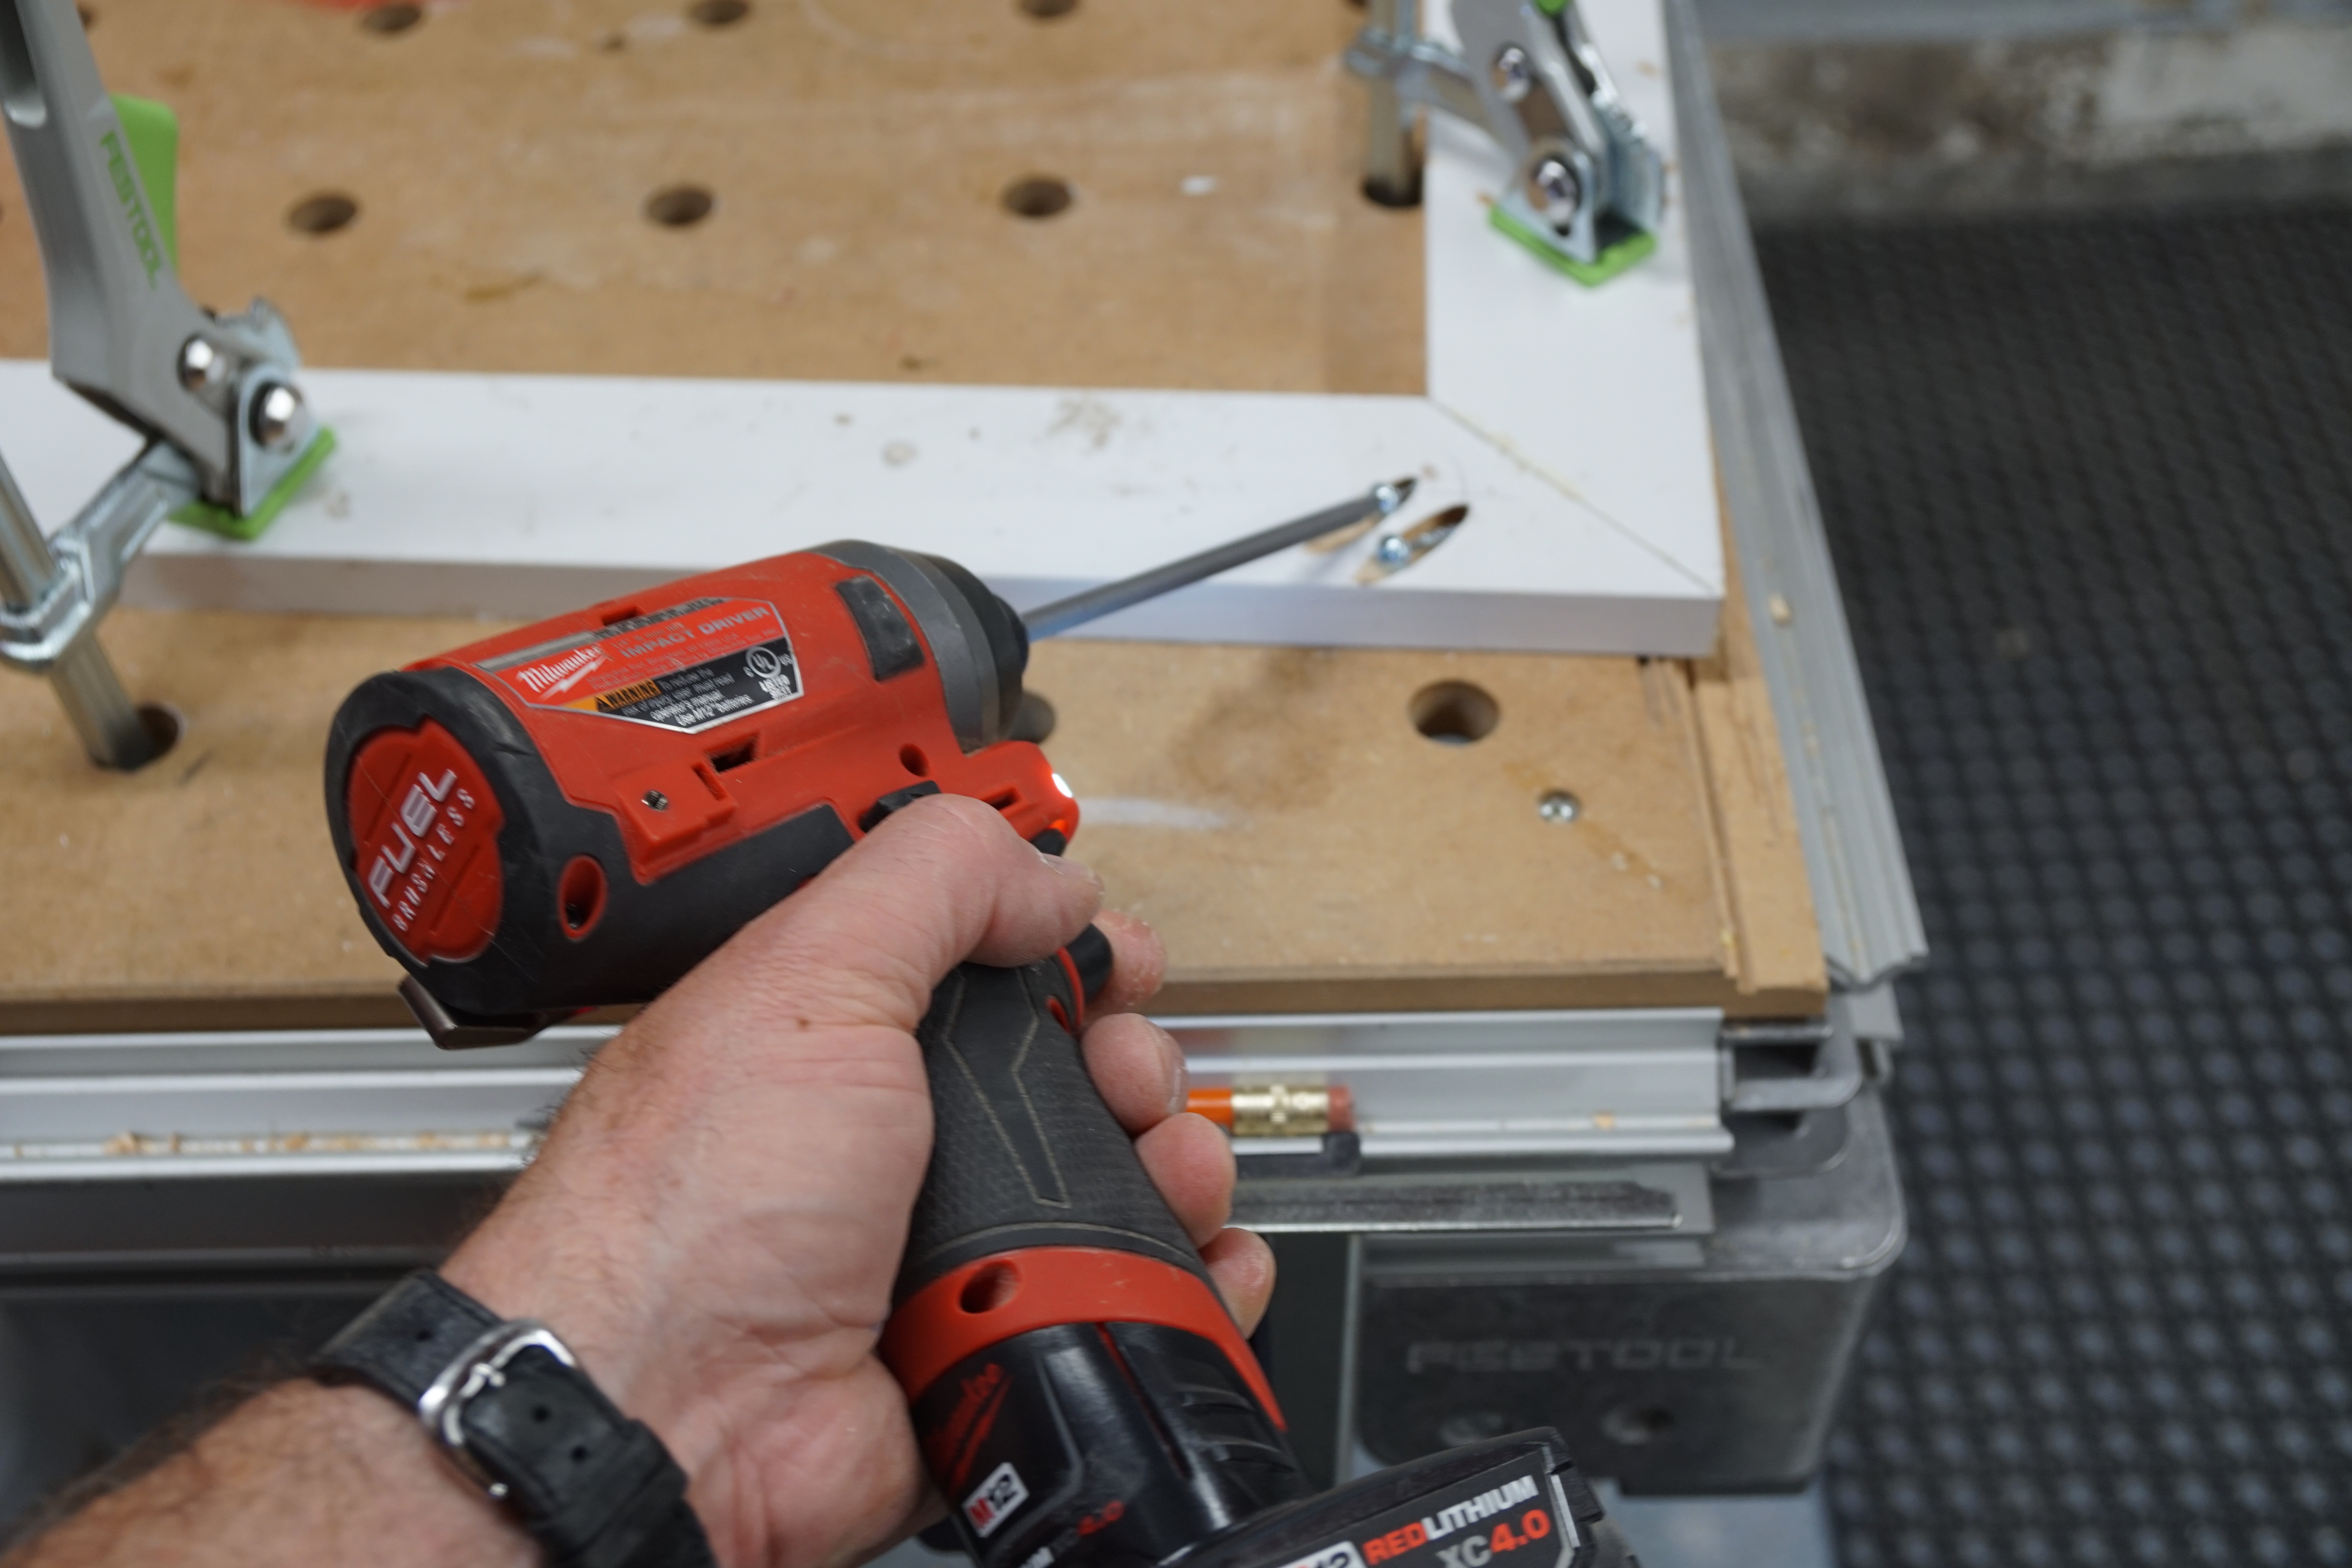
Once everything is cut, labeled, and stacked, I bring it to my Kreg jig which I hook up to a vacuum to keep down the sawdust. At the Kreg jig, I usually use a scrap piece to test fit the location of my pocket holes. Once I find the right location I then go ahead and clamp my mitered trim into the jig, consistently at the same location. In my situation here, I clamped the mitered trim into the Kreg jig and overlapped each board outside of the jig 1/4 inch. This positioned the screws in the good location for fastening the miter.

Pro Tips:
- When clamping the trim in the jig, ensure the miter is flat on the bottom of the Kreg jig.
- Drill my pocket holes on the left side of every trim piece. This ensures that every piece screws into the next one in a counterclockwise fashion.
Alternatively, you could install the pocket holes on the right side of each trim piece and work your way around clockwise period it’s really a matter of preference at this point
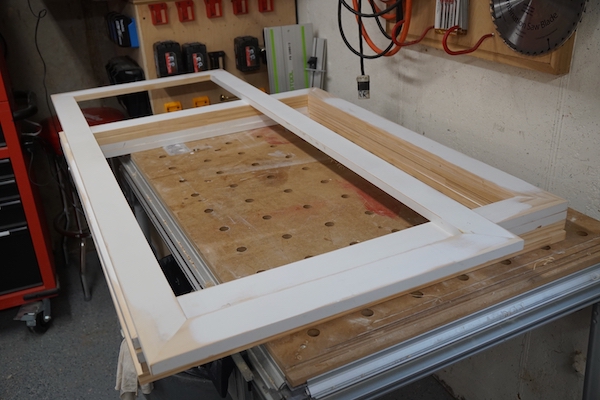
Assembling The Trim Parts
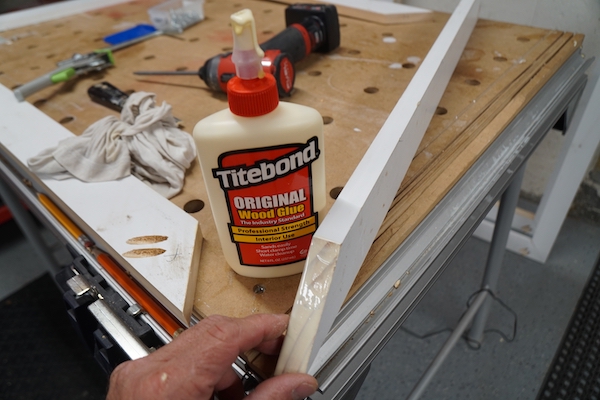
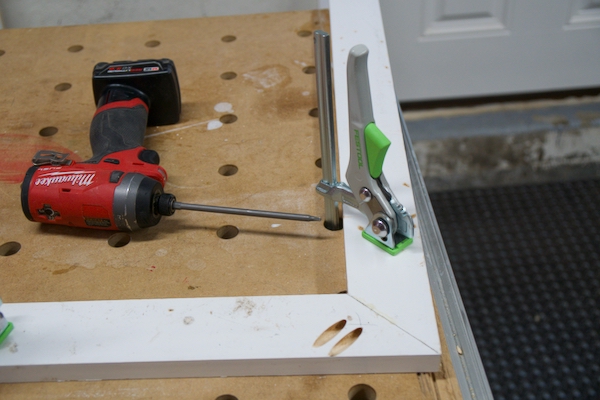
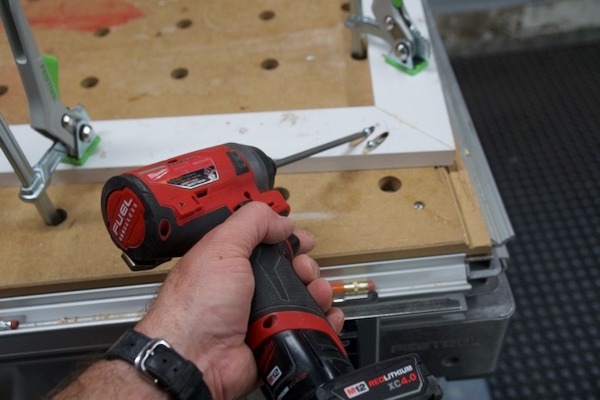
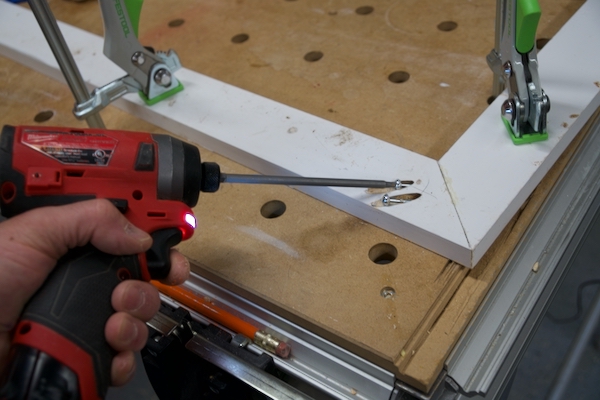
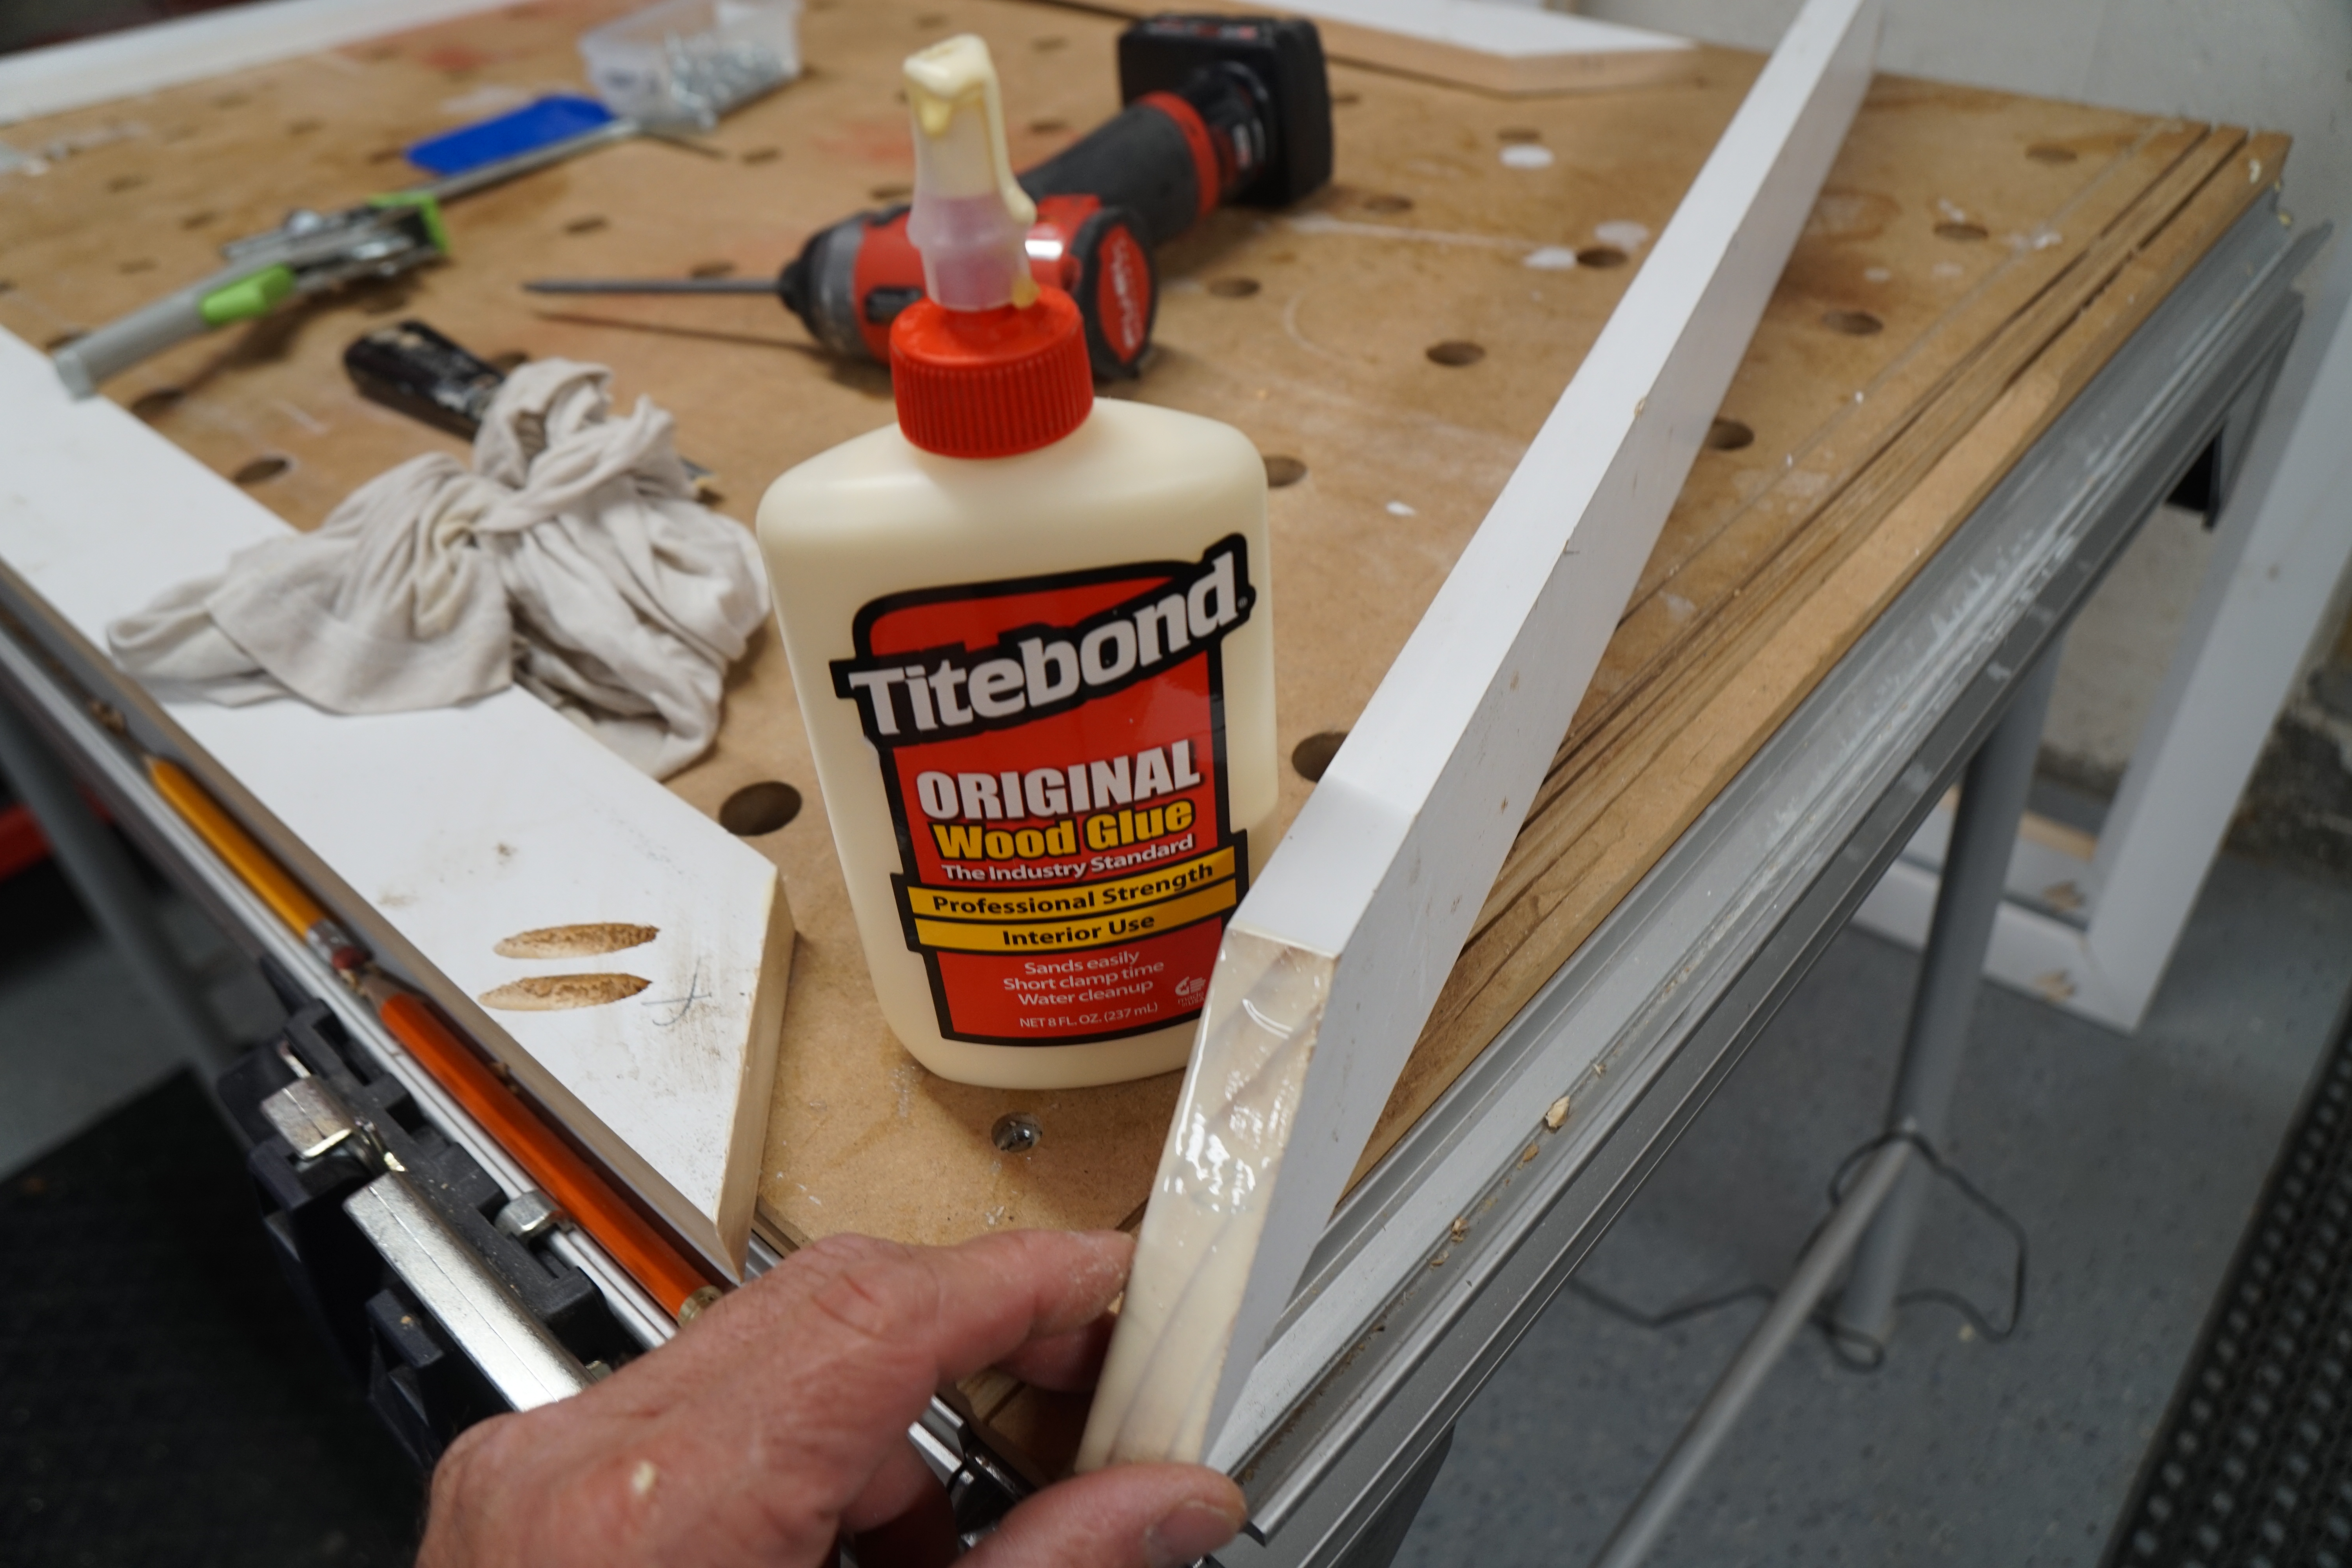
When pre-assembling the picture frame parts, I lay all 4 parts on the table and pick a miter to start at, and work my way around. Using clamps to hold at least one, sometimes two, trim parts down, to my table I use Kreg self-tapping pan head screws, some glue, and fasten the miter joint. When fastening I try to ensure the mitered boards are flush with each other. If they’re not flush, I unscrew, re-adjust them, and try again. If the two parts are not 100% flush when you’re done, I flush them out with an orbital sander later.
Sanding The Joints
Once the entire frame is assembled I wipe off the excess glue, fill any imperfections with wood putty and stack the assembly to dry. I usually let the assembly dry overnight [don’t have to] when dry, I sand the miters flush, and soften all the sharp edges with a block plane. For the window trim installation, I install reveal marks top and bottom of the window jamb and hold the trim to those marks. Fastening the trim with a 16 gauge finish nailer.
The result is a consistent, professional installation with long-lasting, flush, and tight miter joints.
Kreg Jig Cost
You can purchase this Kreg Jig online for $149.00 here: Kreg720 Pocket Hole Jig – PRO
How To Preassemble Window Trim With A Kreg Jig