Snow Melting For Residential Remodeling Projects
As a remodeling contractor we oversee a lot of landscaping with our projects. Recently we have seen an increase in snow melting projects.
SAFETY TIP –
When performing projects like installing this walkway snow melt system or when cutting or grinding masonry it is super important to take safety precautions.
For this project I wore safety glasses, knee pads, a breathing mask and safety shoes. I also always purchase and wear “steel toe” safety shoes. A quality safety shoe is imperative to your foot safety as well as over all comfort while on the job site. The boots I’m wearing on this project are my new Timberland PRO Series Hyperion XL Safety Toe Boots.
I especially like the Hyperion XL because they are lightweight, durable, protect feet and incredibly comfortable. They feel more like a hiking or athletic shoe than a work boot!
The heavy duty Vibram out-sole as well as the rubber coated toe feature really stood up well after getting dragged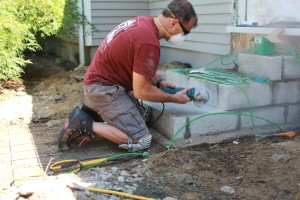

On thing that sounds silly but is a reality is that when laying the blue-stone on the ground I always rest it on my toe first to avoid it hitting the ground and chipping. The safety toe on the Hyperion XL allowed me to do this with no pressure telegraphing through to my toes.
Timberland PRO uses a lightweight molded EVA mid-sole and exclusive Anti-Fatigue Technology that features molded, inverted cones that support, collapse and return in key pressure zones, providing foot arch comfort and overall less fatigue and allow me to stay on my feet all day.
Timberland also uses an antimicrobial treatment called Agion® for odor control and I was amazed at how well it works. This boot consistently performs above industry standards.

Snow Melting Project
Living in the North means shoveling snow and salting your walkway and stairs. Over time it becomes a hassle and that’s why I think so many folks become “snow birds” as they get older. Let’s face it – who wants’ to deal with snow, ice and slipping hazards are you get older and your body becomes more fragile?
Why Install a Snow Melting System:
At first it seems that a installing snows melt system is a complete luxury and a remodeling budget buster until you put your liability hat on and consider what one insurance claim or law suit costs.
A snow and ice melt system is a huge liability reducer and extremely useful if you have a high traffic business or have someone living in your household that is elderly or handicapped. One bad fall can ruin your whole day… year! Avoiding slips and falls can save from litigation and costly surgeries or loss of work!
Snow Melt Systems Work while You Sleep:
The beauty of having a snow melt system is that it is automatic. Sensors built into the system monitor environmental conditions and turn the system on and off as needed.
The system will melt snow and ice while you’re away, at work or sleeping. There is no need to wake up early to take care of the walkway.
Snow Melt Systems Don’t Need Caustic Chemical:
The beauty of having a system melt snow and ice off your steps and walkway means you do not need to purchase, store and use caustic chemicals or rock salt to keep your walkways and steps clear and safe.
Chemicals and salts damage concrete and hard-scape as well damage landscape plantings.

Designing Our Snow Melt System:
For this project we chose a snow melt system from WarmlyYours.com, a company who designs durable, high quality indoor and outdoor snow melt and heating products. Their heating cables are designed to be go under concrete, under pavers, asphalt or masonry walkway, driveways or basement slabs.
WarmlyYours worked with us to design a custom fitted system for the existing walkway and supplied a drawing and complete instructions on how to correctly install our system. Every project manager is involved in a Warmly Yours design.
They approve of the design with you and follow the project to the end. I was impressed with the level of customer attention and service WarmlyYours provided.
They have both mat and cable snow melting systems, because we had steps to transition to as well as the walkway had a ninety degree turn, we used a cable system on our project. That system included:
- 377′ of snow melt heat cable. [Uses 4500 watts at 240V]
- Relay panel [30A-240V breaker at the relay box]
- Snow sensor
CONSTRUCTION TIP –
In order to transition from the landing to the step and then to the walkway I used a Bosch 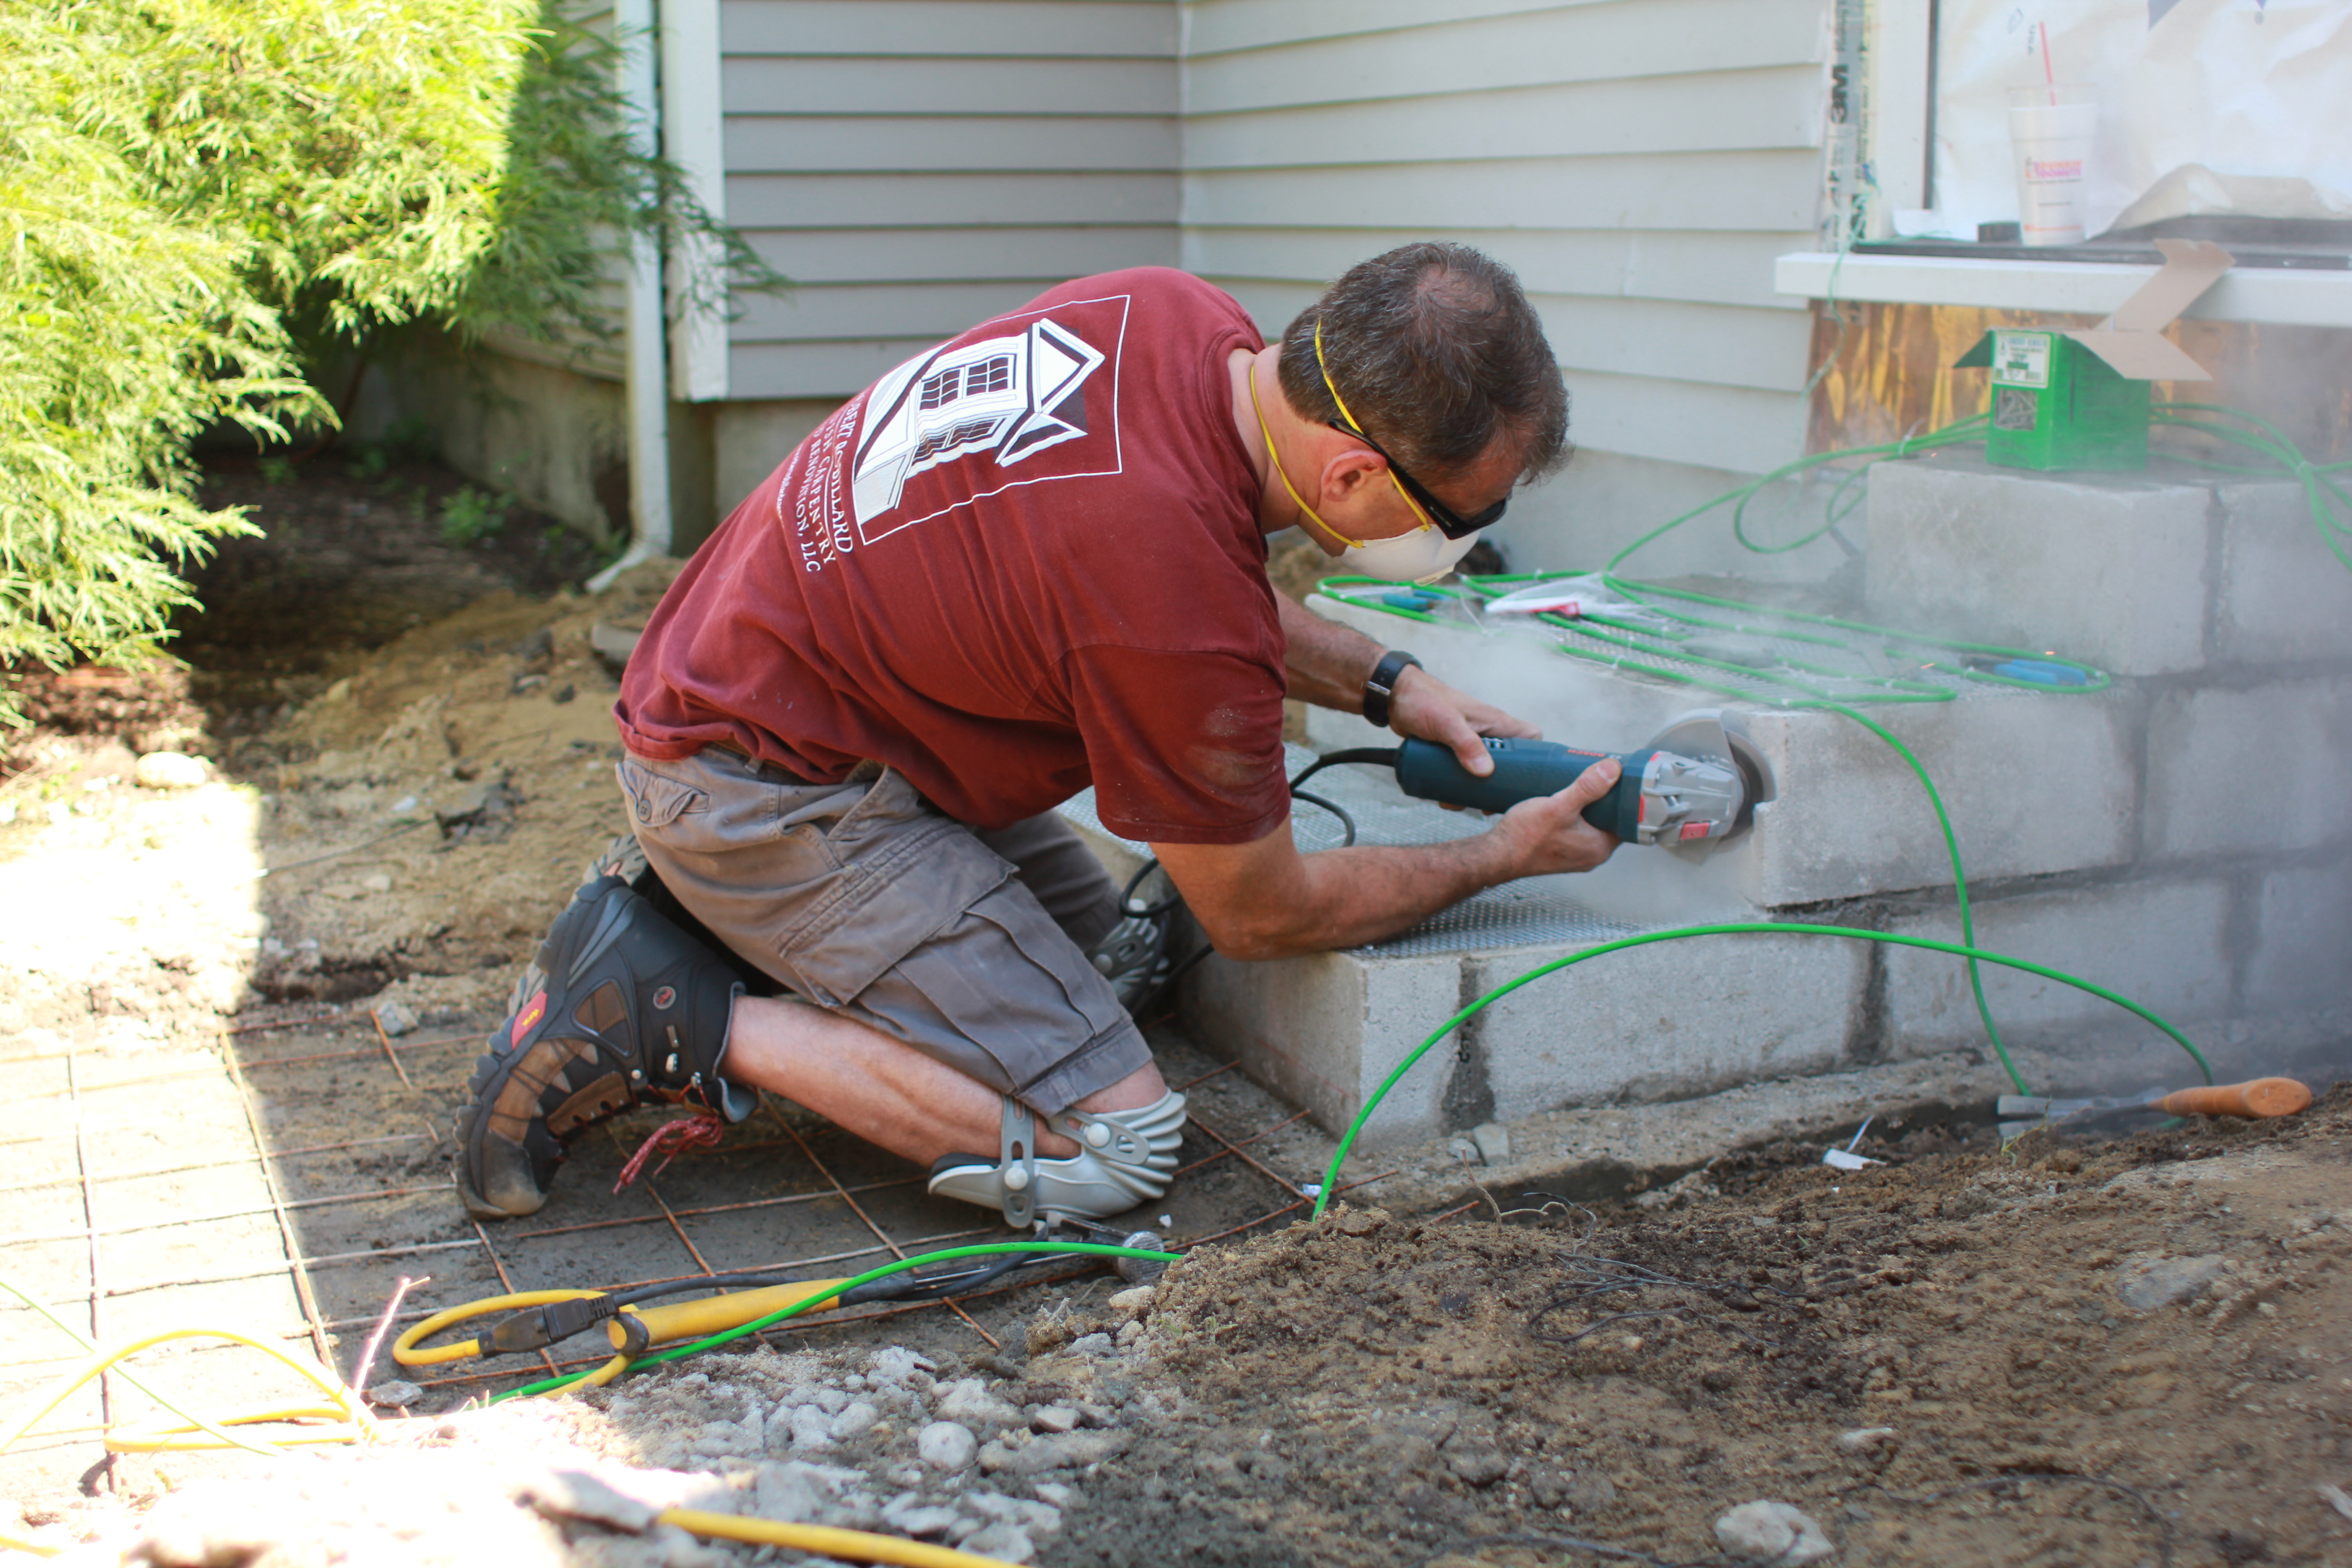
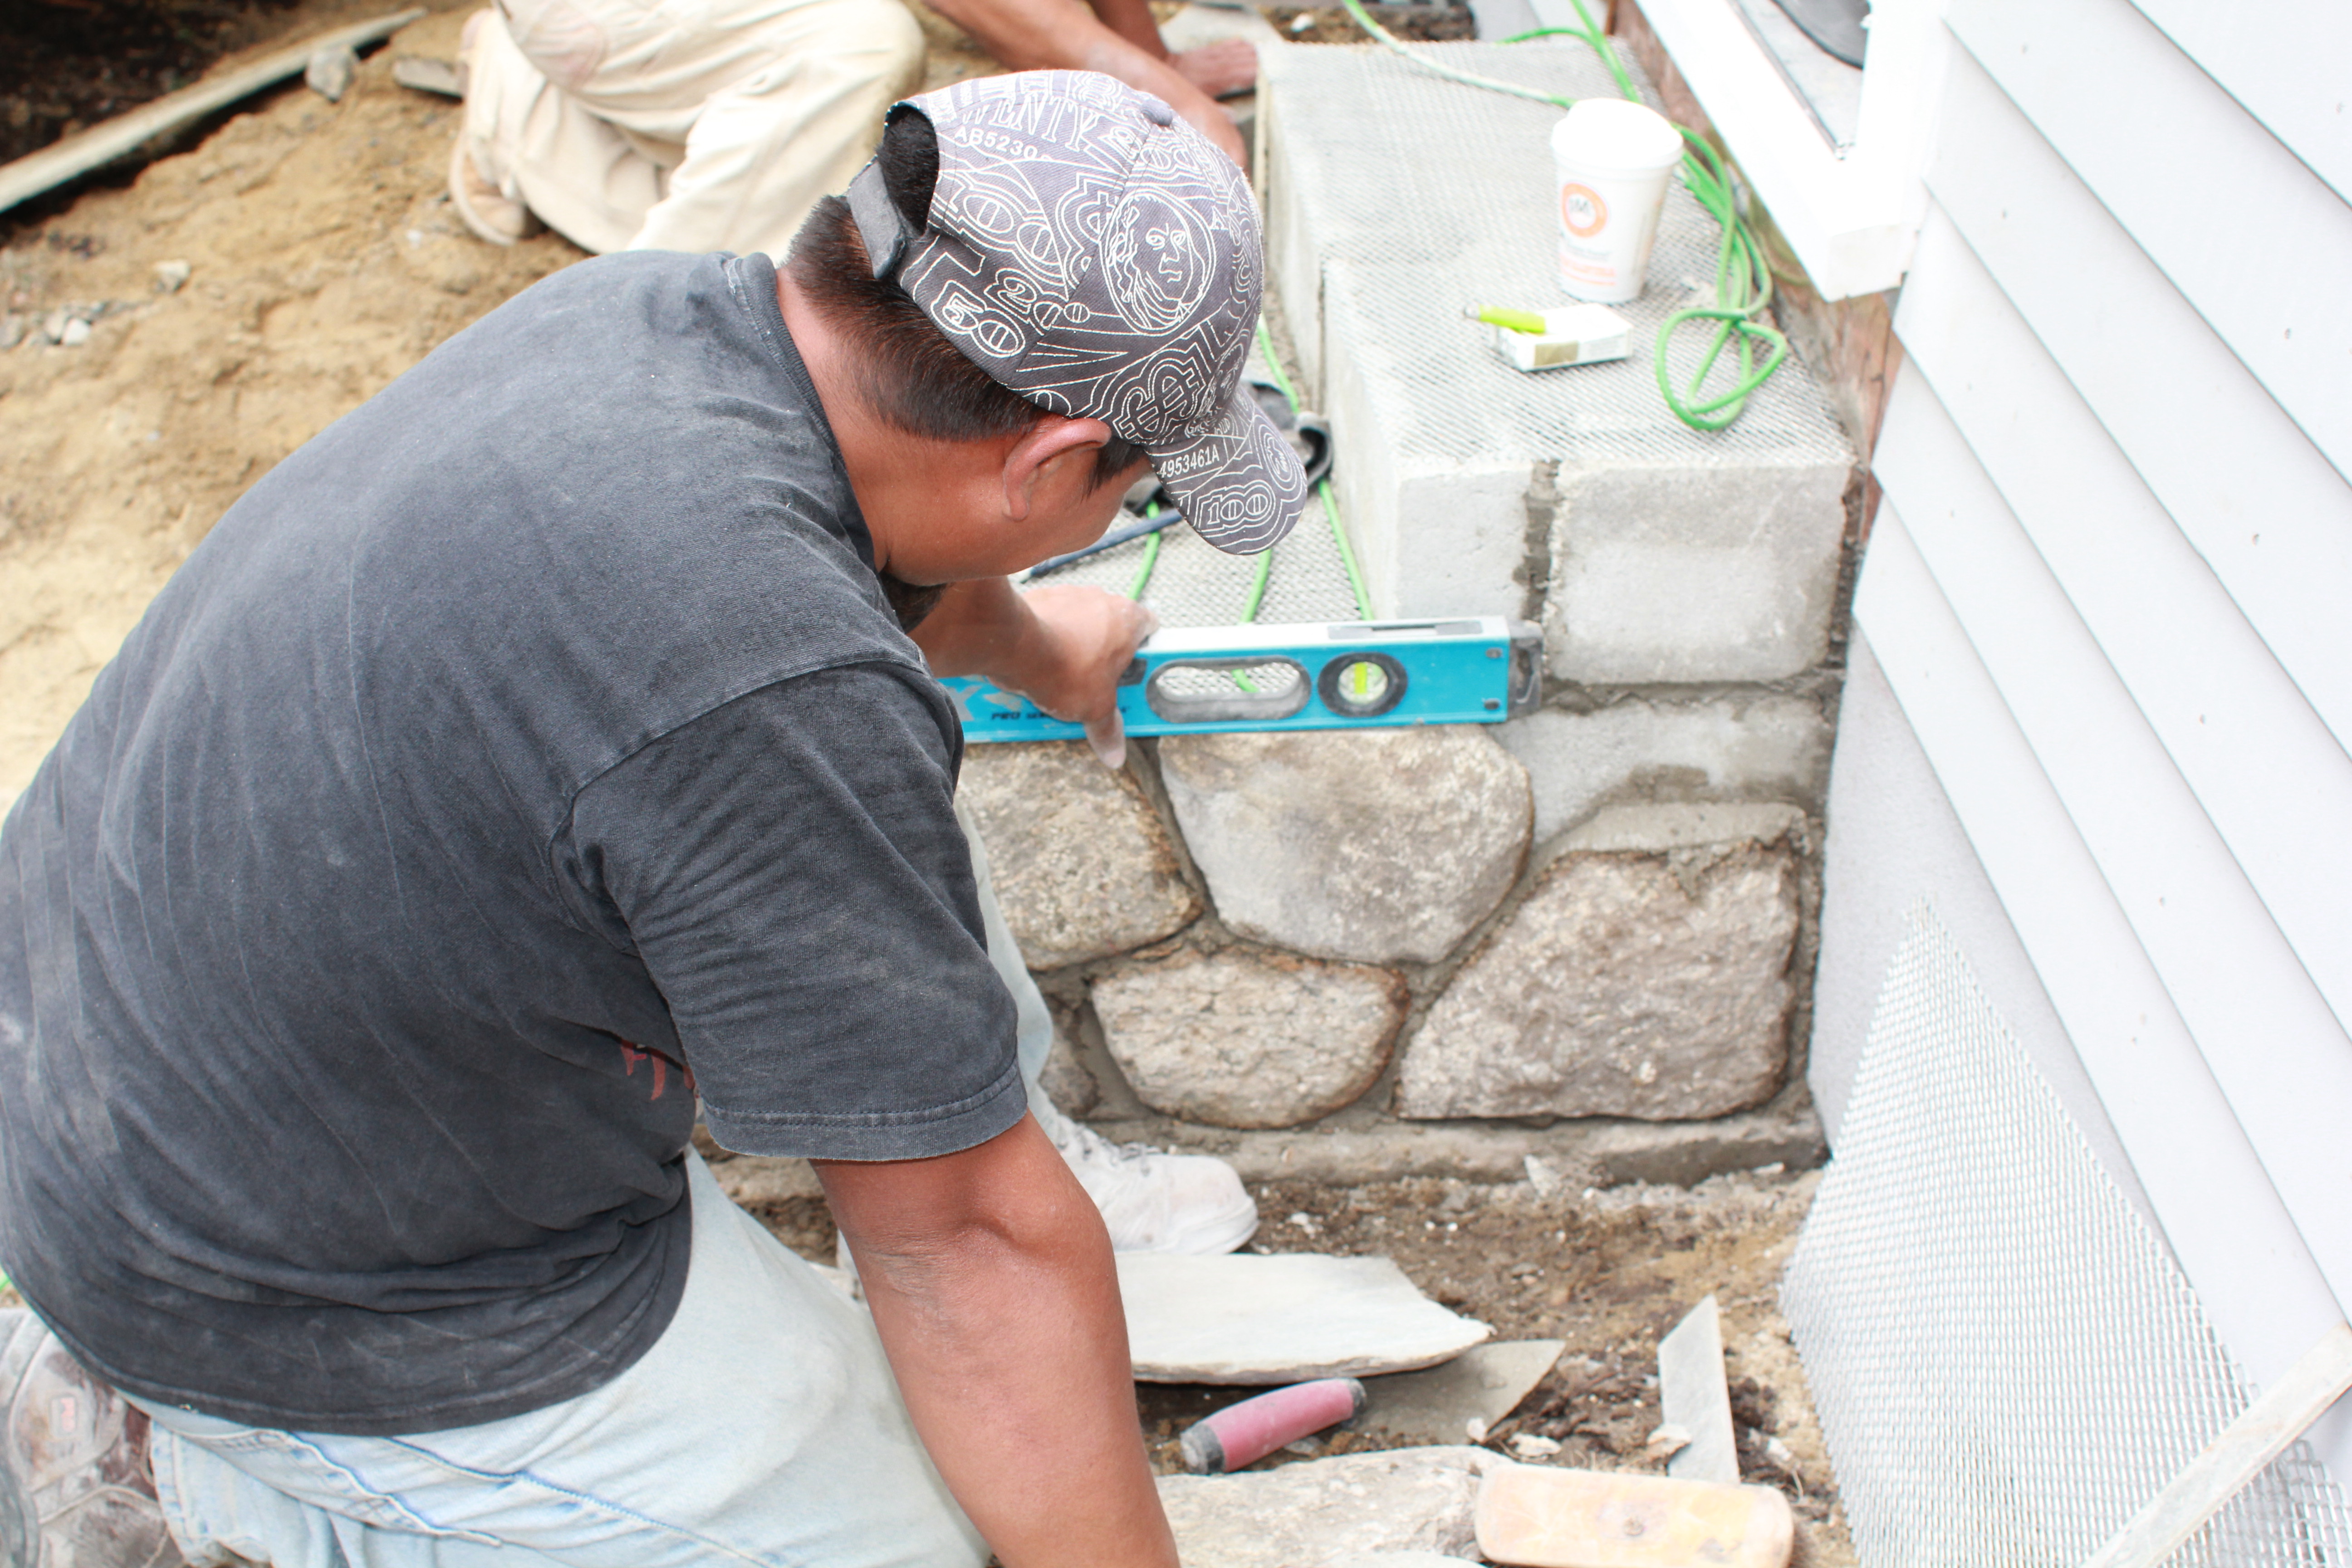
The stone veneer comes with corner blocks that cover all of the corners. By grinding away the concrete blocks corner I was able to create a channel for the snow melt cable to run behind the corner stone.
Installing the System:
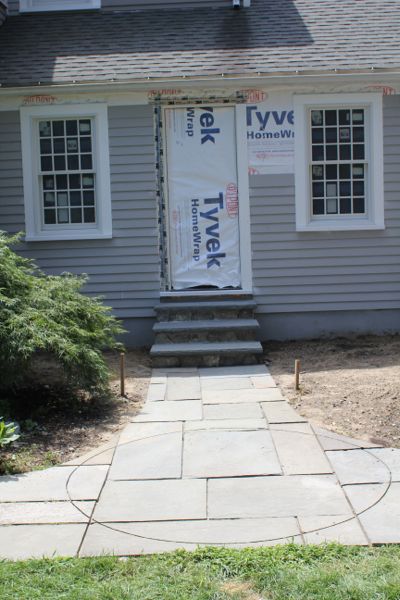
On our project we were converting a covered and open porch into a closed, heated mudroom. Part of this project was to build masonry steps connecting the new mudroom to the existing blue-stone walkway.
The existing blue-stone was in great shape and was aesthetically pleasing. It was decided that we would carefully pull up the blue-stone and store them temporarily while we built the mudroom, steps and installed the WarmlyYours snow melt system.
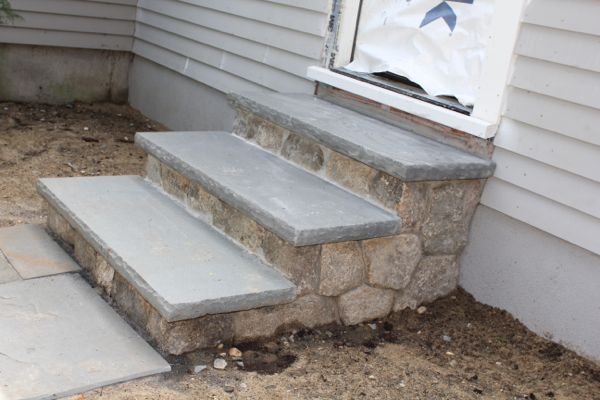
Building the Steps:
We chose to build a concrete block landing and step and use a veneer stone to cover the sides of the landing and step risers. The cables are easier to install with a block foundation. 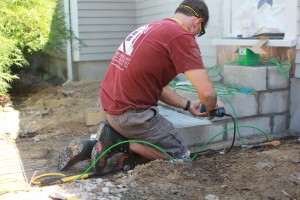
Prior to building the steps we needed to dig and pour a concrete a footing 48-inches deep, below the fronts line. Re-bar and wire mesh was added to this footing for strength.
The step treads would receive the heating cables and topped with 1” to 1-1/2″ bed of mortar and capped with 1-1/2″ thick blue stone treads.
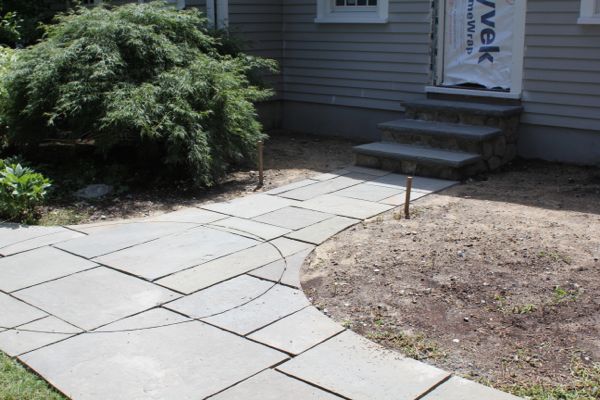
Preparing the Walkway for Snow Melt Cables:
We re-excavated and graded the walkway base and made sure there was a good pitched to drain water away from the steps. To do this we added and tamped layers of gravel in 1” lifts until we had a minimum of 3″ or firm, thick compacted gravel base. Prior to doing this we installed a 4” PVC conduit under the walkway for future lighting or irrigation additions. 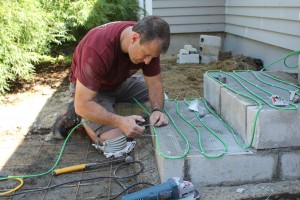
We measured the location of the conduit and wrote that information near the electrical circuit breakers for future reference.
This conduit allows future work to be done without having to lift the blue stone and risking damage to the heating cables.
Installing the Snow Melt Heating Cables:
The WarmlyYours heating cable has a 20′ section of cold wire.
This wire is what you use to run through the floor system of the mudroom and to the control panel.
These cables are terminated with 20’ (6.1m) long standard col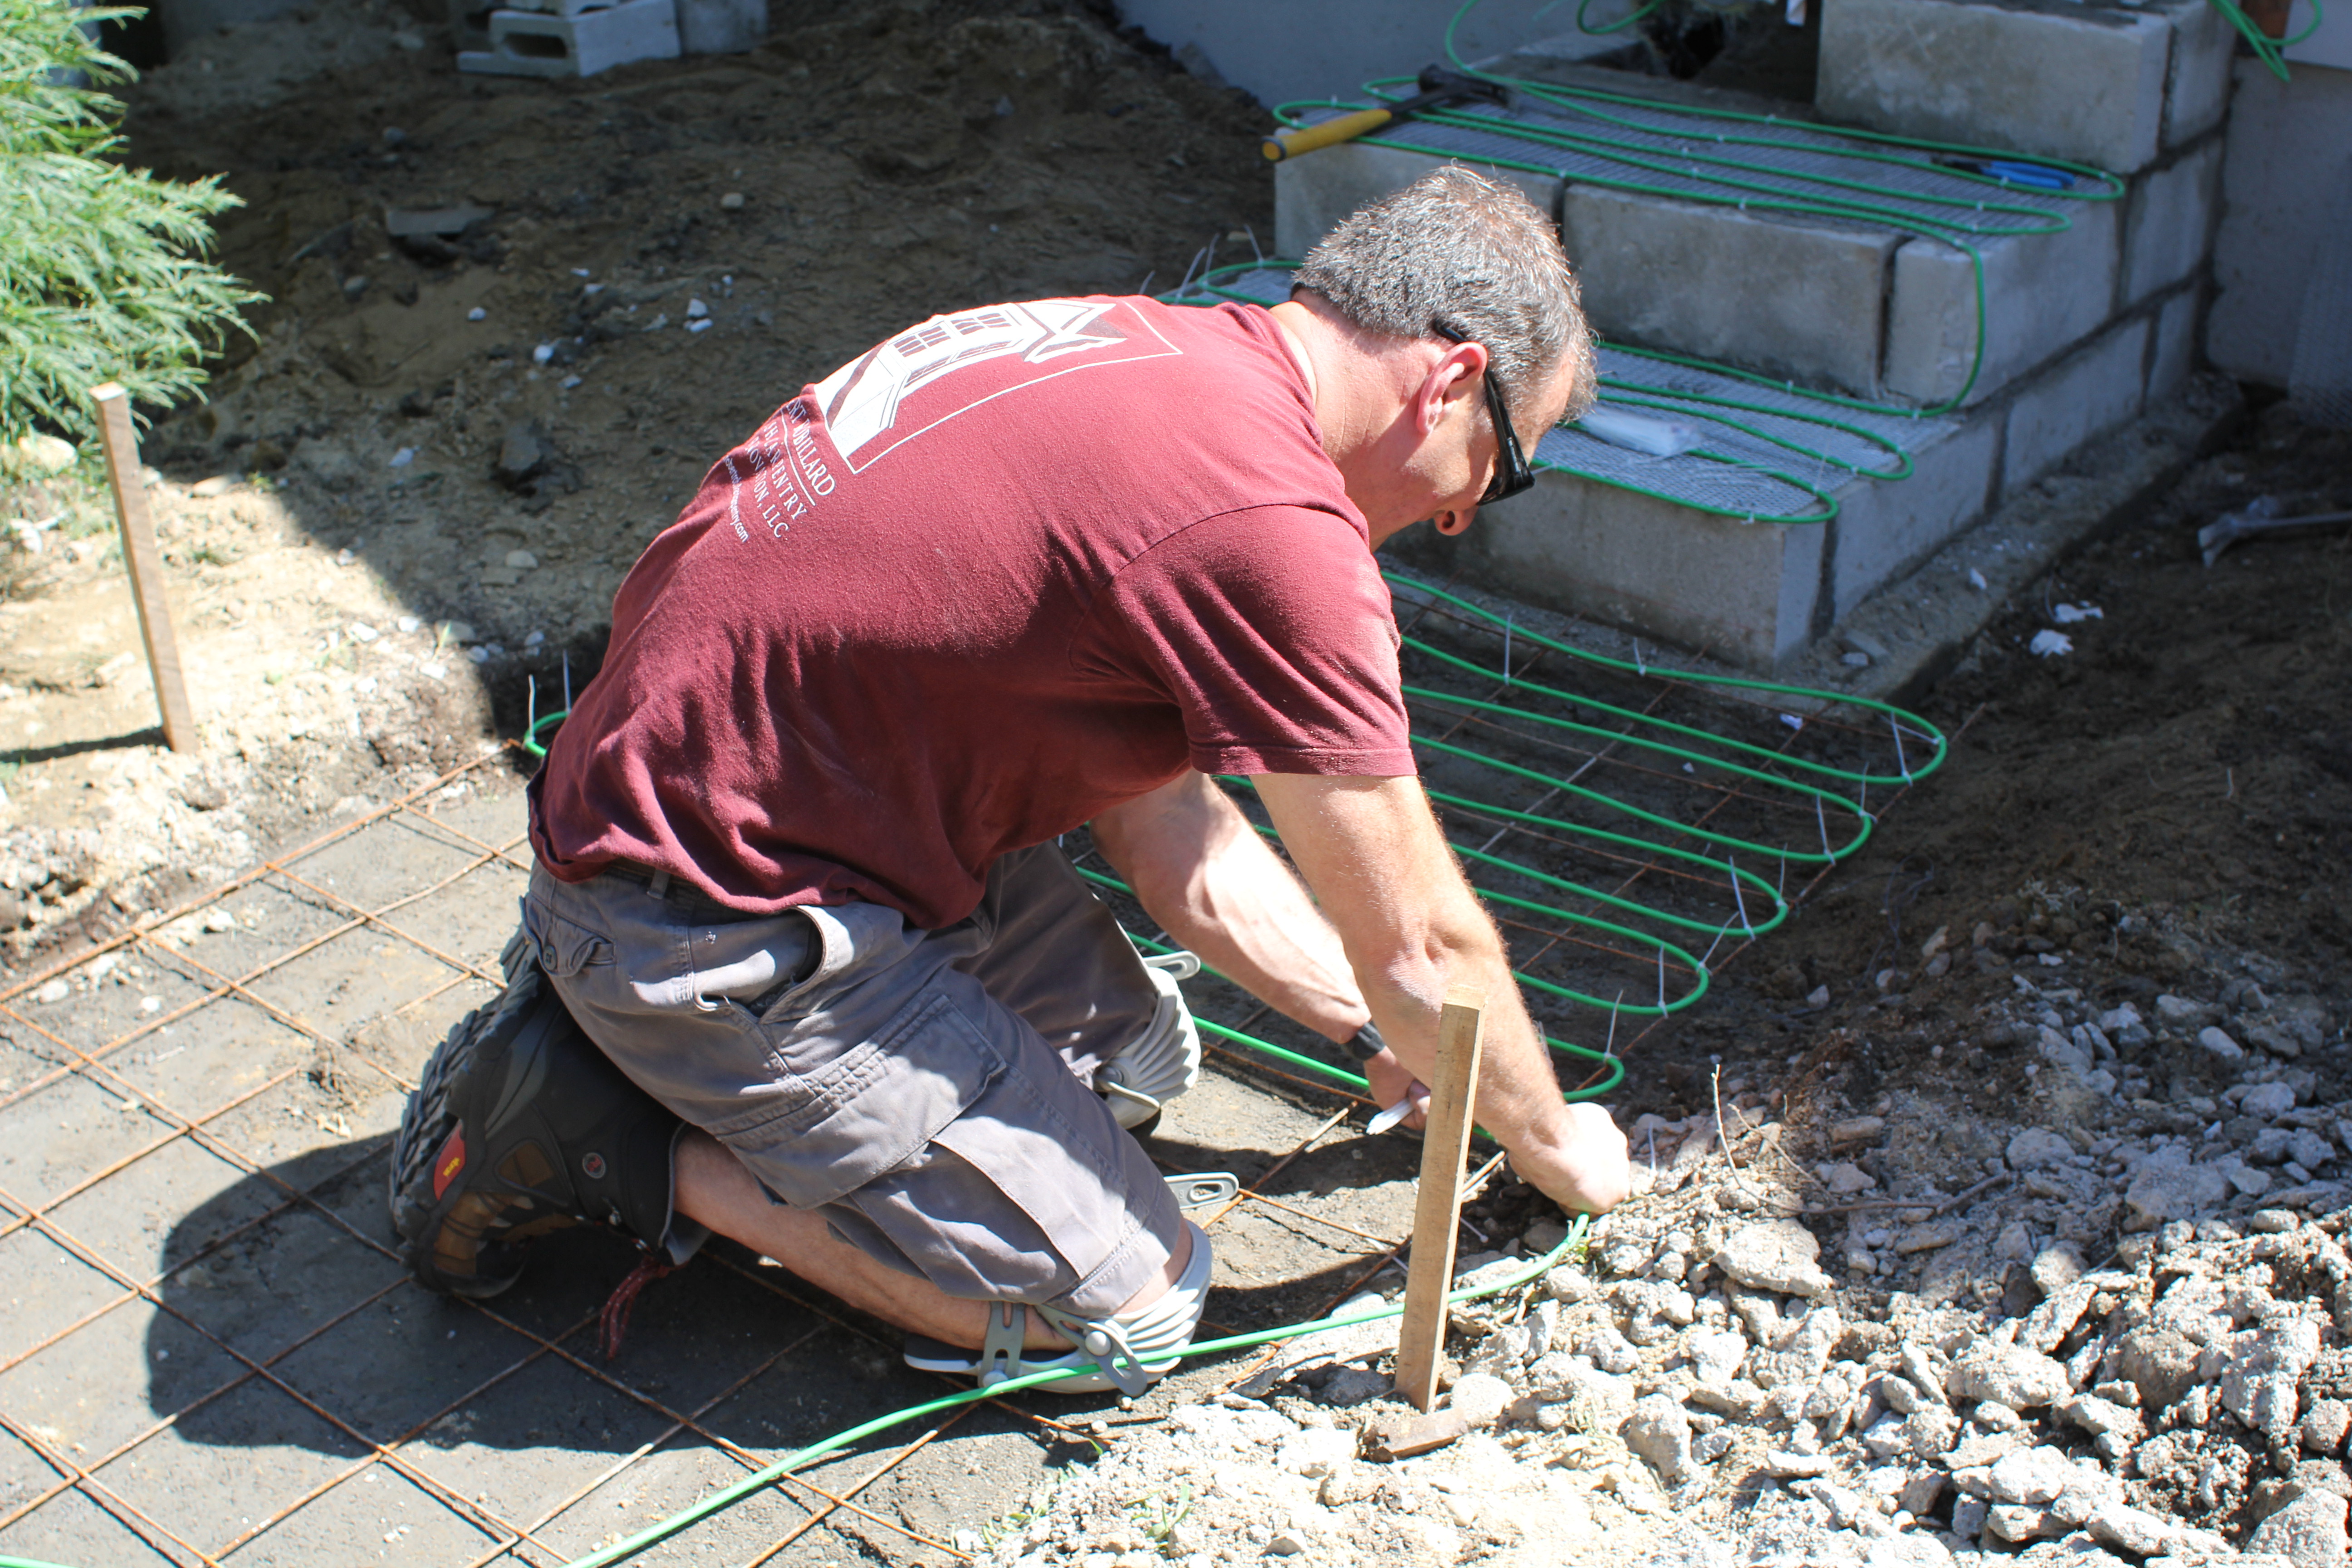
We ran our cold lead wires through the mudrooms new floor joist system and into the basement to the electrical service panel.
The snow melt system requires one dedicated 30 amp 240 VAC breaker.
The electrician chose to wire this project for 240 volts. 240 volts allows you to cover more area with the available amps.
All electrical connections are made by an licensed electrician. The electrician will run also conduit to the snow sensor.
Prior to installation and periodically during installation make sure to check the Ohms, per manufacturers recommendation, to ensure that the cable is not damag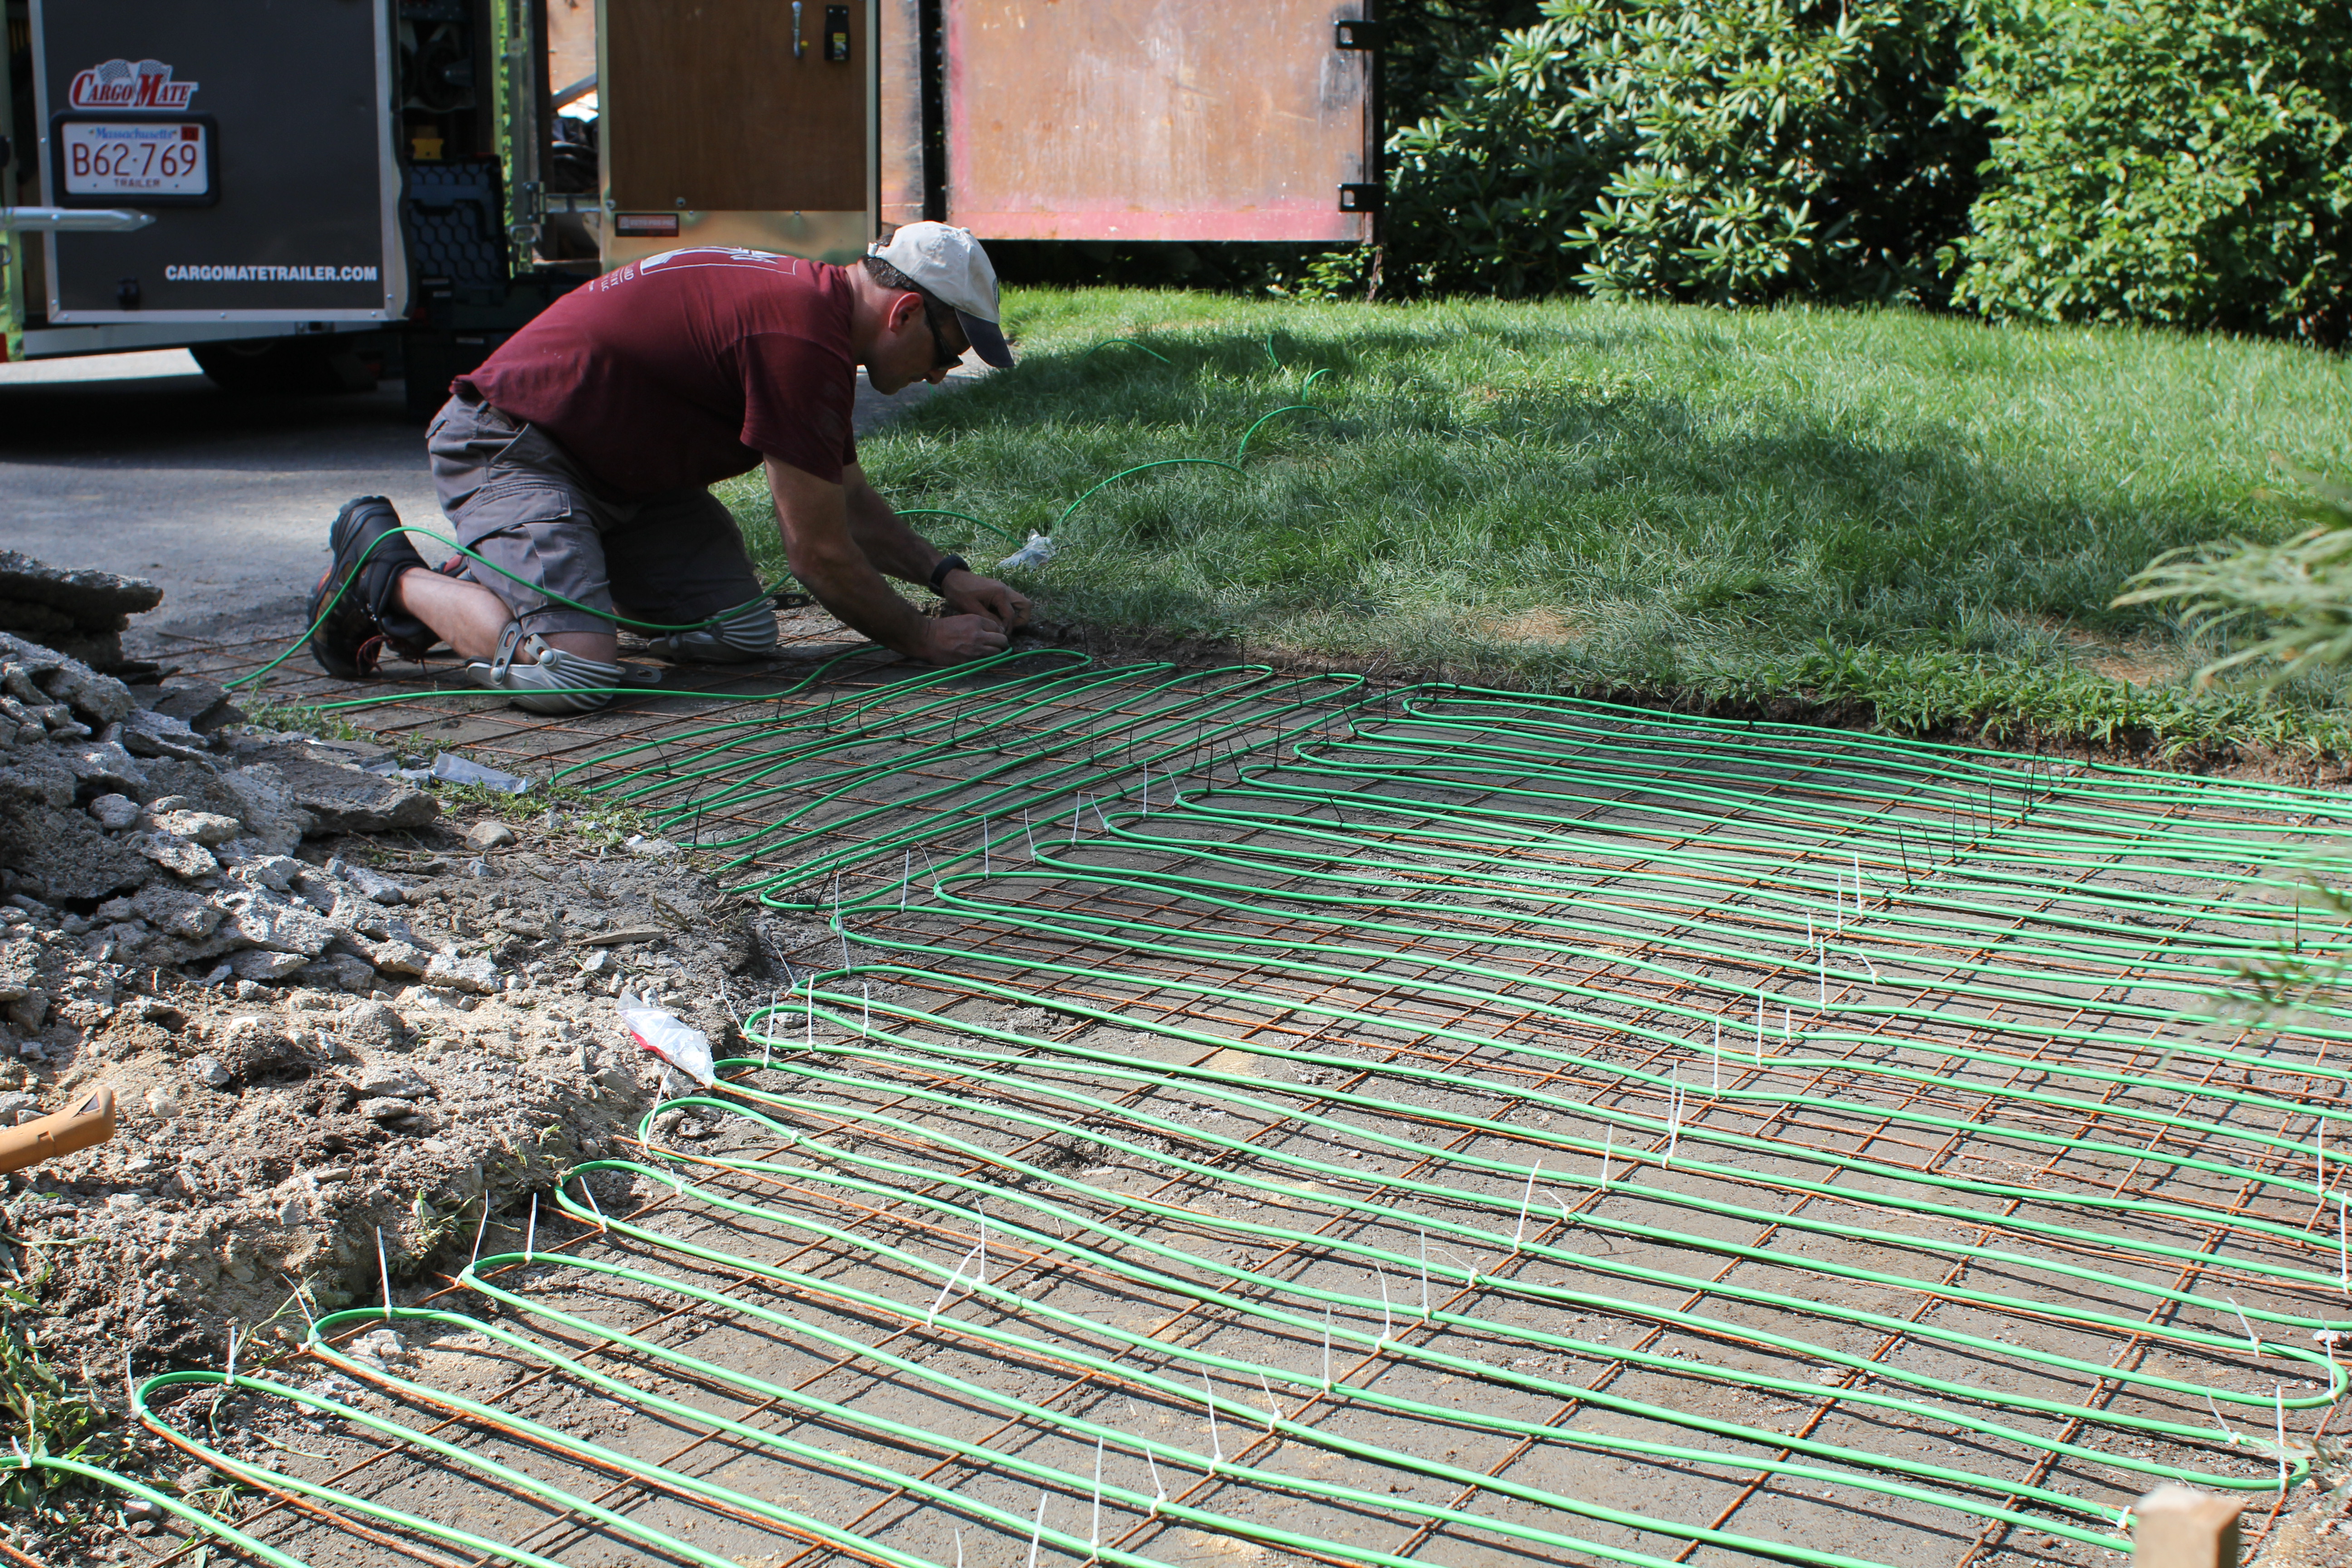
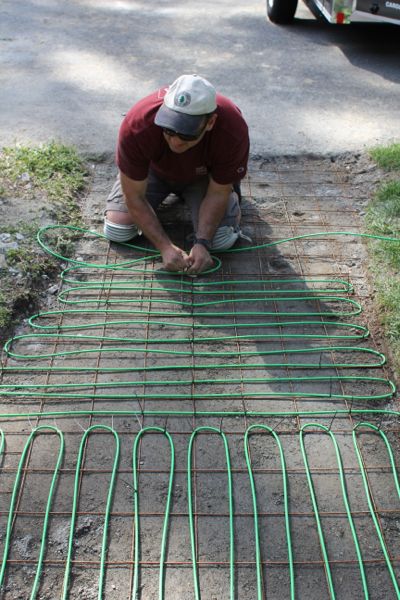
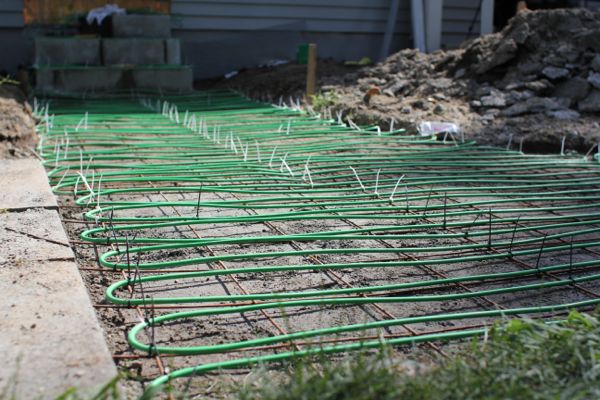
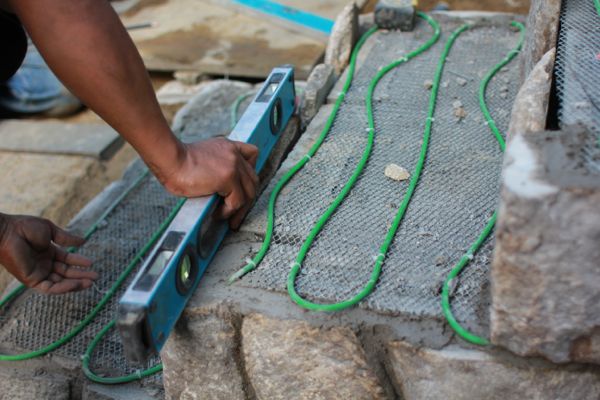
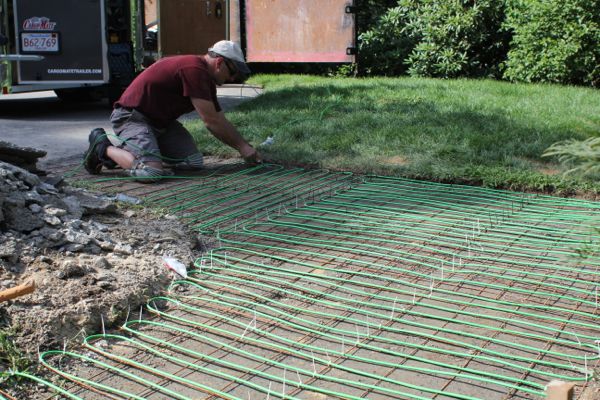
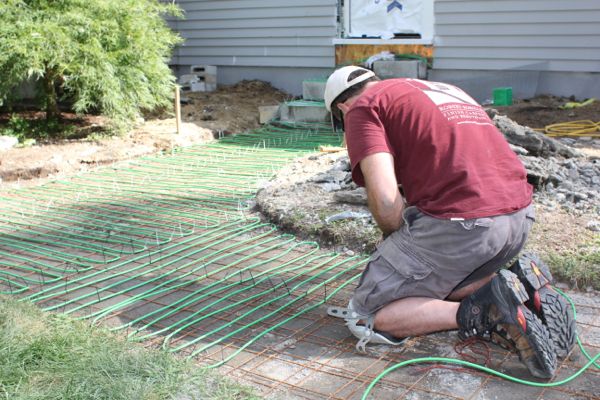
We needed a way to secure our snow melt cable and keep its shape under the walkway. To do this we installed a 6” x 6” wire grid over the gravel base.
The heating cable was then installed in a serpentine pattern, and was secured to the mesh with plastic tie wraps.
I took precautions not to overlap the cables at any point to avoid possibly overheating the cables.
Minimum spacing of the cable s 3″ and the maximum spacing is 12“.
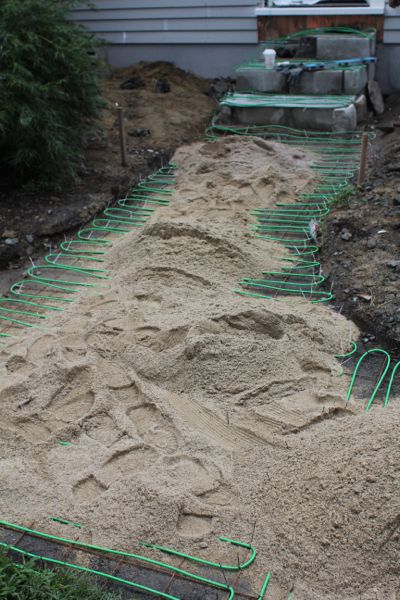
I installed the cable at a depth not deeper than 2-1/2″ from the top of blue-stone. The snow melting heating cable rests in a 1-inch bed of sand.
On the stair treads we installed galvanized stucco type mesh to the landing and step with fasteners embedded into the green mortar to hold the mesh down.

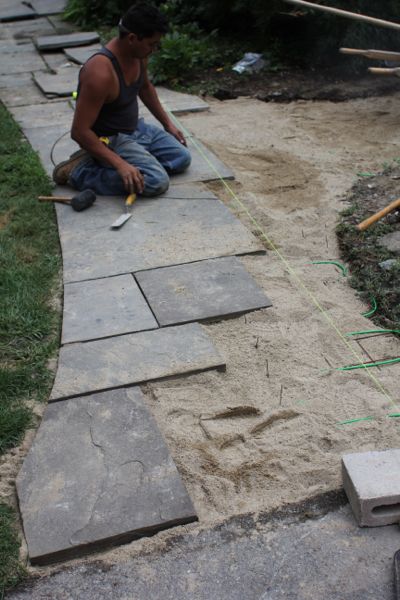
Installing the Blue-stone Walk:
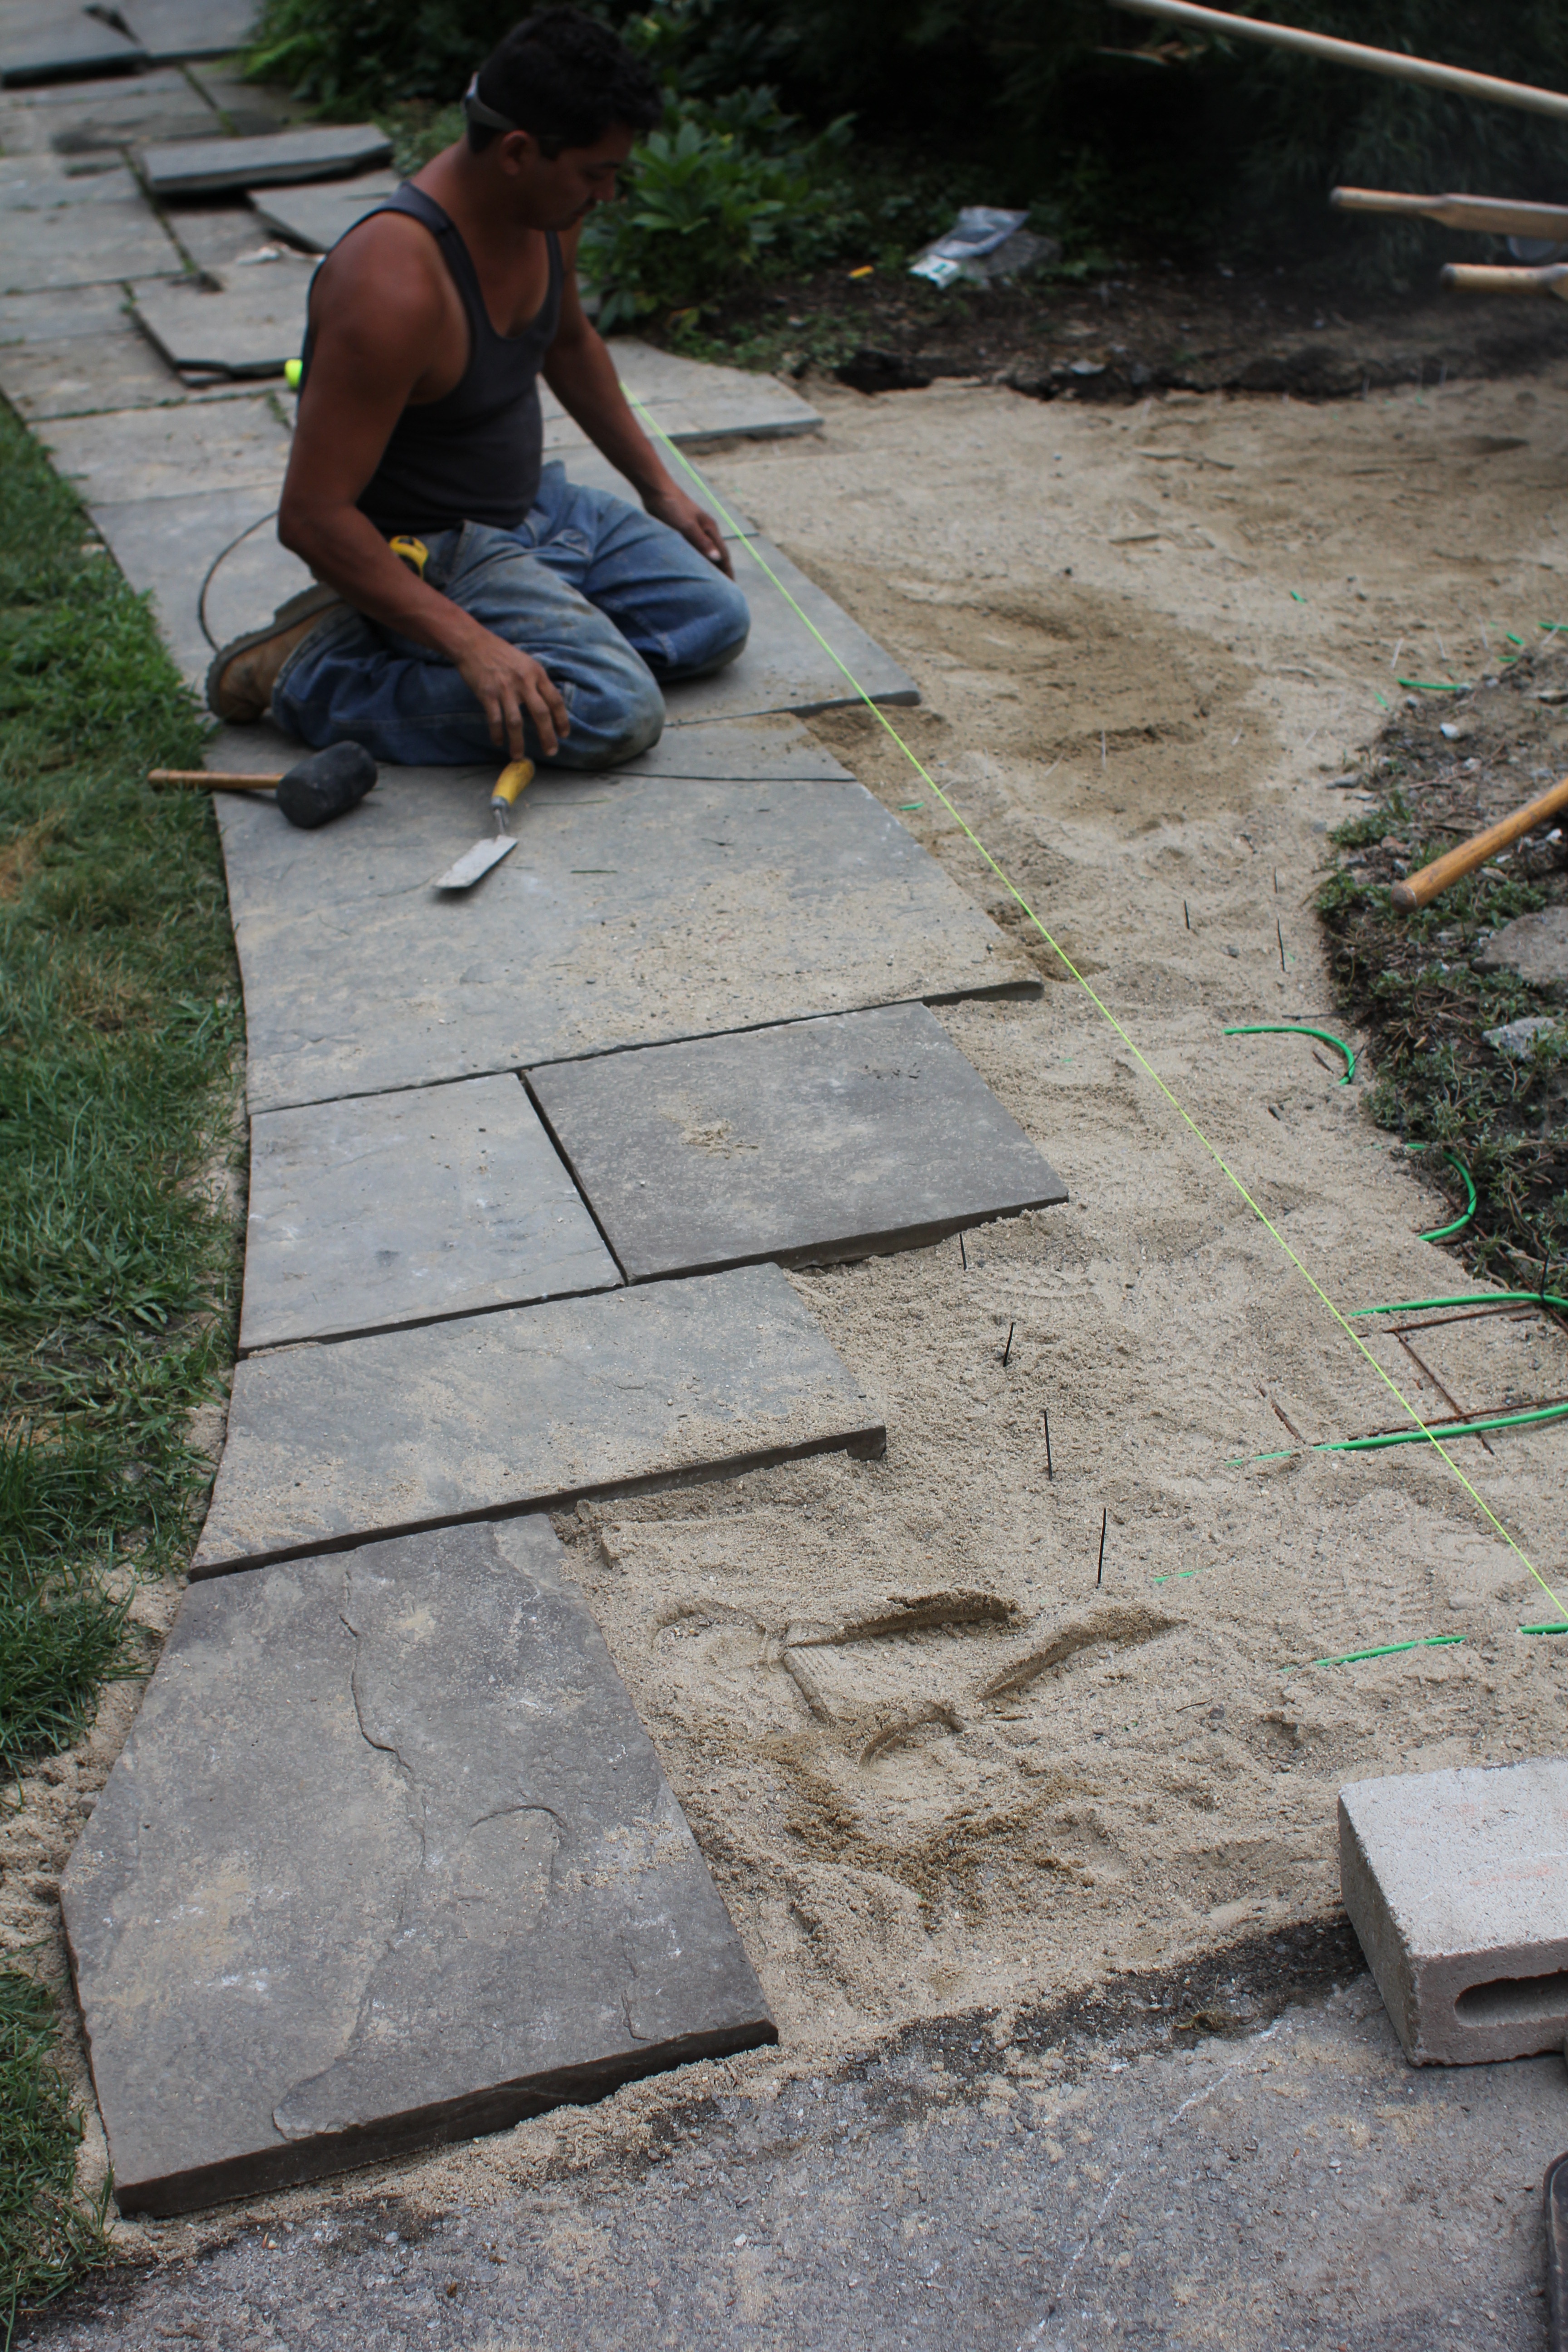
After installing the heating cable we reinstalled the blue-stone walkway on top of two inches of level sand.
CONSTRUCTION TIP –
When removing the walkway we used our iPhone to take a video of the blue-stone pattern. When the time came to re-install the existing walkway this video proved helpful with matching the pieces / pattern.
We used a rubber mallet to tap each piece securely in the sand, checking each stone for level and a consistent gap between stones for an attractive look. The blue-stone joints were filled with a colored plyometric sand to complete the walkway.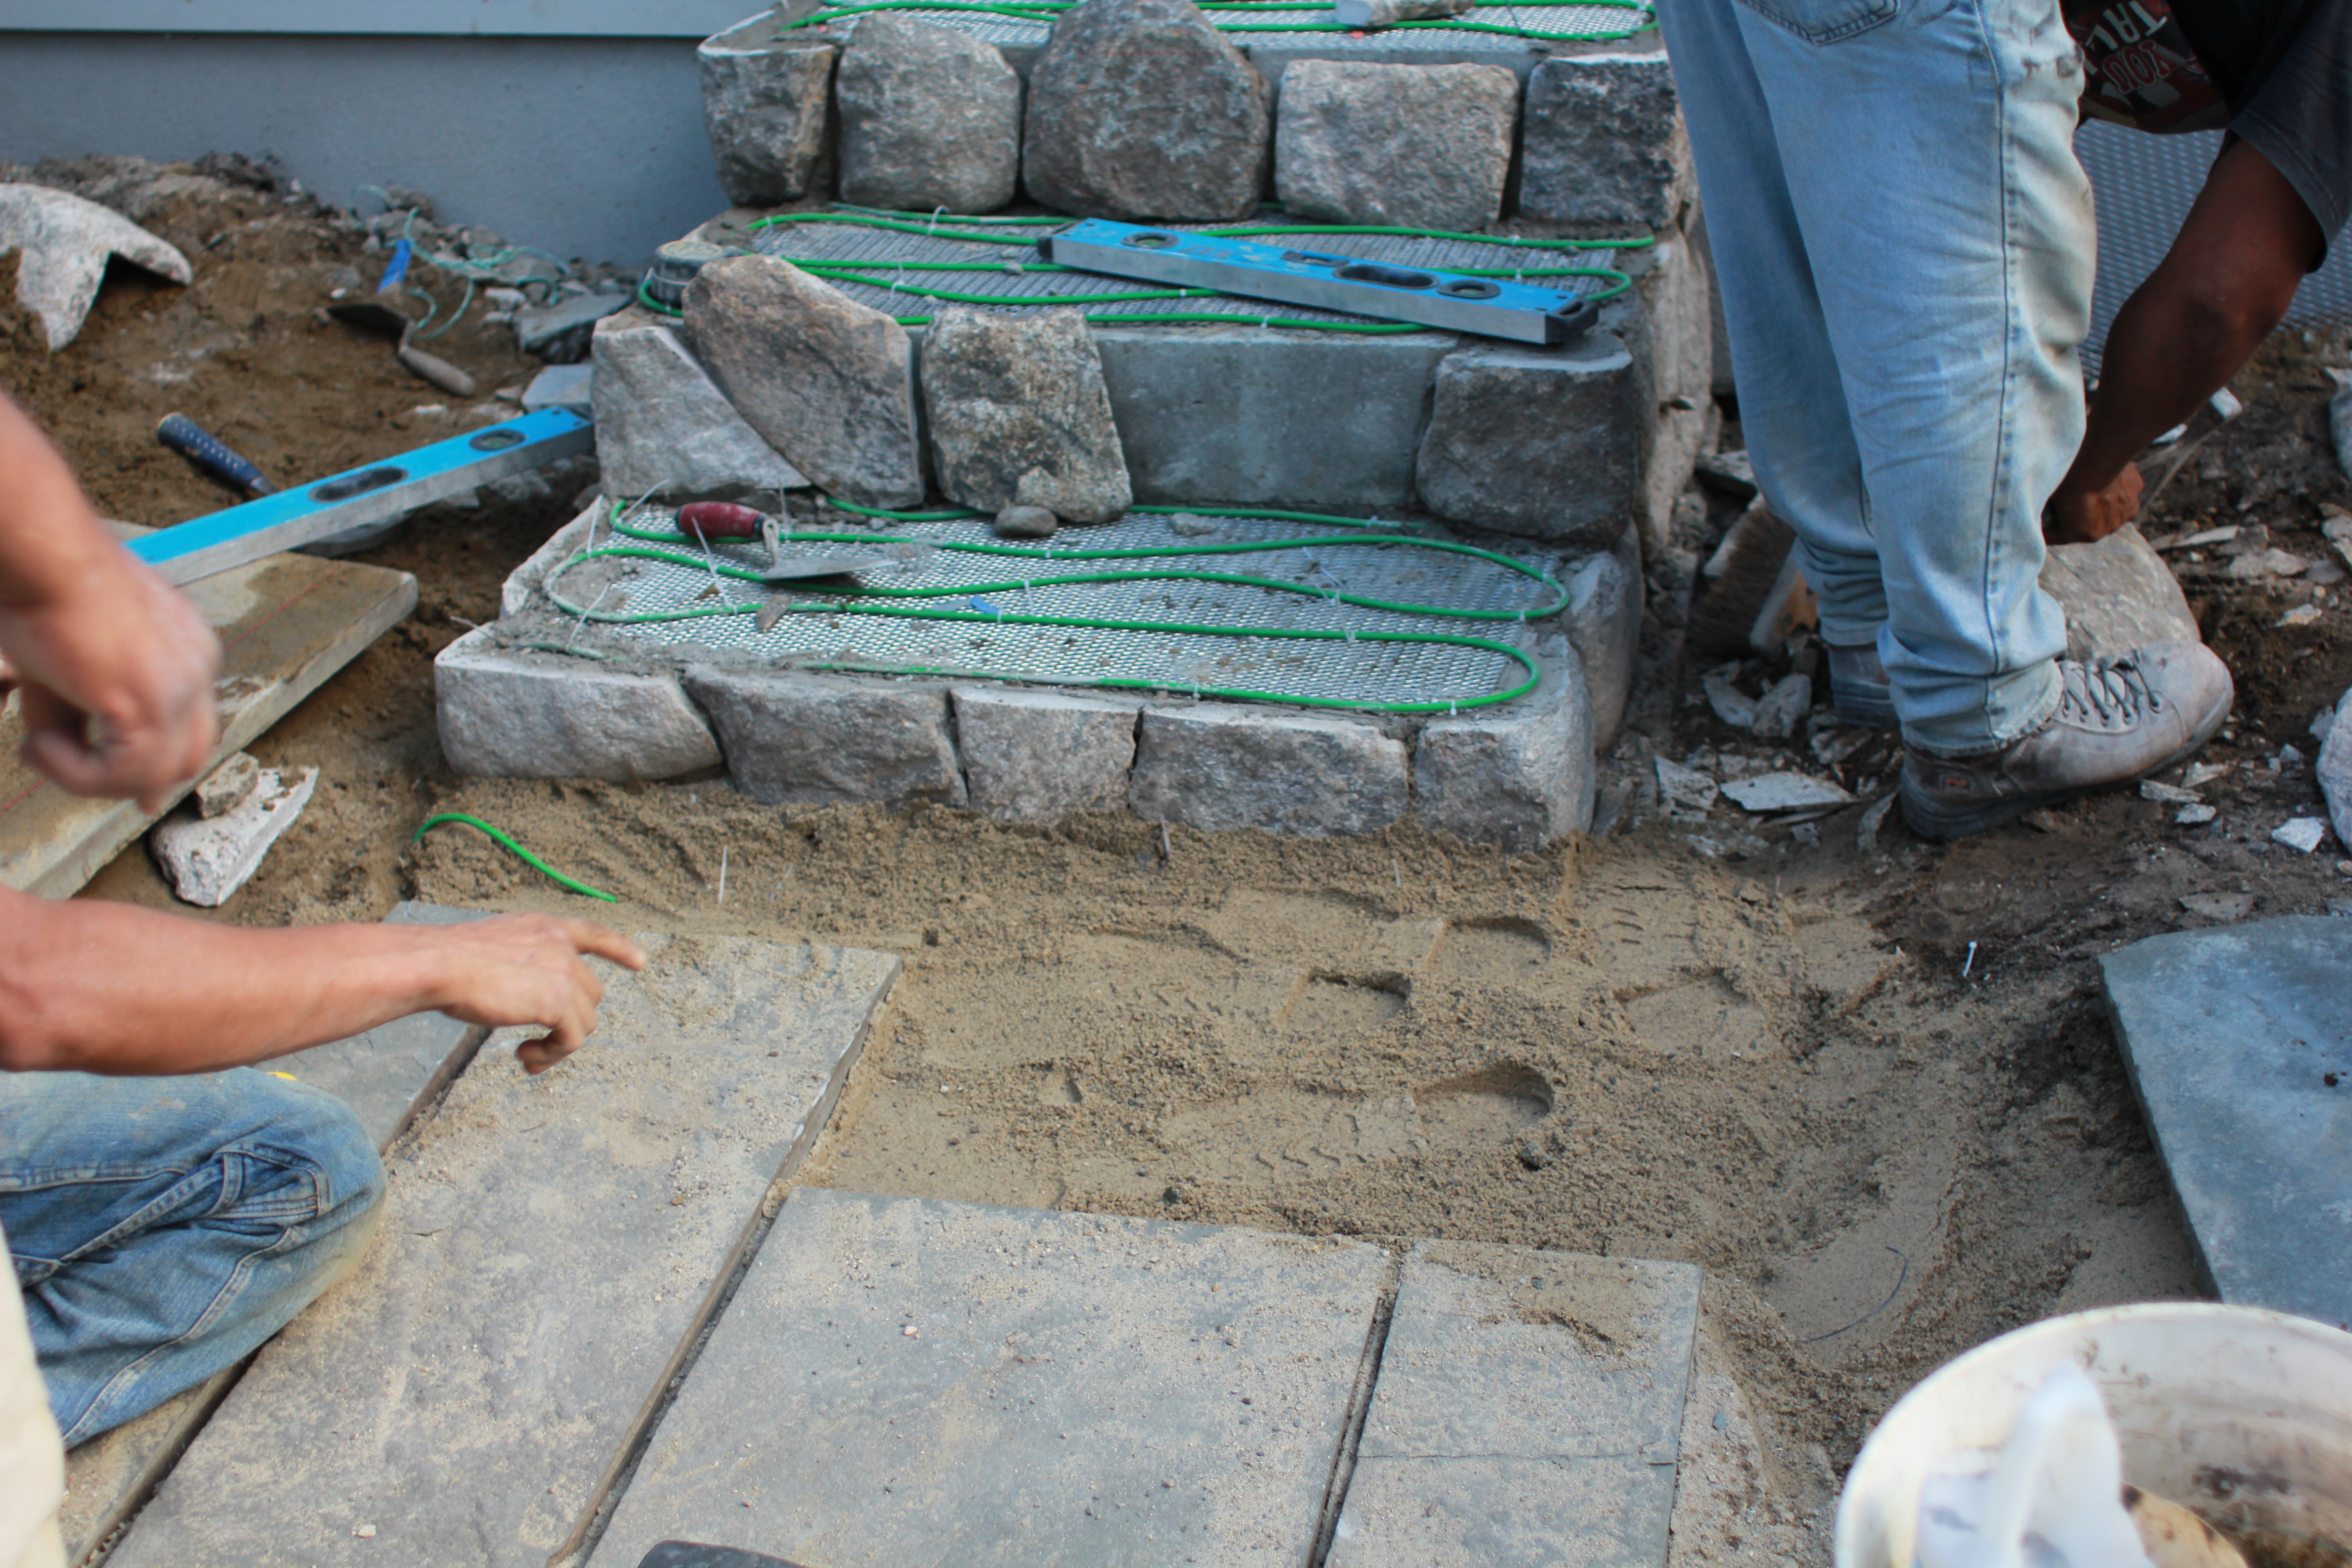
Snow Sensor:
The system has an aerial mounted snow sensor that attaches to the exterior of the house and a low voltage wire runs back to the Warmly Yours relay panel.
The Snow Sensor detects falling or blowing snow at temperatures below 38°F (3.3°C).
This snow sensor is probably the most cost effective automatic snow detection as opposed to turning the system on and leaving it on…. wasting electricity. The sensor can be mounted as far away as 2,000 feet.
The Warmly yours Snow Melt Control, when used with the aerial snow sensor and in slab sensor, automatically installing a snow melting system controls snow/ice melting heaters, ensuring minimum operating costs.
The system has an adjustable hold-on timer that keeps the heater operation on for 3 hours 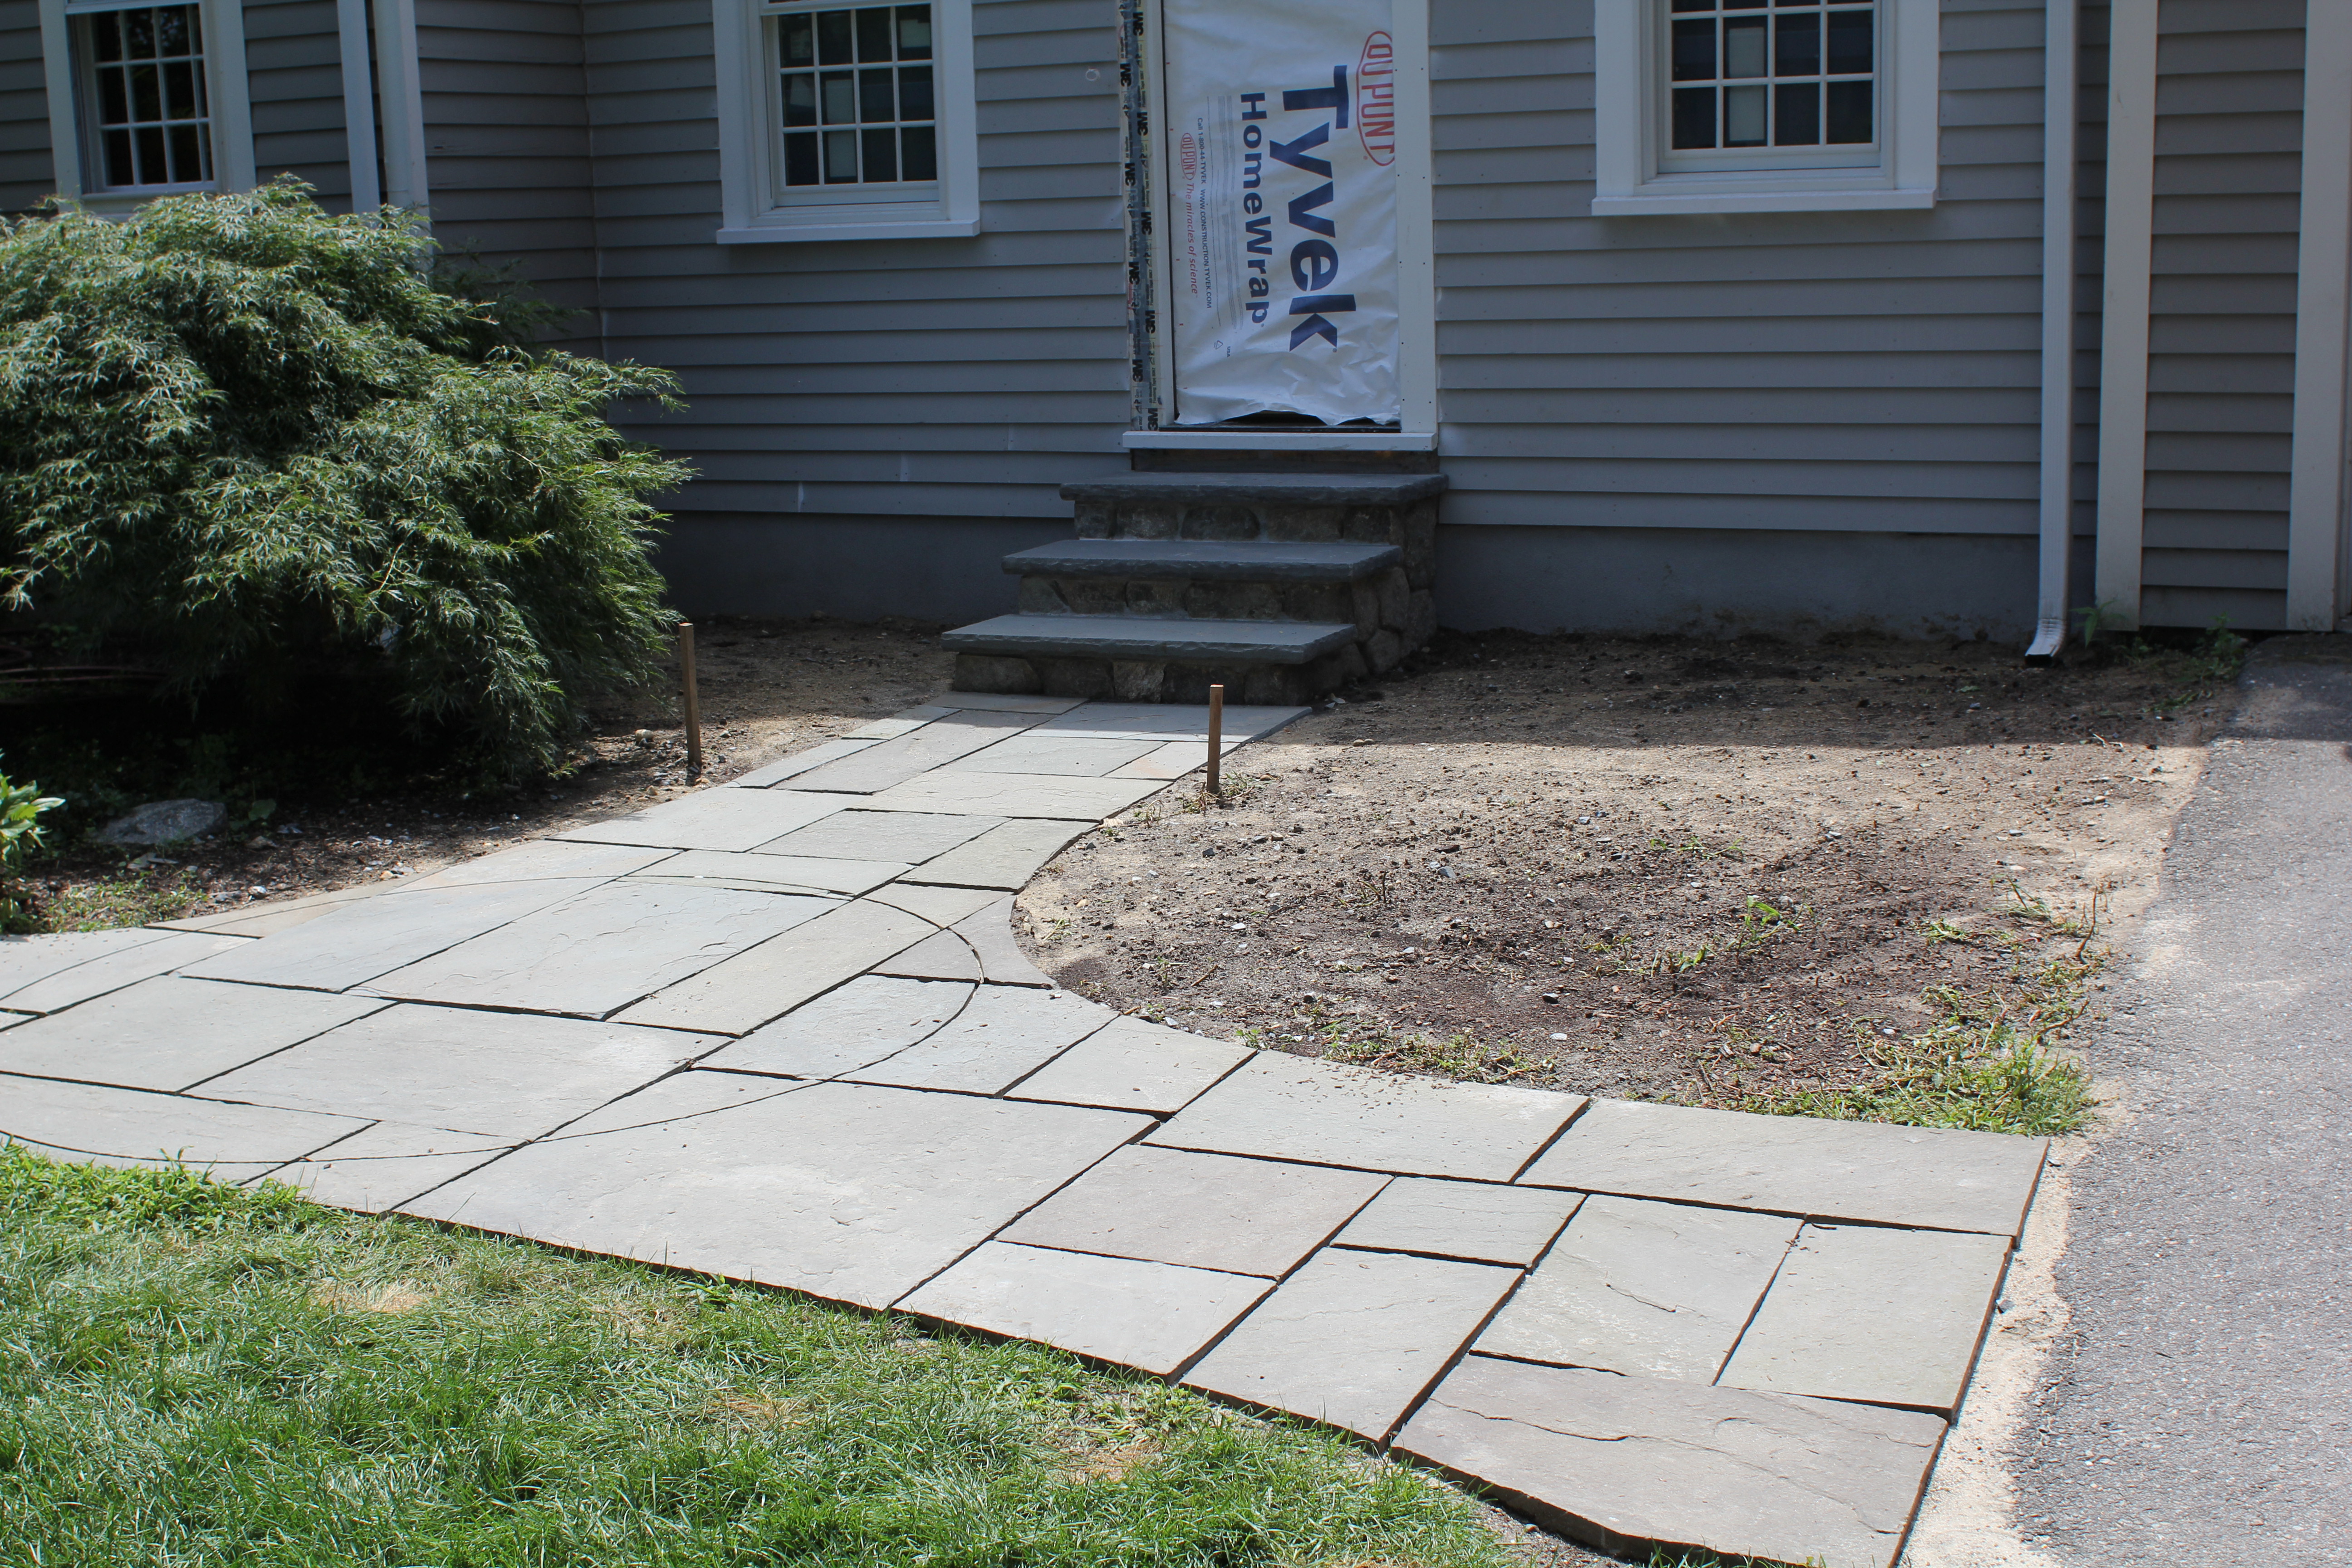
The advantages and benefits of having a snow melting system are obvious. Probably the biggest advantage of all is to the safety of family and visitors to your home or business.