

What Is A Roof Cricket?
Before installing a roof cricket you first should understand what it is, and why it is important.
A roof cricket is a ridge structure, designed to divert water on a roof. Roof crickets are found on the high side of a chimney, or when one roof meets another. The roof cricket is normally the same pitch as the rest of the roof, but not always. Roof crickets can be covered with metal flashing or with the same material as the rest of the roof. Crickets are also often referred to as “saddles” in this context.
Installing A Roof Cricket
When the chimney is at the bottom of a roof slope or has roof sloping into it I always install a cricket. Below are some pictures of a roof cricket I installed.
Roof Crickets Prevent Roof Leaks
Chimneys are notorious for leaking, and the culprit is almost always the sheet metal flashing. It doesn’t take an expert to spot problems—simply look for water-stained ceilings or other telltale signs of leaking in the vicinity of your chimney.
Because chimneys are such a potential trouble spot, consider installing a roof cricket, as well as, inspect them once every year or two. When inspecting; look for loose or missing flashing and cracks in the masonry. Small cracks can be sealed with caulk designed to repair masonry, larger cracks or missing mortar should be re-pointed.
How To Build A Roof Cricket
This chimney pictured below is on a Main Street Concord house. A leak caused rot roof sheathing rot, ant infestation and plaster damage in a bedroom below
We determined the cause of the leak to be several things; lack of an adequate waterproof underlayment [rubber ice and water shield], fatiguing lead chimney flashing and the lack of a roof cricket.
Continue reading. . .
Installing A Roof Cricket
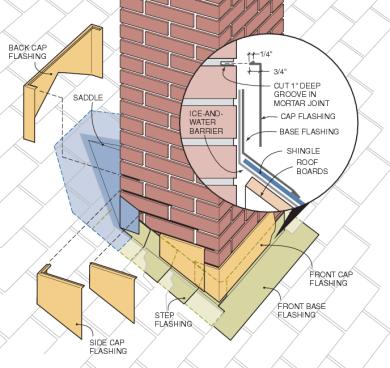
Proper flashing around a chimney includes three layers.
- Rubberized underlayment
- Step Flashing
- Lead Counter Flashing
Rubberized membrane that runs on the roof and up the sidewall of the chimney. Sep flashing is an L-shaped sheet metal are woven into the shingle courses and lapped up the side of the chimney. Lead counter flashing is embedded in the chimney mortar joints, and folded down to cover the top of the step flashing.
First Repair Any Rot
On this project, the roofing was stripped back, and rotted wood and wet insulation was replaced. New roof sheathing, and ice and water shield is then installed and wrapped up the chimney. The roof shingles and step flashing are then replaced. The lead “counter-flashing” on the chimney will be installed next.
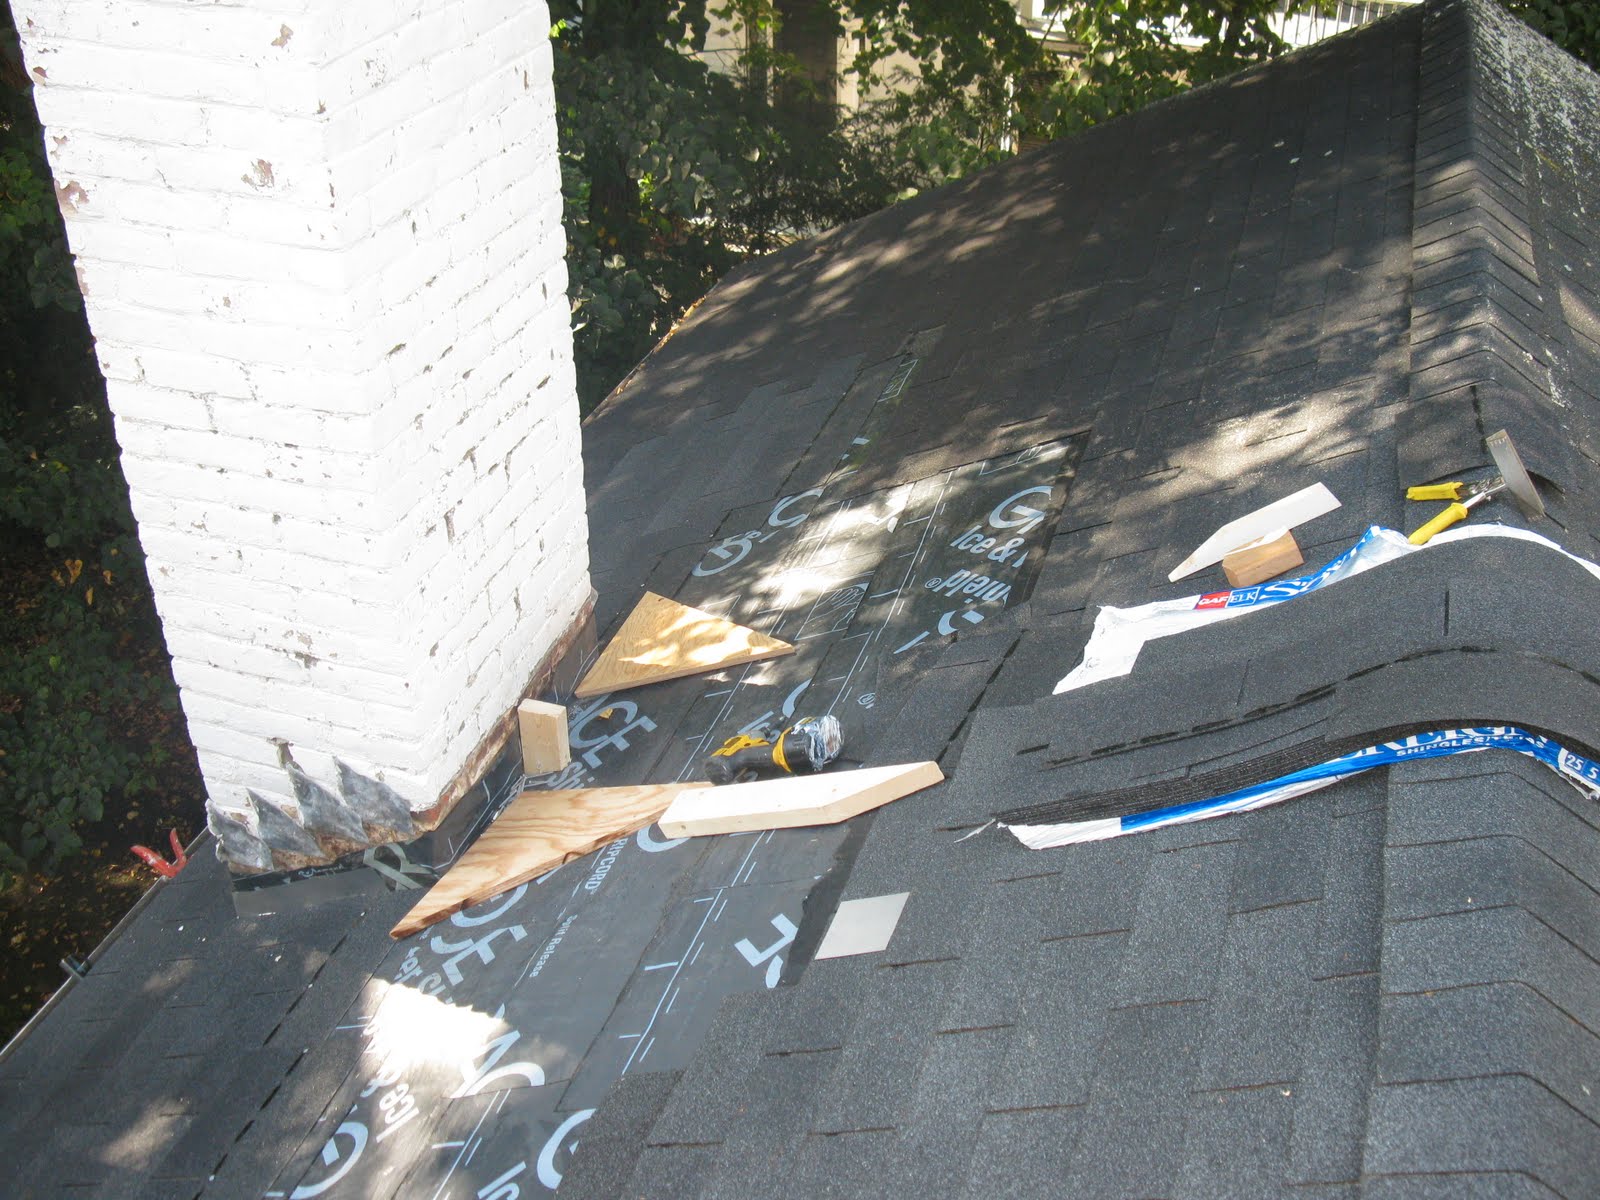
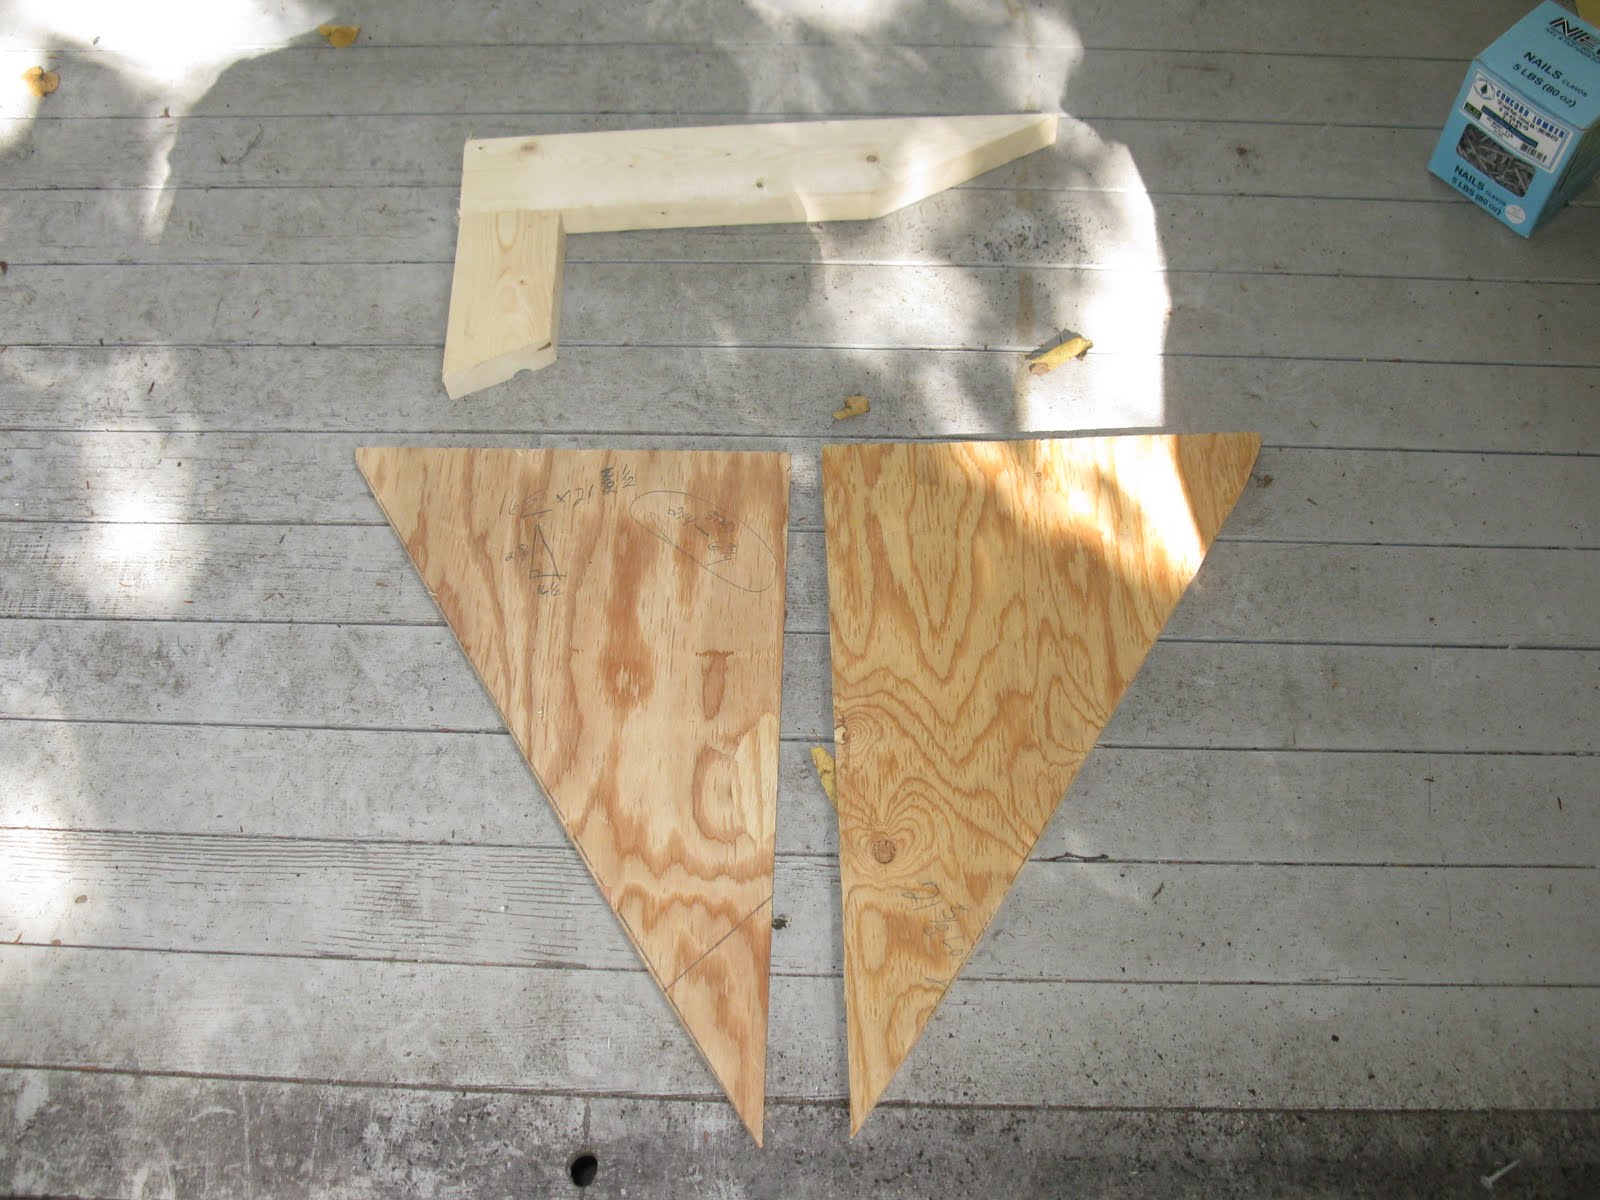
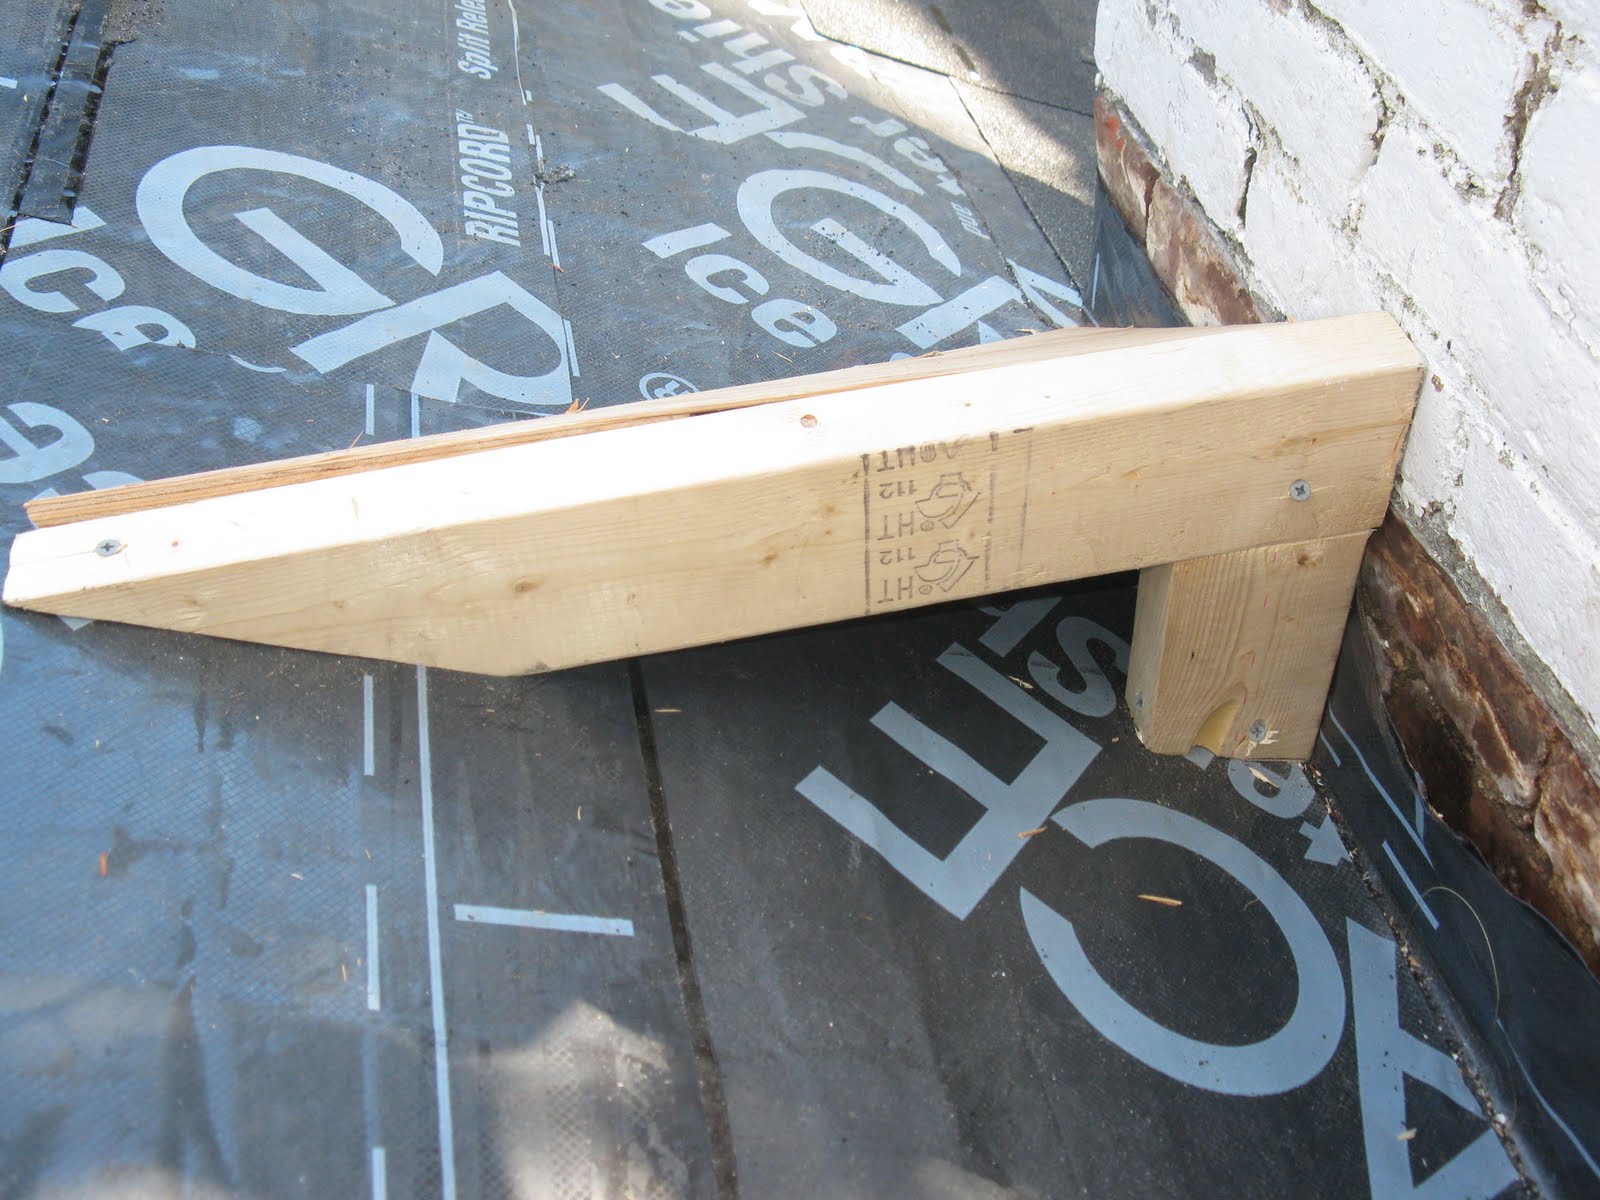
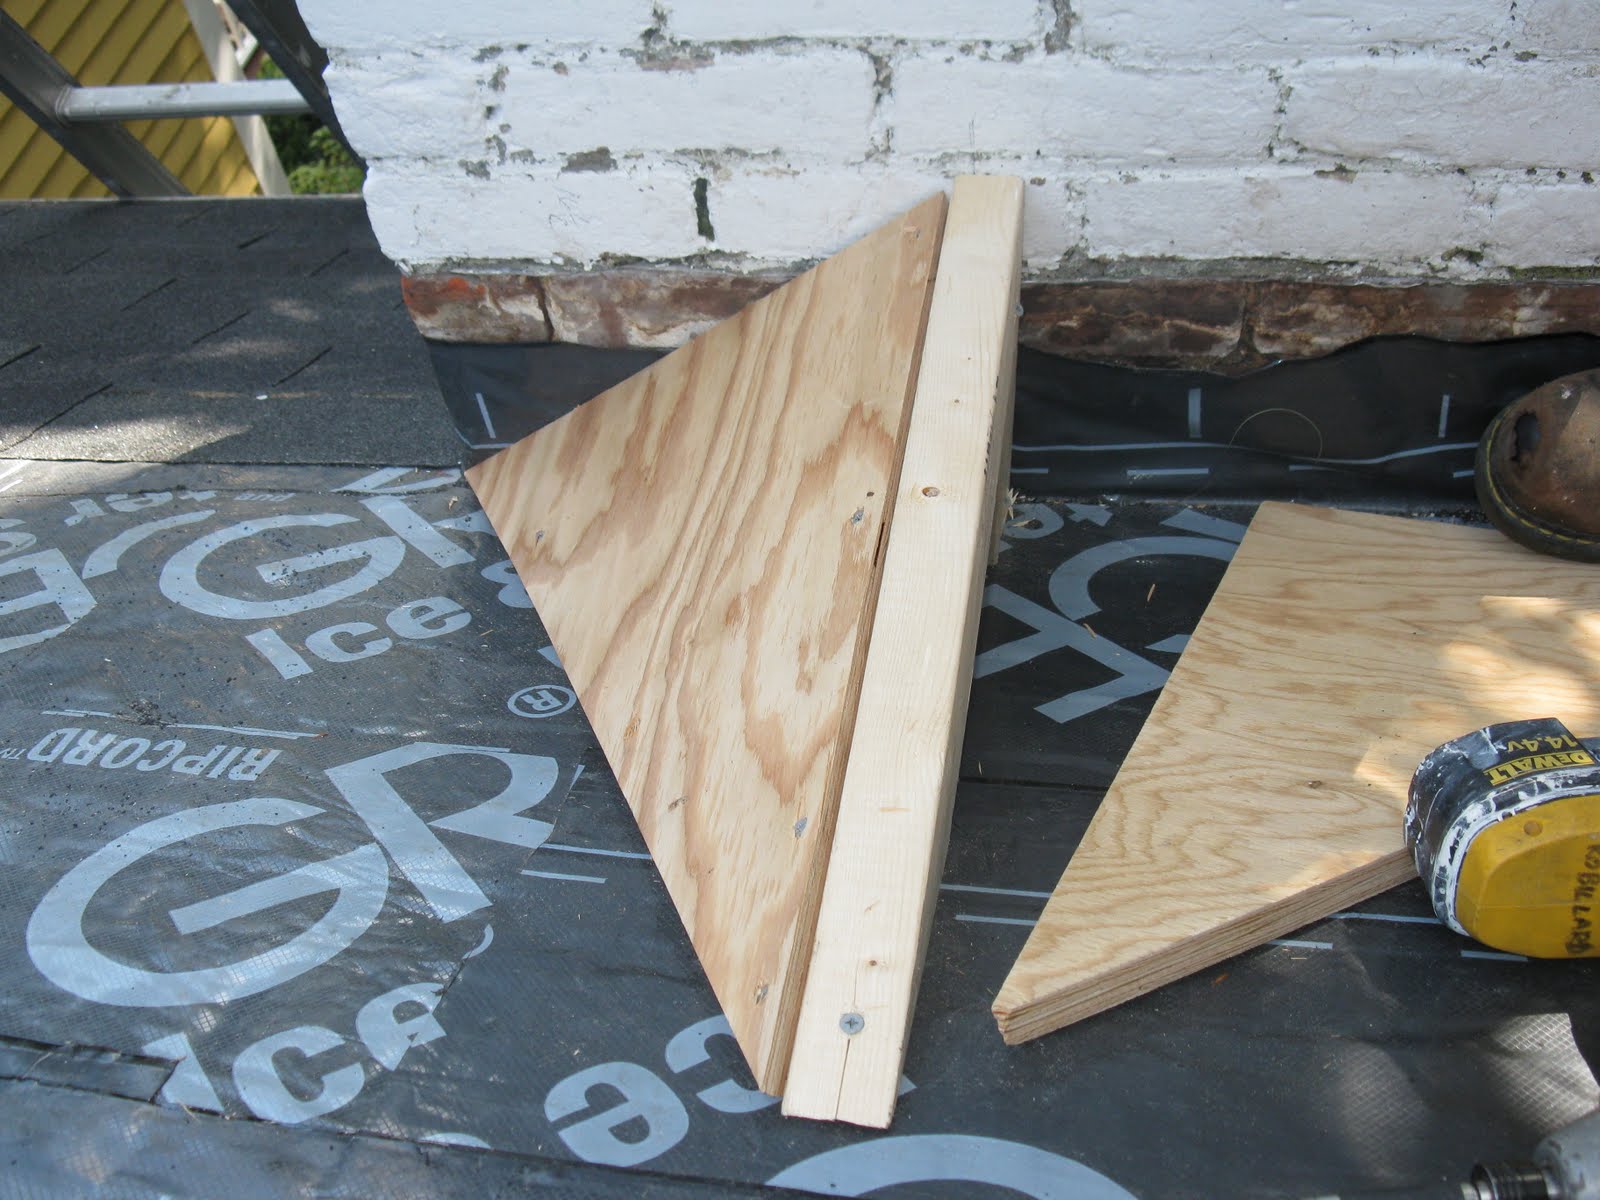
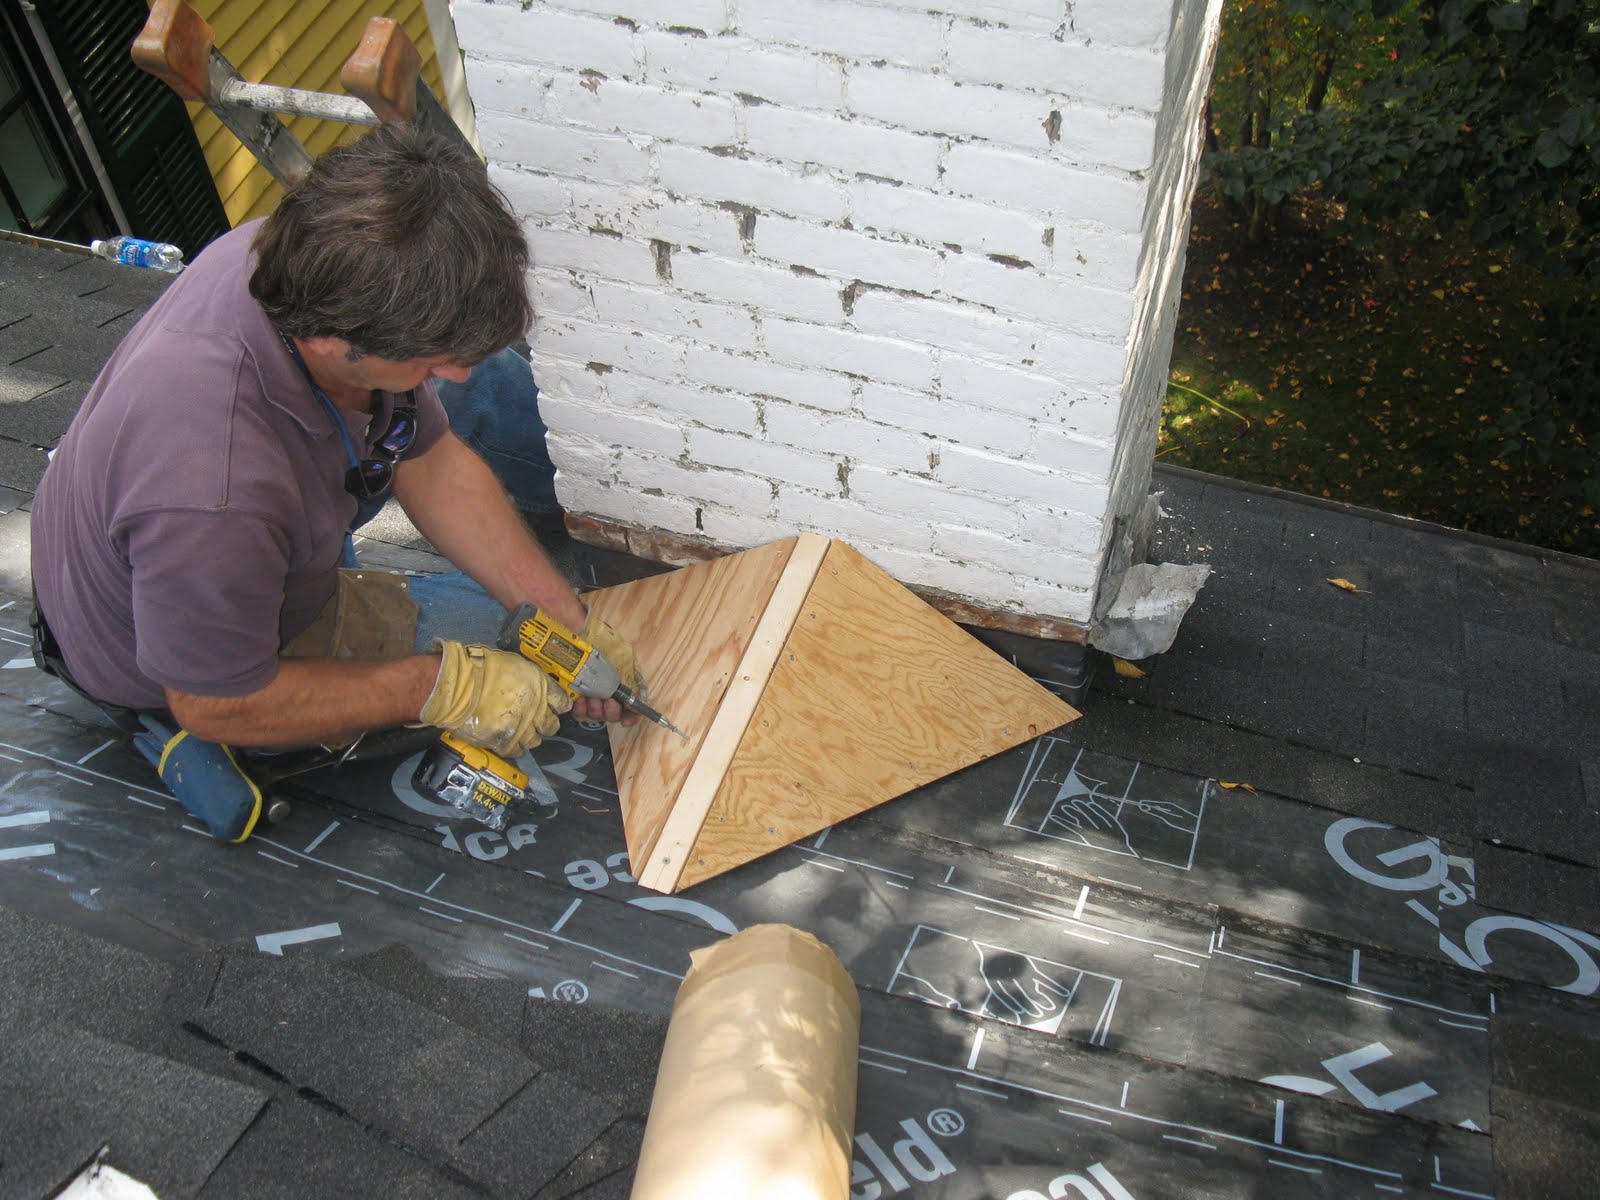
This cricket’s components are four pieces made from 2×4 and 3/4″ plywood.
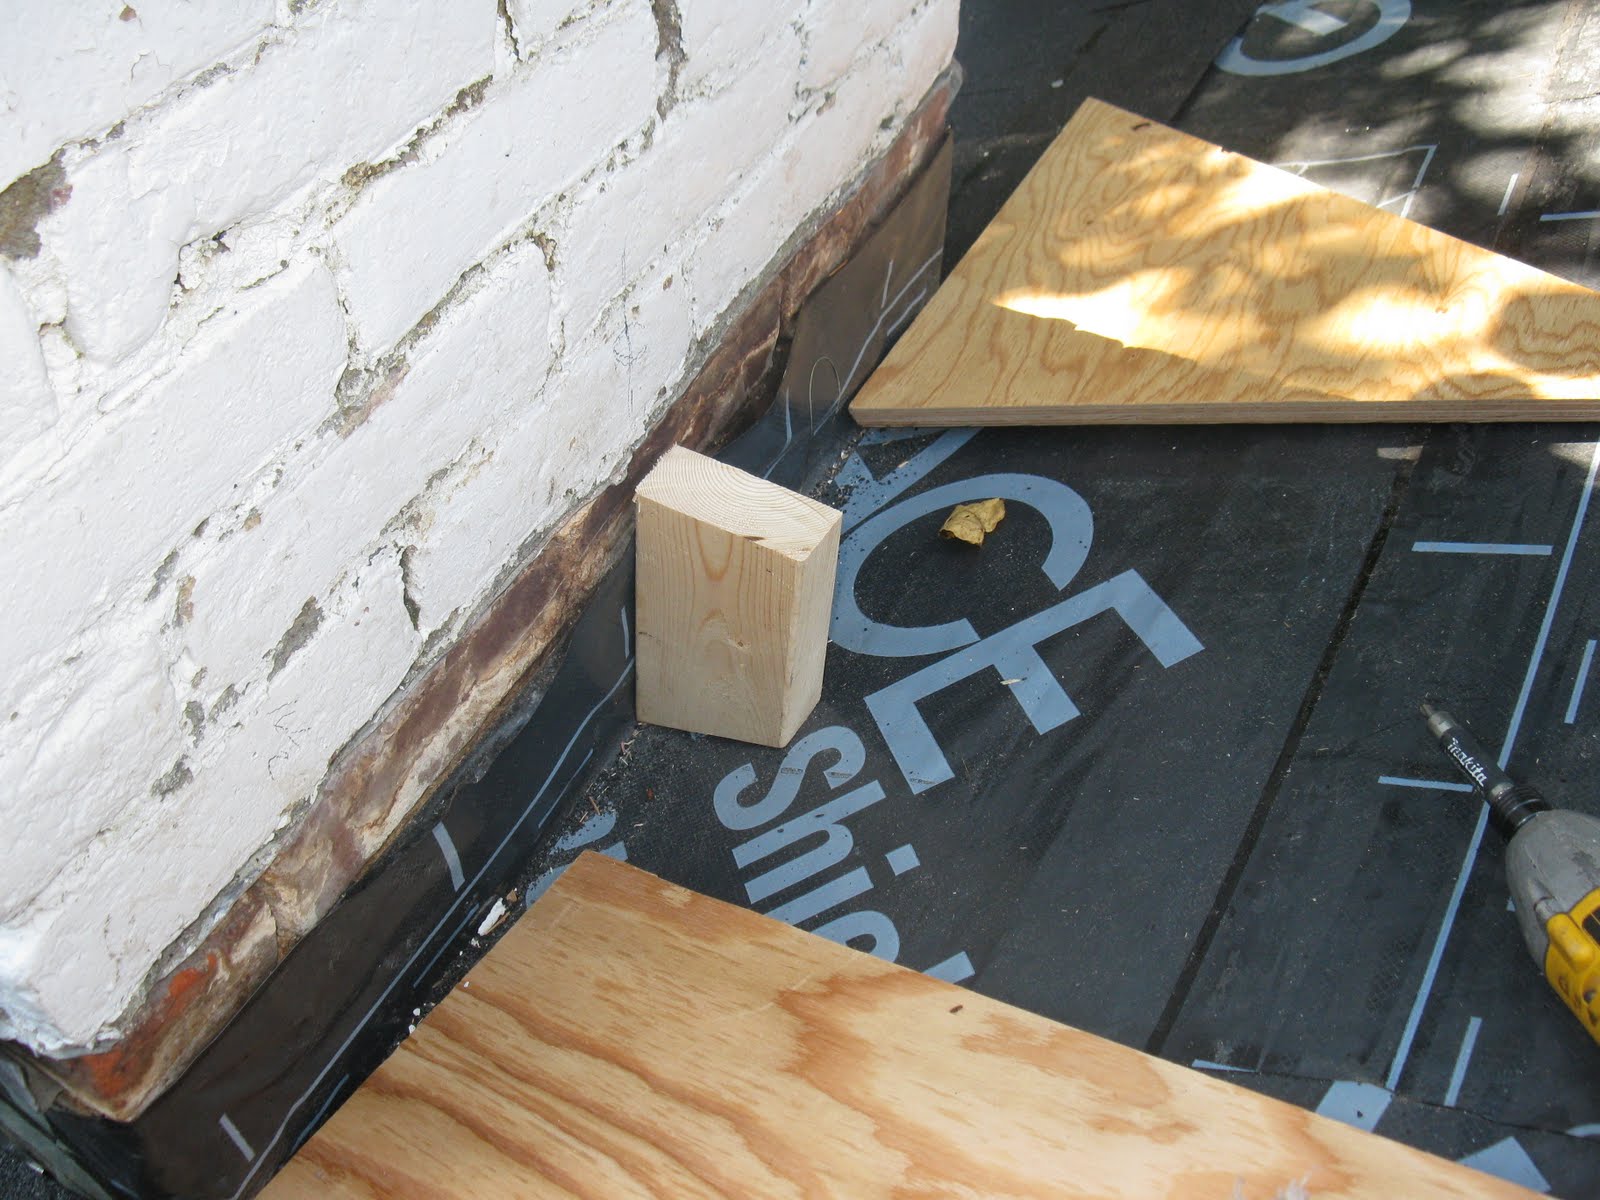
The horizontal ridge board is installed level and matches the roof angle on one end and sits on a vertical support at the chimney. Both pieces are screwed tot he roof.
3/4″ plywood that extends to the edge of the chimney is installed secured to the horizontal 2×4 ridge and along the roofs edge with screws.
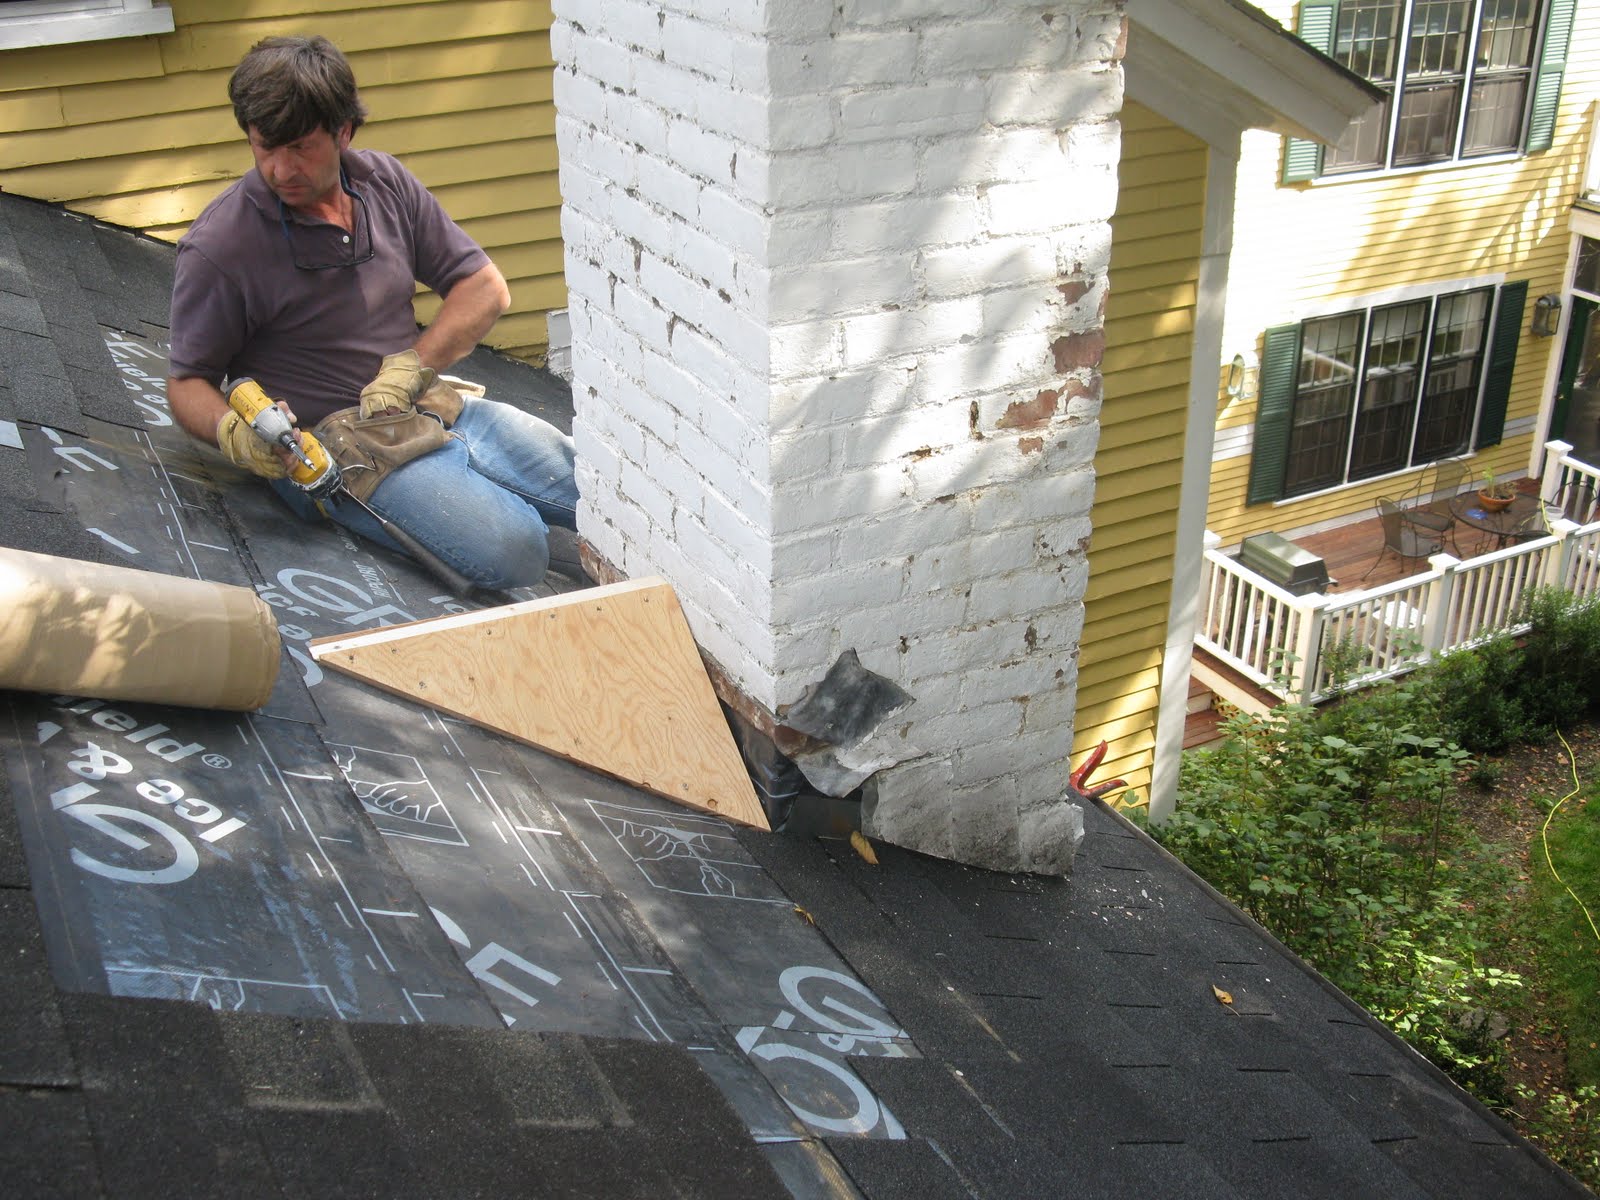
Cricket frame installed.
Side view showing how water used to run down this roof and hit the chimney, pooling, and eventually making its way into the house.
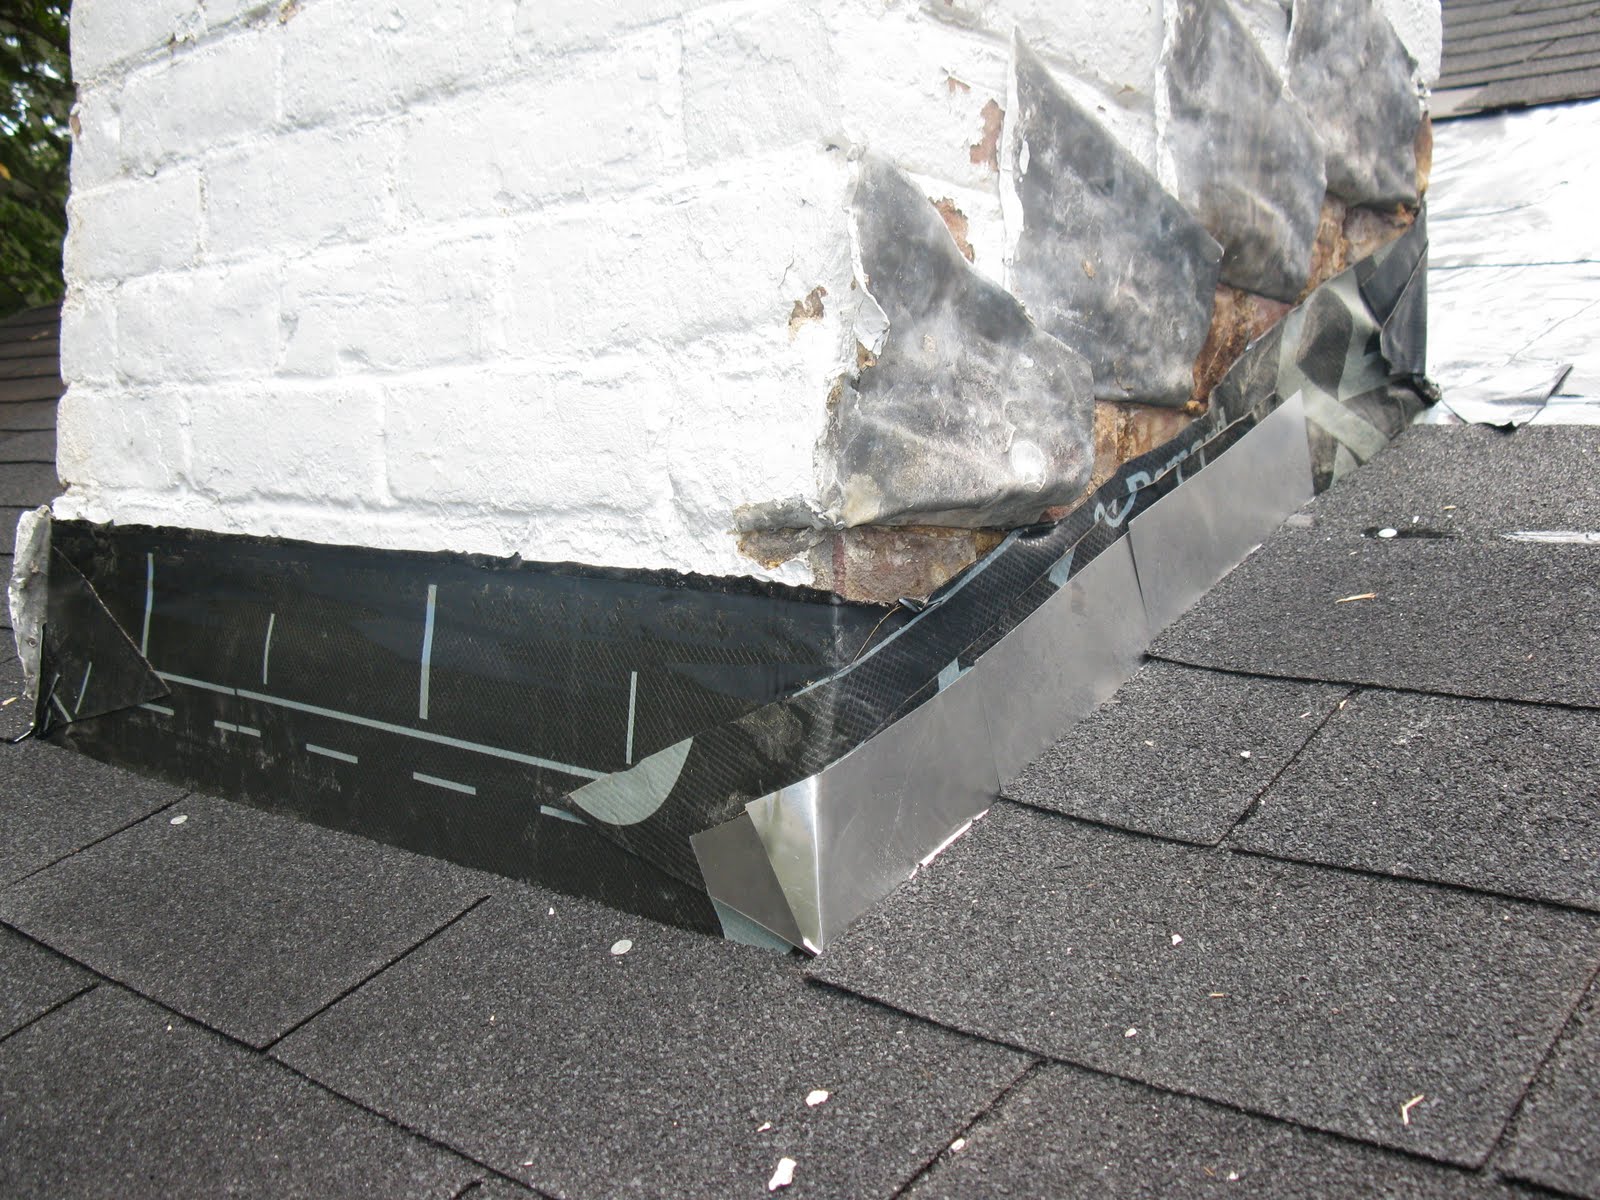
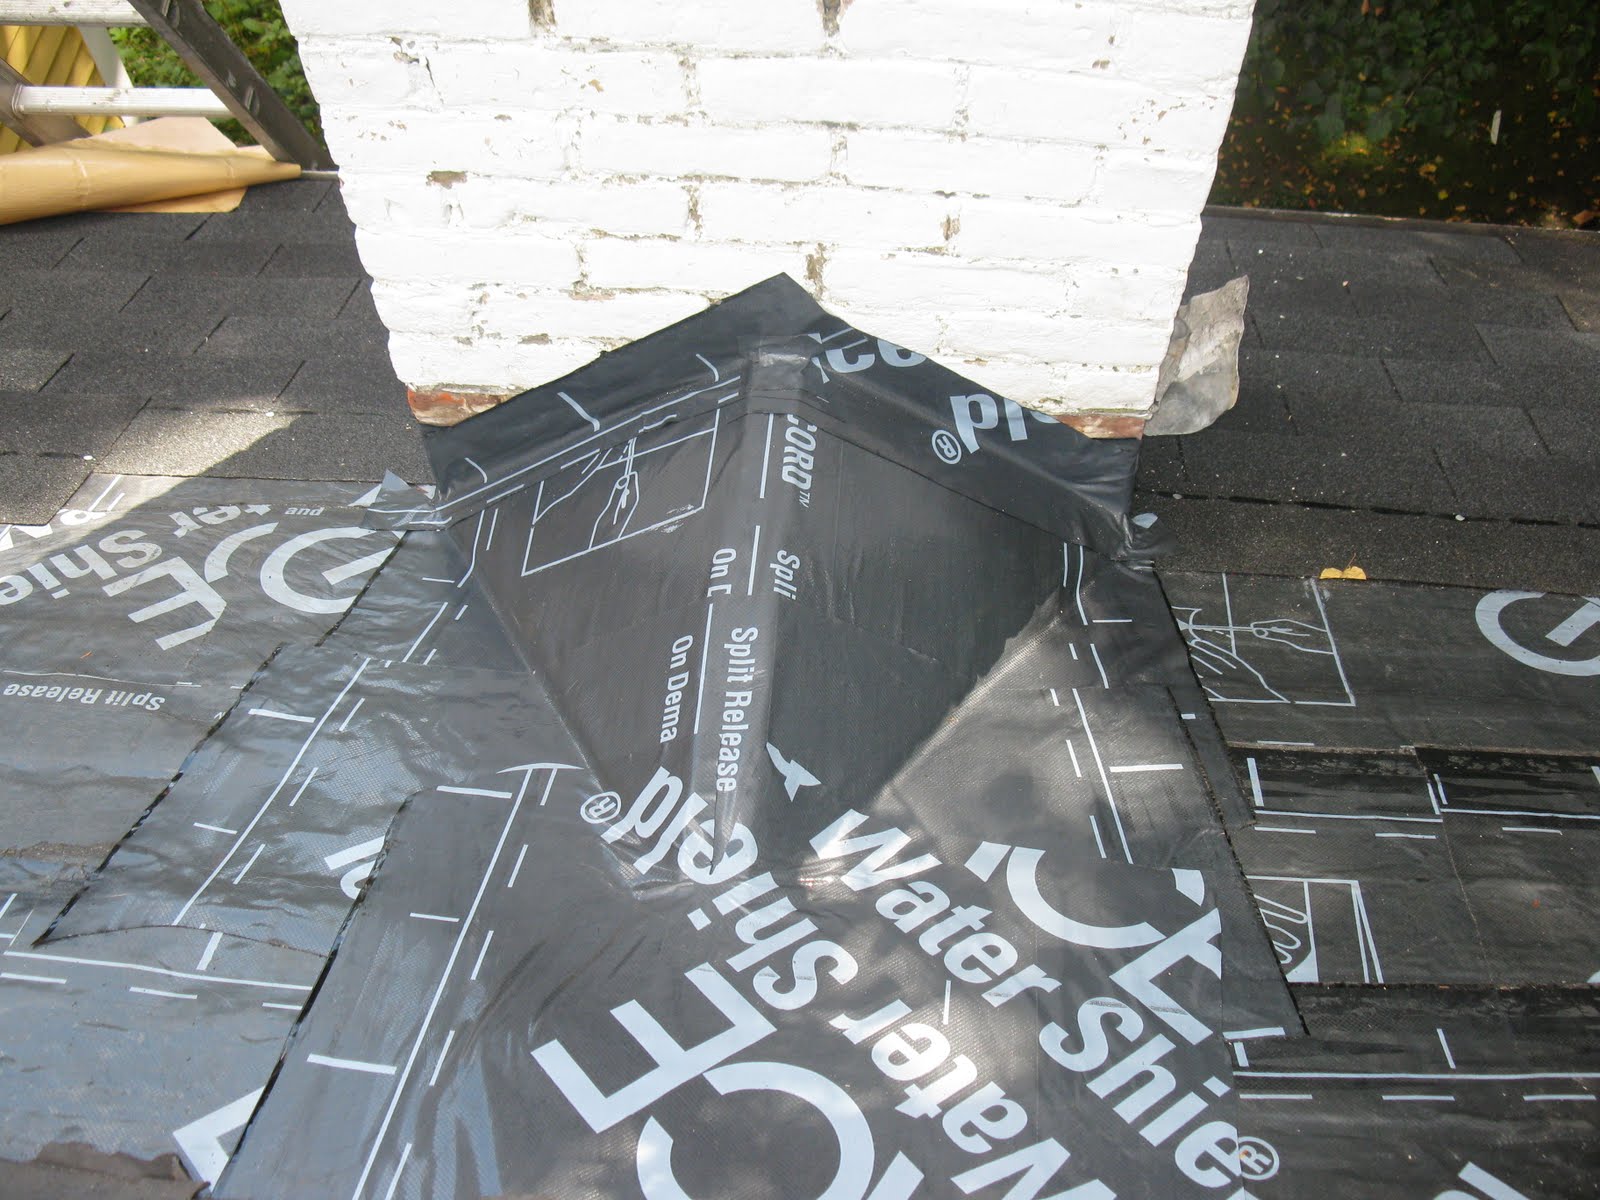
Ice and water shield, a Grace product, is installed over the cricket and up the chimney face.
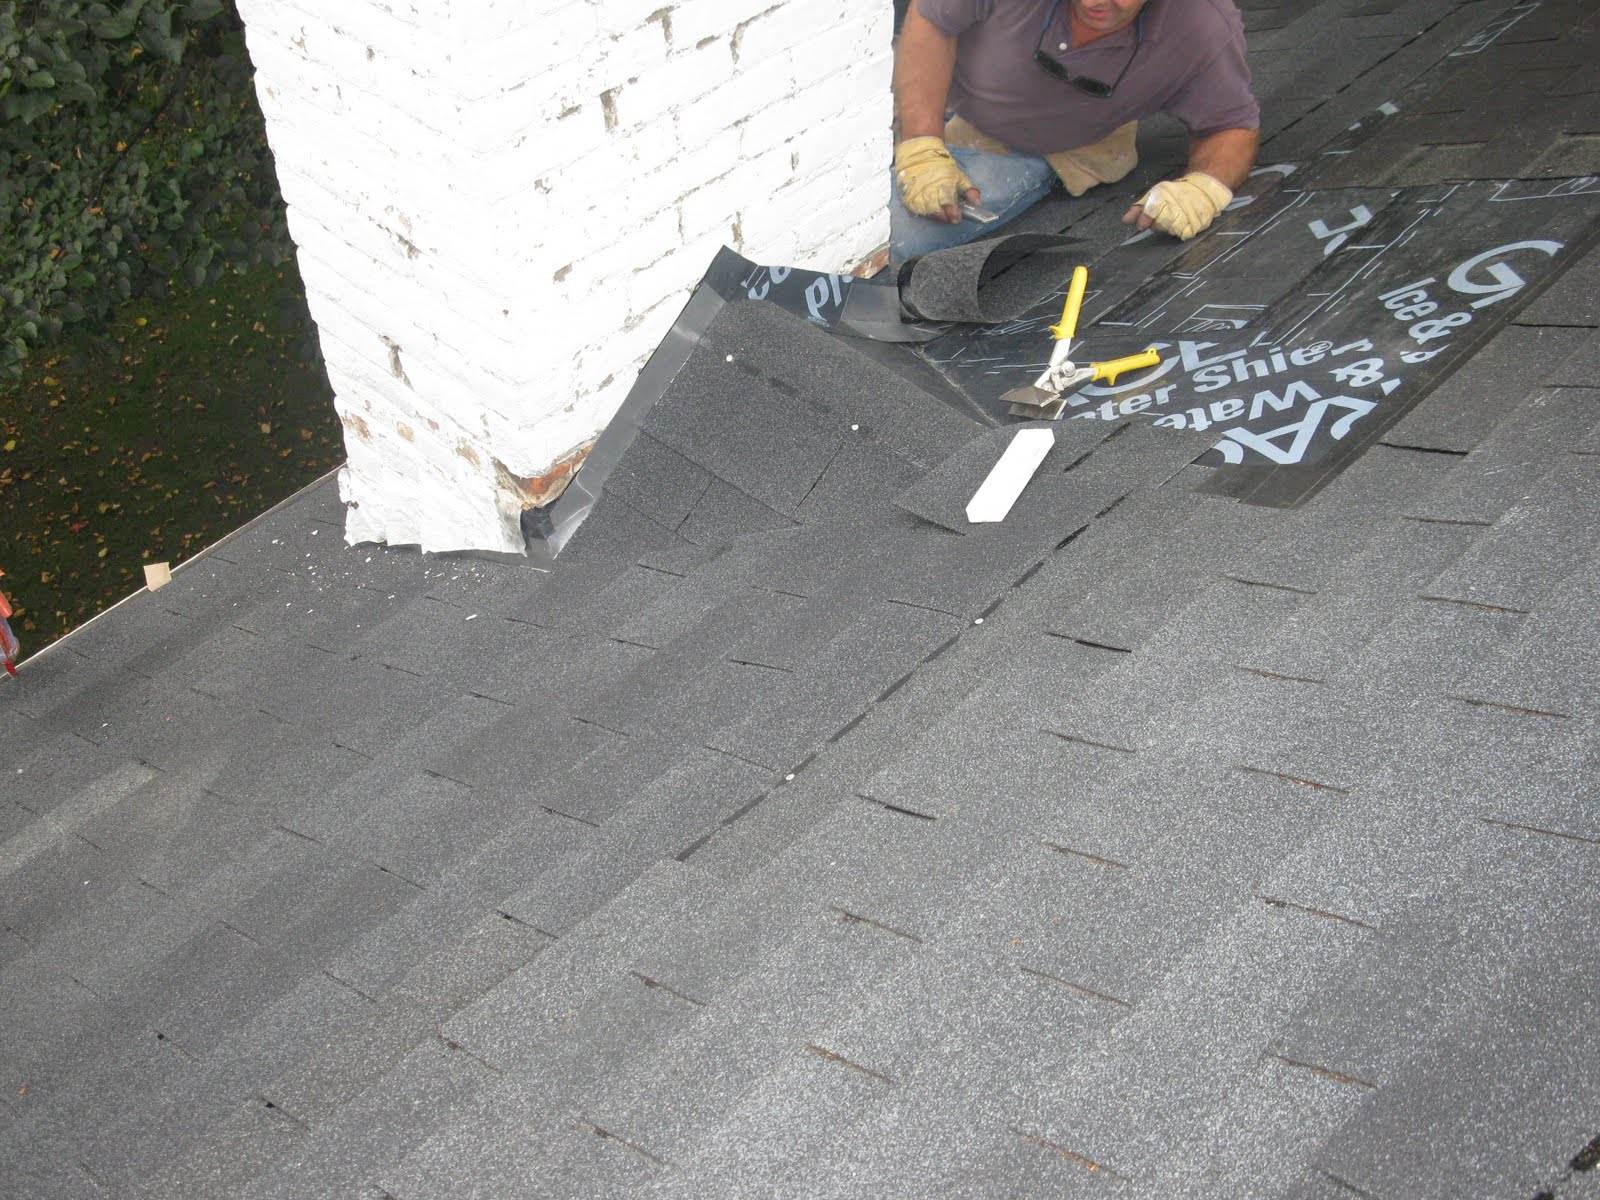
Step flashing and roofing is applied next. When we come back we will grinding out the old lead counter “cap” flashing and install all new lead flashing.
~ concord carpenter
If you enjoyed this article on ” Installing A Roof Cricket,” consider signing up for our newsletter. Stay up to date on tips, techniques, reviews add more . . . SUBSCRIBE to my weekly newsletter.