Installing A Custom Wood Countertop

Preparing The Wood For Glue Up:
After Lay-up, more planing is done if needed. The wood then through the jointer so that the boards have perfectly straight edges and are perfectly flat on all sides. This process s is super important to create tight glue joints.
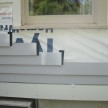
After jointing the boards are glued and clamped. The top remains in the clamps for 2-4 hours. DeVos has wall clamping units [see photo] which I thought were cool and space saving.
Rough Sanding:
After the glue is dried, the top is fed through a 60 grit, 80 grit, then 120 grit, wide belt sanding machine. After sanding the top arrives at its final thickness.
Once all this prep has been done, the exact width and length of the top is cut out on the CNC (computer aided router) machine unless the top has a template. All wood tops with templates are hand cut.
Prepping Edges And Final Sanding:
Bench work, which is all hand work, is next. Edge profiles are applied to the designated edges, then hand sanded. DeVos craftsmen check for cracks, knotholes and other minor defects that need to be filled with epoxy. If imperfections are detected and need to be repaired DeVos uses a 5 minute epoxy, then sands the entire top with 120 grit to a final finish.
Distressing is performed at this stage as well. I chose a medium distressing. 
After final sanding the top is transferred to the finishing room. Finishing generally takes about 5 business days for a Waterlox finished top. DeVos applies 4-5 coats of semi-gloss Waterlox, sanding between each coat, cleaning with mineral spirits before the next coat is applied. Finish is always applied to the bottom of the top first so that it can be turned over (very carefully) and rest on screw blocks while the top and sides are finished. A final coat of satin Waterlox is sprayed on.
Shipping:
The top is allowed to dry 36-48 hours before final buffing, then wrapping and crating for shipping.
The counter-top process takes 4 to 6 weeks. The crate that is shipped is well constructed and prevents any damage from occuring to the tip in transit. I was impressed.