I live just outside of Boston and just about everywhere you look, new and antique, granite is used in hard scapes. Everything from century old granite posts, reclaimed curbing, foundation / seawall block, trestle and bridge support block, steps, gates, post, borders and support walls.
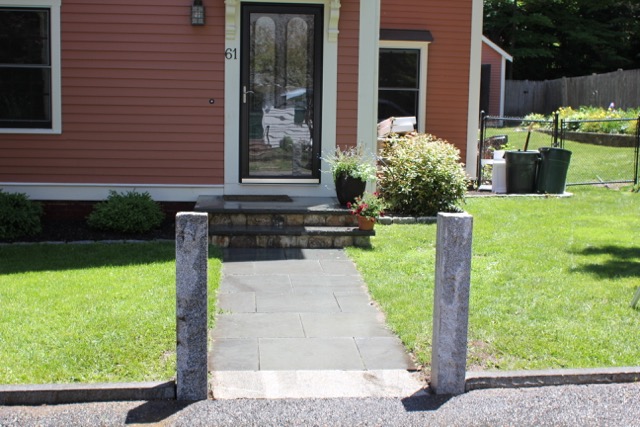
This article will address how I replaced two 6″ x 6″ x 60″ granite posts that were broken off at the base by a snowplow this past winter. [photo below]
Replacing A Broken Granite Post
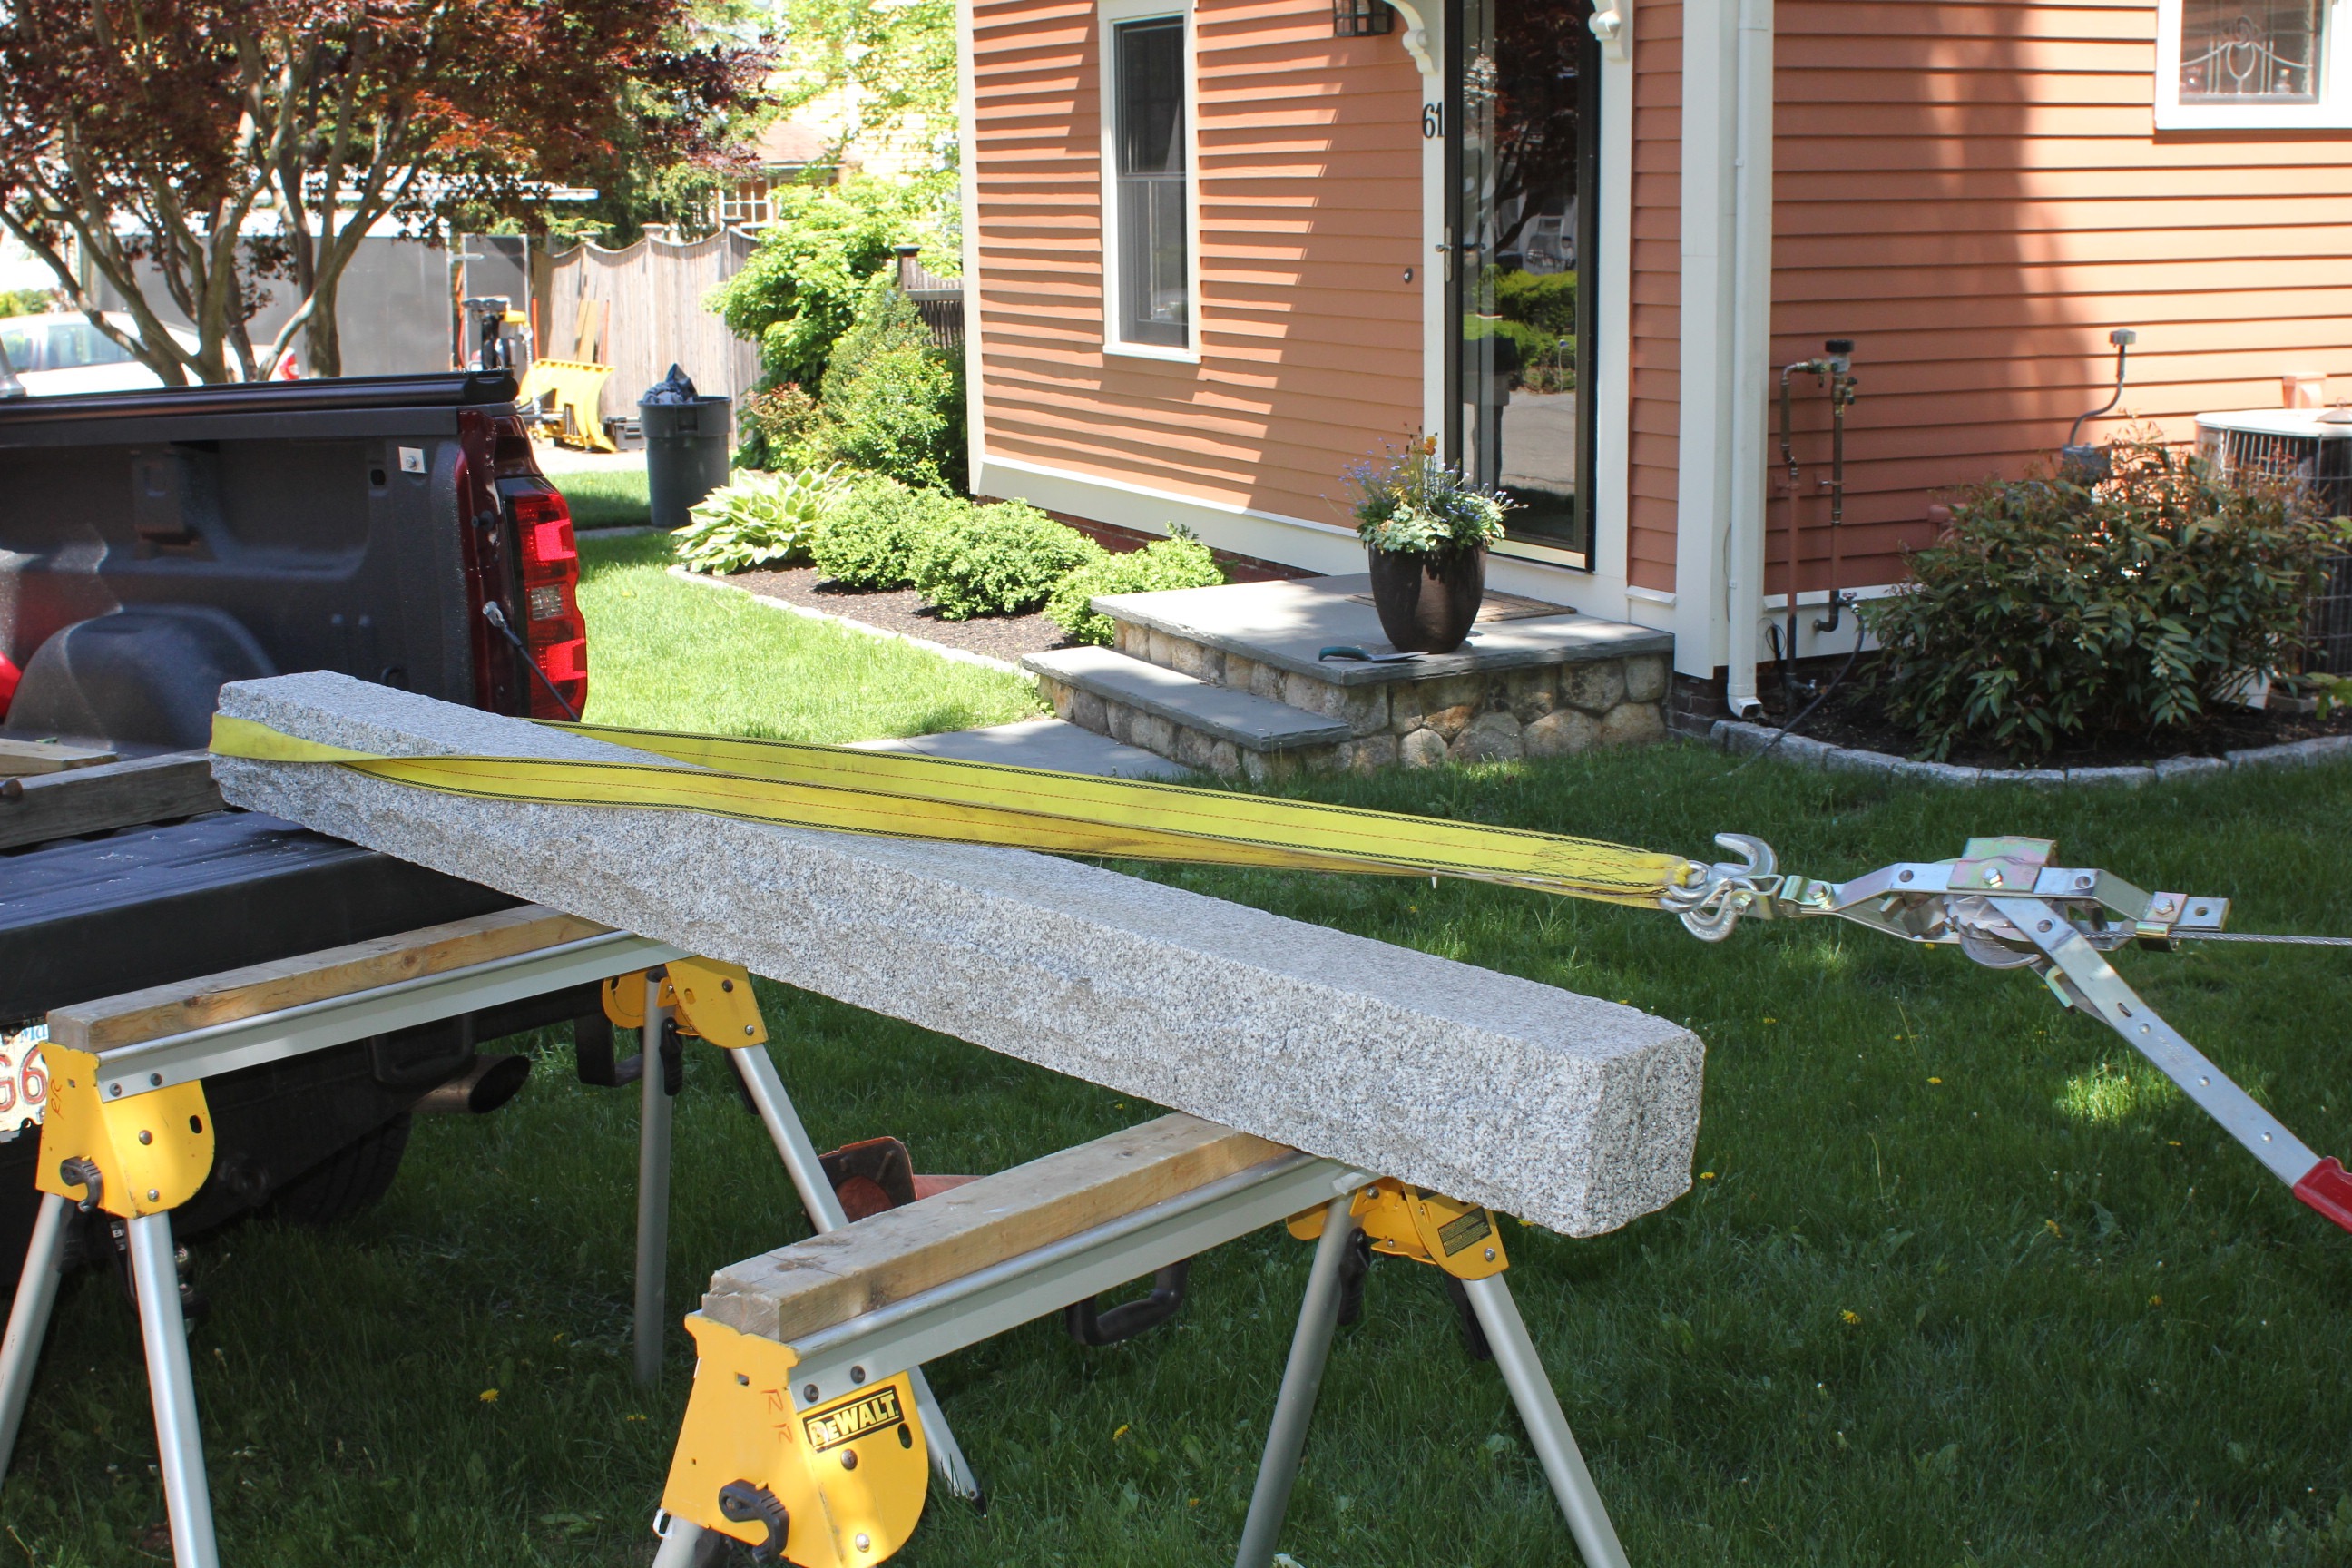
The first step in replacing these posts was to source new posts. The posts I was replacing were embedded into the ground 24 inches and that 36 inches exposed. I needed the same size posts to match existing posts on the property. That meant I needed a 5-foot long post.
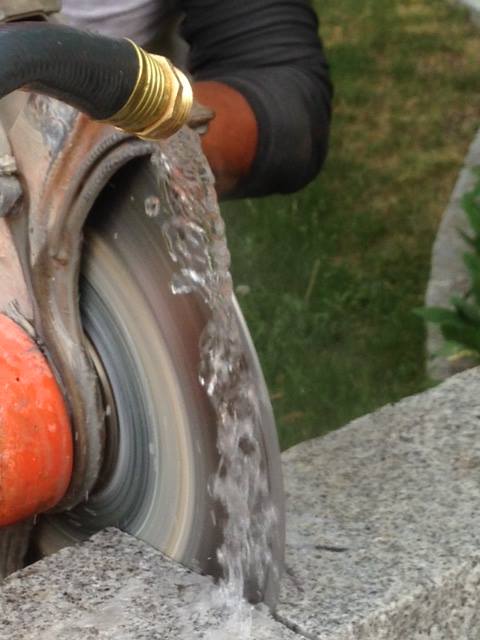
I found two posts at a local contractor hard scape yard, but the post was 7 feet long. I contacted a local mason friend of mine and asked him to cut off 24-inches with his concrete cutting wet-saw – worked like a charm.
Stuck Between a Rock and a Hard Place
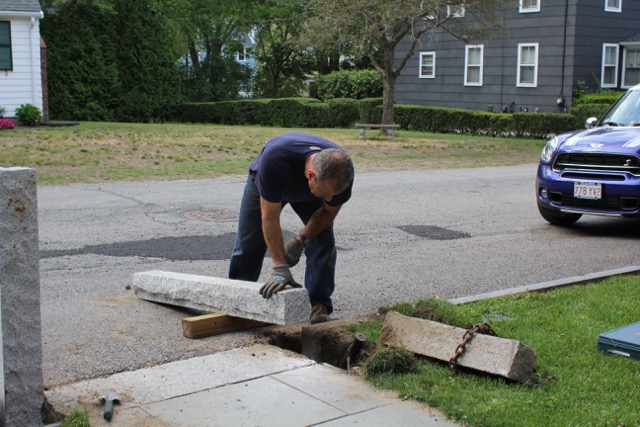
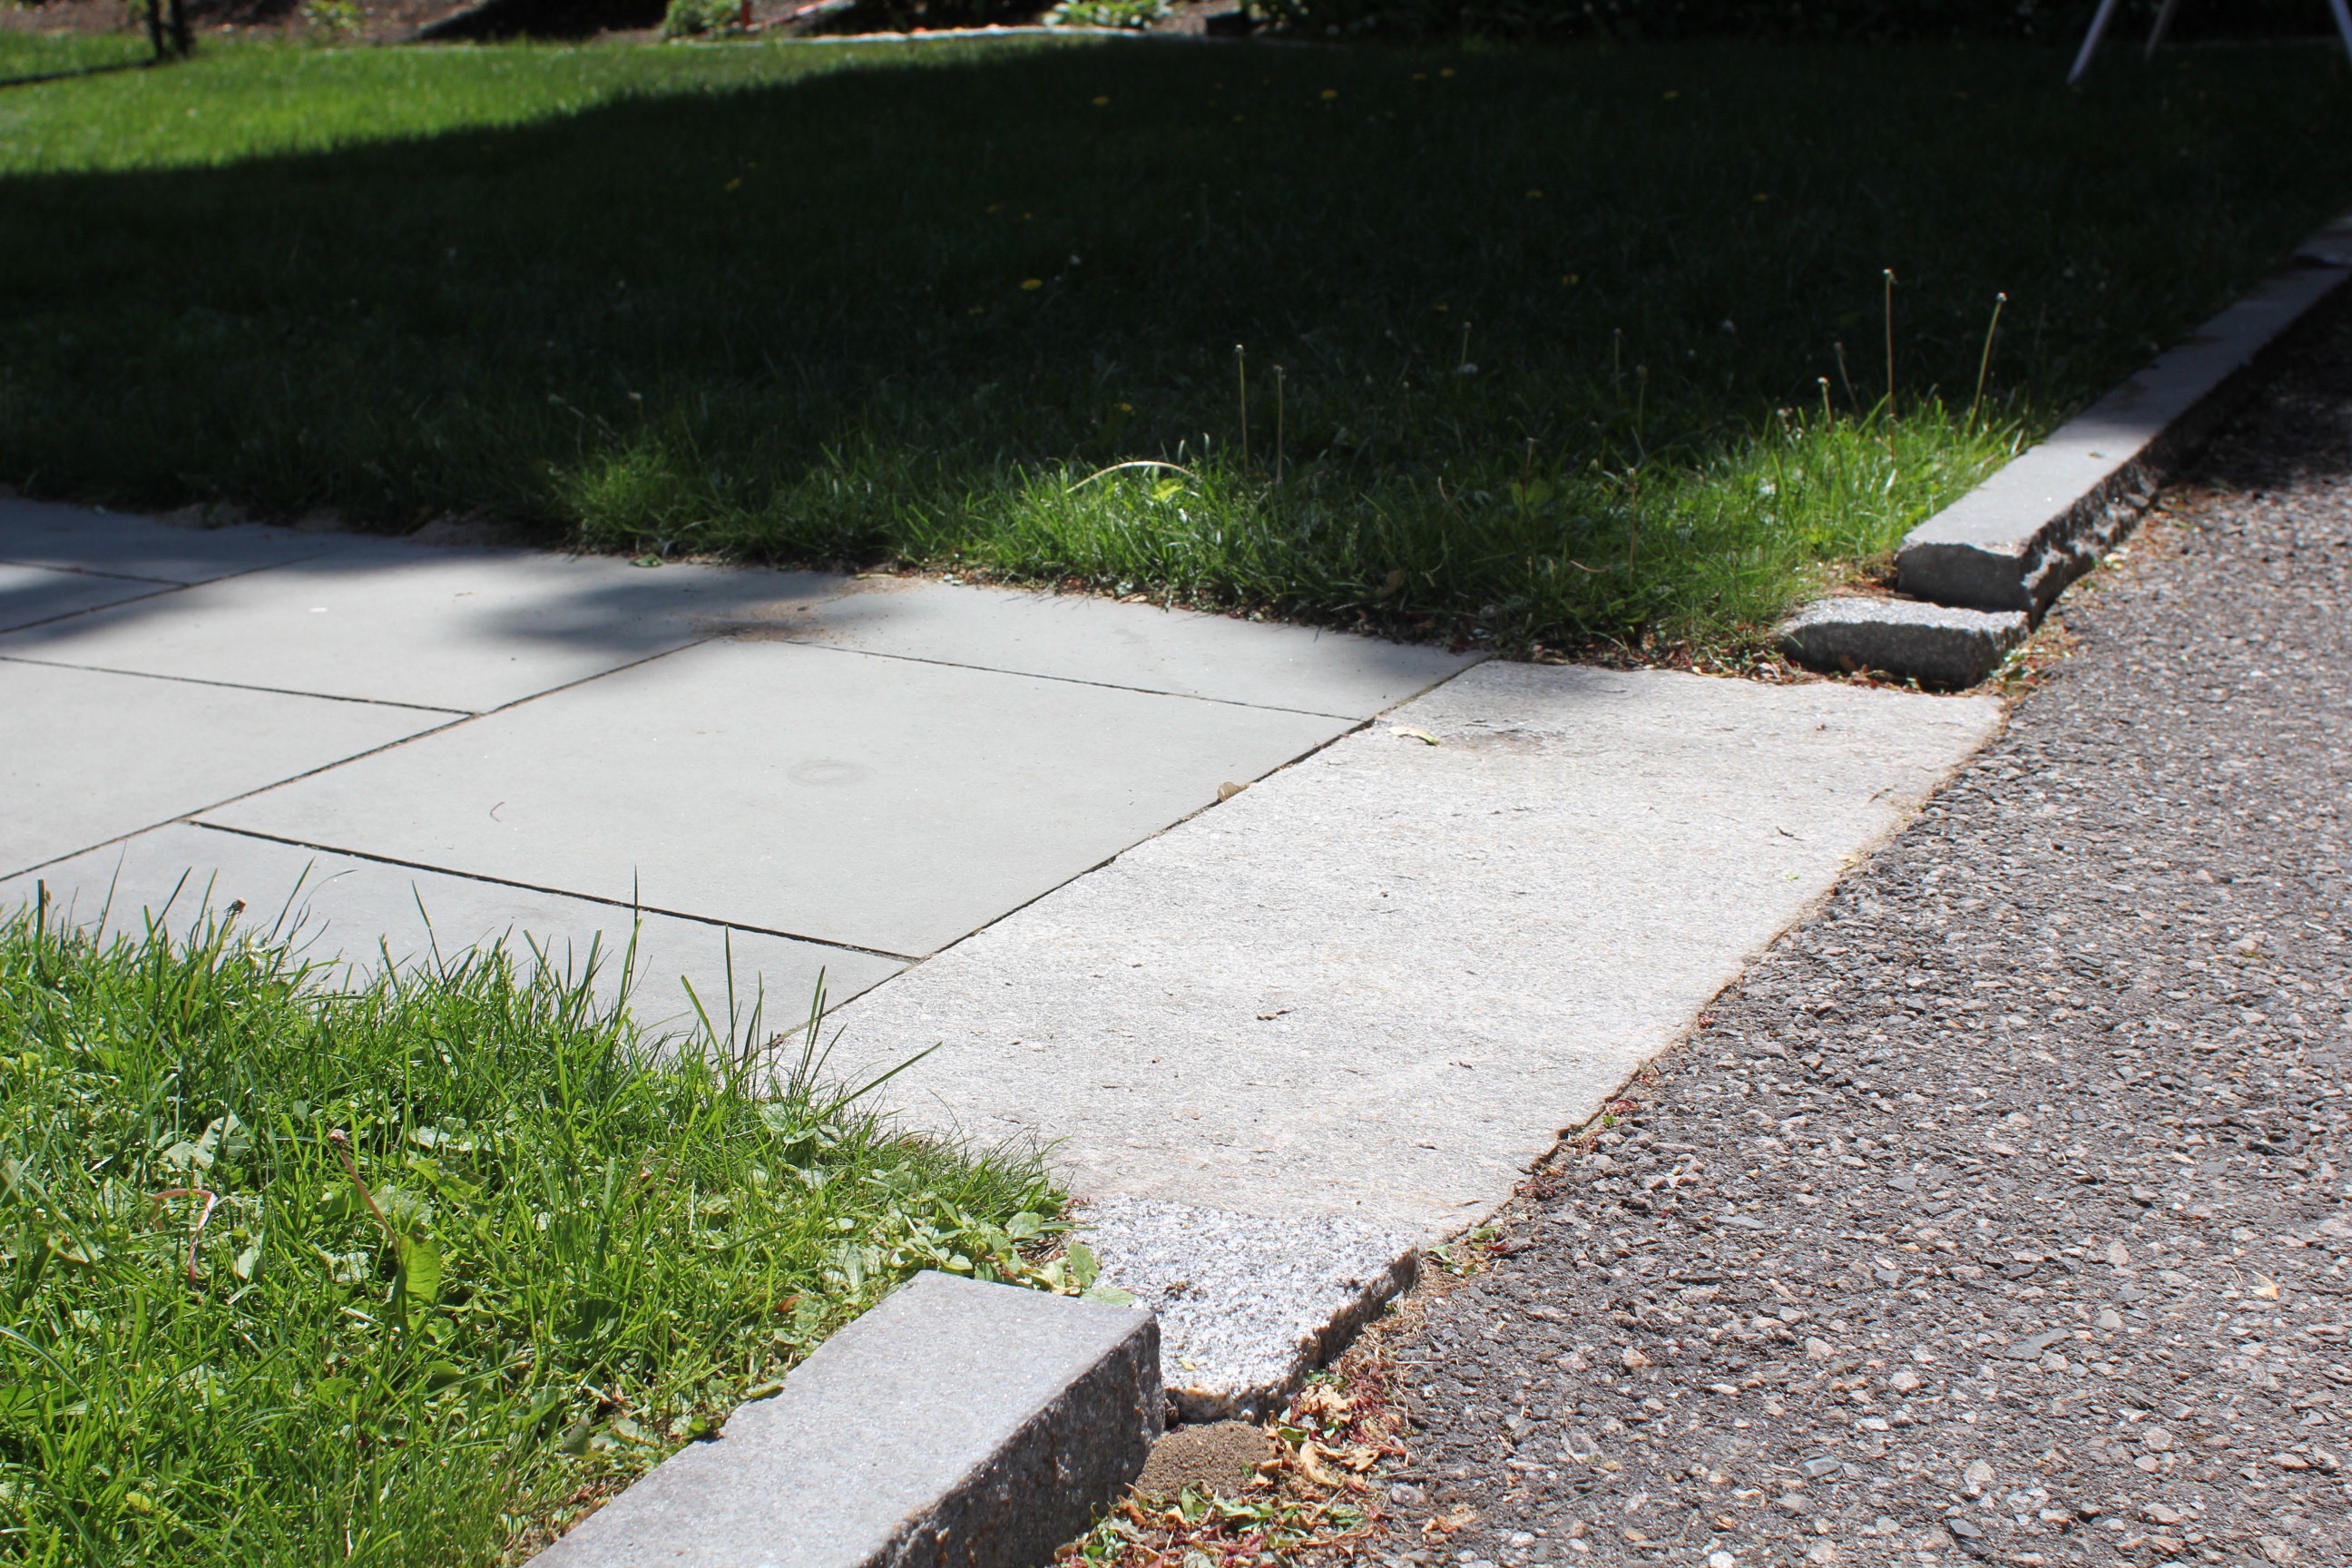
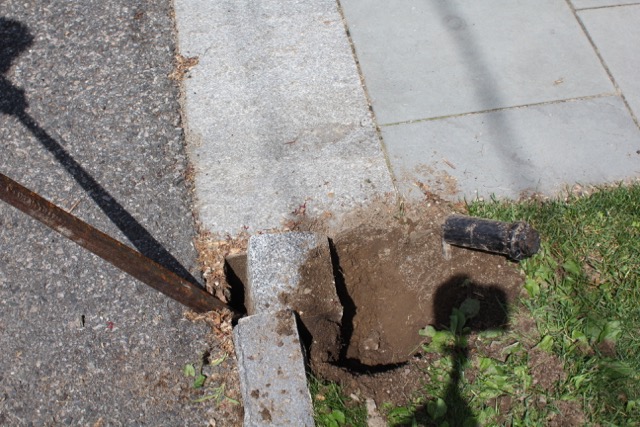
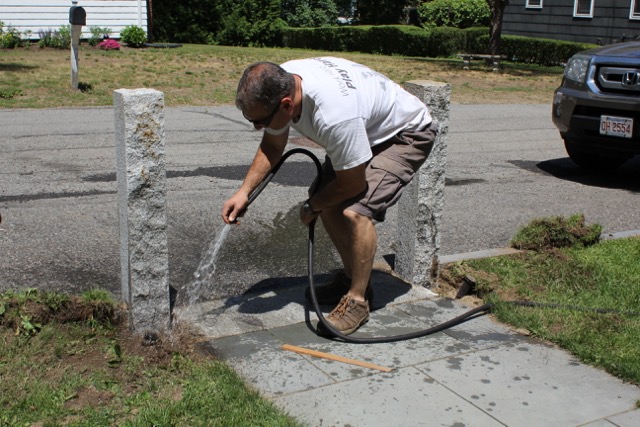
These posts were surrounded on three sides with masonry. On one side there was paved road, the other granite curbing and on the third side was a granite starter step to a blue stone walkway with snow melting cables embedded beneath. I needed to be careful and there was only one small opening to dig this post out.
Dig out the Post
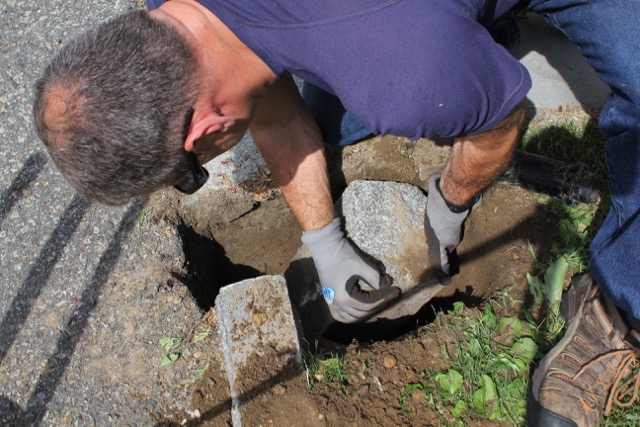
The goal is to dig down to the bottom of the post and then lift out the broken base. This is easier said then done.
First I hade to excavate and remove the grass and sprinkler heads located at each post and bent them back out of the way. I saved the grass chucks with the intent of reusing them later.
Then I dug down slightly wider than the post to the post base depth.
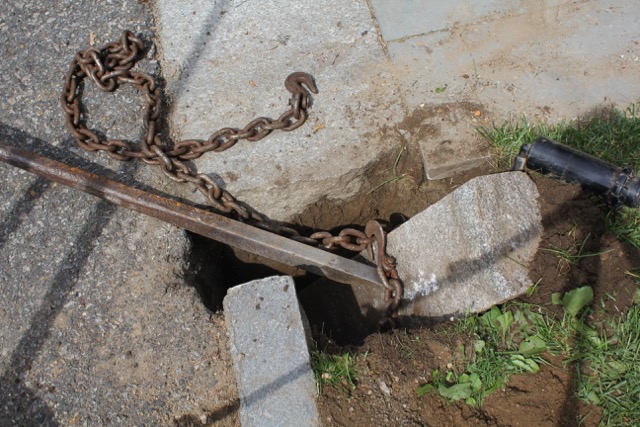
Once the hole was dug I used a large metal bar called a rock bar and pried the post base out from between the pavement, curb and granite starter step.
This takes some effort and I even tried using a combination of prying and a sledge hammer to move the post base back and forth to loosen it up a bit.
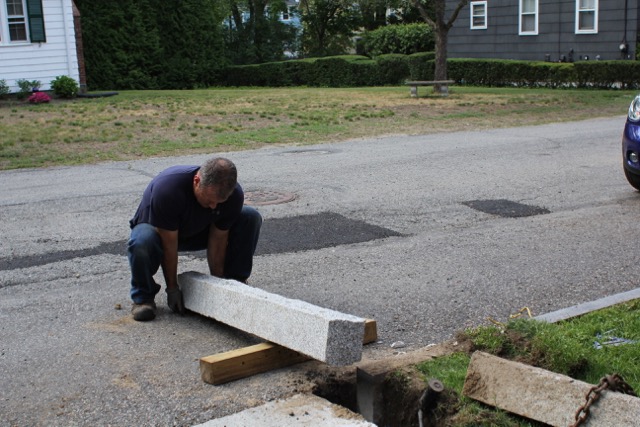
Move the Post into your Hole
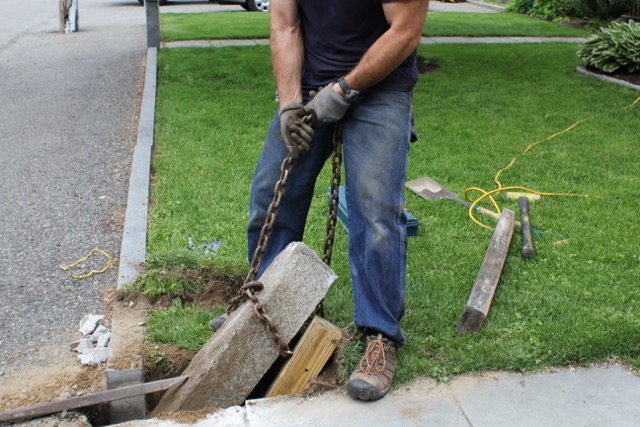
What I found worked best was to use the rock bar to completely bet the post base into the new hole you dug. Once in this larger area I was able to get a chain around the post and used a combination of the rock bar and pulling on the chain to remove the post base.
This is a MUCH easier job with two people. I was alone, so I used the pry bar and then placed the wheel barrel tire over it to hold the post base elevated in the hole. I then walked over, grabbed the chain and pulled the granite base out of the hole – tough work!

Clean out the hole
Now you need to clean out the hole to get ready to install the new post. I used a small gardeners shovel to do this and my hands. A shop vacuum works well too.
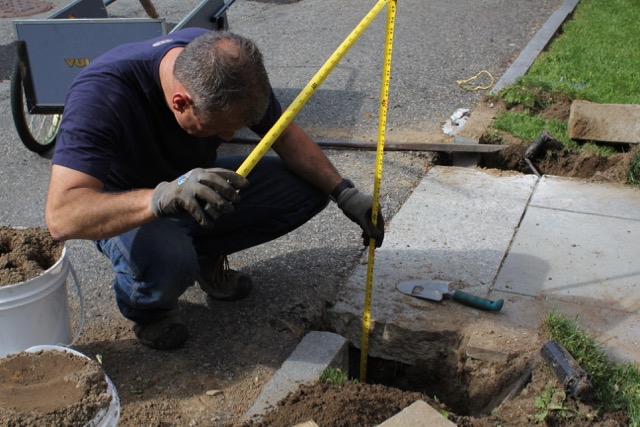
Use a tape measure and confirm that your hole is deep enough. Taking some time here to get this right will save you in time and aggravation later trying to level the granite posts to the same height.
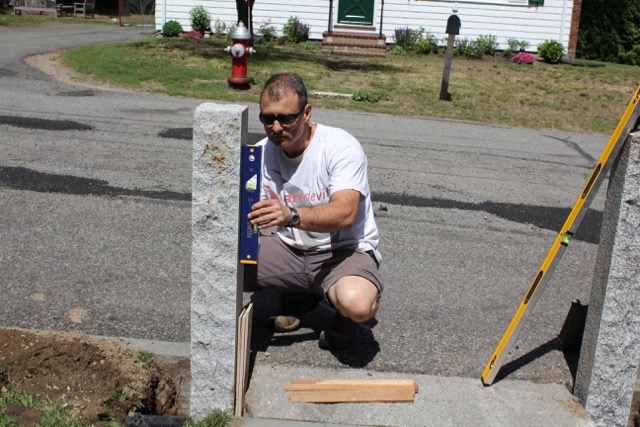
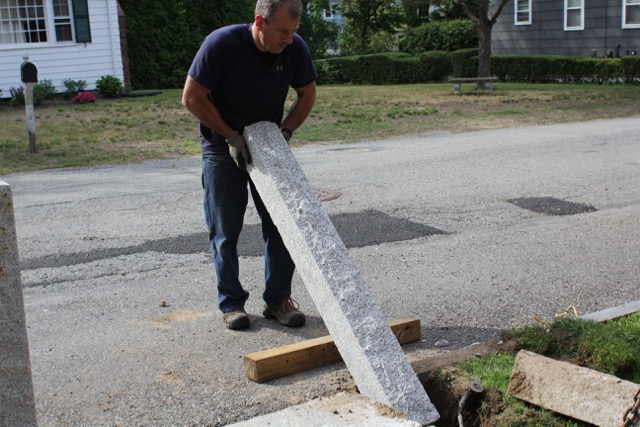
Inserting the New Post
Again this works better with two people. For aesthetics, I made sure that the “cut” or smooth end of the post went into the ground and that the “rough” top was visible. I placed a 4×4 post on the ground near the hole with the intention of using it to rest the granite onto and use as a fulcrum to tile into the hole. It worked perfectly.
I lowered the granite and then used the rock bar and some manual post twisting and back and forth movements to get he post into position.
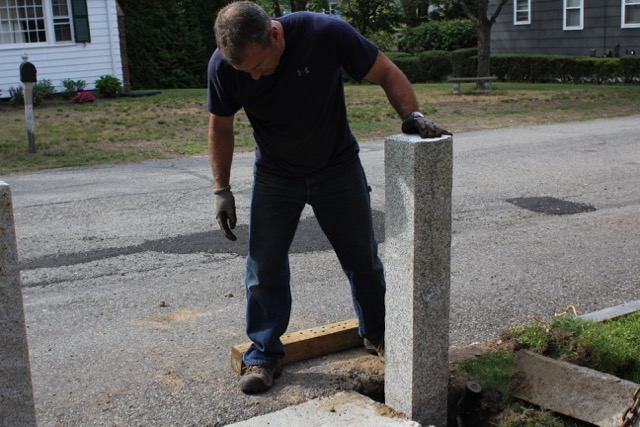
Plumb the Post
Use a combination of tape measure and a level to ensure that the two posts will have the same height exposure. If the area between the posts is too far use a long, straight board with a level or a tight string and a mason bubble level.
Use a level to plumb the post. Without a helper I enlisted the help of some wood shims to hold the post plumb while I added dirt to all four sides.
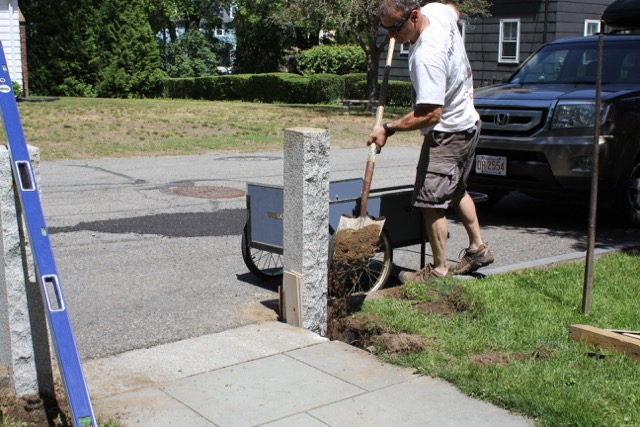
Compact the Fill Around The Post
I used the 4×4 post and a smaller board to tamp the dirt every 8-12 inches. Tamping ensures that the disturbed soil regains it structural strength and holds the post from moving. Stone dust works well for securing posts but I didn’t have any.
I may use it on the pavement and masonry sides to keep the grass and weeds from growing there. Stone dust is pulverized stone that is great for filling between stone materials on walks and other grout type applications.
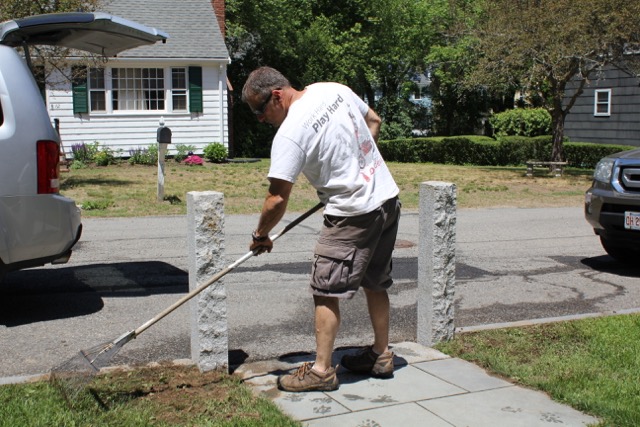
Finish off the grade
Once I had the hole filled to approve 10″ from grade I reinstalled the sprinklers, soil and grass chunks.
Continually check for plumb during this process and adjust as needed. Remove the shims when you have enough dirt or stone dust in place to hold the posts.
I used some water to help settle and compact the area around these posts.