
Today was rot replacement day.
I thought that these pictures would be a good example to use to explain the proper way to splice exterior trim, in this case a corner board.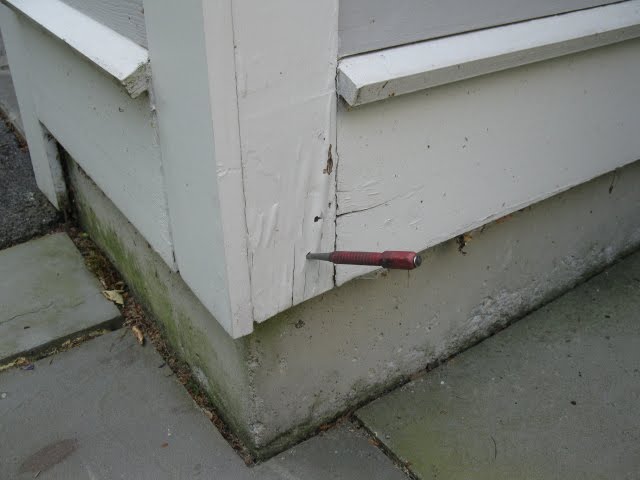
As you can see on the left my nail punch is sticking out of the corner board indicating rot.
For the best appearance, trim, and moldings should run in one continuous strip without joints. When the area to cover is longer than your trim or molding, a joint is necessary.
I will advocate replacing the entire corner board or at least replacing it back to an existing joint but depending on the budget, and what the customer specifies it sometimes is necessary to install a joint.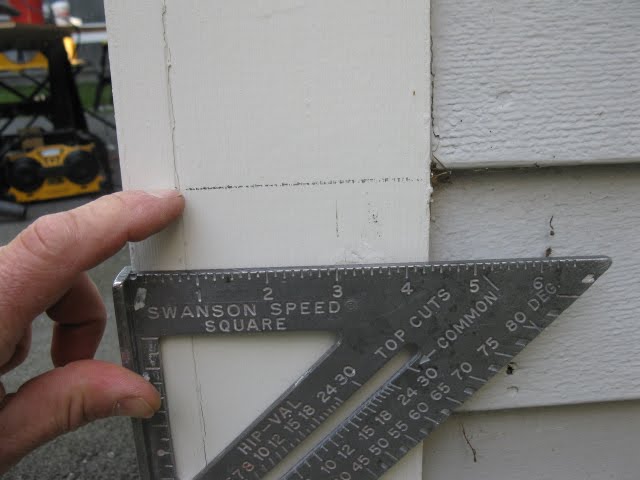
The key is to make that joint as invisible as possible.
I feel that the best exterior joint is the scarf joint.
My reasons for using a scarf joint more than aesthetics – the repair does look and blends better but more importantly, it’s a better fix and lasts longer = longevity.
The scarf joint is alot in trim carpentry inside and out. It is used when the material being joined is not available in the length required. It provides greater surface area to glue two trim boards, and provides for a less visible joint.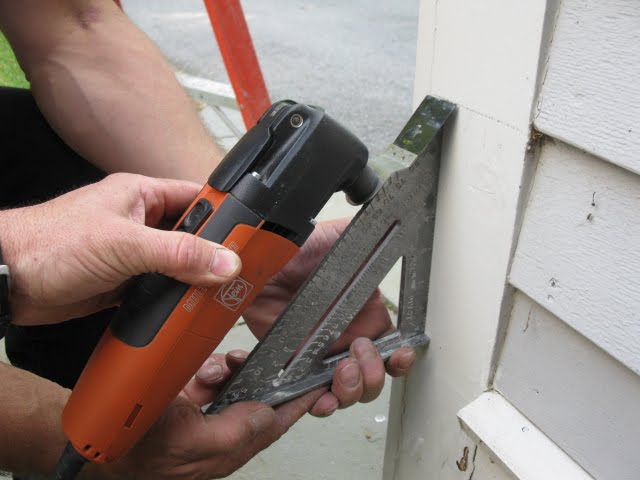
NOTE – A joint is a place for water to enter. If water enters rots and ants will follow.
In the photo above I am using a speed square to keep my Fein Multimaster cutting tool at a consistent 45 degree angle.
The top portion of the trim always gets cut up and back. This is super important to keep water from entering the joint and getting behind the trim.
The bottom board is cut on the miter saw. Leave it long until you get a tight joint, you may need to adjust the angle on the miter saw to get the scarf joint tight.
Once tight prime the end grain and install some caulking in the joint before nailing it off. Place two nails an inch above the joint on the upper board to squeeze the boards tight.
Painted scarf joints are easy to conceal, but they still require careful installation and sanding. Paint is merely a finishing coat, not a cure for a poor fit.
The drawing below shows why it’s important to cut the “exterior” scarf joint properly. [Click to enlarge]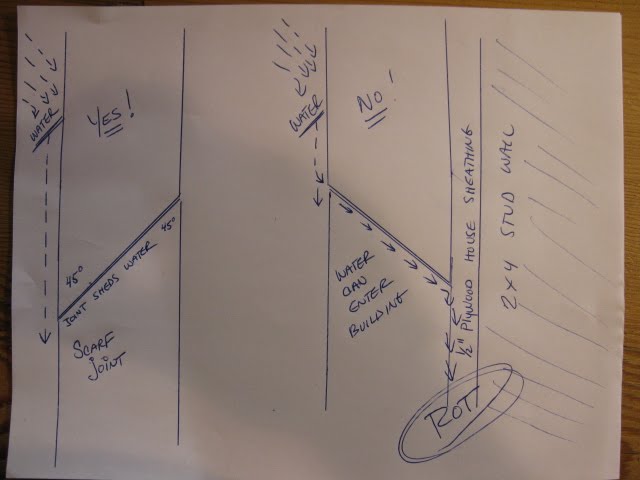
When repairing trim try to think of how water drains using gravity. As water runs down the side of the house you do not want a joint that angled up.
The far left drawing shows a proper exterior scarf joint. Water will run down and over the joint.
The drawing on the right shows an improper exterior scarf joint. Water will run down and into the joint.
If you enjoyed this post, make sure you subscribe to my RSS feed or receive updates via email
