How To Replace A Deck Footing Threaded Bolts
Even the best carpenters I know sometimes pour a footing that is off or place the threaded J-bolt [anchor bolt] in the wrong location. This article will show you how to repair concrete deck anchor bolt when placed in the wrong location.
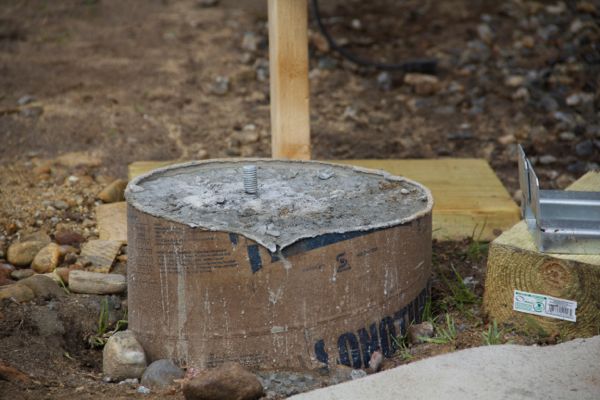
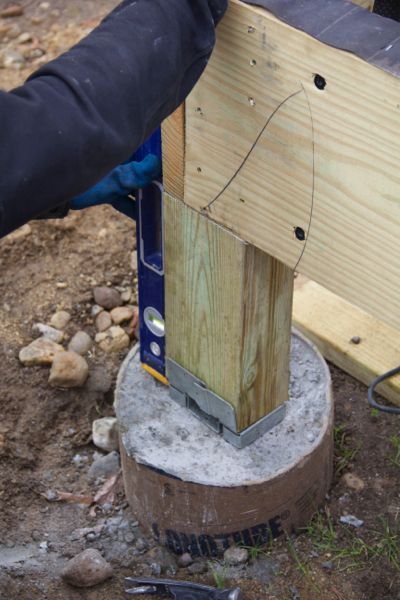
Threaded Anchor Pin Not Centered
Concrete Footings and J-Bolts
Concrete deck footings and piers are designed to support the weight of a deck. In a perfect world deck posts are supposed to rest securely and centered on these footings with a threaded anchor or J-bolt holding it down. Anchor bolts are designed to resist post movement and deck uplift from high winds.
Most deck footings these days are either poured in place or precast and then hoisted down into an excavated hole.
When poured in place most folk s use “Sono-tubes” or an equivalent concrete form. These forms are simple to use, easy to install resist settling, uplift caused by frost and result in a stronger deck footing.
What To Do With Misaligned Anchor bolts
Many times the anchor bolts used in the concrete forms are neither centered nor lined up properly and need to be redone in order to properly secure your deck post to the concrete footing.
Using galvanized, adjustable post base plates allow 1/2-inch discrepancy in any direction if you have made an error when placing footing anchor bolts.
Sometimes 1/2-inch is not enough as everything needs to line up as precisely as possible. Even with adjustable post bases you sometimes have to cut your losses and start over.
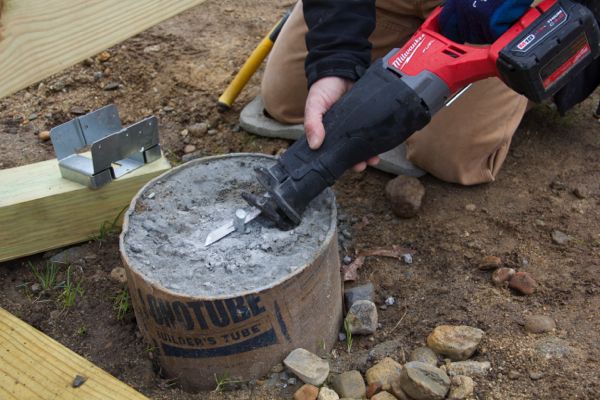
Starting Over – New Anchor Bolts
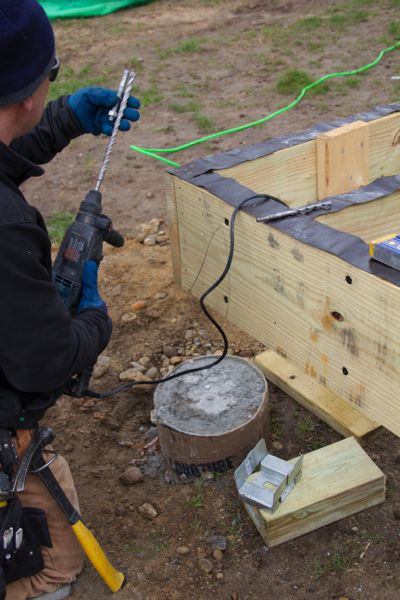
Once you’ve come to the conclusion that the anchor bolt you have is in the wrong location and it needs to be removed, you can get started fixing it.
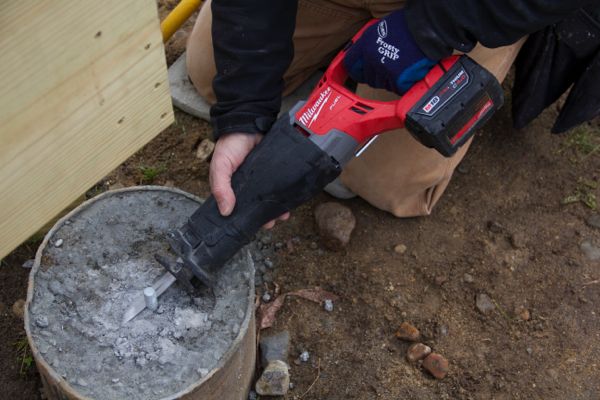
- Start by cutting, the misaligned anchor bolt flush to the footing, with a reciprocating saw and a metal cutting blade.
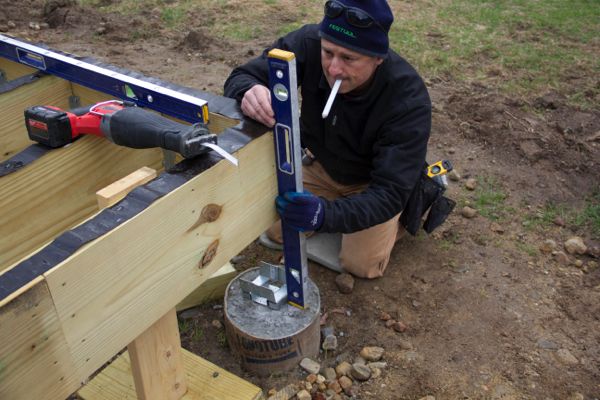
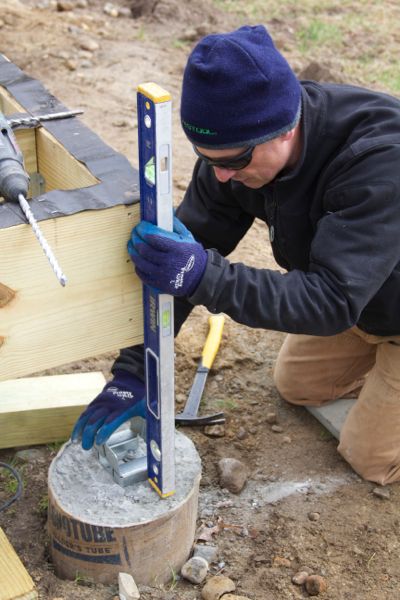
- Use a level, plumb bob or a laser to identify the location of your new anchor bolt.
- I use a level to plumb down from the deck rim joist to locate my post base connector.
- Use a pencil to mark two sides of the post base connector on the footing.
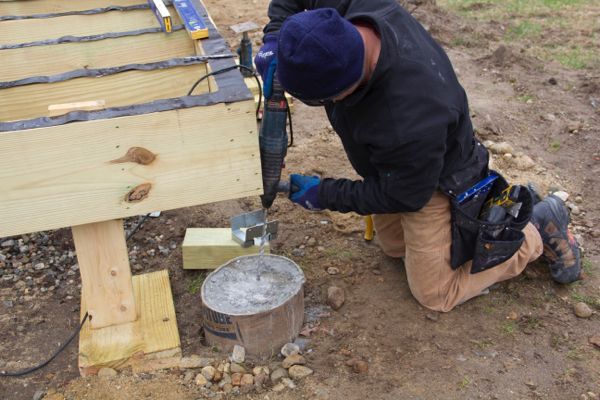
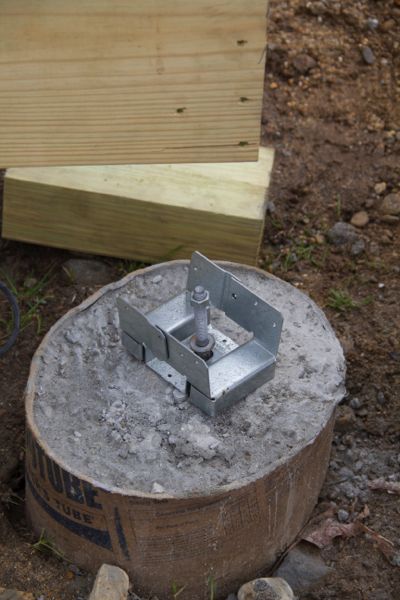
- I use galvanized wedge anchors but you could also use epoxy and galvanized threaded rod.
- Wedge Anchors are designed to anchor objects into concrete. They are installed into a pre-drilled hole, and then the wedge is then expanded when the nut is tightened. The wedge secures the anchor in the concrete.
- Pre-drill this hole with a rotary hammer drill and remove the dust from the hole after drilling.
- Place your adjustable post base on the footing and centered over the new hole.
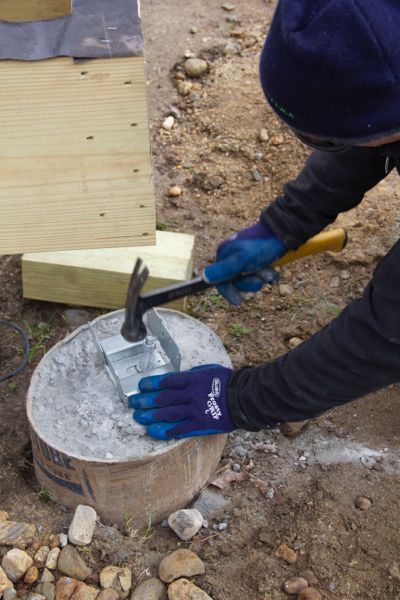
- Tap the wedge anchor into the hole with a hammer.
- Remember to have the washer and nut installed and flush with the top of the anchor bolt. Failure to do so may result in the hammer damaging the anchor threads and prevent you from attaching the nut.
- Once the bolt is flush to the post base connector and footing line up the connector and tightens the bolt.
- Cut your pressure treated post to size and install it on top of the post base connector and under the beam or rim joist of the deck.
- Plumb post.
- Attach all code required post to footing and post to beam connectors and add code compliant fasteners to secure them in place
TIP: Threaded studs are an alternative to J-bolts and you can install them after the footings have cured. Using this method could reduce errors.
By following these simple directions you are well on your way to learning how to repair concrete deck anchor bolt when placed in the wrong location and having a safe and healthy deck!