
Proper Techniques to Insulate your Basement
Source: highremodel.com
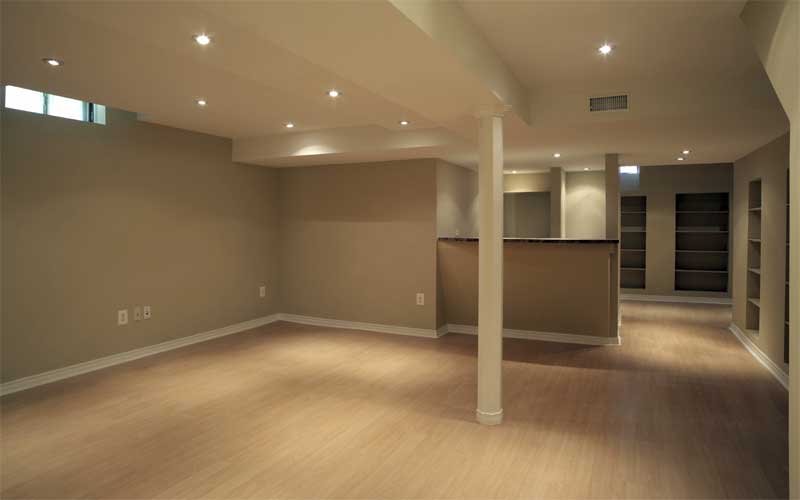
Many homeowners look to their basements when they want to efficiently increase the living area of their homes. Compared to the cost of a home addition and the significant difference in the amount of building material, expanding a home through a basement renovation is cost-effective and easier on the environment. In this article, we’re going to focus on one of the first and most important steps when beginning this renovation, how to insulate your basement.
Warning!
Before you proceed with this project it is vital you know how your foundation walls and drainage measures are performing to ensure your basement space is not collecting moisture. Any leaks or drainage issues must be addressed before you start to insulate your basement and cover the walls with finishes. No matter how well you insulate your basement if a serious and existing moisture issue continues you may find yourself starting this whole process over again.
Create a Moisture Barrier: The Old Fashioned Way.
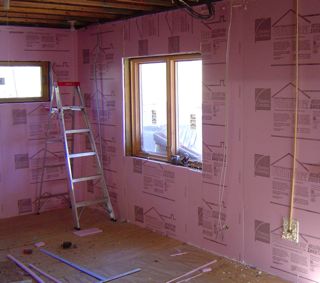
Traditional methods exist to form a moisture barrier between the foundation walls and your interior walls using at least 6-millimeter, commonly referred to as “six-mil”, polyethylene plastic from the bottom of foundation mudsill to bottom of pressure treated bottom plate of the interior wall. This method is designed for framing to sit on the plastic and against the foundation wall. The six-mil plastic creates the moisture barrier, but for insulation, you would rely on fiberglass batting to maintain desired temperatures.
There are a few cons to this method, one is the inherent weakness of the plastic, it can easily be torn during the framing process, or rip if a nail or staple snags it. Additionally, the R-Value of the plastic is only about 0.85, so unfortunately the effort it takes to create your moisture barrier does almost nothing to insulate your basement.
Source: energyvanguard.com
Create a Moisture Barrier & Insulate your Basement.
Ask any Home Improvement Contractor, best practices to insulate your basement should always include spray foam or rigid foam. Why? Because they both offer double duty, it can be used to create a moisture barrier, and depending on the type of foam you choose can provide an R-Value of 3.6 to 8 per inch of thickness.
How to Insulate your Basement with Ridged Foam.
- What you’ll need:
- Ridged Foam Boards
- Adhesive (Approved for use on Styrofoam products)
- Tape (Adheres to Polystyrene)
- Spray Foam (Can)
Source: makinghouseswork.cchrc.org
Installation:
Depending on the type of foundation in your basement, variations of this process may be used. For our purposes, we’ll assume your basement is poured concrete or cinder blocks, and the walls are reasonably plumb and straight.
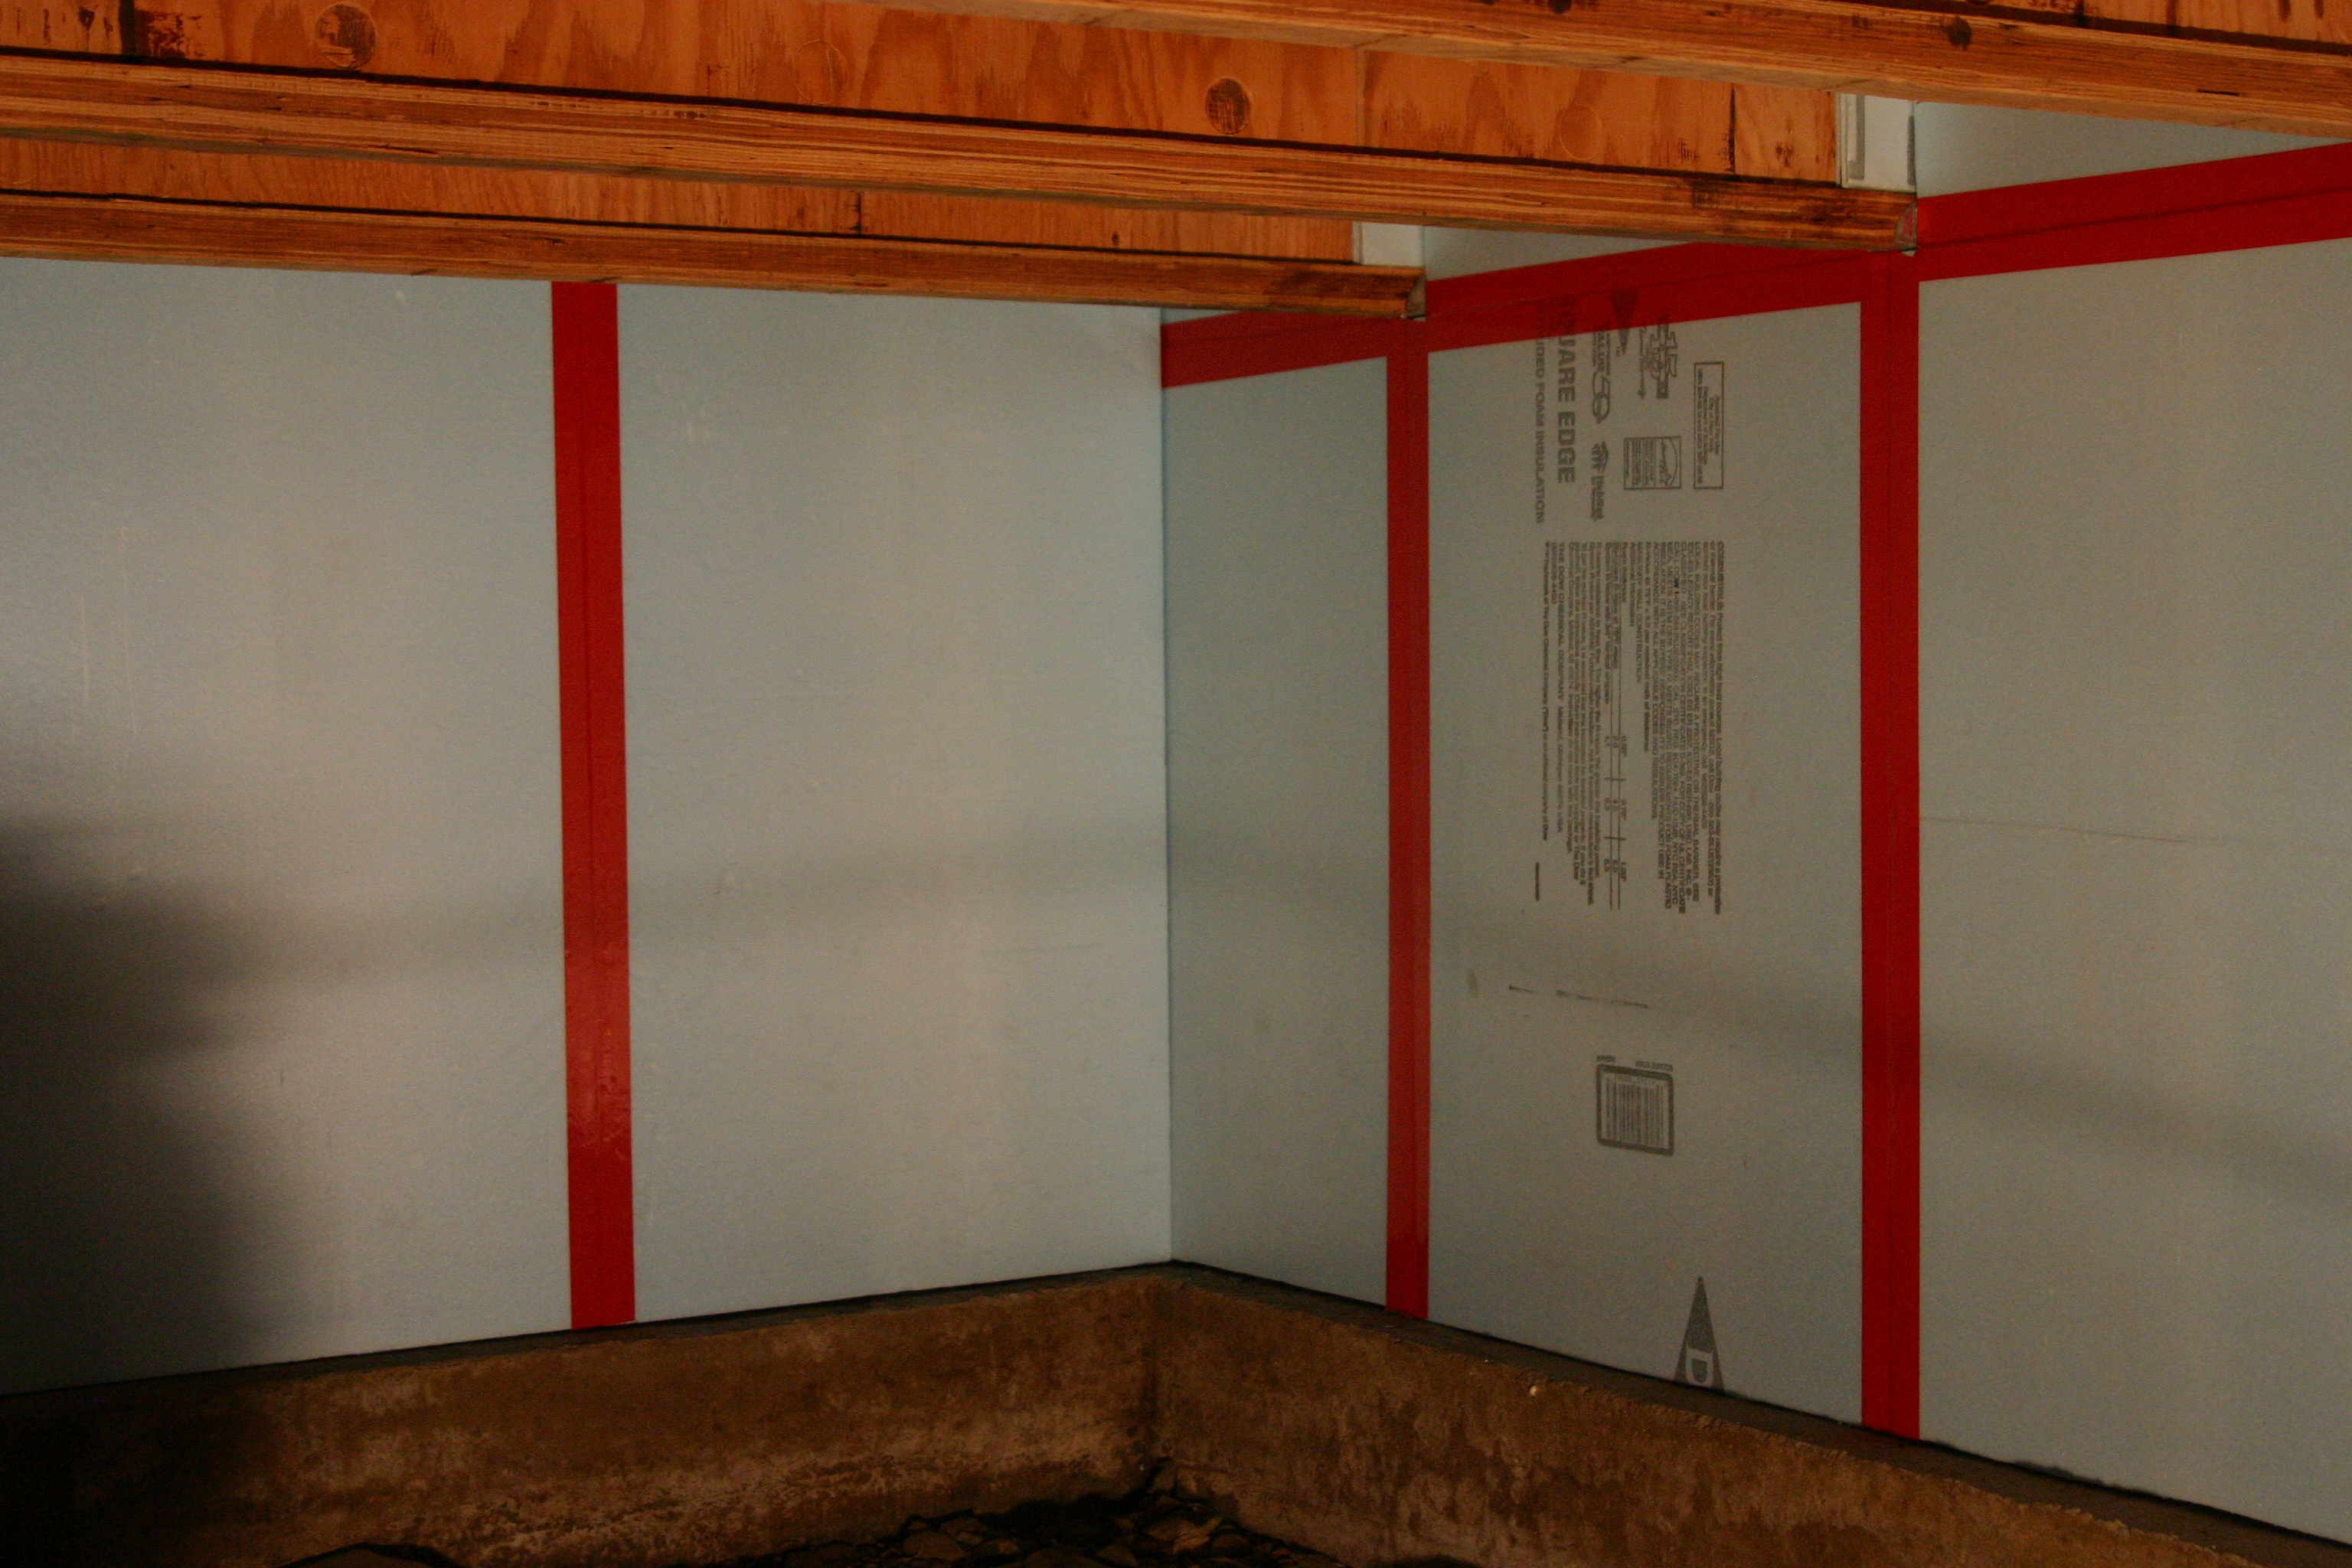
Foam boards will often come in 2′ x 8′ or 4′ x 8′ sheets. Plan out the amount you’ll need and be sure to include the areas up above the foundation wall at the rim joist and add an additional 10-15% for waste or a mistake or two.
Once you’ve purchased enough stock to insulate your basement, begin installing the boards by using a construction adhesive, or spray foam, approved for use on styrofoam, and put a generous bead across the board about every 12 inches. Continue this process throughout the foundation wall.
Source: drenergysaver.com
Once the face of the walls is covered cut pieces to fit over the top of the foundation wall and up against the rim joist around the entire foundation. Be sure to apply these pieces of foam with the adhesive as well.
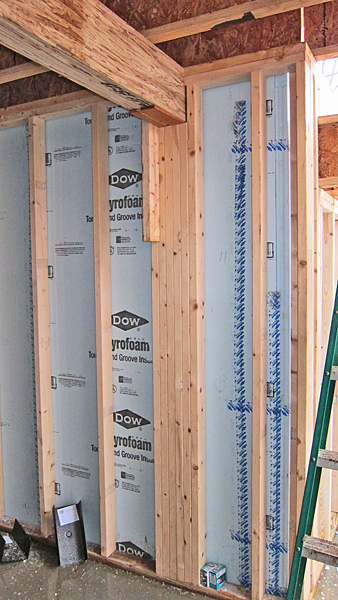
Now that you’ve installed all the rigid foam you can begin to create an airtight seal, to ensure an effective moisture barrier. On the face of the walls use the Tape to cover all the seams, and if possible use the tape in areas where the joints are tight in the floor joist bays and along the rim joist. DOW offers the WEATHERMATE™ Construction Tape, and Owens Corning has JointSealR™ Foam Joint Tape.
For any larger gaps, you’ll use the canned Spray Foam. Use this spray foam along the bottom of the ridged foam to create a tight seal at the bottom of the foundation wall.
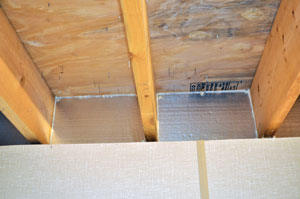
The area above the foundation wall is a bit more challenging to insulate and ensure an airtight barrier but is key to ensure a dry and well insulated basement. So use the spray foam generously.
Frame or Fur Out your Walls?
The ridged foam acts as an insulator and a moisture barrier, but when you begin your basement renovation, you can’t stop, nor would you want to, at the insulation. So when it comes to adding finishes to your walls, you have a few choices.

Source: http://basc.pnnl.gov
Furring Strips:
Some foam boards are designed with a pocket to accept a 2 x 3 furring strip, these strips act as positive attachments for sheet goods like gypsum boards, commonly referred to as drywall. If you are not planning on having any electrical service on these walls this is a simple way to install your basement walls.
You can also build up the furring on your walls by creating a grid of first horizontal strips then vertical strips laid out 16″ on center. Both this method and the furring strategy above require you to fasten the furring strips to concrete, you can do this with concrete screws, masonry nails, or spring spikes.
This second furring method creates enough of a gap for electrical wiring to be run behind your finished wall. What both of these furring methods fail to do is give your walls any additional insulation value. (Well technically the air and drywall does add R-Value, but nothing like the added insulation in a framed wall)
Additionally, before you fur out a wall ensure it is plumb and straight since there is little you can do to correct irregularities in the wall with furring strips, this may not be the best option if your foundation wall is out of plumb or wavy.
Source: hicagotribune.com
Traditional Framing:
Framing out a wall over the foam boards has plenty of advantages. First, you’ll have ample room for electrical and plumbing. Second, the moisture-free space created by your 2 x 4 studs is perfect for additional fiberglass batt insulation, which will add an additional 11 R-Value to your wall. And finally, with an actual wall, you will be able to use more common nails in your construction since only the bottom plate, composed of pressure-treated lumber, will need to be affixed to concrete.
Additional Moisture Safeguards for your Basement.
Pressure Treated Material:
As I’ve mentioned a few times in this article, the bottom plate of your basement walls should be pressure treated material. This is required by code as that board is in contact with the concrete and will be exposed to moisture. A sill sealer can be run along the underside of the bottom plate as an additional safeguard to protect it from moisture.
Composite Decking Material:
To protect against a serious plumbing failure or a sump pump failure, that could lead to pools of water in your basement you can build your framed walls up on composite decking material, this will provide an inch of rot free protection with a material that will not wick water, which can draw moisture up into dry parts of the wall leading to moisture related problems like mold, mildew, or rot in places you though were unaffected.
Install Drywall Cautiously:
With that same idea in mind, when it comes to finishing your walls, have the drywall installed an inch or so above the floor. That gap will get covered by your flooring material or baseboard trim, but if any catastrophe described above happens in your home you’ll have that buffer keeping water away from your walls and avoiding additional damage to your home.
Choose Moisture Resistant Gypsum:
Even if you’ve done a good job creating a moisture barrier in your basement but you are concerned about the regular moisture content of your region or your home you can install mold-resistant drywall similar to products you’d use in your bathroom. Different manufacturers use certain colors or names for their products so check the specifications before you purchase, but these mold-resistant products can be commonly referred to as “green board” or “blue board”.
Best Practice: To Insulate your Basement.
- Solve moisture issues (leaks, drainage, etc.) ahead of time.
- Use spray foam or rigid foam products, with approved adhesives and tapes.
- Seal any gaps with spray foam.
- Line walls with composite decking material to act as a deck for framed walls.
- Frame walls with the pressure-treated bottom plate.
- Add R-Value with fiberglass batt insulation.
- Select mold-resistant drywall products.
- Set drywall 1″ to 1-1/2″ off of concrete slab.
Each home and homeowner is different, so modify these steps as needed, but remember that each deviation from best practices puts your renovation at risk. As long as you understand the most important aspects of how to insulate your basement the right way, you can make the best choices for you and your home to ensure you have a dry, warm, and healthy finished basement.