
Installing A Dryer Duct and Vent – Best Practice
The type and length of your dryer duct can have a significant effect on the efficiency of your dryer as well as increase or reduce the risk of a fire.

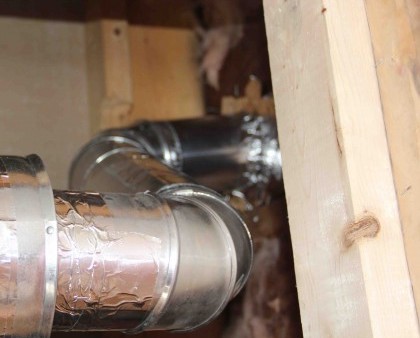
Use Metal Duct Pipe – Best Practice

The best duct pipe to use is 4” solid, smooth aluminum. Solid duct pipe results in better airflow because it has less air drag and is easier to keep in a straight run to avoid drooping.
Other benefits of solid piping are:
- Reduces air flow drag
- Frictionless
- More efficient exhaust resulting in faster drying
- Reduces lint build up
- Saves energy.
The flexible, white plastic hoses that were popular 20 years ago were never designed for dryers and are a fire hazard.
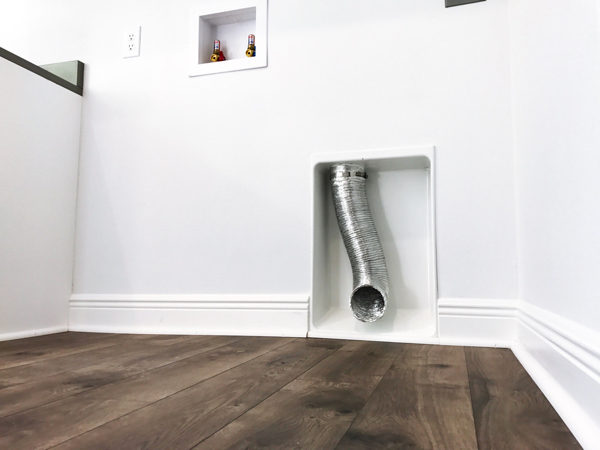
When looking at dryer duct you’ll see flexible metal and flexible foil hose. Flexible hose builds up lint faster and we NEVER recommend using the foil hose ever! Note – dryer manufacturers allow the foil metal – don’t do it.
The flexible metal hose is useful at the dryer connection to allow the dryer to be pulled out from the wall for servicing. Other than that one connection, we recommend the rest of the piping be installed with solid metal ducting.
Dryer Vent Specifications
Local codes and ordinances must be adhered to. Consult your local building inspector to check local guidelines, and be aware that most manufacturers will recommendmuch longer duct runs in their manuals than is advantageous or smart.
Most codes recommend that a dryer duct be no more than 35 feet long. Remember – the shortest run will give you the BEST drying times and efficiency.
When calculating duct, you need to include the “resistance length,” of your total duct run, including elbows and restrictions. For example:
- DEDUCT 2.5 feet off your run of 35 feet for every 45-degree bend
- DEDUCT 5 feet for every 90-degree bend.
- Use wider sweeping elbows if given the option.
- For best performance, separate all turns by 4 feet of straight duct.

Duct Runs Longer than 35 Feet
For duct runs longer than 35 feet in length, the may system requires a booster fan or a high-output dryer. A dryer vent booster fan can increase the life of your dryer, increase the dryer’s efficiency, and decrease the fire hazard in your home.
Longer Duct Runs Are Inefficient
Longer dryer duct runs significantly reduce the efficiency of your dryer resulting in longer drying cycles or multiple cycles achieve drying.
Locating a dryer along an exterior wall always ensures the shortest duct run ad best drying times.
Installing Dryer Duct – Best Practice
Dryer duct runs should be as straight and short as possible. Minimize 90-degree turns; sharp turns cause back pressure and create resistance to airflow. Two 45-degree bends are more efficient than one 90-degree.
Best Practice Tips:
- All dryer ducting must be a minimum of 4″ in diameter.
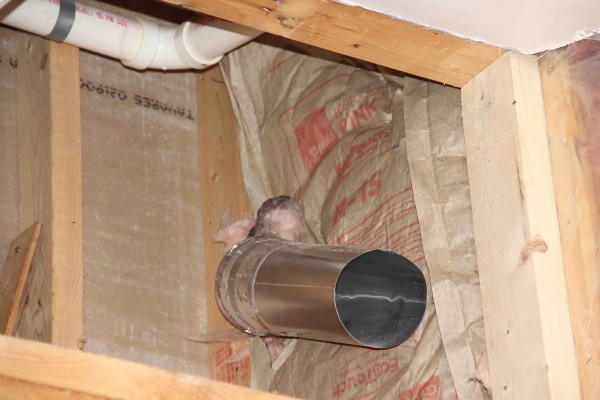
- Any in-wall or concealed ducting must be rigid metal (galvanized or aluminum) duct.
- Length of entire duct run shall not exceed 35 feet [25’ for IRC]
- When possible, horizontal runs of dryer ducts should slope slightly downward (¼ inch per foot) toward the exterior termination to reduce the possibility of condensation accumulating and then collecting lint.
- Never exhaust near the fresh-air intake of any heating, ventilation, or air conditioning intake or water heater.


Properly Seal Your Duct Pipe
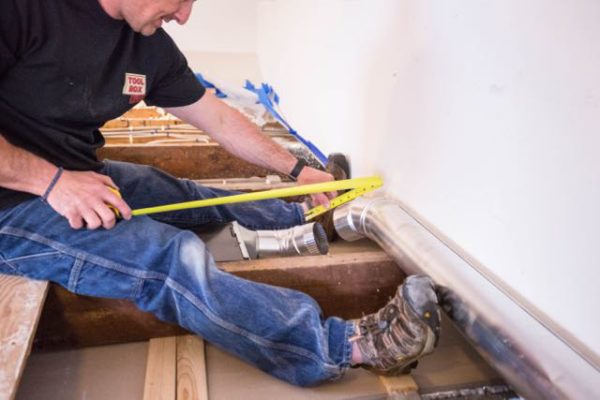
Install all duct pipe with the seams facing upwards and ensure all duct joints are installed so that the male end of the duct points in the direction of the airflow.
Seal all duct seams and joints with aluminum “foil type” tape. [Do not use duct tape!] Avoid the use of rivets or screws in the joints or anywhere else in the duct as these will encourage lint collection.
Support Long Duct Runs
Ducts should always have adequate support, especially at each joint. Examples of duct support are:
- Wood blocking
- Large, heavy-duty cable ties
- plumbing strap
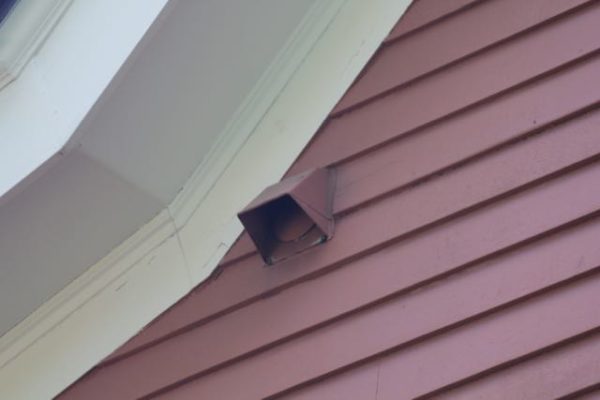
Install Exhaust Hood
Termination of dryer venting must be to the exterior with a proper hood or roof cap equipped with a backdraft damper. The exhaust hood should point down and have at least 12 inches of clearance between the bottom of the hood and the ground.
To drill the hole for the exhaust door I recommend using a 4-1/4″ or 4-1/2″ hole saw.

Insulate Ducts In Unheated Spaces
In cold climates, insulating the dryer exhaust duct in unheated spaces may help limit the condensation from forming inside the duct and collecting lint. Any ducting through unconditioned spaces should be insulated with pipe sleeve insulation