Site icon Concord Carpenter

How to Fix a Broken Floor Joist

IMG_1062

Fixing Broken, Cracked, Sagging Floor Joists

I recently had to repair a broken floor joist that had cracked. I suppose somewhere in the world there are floor joists that need to be repaired that have wide open, clear joist bays, with no pipes, wires or obstructions. That’s not my world!

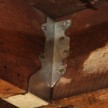
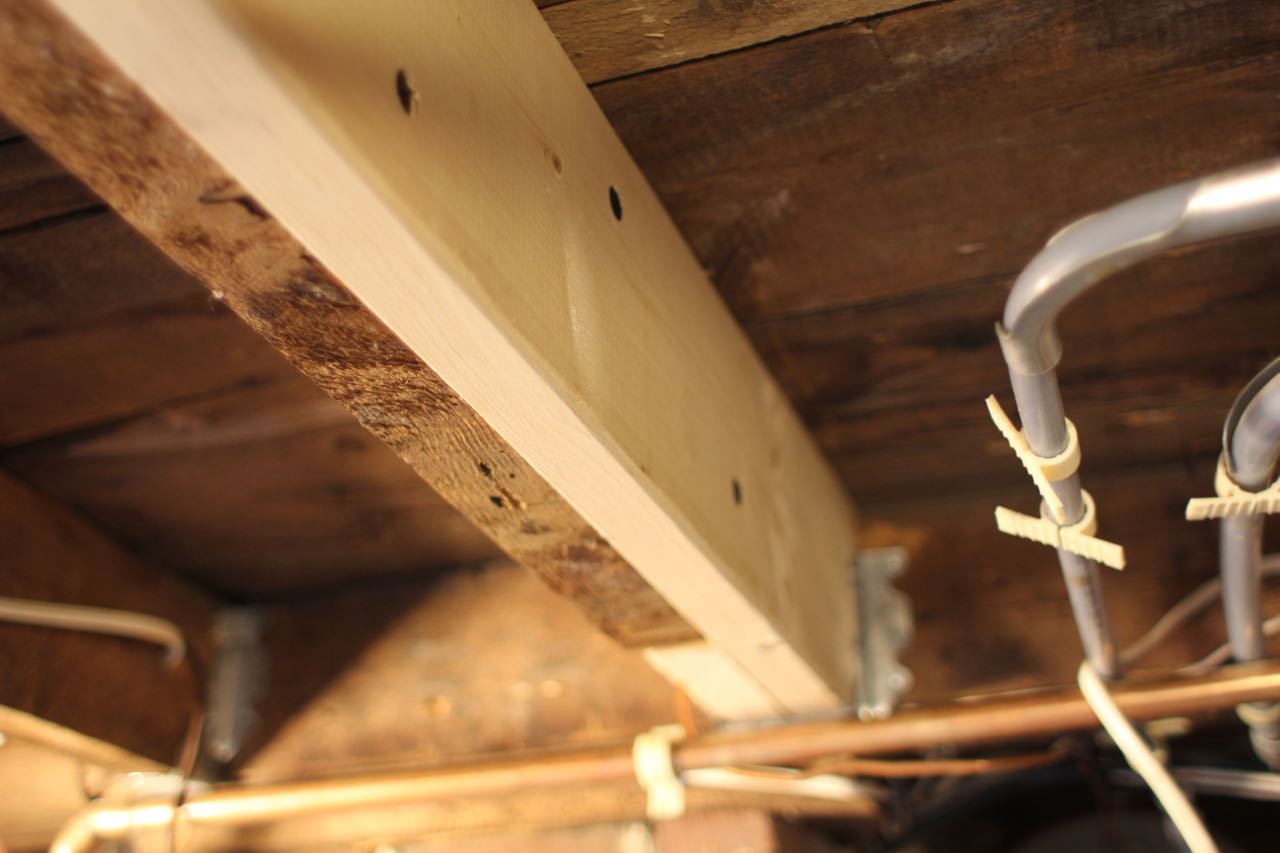
From initial inspection it appeared that someone had notched the joist too much and then installed a make shift patch. The notch was made where the floor joist recessed into a wood beam, supported by chimney corbeling.

Corbeling is an “old-school,” overlapping arrangement of bricks with each course extending farther out from the vertical of the wall, than the course below. Corbeling was done for decoration or to support structural beams.

My guess is that many years back, an old vent pipe or furnace was in this location and the contractor needed to cut this section of joist to accomplish the installation.   Today, this type of notch is not be allowed by code.

Improper Notching Causes Problems

Notches can compromise the strength of floor joists, some notches are acceptable, depending on their location and are dictated by the International Residential Code [IRC]. Here’s a good rule of thumb:

  1. Notches should be no deeper  than 1/6 the depth of the joist.
  2. Notches at the end of the joist  should be no deeper than 1/4 the  depth.
  3. Limit the length of notches to 1/3 of the joist’s depth.

Not only did this aggressive notching doom this joist, it affects the structural integrity of the floor system above. To make matters worse there was a refrigerator above our joist and the floor was sagging a bit!

A severely, cracked, or sagging floor joist can get worse over time, causing the floor above it to slope or become unleveled.

Repairing a Floor Joist with a Sister Joist

Correcting a problem joist is an easy repair and is usually accomplished by fastening a new joist next to a damaged floor joist. This is referred to as “sistering.”

When sistering cannot be accomplished there are a few other ways to reinforce a floor joist.

Plan Your Repair

This floor system was built in 1863 and was later reinforced with a mid-span beam approximately 7-feet away. The damaged joist measured exactly 2 inches by 6-1/4 inches deep, a true 2×6.

My approach was to install a new joist next resting one end 3-inches onto the mid span beam and installing a joist hanger on the other side. I would sister the two together with structural screws.

The space between the beam and the floor boards above was 7 inches so I decided to use regular framing lumber and rip a 1’2-inch on the width of a 2×8 framing member.   Note – A 2×8 board measures 1-1/2 by 7-1/2”.

Tools & Materials Needed

Cutting the New Joist

I used a power saw to cut the new joist so it would sit 3-inches into, and on top of the beam. Once I had my length cut, I then ripped ½” off the width of the new joist.

Note – when installing a new joist, on a foundation wall you may need to notch the bottom edge so it can fit. Each situation is different. Follow IRC and your local building code guidelines for notching framing material before doing this repair.

Creating Room for the New Joist

I had a few obstructions in my way; there were electrical wires, thermostat cables, a refrigerator water line, electrical conduit and heating pipes all in the way. Plus old nails and pipe brackets, from years past, left in place – I hate that.

The first step was to temporary remove or even relocate these electrical cables, and pipes.  This necessitated shutting off the electricity and temporarily disconnecting a smoke alarm and some thermostat wiring.   I also had to pull wire staples and unscrew conduit and heating pipe supports. These items will all need to be replaced after I was done sistering the joist.

Once complete I checked the subfloor above for any penetrating nails that would inhibit the new joist. There were none but if there was I would have used end nippers and cut them flush with the subfloor.

I also removed all of the nails and old pipe hangers.

Jacking the Joist

I placed the new joist in place and then set up a 6 ton hydraulic jack with a jack post. The new joist fit in the space sideways but would not tilt into vertical position. The reason for this was the new joist, when at a 45-degree angle touches the top of the beam and the bottom of the floor boards. Once the joist is vertical it will fit fine – hence the slight jacking.

I plumbed a double 2×4 jack post and placed it directly under the cracked joist in order to lift a small sag out of the old joist as well as create a tiny bit of room for me to get the new joist against the old one – at the beam.

A note on Jacking: Jacking too fast can cause wall cracks above and many times it’s better to jack slowly, 1/8 a day, to get a joist level.

I then used a 5-pound hammer to carefully move the new joist into position. I needed to hammer the joist only where it sat on the beam, since this is where the joist was catching.

Alternative Joist Install TIP: if the new joist is hitting a beam and the floor above and jacking is not an option, you can cut small bevels on two opposing ends where the touch the beam and floor board. This helps the joist turn into the proper resting position.

Making a Jack Post

I made a fast, and simple jack post with two 2×4 screwed together. I was not lifting a lot of weight or lifting and holding for a long period of time so I chose not to make a “strong back” or “T” jack post.  “T posts are stronger because the 2×4 boards oppose each other and counteract any bending force created during jacking.

To make a “T post” nail your 2x4s together perpendicular to each other in the form of a “T.”

Truss Lok Structural LAgs

Installing the Sister Joist

After the new joist was in place; vertical and adjacent to the old joist I used a clamp to hold them together at the chimney end.

I patched in the notch on the old joist, mostly so I had structural bearing onto the joist hanger. I also added a shim board to the width, to keep the hanger from deforming when fastened.

I then relocated the jack under the joist and place a slight amount of pre-stress tension on it, ensuring that I was level, I then installed a double joist hanger.

The joist hanger I used was designed for “old work an fits the wider faming material often found in older homes. I secured the joist hanger into the corbelled beam with 2-1/2 inch Simpson structural screws and into the joists with 1-1/2 inch structural screws.

Then I installed a series of 3” Truss lok structural lag screws, joining the new joist to the older one. Once secured I released and removed the jack.

Note on Structural Engineer Inspection

If you’re concerned about the structural integrity of sagging, cracked or twisted joists in your house, first call in a structural engineer to inspect the floor and pay to get a recommendation for reinforcement and strengthening measures.

This type of inspection typically costs $500 to $700 and will assist with any other remodeling or building permitting projects.


If you enjoyed this post, make sure you subscribe to my RSS feed!
Exit mobile version