Cope and Stick Rough Sawn Cabinet Doors
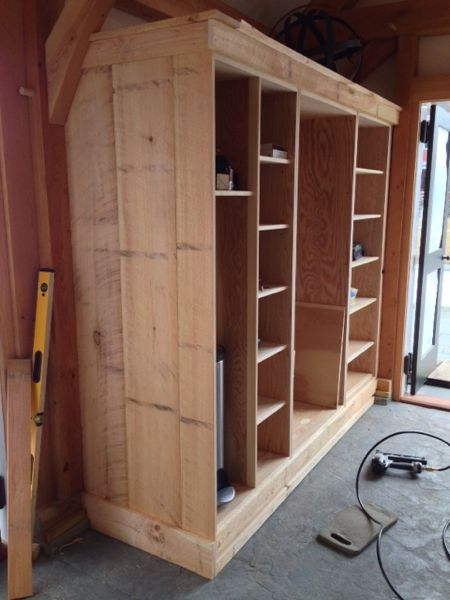
In this article I will discuss how to build rustic cabinet doors. We recently had a remodeling project where we were asked to trim out a timber framed pool house. The project required us to work with rough sawn, ship-lap pine boards and to build two changing rooms, and laundry, sink and pantry cabinets.
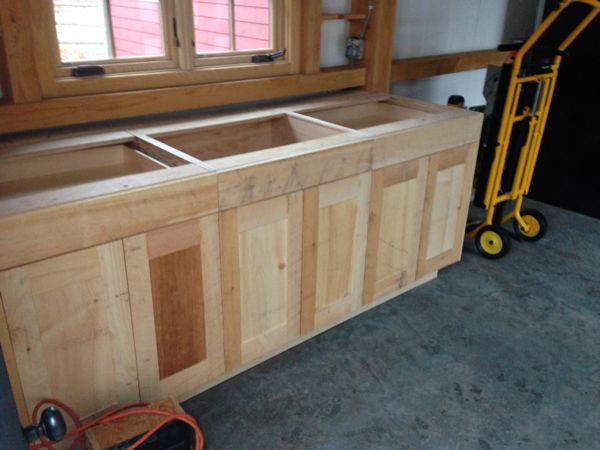
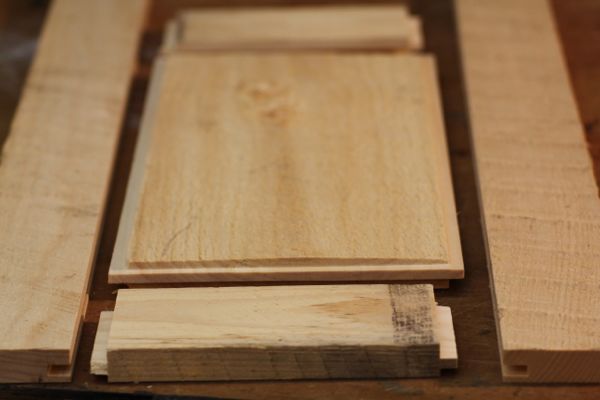
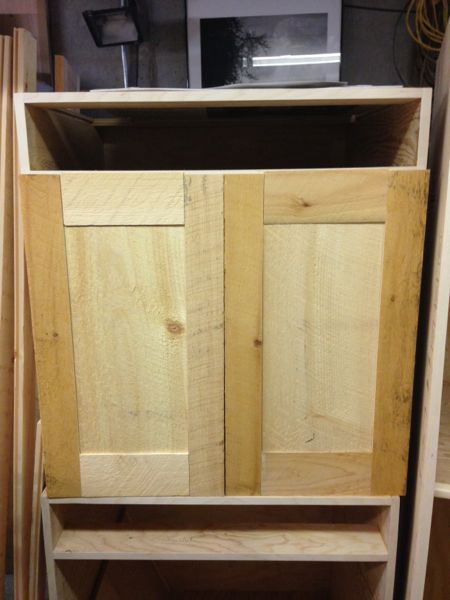
Twelve cabinet doors needed to be made to match the desired rough sawn theme. We decided on a recessed, flat panel look. We also decided that it was best to use tongue and groove joinery to make the frame and panel doors.
What is Rough Sawn?
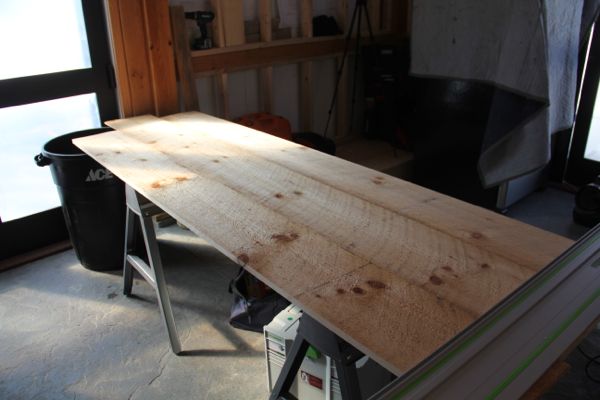
Rough sawn lumber is lumber which is left rough and usually needs to be dried, planed, and otherwise dressed by the end user. Drying is often done by leaving the lumber outside, but it can also be dried in a lumber kiln or in your workshop. Often times you can purchase this lumber from the mill after it is kiln-dried.
Wood species:
There are a few species that are best suited for a rustic appearance. We chose Kiln-dried, rough sawn, Pine. It is a fairly popular choice for a rustic look, because it displays the visible knots for which rustic kitchen cabinets are well known. Pine is also a sustainable resource, readily available and reasonably priced.
Purchasing Rough Sawn Lumber:
Roughs sawn boards come in random widths and lengths and are measured by volume, which can be calculated by using a simple formula. A board foot (bd. ft.) measures 12-in. x 12-in. x 1-in.-thick, or 144 cubic inches.
Because board foot. is a measure of volume, any combination of thickness (minimum 1 in.),width and length that equals 144 cubic inches also equals one board foot.
Rough lumber thicknesses are measured in 1/4-in. increments. The thinnest rough-cut boards, labeled 4/4, and called four quarter, are 1-in. thick.
TIP: A common rule of thumb is to buy 10 to 20 percent more than you need.
Story Pole
Using the Mill to Size Your Wood
Rough lumber is rarely flat or straight. Milling your wood is a lot of work, puts wear and tear on your tools and creates a ton of sawdust.
Most yards will rip one edge of a rough board straight (called SL/E, straight-line edge),plane both faces (S2S, surfaced two sides),or mill both faces and edges (S4S, surfaced four sides).
This makes sense if you have a lot of board feet to address.
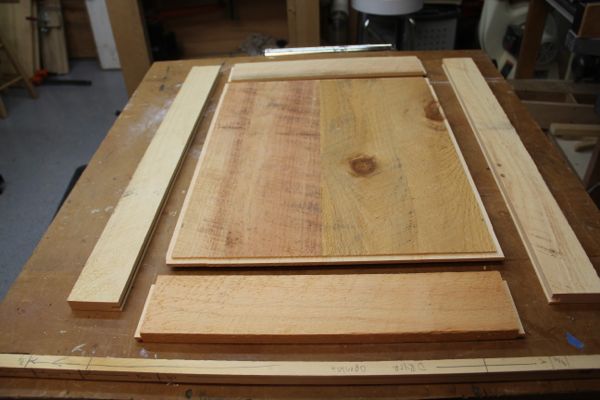
Panel Doors:
Panel cabinet doors are an example of frame and panel construction, a method developed hundreds of years ago to deal with the expansion and contraction that seasonal humidity has on solid wood cabinetry.
The door panel fits into groves along the door frame. The frame is also referred to as style and rail frame.
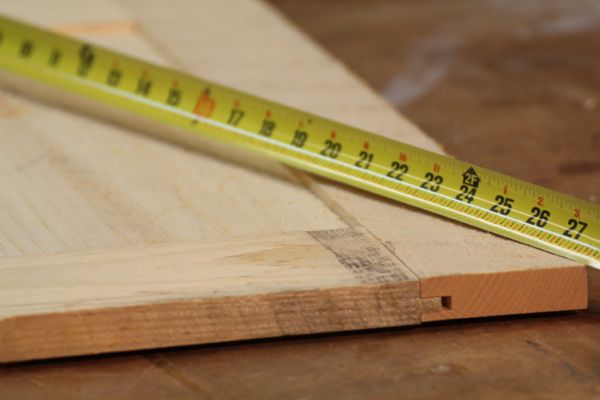
Measuring For Doors:
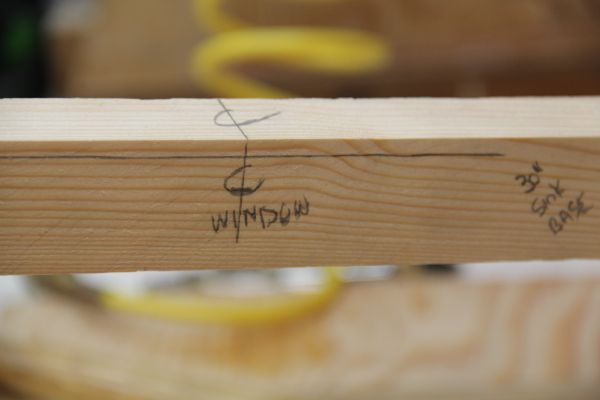
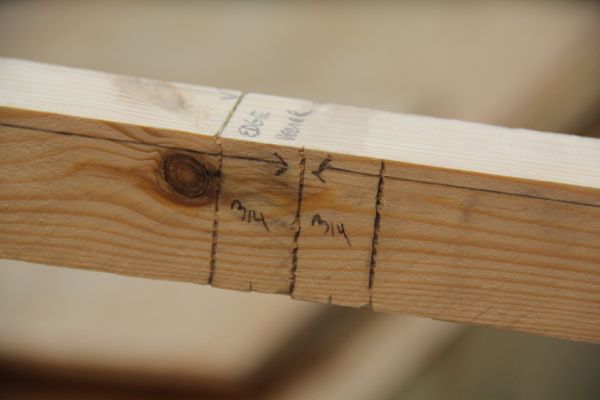
One very important step in learning how to build rustic cabinet doors is to learn how to make and use a story pole. We use story poles to layout and build our cabinets. We also used a story pole to make our rough sawn cabinet doors.
A story pole is a permanent way to mark and layout for an accurate quick and easy recall when measuring, marking and transferring accurate measurements.
We often use narrow rips of wood to make our poles. Early carpenters relied on story poles for building all sorts of things and used it to measure and mark heights from the floor platform of a building and up.
I was taught to use story poles when building custom bookcases and built-ins.
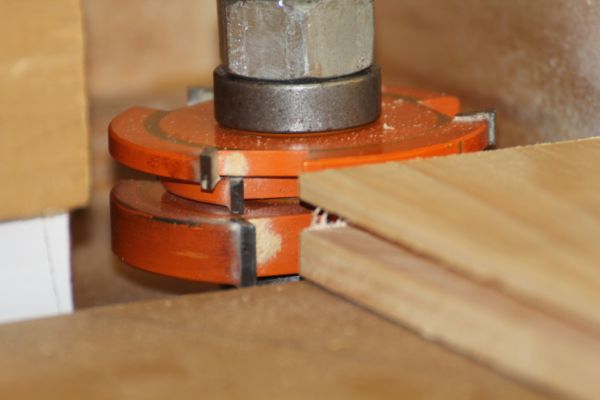
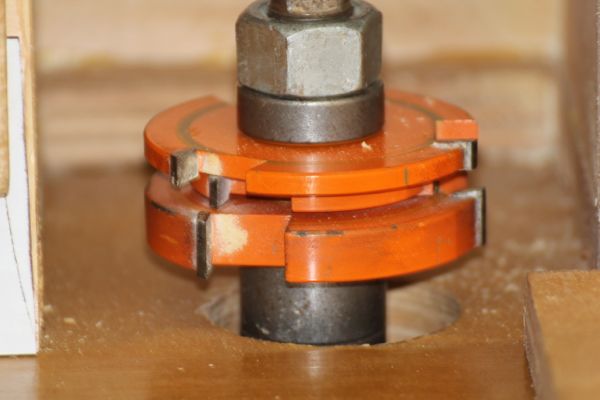
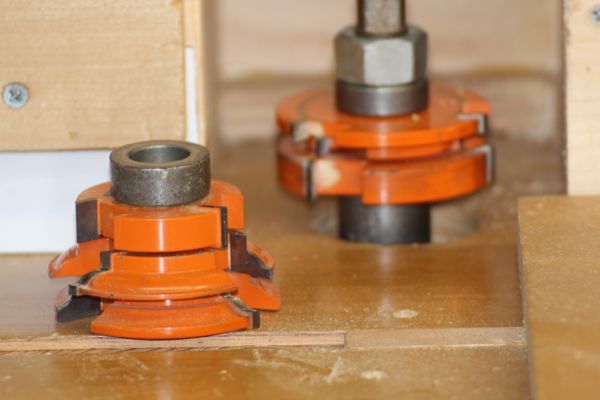
Shaper bit – exposed for photo
Building the Doors:
Part of our plan was to leave the rough sawn edge on as much of the doors as possible to match the pool house theme. This brought some thought and challenge to the door making process.
Normally I would make the doors slightly larger than needed and then plane them down when fitting them onto the cabinet face frames. We did not have this luxury with rough sawn wood since we wanted to leave the rough sawn edge.
To deal with this complexity I needed to deduct my door reveals ahead of time and make the doors exactly that size. This is where theory and reality separate. It is difficult to account for material lost during the milling process and we quickly learned that the tongue and groove milling took a miniscule amount of material away and had to make adjustments. With smooth, milled wood this would not have been a concern.
Door Joinery:
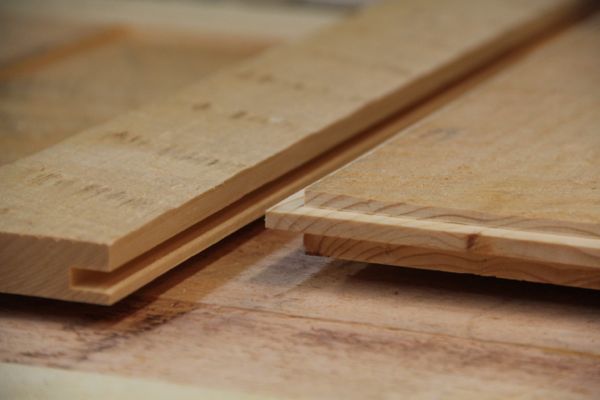
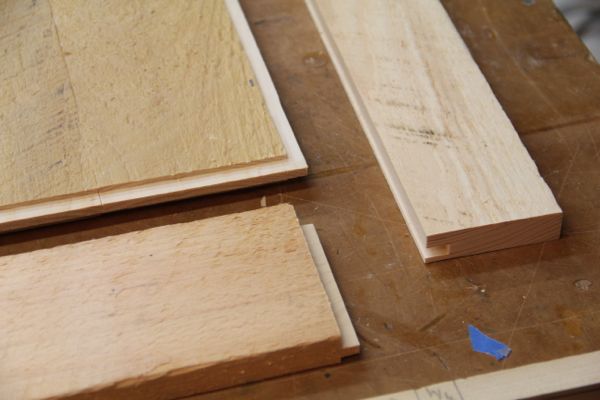
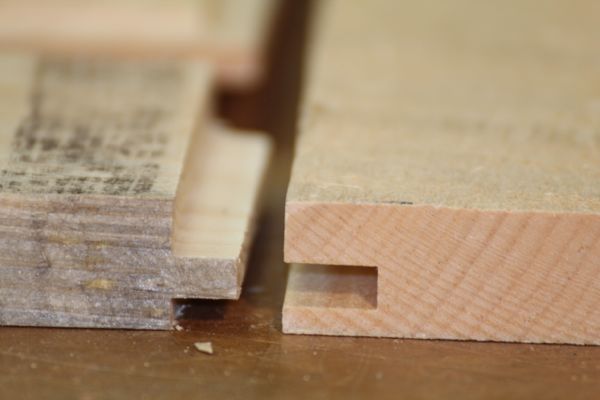
We mostly make our panel doors with a “cope and stick” or “Style and rail” shaper bit. Stile and rail router or shaper bits are matched bits that come in a variety of profiles, including ogee, bead edge, round edge and traditional.
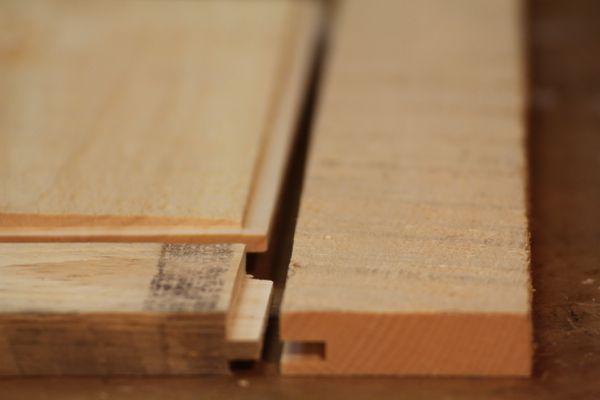
With cope and stick joinery, the frame is held together by a joint between the edge of the “stiles” (the vertical members of the frame) and the ends of the “rails” (the horizontal members of the frame). This joint is called a “cope” and is the result of two matching profiles that are glued and clamped together. The strength of the cope joint relies on a near-perfect match between the two boards.
Because our pool house cabinet doors were small we were able to make our door panels our of one board on all but the dryer door panel. For the dryer door panel we cut down and glued up four smaller boards to make a larger panel.
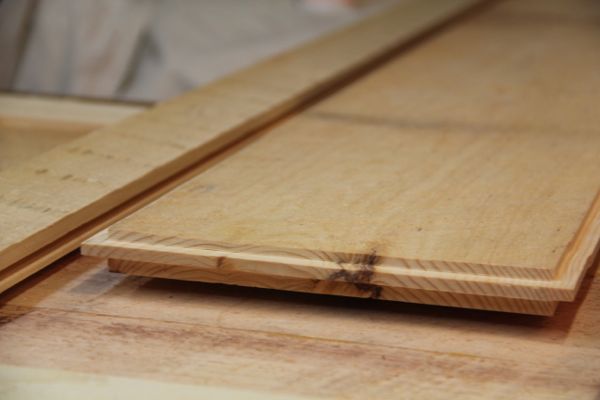
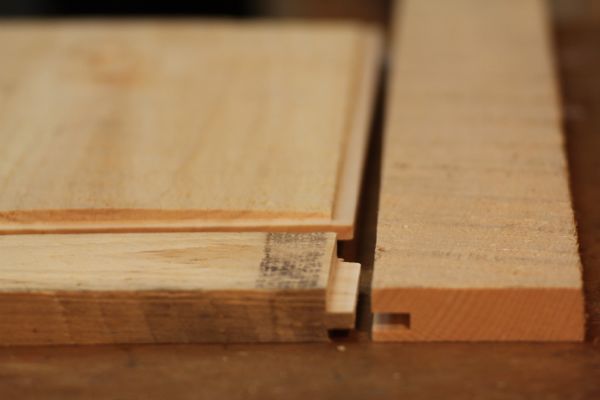
We used a stile & rail cabinet door cutter set for 1-3/8 to 1-3/4 inch material to mill a tongue and corresponding groove for our door styles, rails and door panels.
This bit also allows for a miniscule amount extra room in the groove for panel movement. I always make the door slightly smaller than actual dimension that the grooved frame will accommodate, allowing it to simply float in the groove without being physically attached to the frame.
Panel Movement: This extra room in the groove allows the panel to contract and expand with seasonal changes in humidity without affecting the suitability of the cope and stick frame.
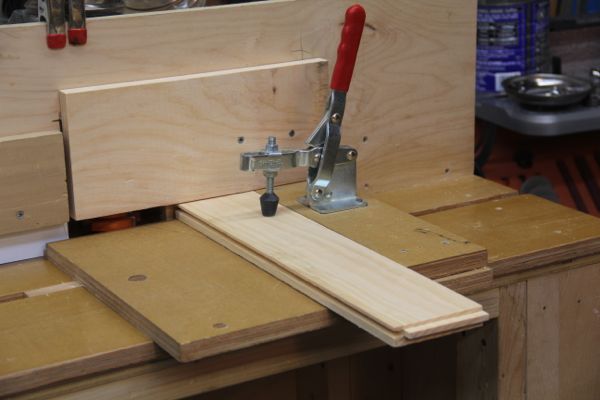
I have a home made shaper, sled jigs and use Bessy clampdowns to keep the material secure, safe and consistent. This can also be done on a router table with store bough hold-down jigs.
Door Construct:
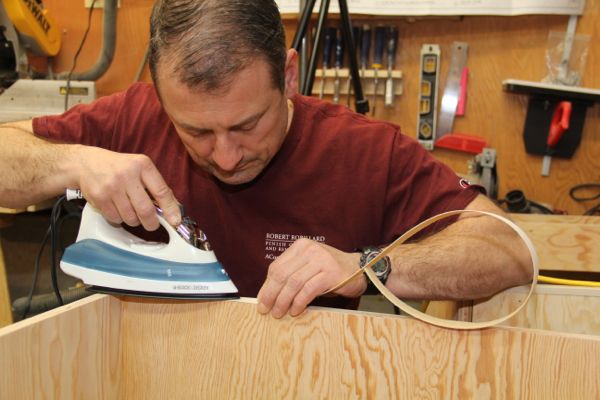
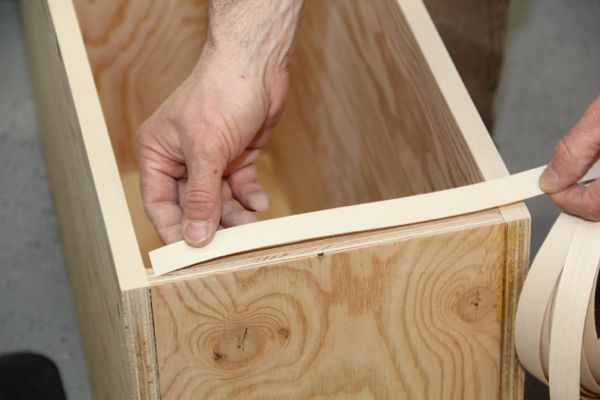
The first thing is to figure out the size of the door. Our doors were designed to overlap a frame less [no face frame] cabinet. Because the cabinet did not have a face frame we used wood veneer to cover the plywood edges.
TIP: When ripping the boards to size we took pains to make sure the saw cuts face inward, toward the panel, and rough sawn edges faced out. Next we need to determine the length of the styles and rails as well as the size of the panel.
Rail formula:
To determine your rail length take the width of the opening plus any overlap minus the width of the two vertical stiles. Then add the depth of the groove for the panel.
Style formula:
The length of the stiles equals the height of the opening plus any over lap at the top and bottom.
Panel formula:
The width of the panel equals the width of the rails minus one quarter of an inch. This allows for seasonal panel expansion or contraction room.
To get the height of the panel, take the length of the stiles minus the width of both rails plus the depth of the groove. The panel will not expand or contract with the grain as it would across its width, so for the length I reduce it’s size by only 1/8 of an inch.
Steps in How to Make Build Rustic Cabinet Doors:
Step 1 – Prepare stock
Select and prepare the stock that is square and flat. Determine your style and rail widths and mill your stock to size. Usually I cut and rip my stock 1/16′ wider than its finished width to leave room for final fitting and trimming. With our rough sawn doors we made them exact and knew we would have to make our adjustments with the hinges.
Step 2 – Measure your doors [cut list]
I usually have a rough cut list and then refine it using the story pole as a reference.
Step 3 – Cut the cope first then the grooves
Set up your router or shaper table and get milling.
Getting a cope cut that’s square and as close to perfect is crucial. The cut has to be square if the parts of the frame are to fit together correctly, and become a strong glue joint. It is also crucial that the stiles and rails meet flush with one another.
TIP – when making the cope cuts keep the same side of the rail facing up. I use blue tape to remind me of the face side.
Step 4 – Cut the panels
I size the panels on my crosscut sled to ensure accuracy and square. Then I rout the tongue on all four sides to fit into groove in the cope and stick door frame.
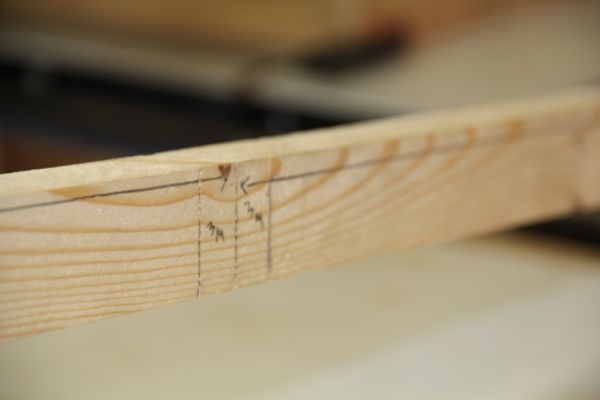
Checking diagonals
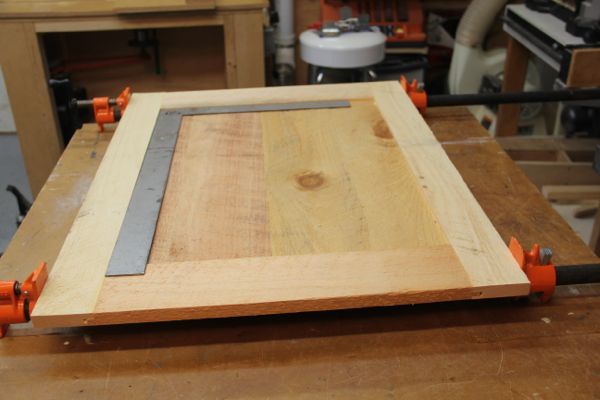
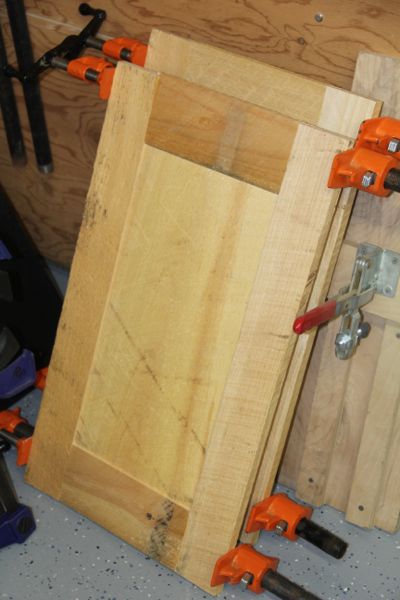
Step 5 – Assembly
Dry fit the parts before applying any glue, to make sure that everything fits together correctly, and that you have the procedure down. This is also the time to double check your dry fit sizes to your story pole.
Once satisfied, glue to the ends of the rails and assemble the door by clamping the parts together until you achieve a tight fit between the stiles and rails. Check that the door is square by measuring diagonally cross-corners and also check using a framing square.
TIP: If the diagonal measurements are off then the door is out of square. to remedy, loosen the clamps slightly and apply a clamp across the two corners that have the longest corner-to-corner measurement. Slowly tighten the diagonal clamp while monitoring the opposite corner-to-corner measurement. When the difference between the two measurements is equalized, re-tighten the clamps and check again for flatness.
TIP – to keep the door flat press down flat against the surface of the clamps while tightening them down.
When the clamps are tightened, check the door for flatness with a straightedge or level. If the door is out of flat, loosen the clamps, press the door down flat against them and re-tighten them.
Wipe off any excess glue and let dry.
Hardware:
Once the wood is chosen, it’s on to the hardware. There are certain styles of pulls, knobs and door handles that work well with rustic designs.
Hinges:
We chose European style hinges that allow the doors to open 110 degrees. these hinges are completely invisible when the door is closed. The hinges allow for 1/16 to 1/8 lateral adjustment through the manipulation of a setscrew.
If more then that is required for adjustments to move the door toward the center, then the addition of a shim behind the hinge can help.