How to Paint a Basement or Garage Floor
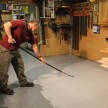
Like a lot of folk, I spent quite a bit of time in my basement workshop. A workshop floor takes a huge beating and nothing looks better in a workshop or nice garage as a clean, shiny and professional quality finished floor. This article will show you how to apply epoxy paint to a workshop floor.
In order to obtain that professional finished quality floor look, you need to use epoxy paint. Epoxy paint is the best product to use for adhesion and it protects the floor from oil, gasoline, salt, glue and resists cracking.
Epoxy paints are well known for their excellent adhesion, chemical and heat resistance. Bottom line – it’s a tough paint for tough locations like workshops and garages. This article will explain how to apply epoxy paint to a workshop floor
Using Rust-Oleum EPOXYSHIELD
I’ve used Rust-Oleum EPOXYSHIELD several times in the past with outstanding results and decided it was the best choice for our new workshop floor for the following reasons:
- Easy to Mix: comes in a two-component, water-based epoxy kit
- Low odor
- Water based: soap and water clean up
- Easy to apply: one coat
- Dries in 24 hours: can be driven on in 72 hours
- Super durable: resists peeling, cracking and fading.
- Excellent impact, stain and abrasion resistance
Rust-Oleum EPOXYSHIELD
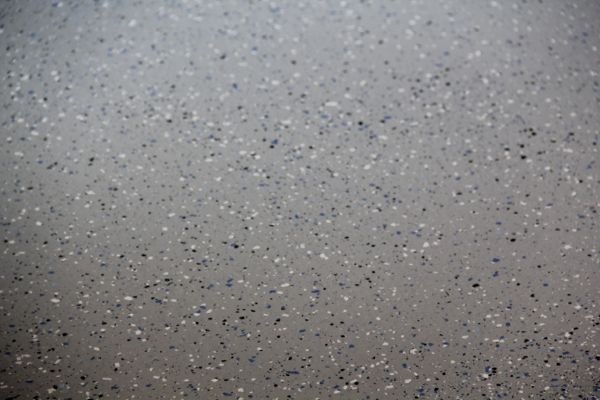
I really like that EPOXYSHIELD dries to a gloss finish. It is applied as a solid base color with a color fleck finish that is applied when the paint is wet.
EPOXYSHIELD comes in two colors, tan or gray, colors and a tint base that can be tinted to 32 colors. Decorative colored paint chips are also provided and result in a terrazzo-like finished look.
Skills Required:
DIY
Time Required:
8 hours
Type of Project:
Basement workshop floor
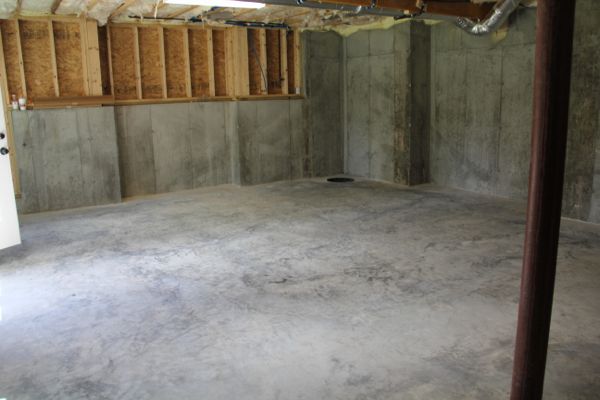
Continue Reading . . .
Materials Needed:
- Concrete Etcher
- Bristle brush, bucket and water
- Broom and Wet/Dry vacuum
- Fan to dry floor
- Rust-Oleum EPOXYSHIELD
- Stir stick
- Mixing bucket
- ½” nap roller with extension pole
- Paint tray
- Throw away brush
- 2 or 3-inch painters tape for masking
Concrete Preparation:
For best results, and a long-term successful installation, new concrete should to be etched and cleaned. Old concrete should be cleaned.
Our concrete was 1 year old and needed to be etched. We used Rust-Oleum Concrete Etch which is a environmentally friendly, citric-acid-based formula is easy and safe to use indoors.
Why Etch Concrete?
Etching cleans the concrete opens pores within the concrete to allow for maximum penetration and adhesion for the epoxy paint.
Concrete Etching also removes which is a major cause of failure in flooring installations.
Laitance is made from cement and the fine aggregates that rise to the surface when too much water is added to the concrete pour. Laitance is always present on new concrete and must be removed. If not removed, the application of epoxy paint will have a high risk of failing.
NOTE – Concrete Etch is intended for use on bare concrete surfaces. There is no benefit for use on previously painted floors.
Preparing Concrete for Etching
- Allow new concrete to cure for a minimum of 28 days.
- Sweep away all loose dirt and debris.
- Clean and remove any oil spots or spills and wash floor with a suitable detergent or degrease solution and rinse thoroughly.
Continue Reading . . .
Mixing EPOXYSHIELD Concrete Etch
- Mix the entire contents of the Concrete Etch granules with 2 gallons of water.
- Evenly distribute the Concrete Etch solution when mixing.
Application of Concrete Etch product
- Scrub the floor with a stiff bristle brush and make sure the floor stays wet during this process until you are ready to rinse. The concrete floor should be damp with no pooling water.
- Continue to scrub while rinsing to ensure all contaminates are washed away.
- Squeegee [garage floor] or wet vacuum [basement] off excessive water or puddles and allow drying.
- Remove any oil spots, grease or spills and wash the floor with a suitable detergent or degrease solution and rinse.
- Scrub a 10×10 foot sections at a time.
- Completely wash, rinse, squeegee or vacuum each section before moving on the next.
- When all sections have been completed, re-rinse the entire floor.
- When the floor is dry, rub your hand on the concrete and check for a white film. If a white dust or powder is evidence, repeat the rinsing process being sure to thoroughly scrub during the rinse.
- Once the concrete is free of surface residue, you are ready to begin application of the coating.
TIP: In garages, pay special attention to the area where the vehicle tires normally rest.
Prepare Surface for Epoxy Paint
Guaranteeing success of any epoxy paint really comes done to whether you do the prep or not. A poorly-bonded paint coating is doomed for failure and a complete waste of your time.
- Make sure the floor is clean and dry.
- Use a wire brush and scraper to remove any loose or peeling paint or stain.
- If floor does not need to be etched wash with TSB cleaner and a stiff bristle brush, rinse, vacuum and allow drying.
Preparing To Use EPOXYSHIELD
- The EPOXYSHIELD kit comes in two gallon cans and a bag of dried paint chips. The kit covers up t to 250 square feet of floor.
- Premix both cans, adding the activator can to the base can. It is critical to add all and mix for 3 minutes.
- Do not mix the color chips in with the coating.
- Allow the coating to stand 30-minutes before using.
- Mix again just prior to application. The activated coating must be used within 1-2 hours after the mixing based on temperature.
- Apply only when air, material, and surface temperatures are between 60-85°F
- EPOXYSHIELD must be used within 1 to 2 hours of initial mixing.
How to Apply Epoxy Paint to a Workshop Floor
Use a throw away paintbrush and cut in all of your tight spots and anything that is not movable, like columns.
I used the roller to paint along the walls and found cutting in with a brush was not needed there.
Apply paint in a small area at a time and keep a wet edge. Work quickly to maintain a wet edge and to avoid paint lap marks. The epoxy paint is forgiving and the chips do help cover lap marks
Try to work in four by four squares and applied the chips to the wet paint as I worked; it is easier to distribute the colored chips onto the freshly coated surface.
Applying Paint Rust-Oleum Chips to Workshop Floor
Scatter the decorative chips up and away from you so they float and land flat on the wet paint, then continue on to the next section.
I painted four feet out from the wall from left to right, wall to wall. I applied the paint chips while the paint was wet, then moved backwards and repeated my pattern, painting another four feet across that area and applying more chips until I worked my way out of the workshop
TIP: Paint in a way that finished at a doorway or exit and apply the paint chips as you go. Don’t paint yourself into a corner.
Final Thoughts:
Rust-Oleum’s EPOXYSHIELD was easy to use and is a great way to clean up your garage, basement or workshop floor. It’s a classy look creates a great looking, long lasting floors and could even be used aesthetically for finished basements. The quality of finish looks like it was professionally done. Cost of this product to the value that it provides can’t be overstated.
How to Apply Epoxy Paint to a Workshop Floor Video
