

How To Make a Raised Vegetable Bed
A few years ago, I created two small Cedar raised garden beds 24” x 36” and they were an instant hit at my house. In this article, I cover creating a raised garden bed with metal containers. Recently, my wife asked me to build two more but make them 36” x 96”. When I quoted the Cedar material at the lumber yard the cost or just the material was $2,800.00. Deterred by the high cost of Cedar I started looking at metal containers.
Creating A Raised Garden Bed | Metal Containers
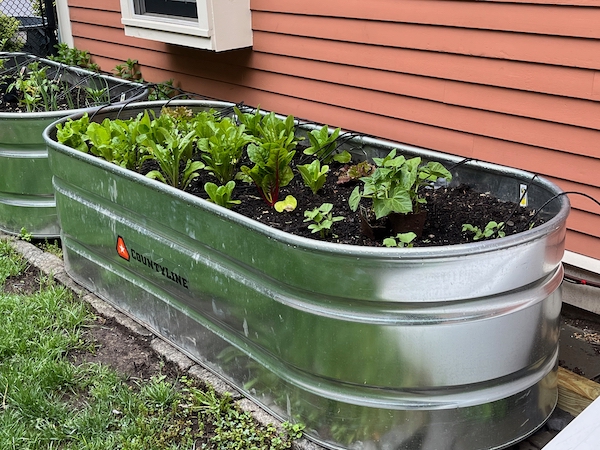
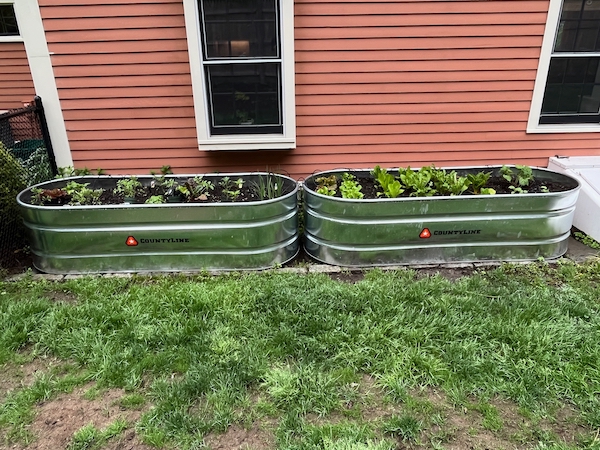
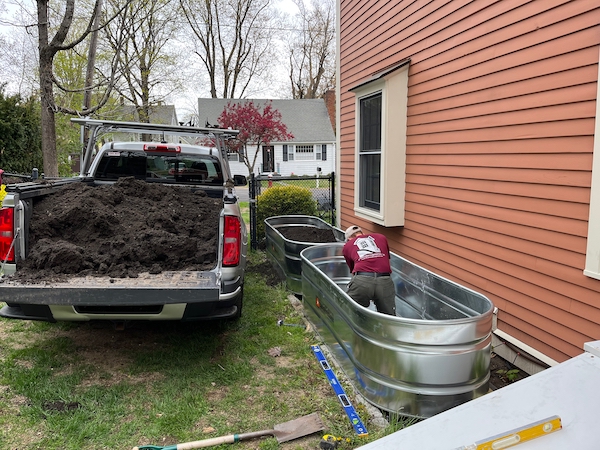
I found two Countyline Galvanized Oval Stock Tanks designed for livestock at a local Tractor Supply store. This high-quality galvanized steel, this stock tank is both resistant to rust and extremely durable, so I figure I’ll get 8-10 years of life out of them.
The tanks measure: 3′ W x 2′ T x 8′ L and has an approximately 300-gallon capacity. The size is approximate and within a 2-inch variance because the company that makes them nests them when shipping.
Raised Garden Bed Location
It’s important to place your raised garden beds in a location that receives at least 6 hours, preferably more, of sunlight a day. We placed ours South facing where they enjoy sum from 11 am to 7 pm.

Preparing the Metal Raised Bed for Dirt
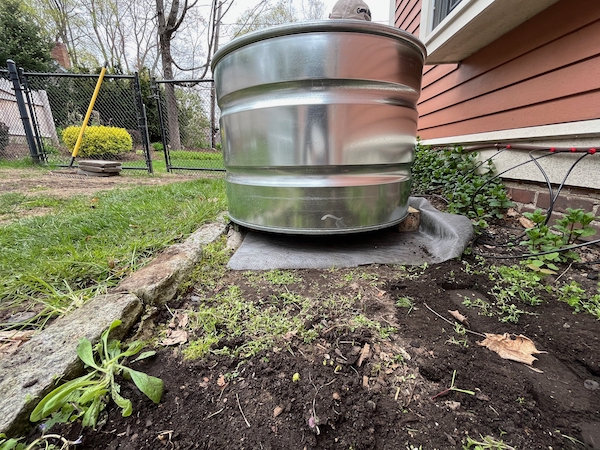
I cut three 4×4 pressure-treated timbers 6 inches wider than the metal containers, for them to sit off the ground. Using a shovel, tamper, and builders’ level I installed the timbers level front to back and left to right. I then covered the timbers and dirt under the container with landscape fabric before placing the containers on top.
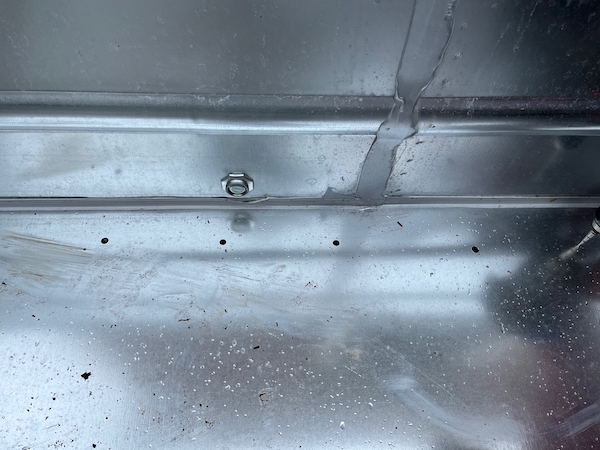
Once the tubs were level, I used a titanium step drill bit and drilled 1/2″ drain holes every 6-8 inches along the bottom of the container.
Line Bottom with Landscape Fabric
After drilling the holes, I lined the bottom of the container with Landscape Fabric to prevent the drain holes from getting clogged.

Adding Soil to The Raised Bed
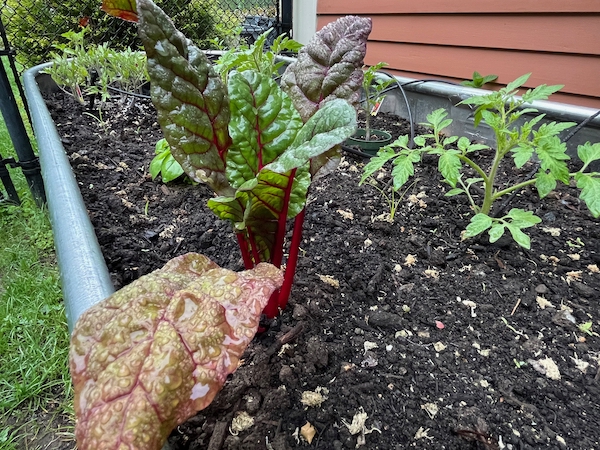
A vegetable-raised bed should be approximately 12 to 18 inches deep. Our tubs were 24” deep, so we filled our tubs to 20-22” based on tomatoes which prefer 24-36”. The tomato plant will remain smaller and compact if the roots do not reach the full depth.
A raised garden bad wants to have one that’s dark, rich, and loaded with microorganisms. We used a 60/40 mix of topsoil and compost, the tubs too almost 2.5 total yards of dirt. To determine how much dirt, you need to fill your container use the formula Length x Width x Depth. For example, 3 x 2 x 8 will need about 48-cubic feet of soil.
Once all the soil was added we used a pitchfork and mixed it all together.
TIP: Before each growing season, you can test the PH and nutrient content of your raised garden bed. Many home-improvement stores sell kits that you can test yourself.
Creating A Raised Garden Bed | Adding Vegetable Plants
We always start our raised beds with small plants instead of seeds. In New England we have a short growing season so starting with plants allows us to grow/ harvest longer.
The biggest thing I’ve learned from my other raised beds is to pay attention to what the plants need for space. This is usually listed on the tag that comes with the plant. Pay attention to the plant far enough apart and at a proper
Plant the taller plants in the back to avoid blocking sunlight from their shorter plants
Adding Drip Irrigation to A Raised Garden Bed
Because of the drain holes, and their elevation out of the ground, raised beds have excellent drainage, which is good for the vegetable’s health, but they can also dry out quicker.
Plants need about one inch of water a week once they are established and actively growing.
My lawn already had an irrigation system with a timer, so I decided to tap into that to create a drip irrigation system for my raised garden beds.
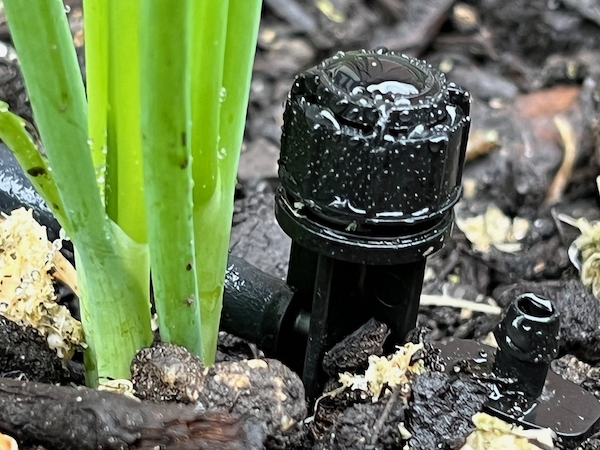
Drip irrigation waters the plant’s direct root zone. It’s a cost-effective way to distribute low-volume water evenly. It also eliminated overspray and wasted water.
Converting Irrigation Spray Head to Drip Irrigation
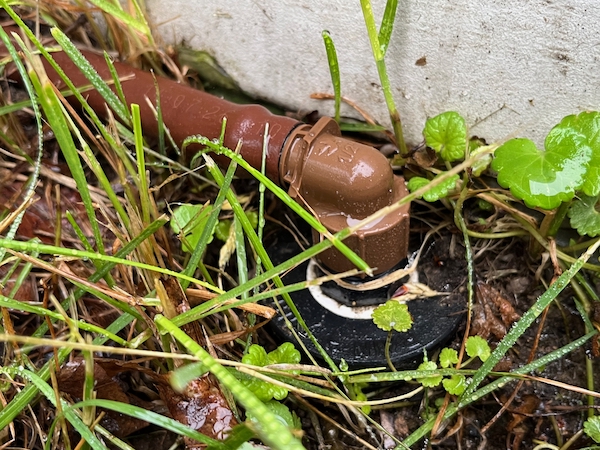
I was able to convert a lawn sprinkler into a low-volume irrigation zone by using the Rain Bird landscape irrigation product. s I used their model #1800-RETRO spray-to-drip conversion kit. The 1800 series spray body contains a filter, pressure regulator, 1⁄2” male threaded outlet, and low-profile fittings. The kit comes with an Elbow or Tee Fitting to connect to drip tubing or connect other 1⁄2” FPT devices.

I then ran ½” piping above ground along my house foundation and used ¼” barb connectors to pierce the ½” tubing. I then connected XQ ¼” distribution tubing to the barbed connector and ran the tubing to each plant. At the plant, I connected the XQ tubing to a Xeri-bubbler SPYK. The Xeri-bubbler has a spike that allows you to place it right up to the plant. The top has a rotating cap that adjusts the flow and radius of water.

Finished Product
Creating A Raised Garden Bed was quick, cost-effective, and fun with these meta containers.