How To Build An Oak Step Stool
This article is about building an oak stool, the benefit is using Oak is that it is durable and a strong wood to use. My design was to follow an old stool I made out of leftover Oak flooring from our house renovation, in the early ’90s.
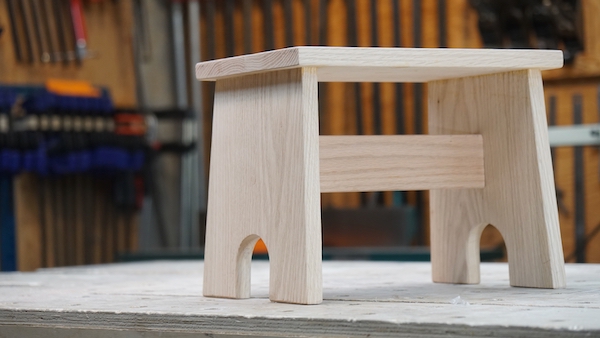
Oak Stool Design
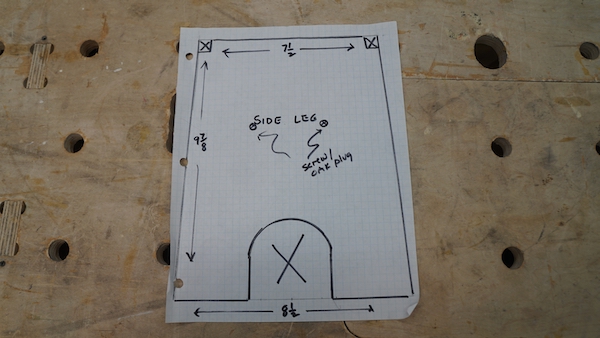
It’s a simple, sturdy design. The stool is approximately 9” x 13” -10” high, with tapered legs from 9” at the base to 7-1/2 where it connects to the stool top. The legs also angle out from each other for additional stability.
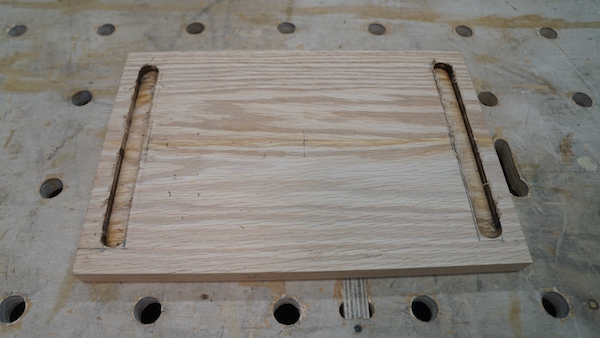
For this design, I used a hidden dado for the leg connection into the top step. A hidden dado is for those times when you don’t want to see the joint connection of the finished project. The dado is stopped short of the stool top edge. To connect the legs, and prevent them from separating, a simple horizontal stretcher is used. To finish the legs off, and prevent rocking, I cut decorative half-rounds at the base end.
Cutting Oak Stock To length
I used up scraps of wood, for this project. Had I been buying wood, I would prefer to use a 1”x10” – 60” piece of Oak for this project. I also suggest using, and ripping this 1 board in half, and re-glue it to prevent cupping. Everything you need will come from this board.
Pro Tip:
When gluing up boards, especially wider panels, make sure your boards are no more than 4 inches wide. This will maximize the stability effects of a glue-up. Narrower is better.
Cut Oak Top
I wanted the stool top to have a ¾” overhang on all sides of the legs. To do this I laid the top, bottom-up, and mark your two hidden dados. The hidden dado stops 3/4″ on each side. The leg tapers from 9 to 7-1/2″
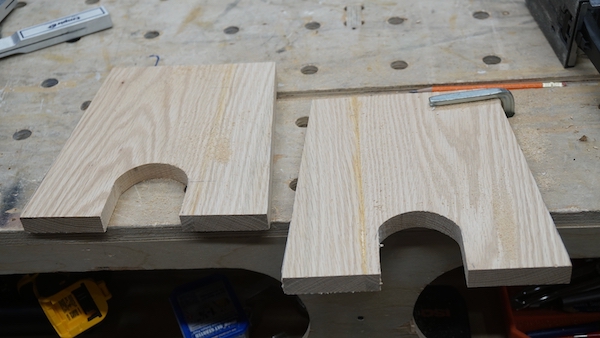
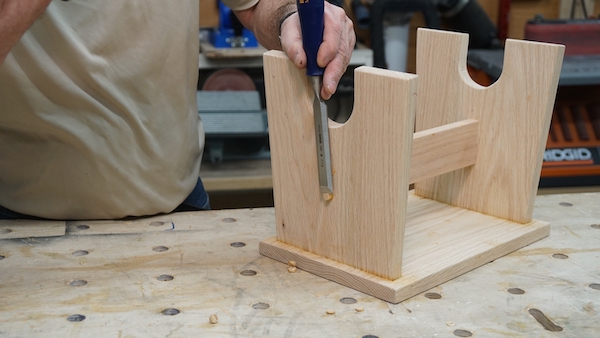
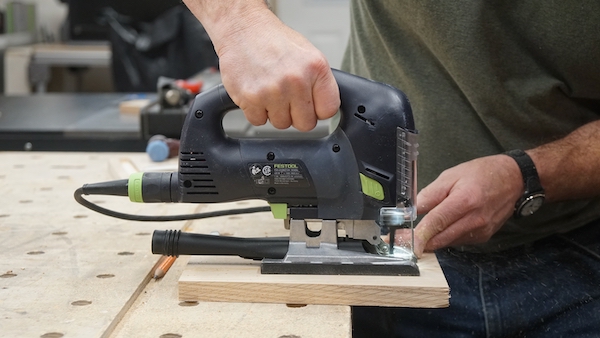
Creating the Oak Stool Legs
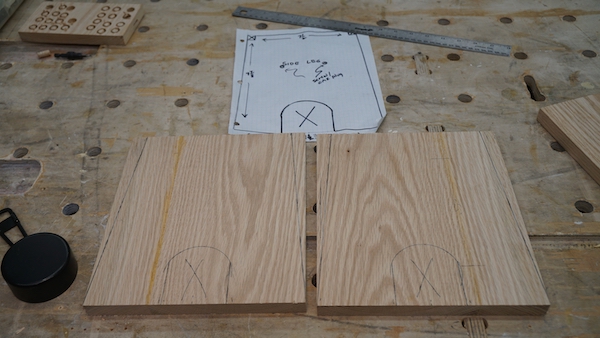
I used a round measuring cup and combination square to mark out a decorative cut out, cutting it with a jigsaw.
Dado Joint Connection
The most often used type of dado joint is the through dado. It’s made by cutting a groove with a dado blade or router bit completely thru the board – on both ends. I didn’t want my dado to show on my stool so I decided to use a hidden dado.
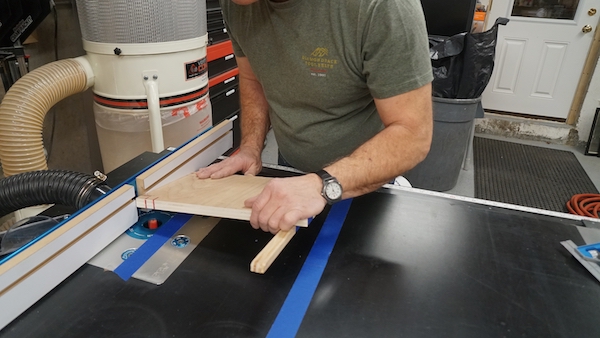
The trick to a drop cut or hidden dado is to use marks on the workpiece and router table to guide your cut. When your piece is short or narrow, you can mark and use your router fence as a reference. When you’re routing taller or larger items, the fence is hidden from view. That’s where you’ll need to mark the table.
The reference marks on the router table are to show you where the router bit is located. The marks on the workpiece show you where to start and stop your cut in relation to the router bit.
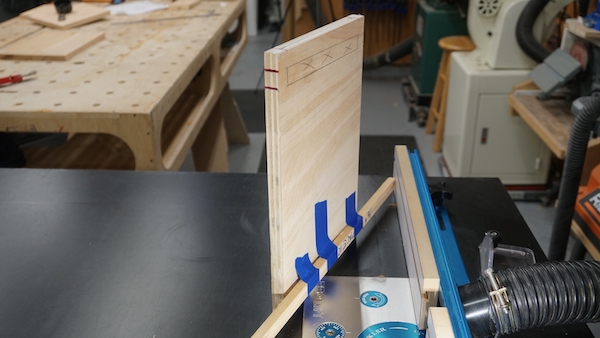
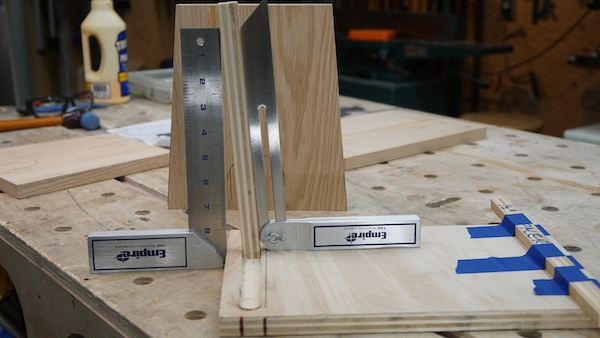
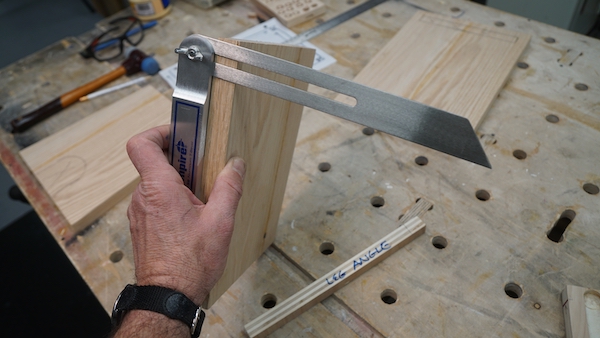
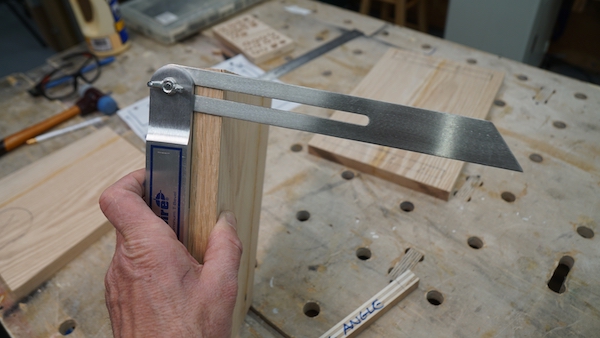
For stool stability, I designed the legs to angle out slightly. To determine the leg angle and angled dado I taped a ½” shim on the opposite dado.
This took some trial and error with scrap wood. A ½ shim gave me a 5-degree leg angle which seemed right.
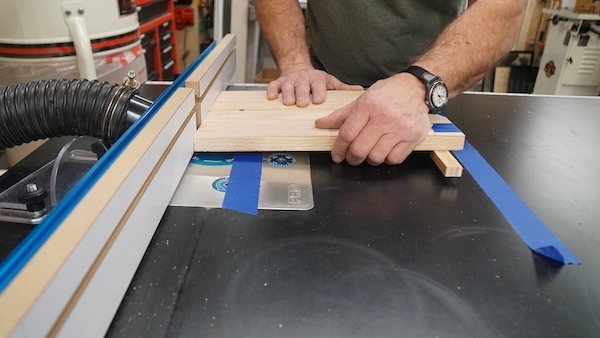
Drop Cutting 10 Routing Steps:
- Line up and position the router fence. Mark the dado location on your workpiece [edge or face] and line up with router bit.
- Ensure that you mark a spot that is visible during your entire routing process.
- I used a blue table on the router table and then use a scrap block and draw reference marks at the front and rear edges of the router wing cutters
- These reference marks allow you to see exactly where the bit is in relation to your workpiece.
- Set the router bit to the proper depth
- Blue tape is used to secure a ½ inch strip of wood on the dado location, opposite the board router bit.
- This shim will create a 5-degree angled dado.
- With the workpiece against the fence, start your cut by lining up the router bit reference line to your workpiece.
- Lower your workpiece down, plunging down onto the router bit to start your cut.
- Push the workpiece and make your cut. Stop your cut at your stopping reference line, tilt up the workpiece, off the router bit.
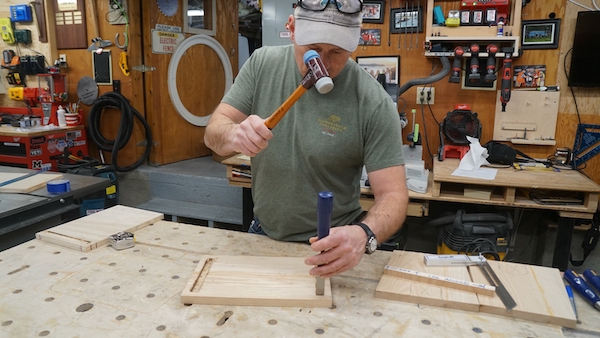
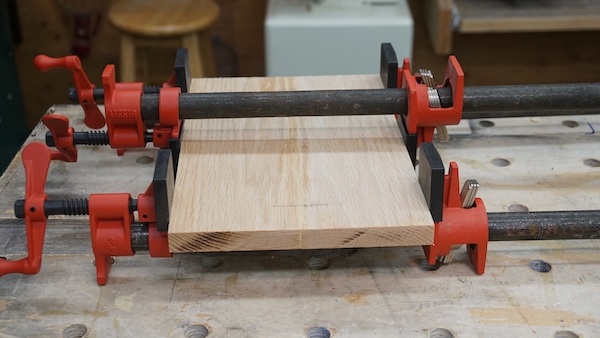
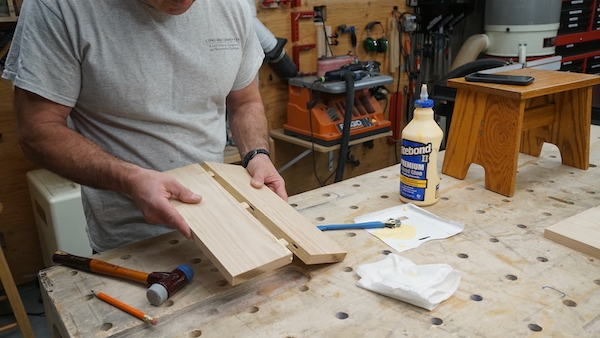
Dry Fitting | Oak Stool
I constantly test my joints first on a scrap piece of wood, and dry-fit my parts to ensure I’m on track.
Easing Edges | Pre-Sanding
Once all the parts have been cut and dry fitted I run them through the router with an edge easing bit. Then I sand all surfaces with 80 and 120 grit sandpaper prior to assembling.
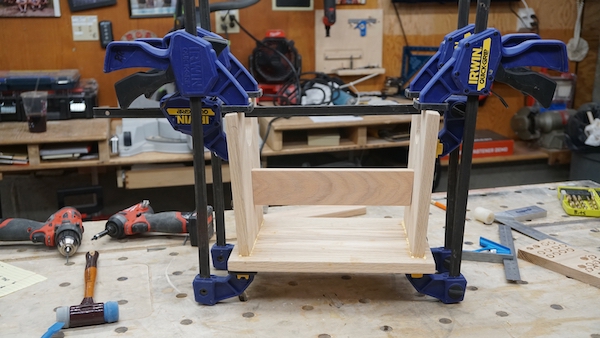
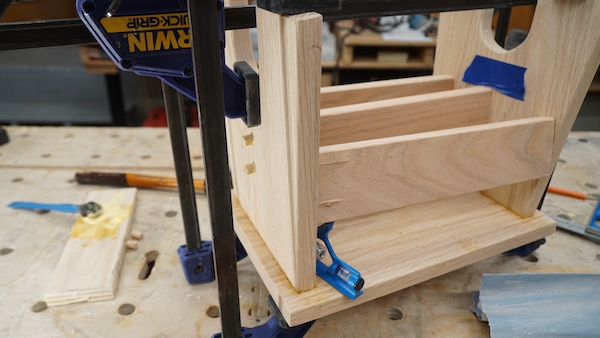
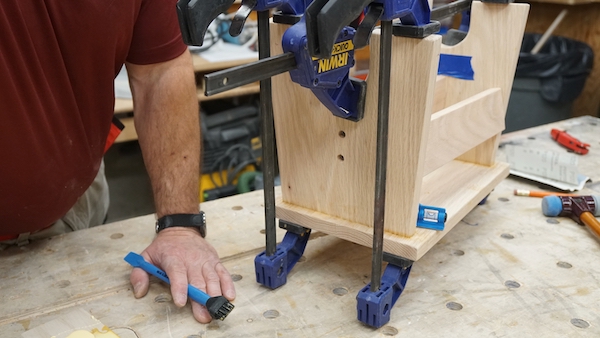
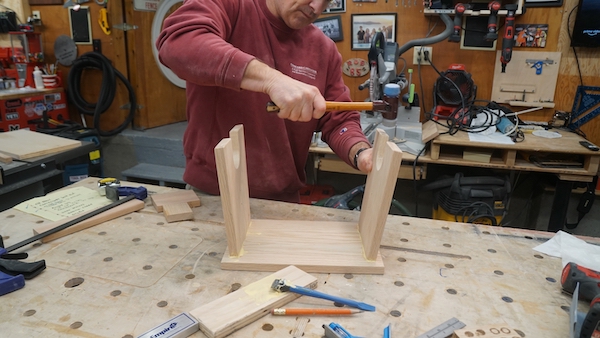
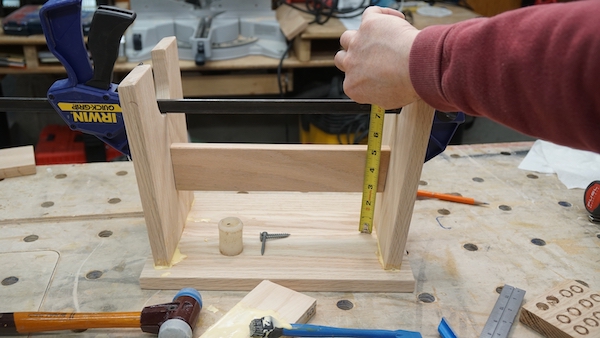
Assembling the Stool
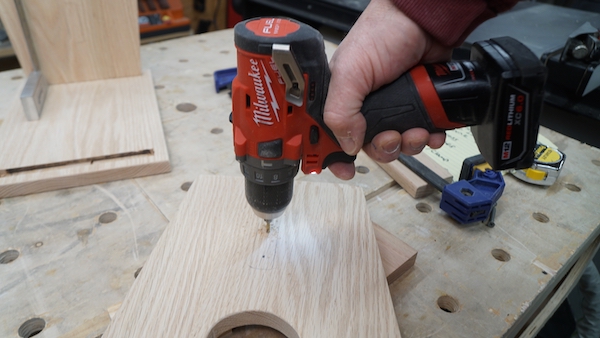
Each leg will have two screws securing them to the stretcher. I used a countersink to create a hole big enough to insert an Oak plug to hide the screws. Final assembly involves gluing the leg to stool top dado, installing fasteners into the stretcher, and clamping the top to the legs.
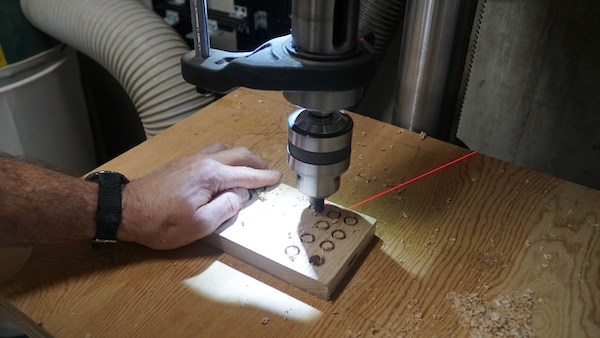
Once the glue has cured, I cut four Oak plugs with a plug cutter and my drill press. I glue and insert the plugs trying my best to match the plug wood grain to the leg grain, and later using a chisel to cut flush.
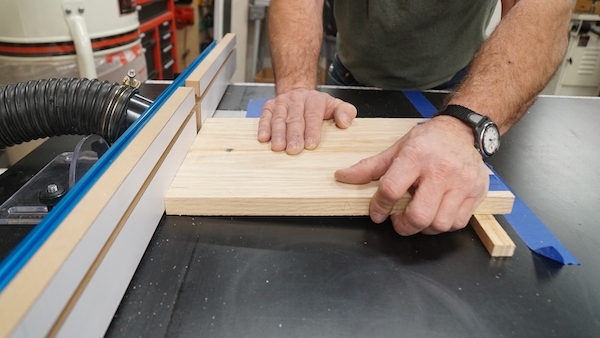
Beveled leg feet
Once all the parts were dry fit I cut a 5-degree bevel on the stool feet – to get the feet 100% in contact with the floor. I used a table saw to do this because the leg bases and stool top are the same dimensions.I clamped a square to the stool to be safe. If you’re unsure of this bevel angle you can always scribe this cut on the floor.