Building Exterior Shutters
Written by Justin Prewitt
This article discusses how to build exterior shutters.
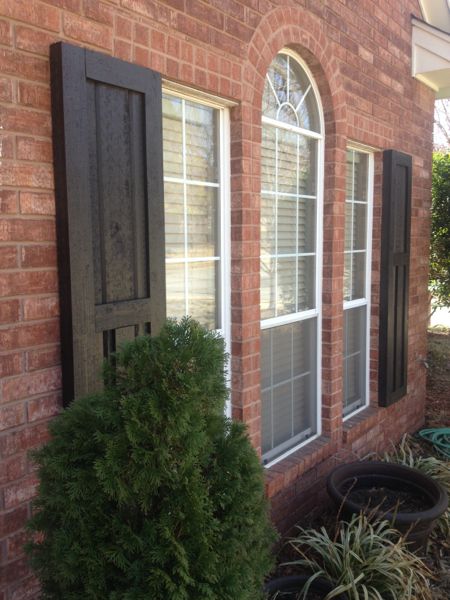
In my neck of the wood most of the homes have shutters as part of their aesthetic design. The overall elevation of a house is the first thing folks see when they approach a home and is a major part of the homes curb appeal.
Measure Windows First
First step in any job is to take accurate measurements. I measure the window width and the height of all of the windows that will receive shutters,
This is the time to look for and identify problem issues. I’m looking for anything that will slow us down during installation or prevent from getting a good fit and finish look on the house.
When measuring an Arched window for shutters, measure the lowest and highest part of the arch window.
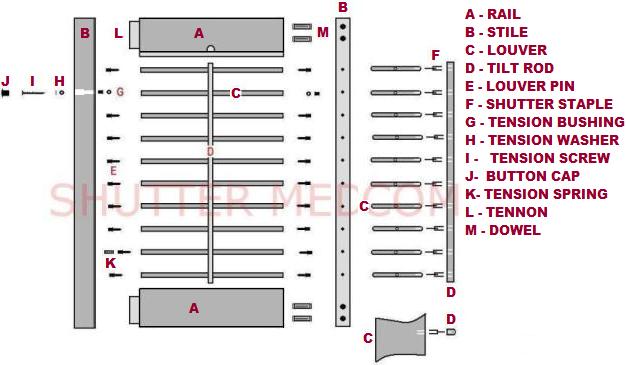
Traditional Shutter Nomenclature
Rule of Thumb:
As a general rule we make two-foot wide shutters and use two 2×6 cedar boards for the rails.
Shutter Material:
We like to use 2 by 6 Cedar stock for our shutters and 1×4 board and batten boards for the shutter panels. Cedar has inherent insect and rot characteristics and finishes nicely. It makes a perfect exterior project material to use.
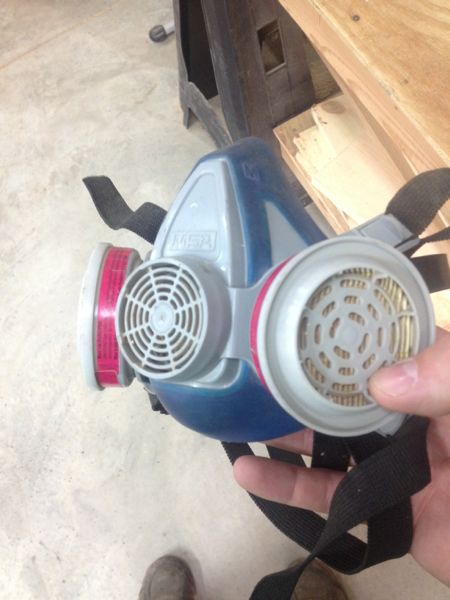
When I work with cedar especially in the shop a dust mask is a must to protect my lungs. Dust masks are uncomfortable but it beats the alternative, which is feeling like you’ve been smoking for 100 years or inhaled a bunch of razor blades. Being in the construction trades is hard enough on your body so if you can prevent anything is the best thing to do.
Sizing Materials:
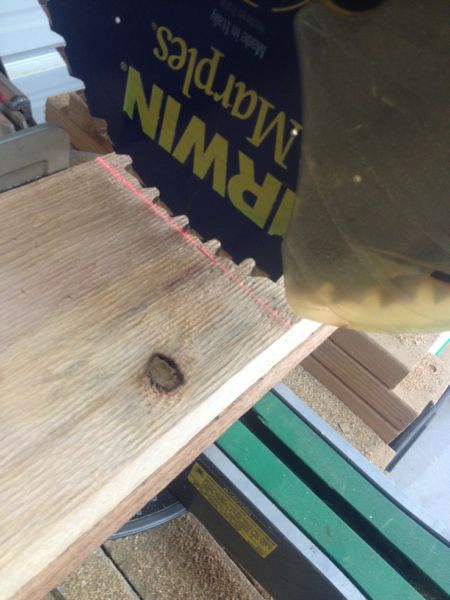
Once we have all of our Cedar material we cut our shutter parts to the height of the windows. For arched windows, we cut them to the highest point.
For aesthetic purposes we route a bevel on the edges of the shutter styles and rail ends. We found that where the styles and rails meet its a nicer look to have a beveled edge. All of this work is done back at our shop.
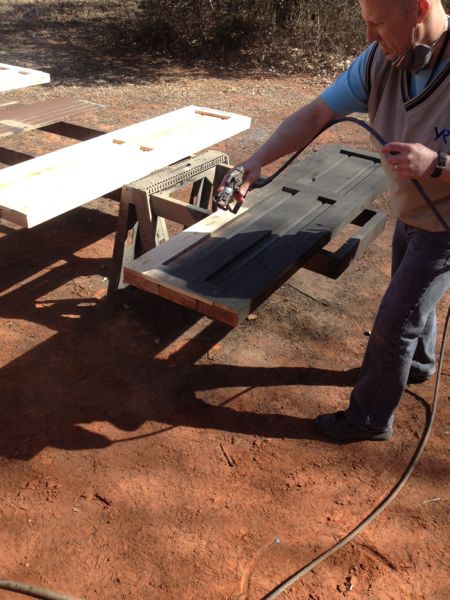
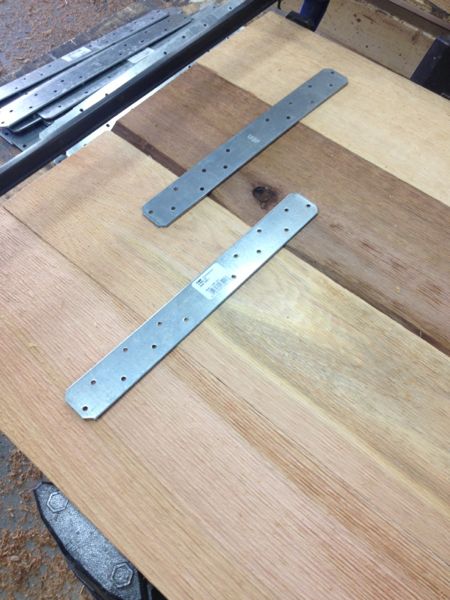
Once beveled, we clamp them together and fasten galvanized strap braces with screws to the back of the 2×6 cedar boards to keep them from spreading a part. I will call this our shutter base. This base is what you will nail the 1×4 cedar trim and or a 2×6 cedar board for a board and baton shutter. This is for shutter with out a panel in them. With our company most of the builders request shutter styles without panels.
If the shutter is being fitted for an arched window we mark the lowest point of the window on the shutter base and use a flexible piece of metal to draw our arch. Then we trim the shutter out to the style of shutter you are building.
Painting:
We paint or stain the shutter before installation. This is something that builders like because when they order shutters from us we are a complete turn key shutter service.
Mounting To The House:
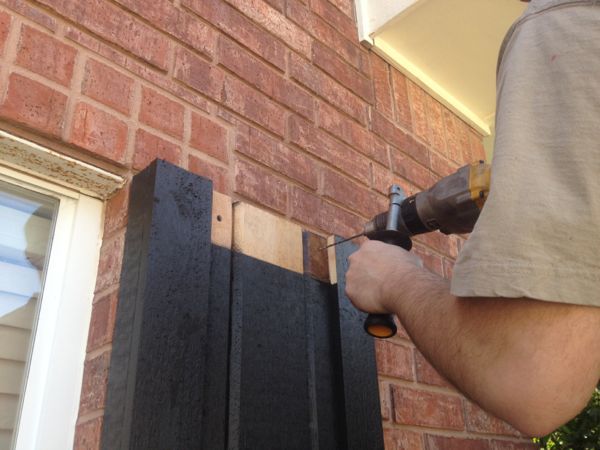
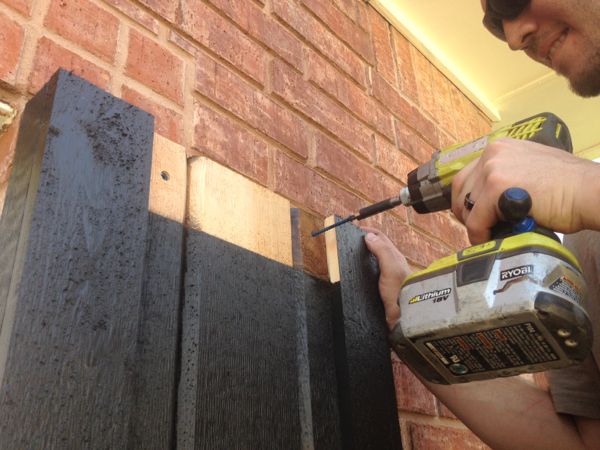
Our company has over 15 shutter styles. When we trim it out the shutter we leave the top and bottom rails parts off so we can hide our Tapcons or screws fasteners behind them. Once the shutter is attached to the house we apply the rails with finish nails.
When preparing to install our shutters we bring all of the tools and hardware needed to get that job done. This means being prepared for a wood or masonry installation. We get bring hammer drills, ladders, assorted fasteners, impact drivers, cordless 18g nailers, paint, stain, and extra drill bits.
We have done this enough that we try to make sure we have everything so that it will be a fast and easy install. There are always things that will slow you down like really hard stone, uneven stone or brick. Once were ready it takes us approx. 10 to 15 minutes to install one pair of shutters. A second or third coat of paint can be brushed on in place.
One person will hold the shutter at the same height as the window and level it. We will drill then drive four Tapcon masonry screws; two in the lower and two on the upper style section of each shutter on brick or stonewalls. If there is wood wall or Hardie board siding I only pre-drill the shutter then drive a 4in exterior wood screw. To complete the installation we follow by nailing on the top and lower rails with finish nails, following with paint touch up.
Not interested in building your own shutters? then check out ShutterLand. They are a great resource for those who are unwilling or unable to complete the steps necessary to build their own shutters.
About the Author:
Justin Prewit is a father and US Army veteran. He has been a carpenter for 3 years working on different projects ranging from trim work, custom cabinets and furniture, remodels, exterior shutters, and interior barn style sliding doors with custom tracks.