WarmlyYours Snow Melting System Hard At Work!

WarmlyYours Snow Melting System Hard At Work!
In the North East winter means shoveling and salting your walkway and stairs. The problem is salt destroys stonework and black ice can cause falls. One bad fall can result in a broken hip, leg or cause you to throw your back out. Heating a driveway or walkway is a great way to get rid of snow melt chemicals and to ensure that your driveway or walkway is always clear and less likely to cause a slip and fall injury.
Snow Melting Cables IN ACTION!
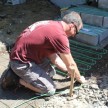
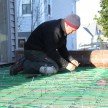
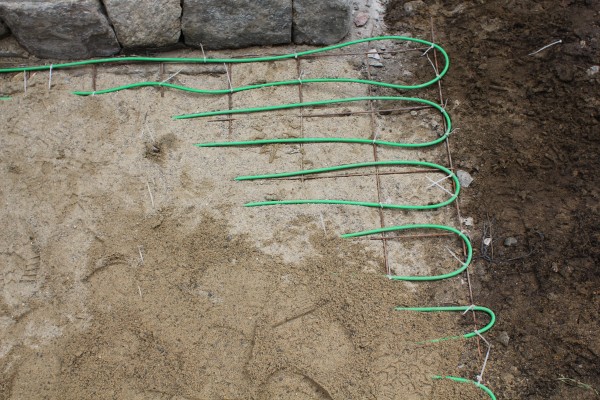
Recently we installed snow melting cables made by WarmlyYours under this bluestone walkway and stair landing. [Click here to see the Warmly Yours Snow Melt Cable installation article]
The WarmlyYours snow melting system is wired to an snow and ice sensor that turns the system on and off automatically, saving the need to operate the system manually. This saves electricity because the system is not left on longer than needed.
Today’s weather delivered us a blizzard that dropped 18” of heavy wet snow in a 12 hour period. A blizzard is categorized as a storm that delivers a minimum of 35 mph wind with snow visibility of ¼ mile or less. That means drifting snow.
The WarmlyYours Snow Melting System turned on automatically and ran throughout the storm. The storm dropped 1 to 3” per hour at times and as a result I had to shovel 1” of snow off the walkway about two hours into the storm. I attributed this to the bluestone slab needing time to warm up and reach snow melting temperature.
If I had planned better I would have turned the system on before the snow started to pre-warm the slab.
Regardless of the whether I pre-warmed the slab or not the end result after the 12 hour snow storm was a clear and dry walkway. This picture was taken while it was still snowing with 17” of snow on the ground.
Impressive technology!
RELATED POSTS:
Installing Snow Melting Cables Part 1
Installing Snow Melting Cables Part 2
.