Adding Joist Hangers To Old Joists

Supporting floor joists with joist hangers:
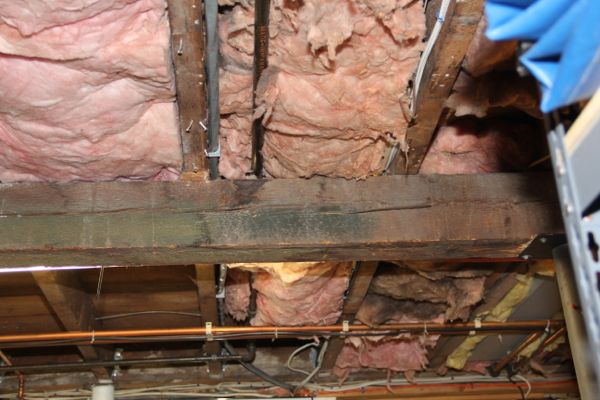
This house was built in 1863. Back then there was a lot less furniture and heavy appliances to add to the dead load on floor joists. Adding Joist Hangers To Old Joists is a good preventative measure to beef up the structure of your home.
Old Notched Joists
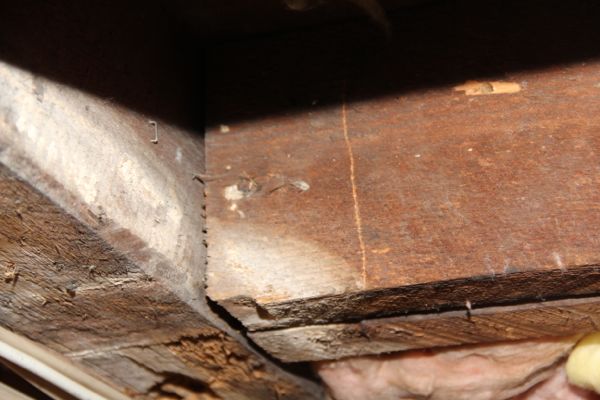
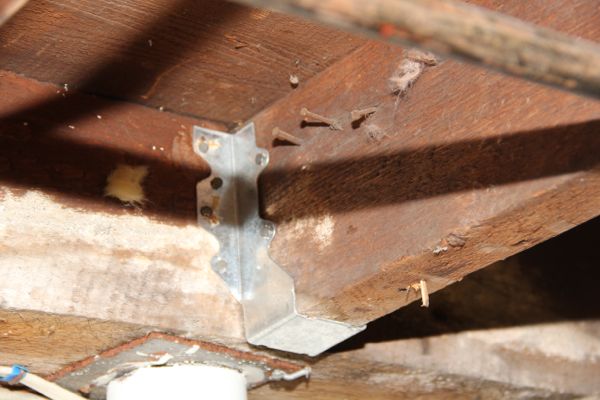
Many times floor joists were nailed to balloon framing and if you were lucky the carpenters would also add a 1×2 ribbons or ledger under the joists. In this application the 2” x 6” floor joists were “let in” or mortised into a 6” x 6” beam. To do this, the 1863, carpenters cut a 3” high x 3” deep notch into the end of the joist. The beam was also cut with a 3” x 3” deep mortise or pocket to receive the floor joist.
The problem with this approach is that the 6” joist is now 3” at the beam, which becomes a weak spot.

The reason for doing this was to get the floor joist and the beam flush at the top. – A very common building approach.
Modern construction methods still install floor joists and beams flush at the top but we use metal joist connectors to accomplish it instead.
Reinforcing These Floor Joists
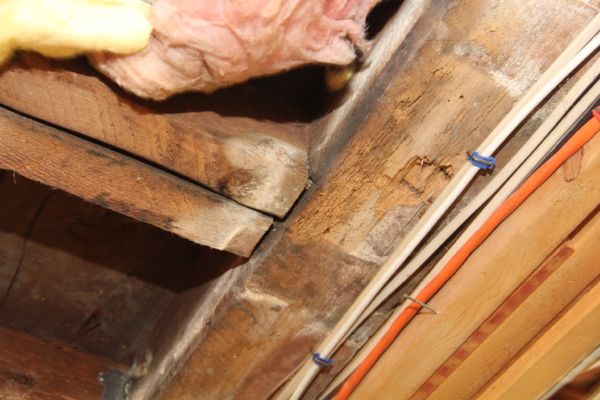
As you can see from the pictures many of these circa 1863 joists has split and cracked at the 3” notch point. This floor has sagged a bit over time and I was concerned that the joists were being stressed too much.
Many years ago another carpenter installed a 6×6 beam and two columns at the mid span of these joists, my guess is, to reduce the bounce in the floor above and strengthen the floor system. It worked as planned and also took a ton of weight of these stressed out joist ends.
 Adding Joist Hangers
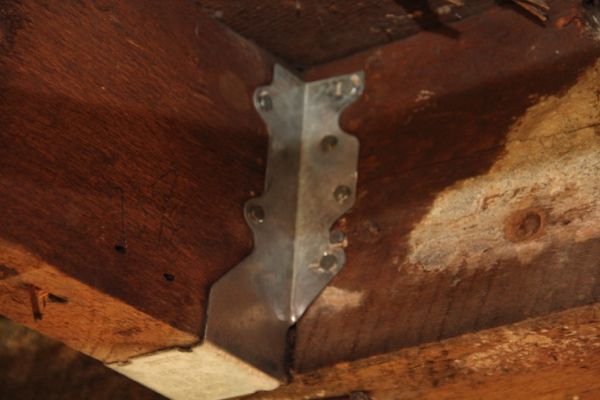
A joist hanger is a metal bracket used to hold floor joist end without compromising its structural loading.
The U-shape bracket is attached using hardened nails or specially designed structural screws.
Joist hangers come in many sizes to support different dimensional sizes of lumber and I-joists and have almost four times the load capacity than toe nailing joists to a beam.
My first course of action was to support the old joists to the beam, using joist hangers, and to increase their structural load capacity.
Using”Old Work” Joist Hangers
Because of their age, these 2×6 joists actually measure 2” x 6” and not a nominal 1 ½” x 5 ½”. Unfortunately a standard 2×6 joist hangers will not fit these 2-inch wide old joists. I had to get “old work” or “rough joist” hangers to fit which required a special order at the lumberyard.
Installing these “old work” joist hangers is straightforward. The most important thing to remember is to keep the bottom of the joists hanger bracket tight to the bottom of the floor joist.

The performance specifications for each type of hanger are carefully engineered and tested to meet the approval of local building codes. For the performance they deliver and their installation speed, joist hangers are a bargain.
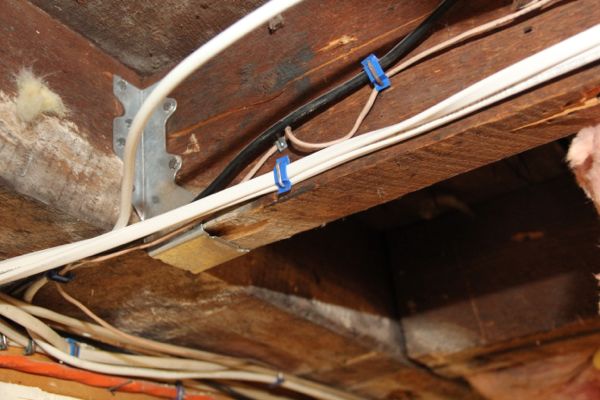
The joist hanger has pre-determined holes most of the holes are for nailing into the beam and there are also two holes on each side for securing to the floor joist.
It’s important to note that you cannot use any nails or screws. Building codes require the use of 10d or 16d common nails. These nails are hardened and stronger than normal nails to resist the shearing weight that a floor system has.
When nailing the joist hanger in make sure you push the sides tight to the sides of the joist for a nice tight fit.
when nailing into the side of a joist you can use 1 ½” code approved joist nails.
NOTE – when nailing into the beam follow code recommendations and install 3″ [10d] or 3-1/2″ [16d] common framing nails.
In tight quarters I needed to use a palm nailer. The palm nailer is the size and shape of a pear. A single hand nail is inserted into the palm nailer’s tube; the pneumatic action of the nailer hammers the nail into the wood.
Installing The Joist Hangers
- Place a joist hanger underneath the joist with the big U-shape facing upward and the flat flanges against the wall ledger.
- Raise the hanger until the bottom of the hanger is seated tight against the bottom of the joist.
- Pinch together the two sides of the joist hanger so that the sides hug the joist evenly. Hammer the tab on each flange into the wall ledger to temporarily hold the joist in place.
- Hammer a joist nail through each hole in the flanges into the wall ledger.
- Install code compliant fasteners through each hole in the flange facing the joist.
- Repeat these steps for the other hangers on each end of the succeeding floor joist.
Now the joist hangers are installed and providing support to the notched floor joists.
Our mission of adding joist hangers to old joists was accomplished and gave additional structural support to resist the downward pressure of the floor system and anything placed on top of it.