StickyMat Radiant floor Heating – Electric Matting System

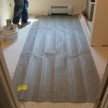
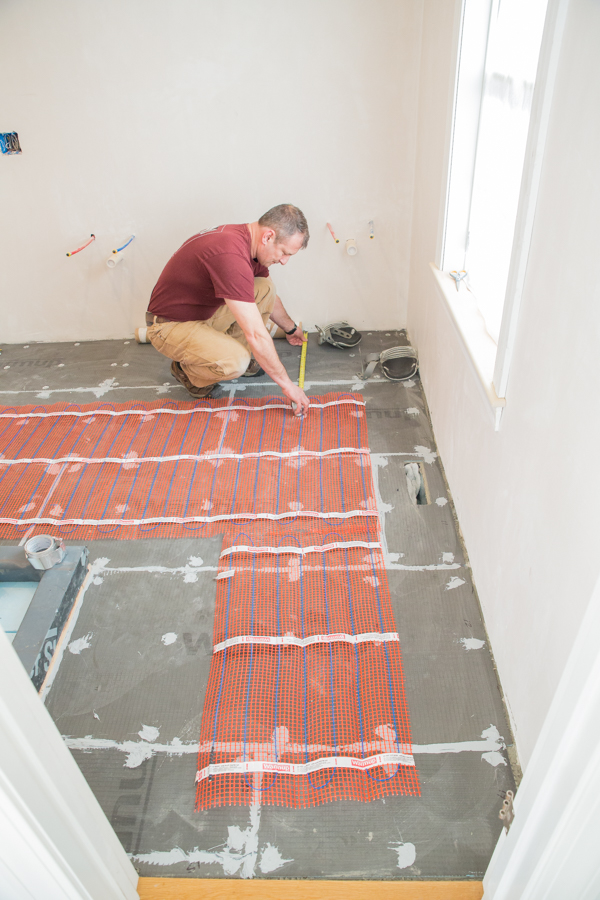
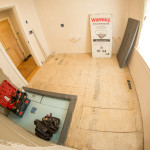
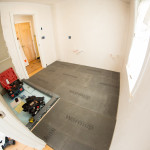
L-shaped bathroom floor layout
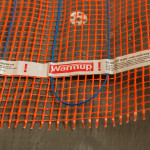
Warmup StickyMat Electric Floor Heating Mat System
The science behind electric radiant floor heating is quite simple: electric heating coils warm the floor surface, which effectively becomes a low-temperature radiator!
Electric radiant heat systems deliver heat people and objects in the room by heating up a mass (the floor) and “radiating” the heat into the space (like the sun). A heated tile will lose its heat gradually into the space delivering to the people in the room.
Using Electric Radiant Heat Mats
Once you have designed your bathroom and understand the floor plan, it’s time to plan for floor heat. There are a lot of electric radiant heat companies to choose from. You need to decide which one has the best overall product for your needs.
I recently discovered Warmup Inc. and was intrigued in their “BRAND NEW” StickyMat Electric Floor Heating Mat System. I especially like the installation speed and efficiency that the StickyMat system provides.
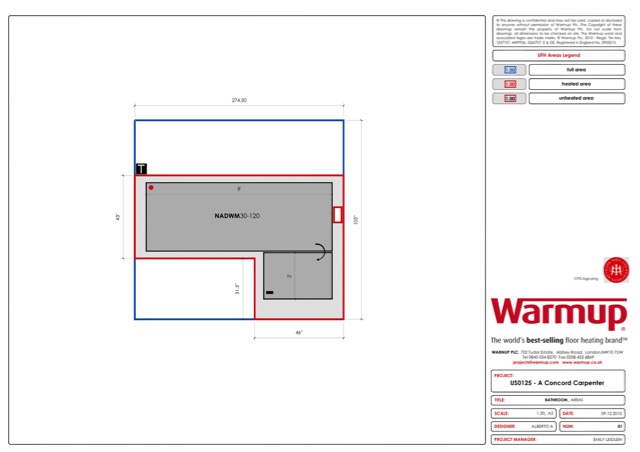
Customer service floor, plan based off my measurements
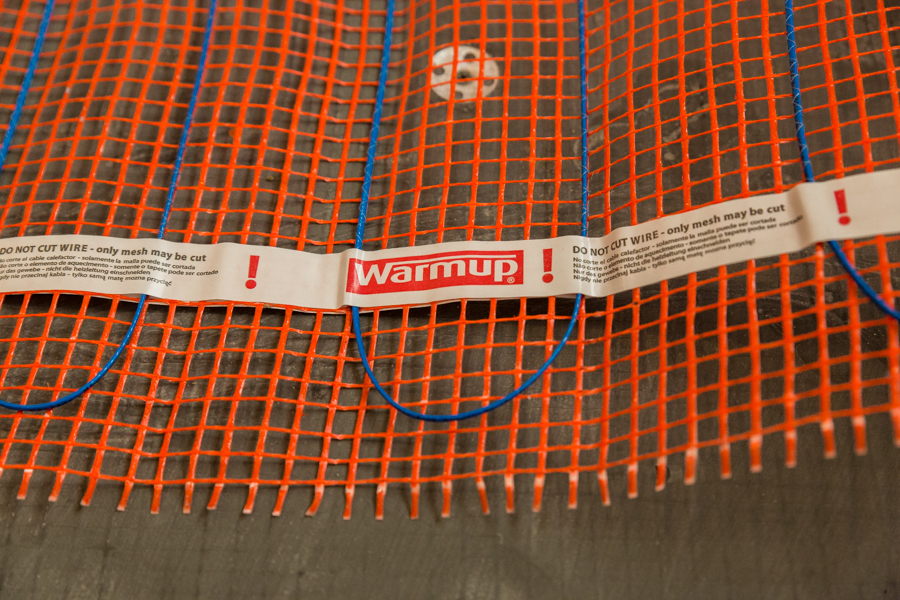
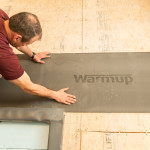
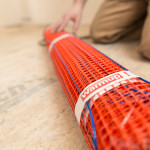
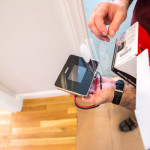
Warmup Sticky Mat Heat System
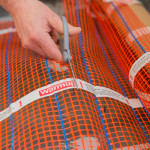
The Warmup StickyMat Matting System is a series of small, three-foot wide mesh fiber mats that are extremely durable and designed to be installed under both tile and stone.
StickyMats have a thin, dual flouropolymer-coated heating wire that measures less than an eighth of an inch thick and does not negatively impact floor heights like other cables do. The mats have a dual-adhesive, double-sided tape as well as a pressure-sensitive adhesive on the entire mesh. The adhesive allows the mat to adhere to the subfloor, resulting in a fast installation. The mats can be re-positioned numerous times without losing their adhesive capabilities.
StickyMats can also be combined in a patchwork and to customize the coverage to the shape of your room.
StickyMats are available in ten sizes:
- From 3’ x 3’ to 3′ x 10′
- From 4′ x 3′ to 4′ x 10′
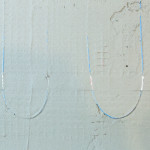
Spacing mat out from vanity cabinet
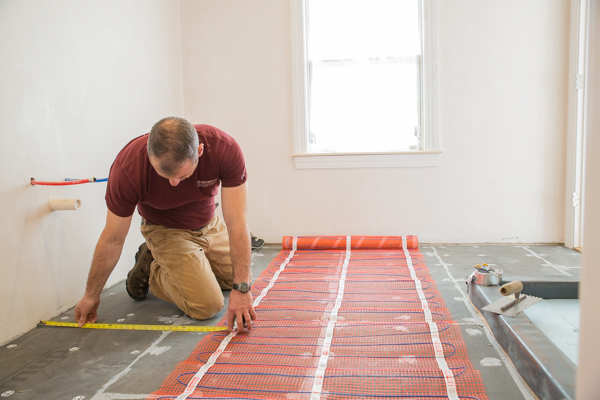
Measure Your Heating Area
Just like the old carpentry saying, “measure twice, cut once,” you need to measure your room several times. I then suggest that you draw it out on paper. Most heating mats come with a cold power lead that is 10 feet long, so it will be important to determine your thermostat location within that 10-foot area.
When planning your floor heat, do not run your mat under appliances, permanent fixtures, vanity cabinets, tubs, or showers. The mat is designed to be installed only under the tile that you will walk on.
Measuring Tip: When I measure my bathroom remodels for floor heat I measure exactly to the walls, vanity, tub, or toilet and then deduct three inches from that measurement. The deduction allows for the installation of 3/4″ baseboard trim and gives you some wiggle room.
Choose Your Thermostat Location:
Warmup electric radiant heat mat systems are designed to be used with a UL Certified programmable thermostat. Programmable thermostats operate an electric radiant system efficiently and make it more cost effective by only heating the floor when you want it heated.
Thermostat Install Tips:
Here are some thermostat tips that have helped me in my installations of programmable thermostats with radiant floor systems:
- Locate your thermostats approximately 5 feet off floor and always on an inside wall.
- Try to avoid placing it near heat sources, excessive sunlight from windows, skylights or heat generating appliances [i.e., a towel warmer] that could affect its temperature.
- On my projects I always have my electrician run a 20-amp, dedicated GFCI protected circuit to my thermostat location to operate the floor heat. For smaller areas, you may be able to use an existing circuit. In most cases, the mats only pull about 1 amp for every 10 sqft, you will need a separate dedicated 15-amp circuit to power the Warmup heating mats.
- Prior to closing up any walls, I install a wire pull string from the thermostat box, down the wall cavity, and through a notched section of the 2×4 wall shoe plate. After the wallboard is installed the string will be used to pull the 10-foot cold lead and floor sensor wire up the wall to the thermostat location.
Pressing down WIBs underlament
Warmup Cable Information:
The Warmup heating mat consists of a twin conductor resistance-heating element woven onto a fiberglass mat. The heating wire measures less than 1/8” and is insulated with Fluoropolymer (FP) with high dielectric strength and high temperature properties.
The conductors are covered by a metallic sheath providing additional mechanical strength and a ground path. A final outer jacket of Fluoropolymer is given to make it sturdier and provide corrosion protection.
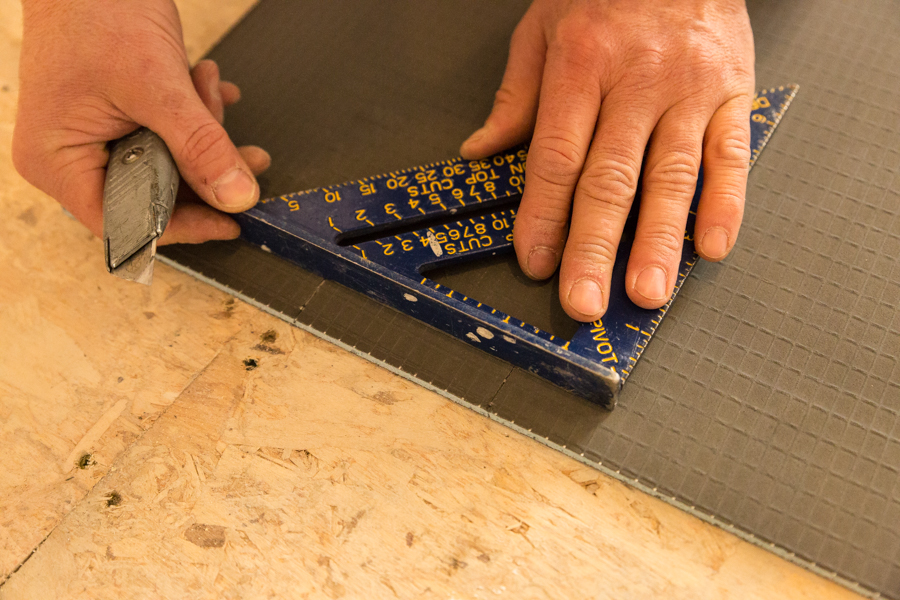
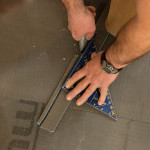
Cuts easily with utility knife
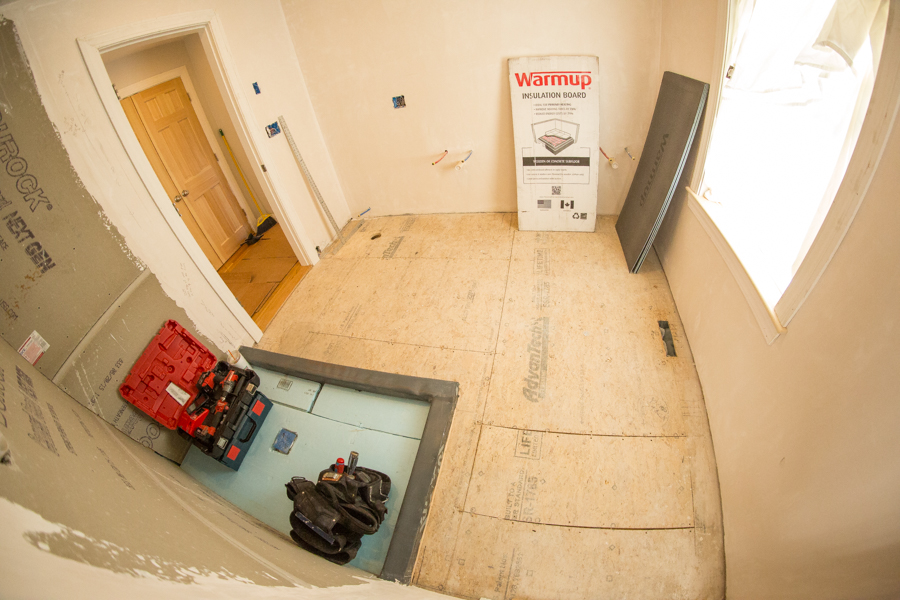
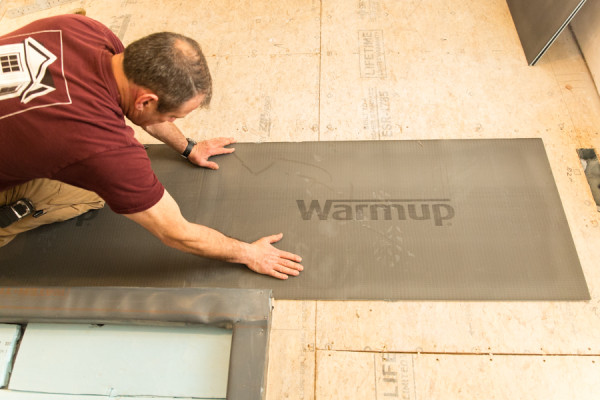
Prepare the Sub-floor:
It’s super important that you inspect your sub-floor for damage, debris, or sharp objects. All nails and screws should be countersunk and the floor thoroughly cleaned.
One major benefit of installing the Warmup StickyMat is that will not dramatically change the height of your flooring. Floor height concerns come into play at doorways or when your room meets another room. In most cases, with the addition of a 1/4 underlayment, the Stickymat heating mat, thinset, and 3/8” tile, you are usually pretty close ¾” height, which is perfect for meeting hardwood flooring or carpeting.
Fastening down WIB underlayment
Tip: If the floor heights are off, chamfer the higher flooring material, or install marble thresholds at the doorways.
Ensure that the sub-floor is smooth, dry and free from dust. If re-using an existing sub-floor I take the time to refasten the old sub-floor with screws to ensure a solid attachment, and to resist squeaks and movement.
Visually check that there are no objects on the floor, such as popped screws or nails that might damage the heating mat.
Tip: If you plan on using a level compound to deal with slanting floor, ensure that the compound has properly cured prior to installing your StickyMat system.
Dryfit WIBs – next step Thin-set
Consider Thermal Sub-floor Insulation:
Did you know that using thermal insulation with your floor heat system will result in your floor reaching operating temperature up to 4-hours faster? According to Warmup, heat-up times with floor insulation, in testing, were cut from over 2½ hours to just 25 minutes.
A lot of contractors do not use thermal insulation when installing radiant heating — that is a BIG mistake. I was one of them, and the reason was, I simply did not know that using thermal insulation makes your system heat up faster and prevent heat loss from below.
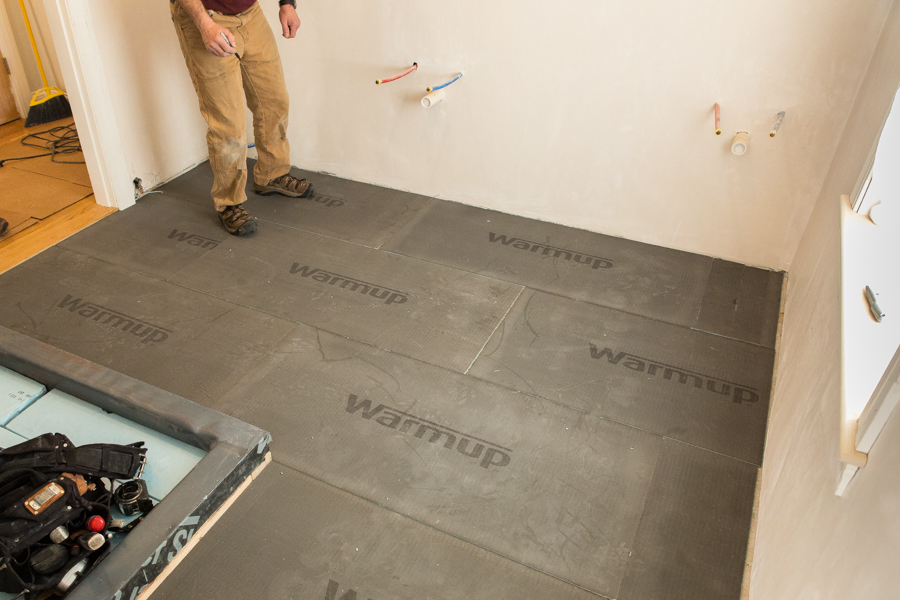
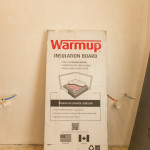
I now use Warmup Insulation Boards [WIB] for floor heat installations like this. WIBs can be used as a tile backer board underlayment on your concrete slab or wood sub-floor. WIBs is made from extruded rigid polystyrene foam. The key behind the success is the rigid blue core, which is totally waterproof and requires no additional moisture barrier.
WIBs help reflect heat upwards, and prevent heat loss into the sub-floor or cold slab. WIBs provide a 92% thermal break from the cold sub-floor and ensure that your floor heating system operates at the highest and most efficient levels. That’s something that not only helps me sell these systems to my clients, but makes people feel like they are using electricity efficiently and getting the most out of their radiant heat system.
The key points to Warmup Insulation Boards are:
- Increased energy efficiency – the boards help cutting the heat-up time by up to 90%.
- Strong but flexible – they are ¼-inch thick, and made from extruded polystyrene, and coated with fiberglass and concrete, the boards withstand a load of 30 tons per square meter and they can be cut to size to suit all shapes of rooms.
- Waterproof and soundproof in one single step – the boards are ideal in waterproofing bathrooms and kitchens and also carry sound proofing properties.
- High thermal insulation – the boards create a barrier to cold rising from the sub-floor with high R values.
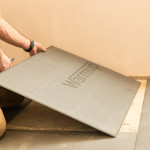
- Can be cut with a utility knife.
- Come in boxes of 6 (48 sq. ft.). Warmup ships them directly to your doorstep or job-site.
- Depending on the cost of electricity and price of the WIBs insulation boards, pay-back time is estimated between 1.7 and 2.1 years.
The Warmup insulation boards measure 2’x4’x¼” and can withstand 5,735 lbs. per square foot. They also have inorganic and waterproof capabilities that make them inhospitable to mold.
Recessed area for cold lead and sensor
Concrete Floor Tip:
If the Warmup heating mat is being installed onto a concrete base, it is highly recommended that a layer of insulation is used prior to installing the heating mat. The thermal insulation reflects the heat upwards instead of allowing heat to penetrate into the sub-floor, greatly improving the warm-up times & running costs.
Installing WIBs Over Plywood:
- Measure, cut to size and dry fit your WIBs boards, with staggered joints.
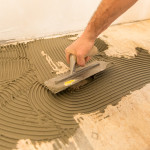
- Spread down a modified mortar using a notched trowel.
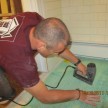
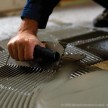
- I install one board at a time and work my way through the room. Set the boards in mortar and press down firmly and evenly with a rubber float.
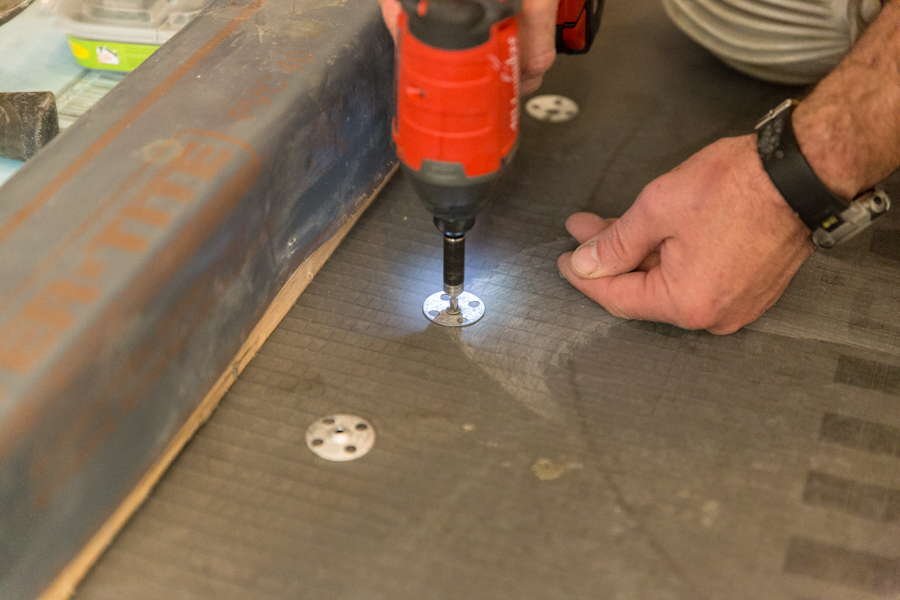
- Install galvanized screws and tabless washers approx. every 8-inches
- Use WIB-Sealant to seal seams, and washer locations.
- Install your radiant heating system according to manufacturers recommendations.
Warmup Sensor install
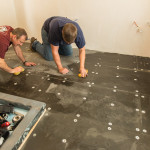
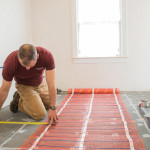
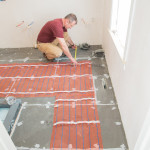
Install the Warmup StickyMat
Warmup StickyMats, can be installed on sub-floors, concrete slabs, or tile backer boards. It should be installed with the cables facing up. Installation is simple, simply roll out the mat, remove the adhesive tape covering and firmly down onto the Warmup Thermal boards.
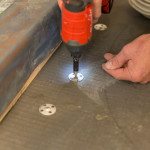
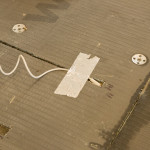
Install the thermostat sensor probe a minimum of 12” into the heated area, and between the heating cables.
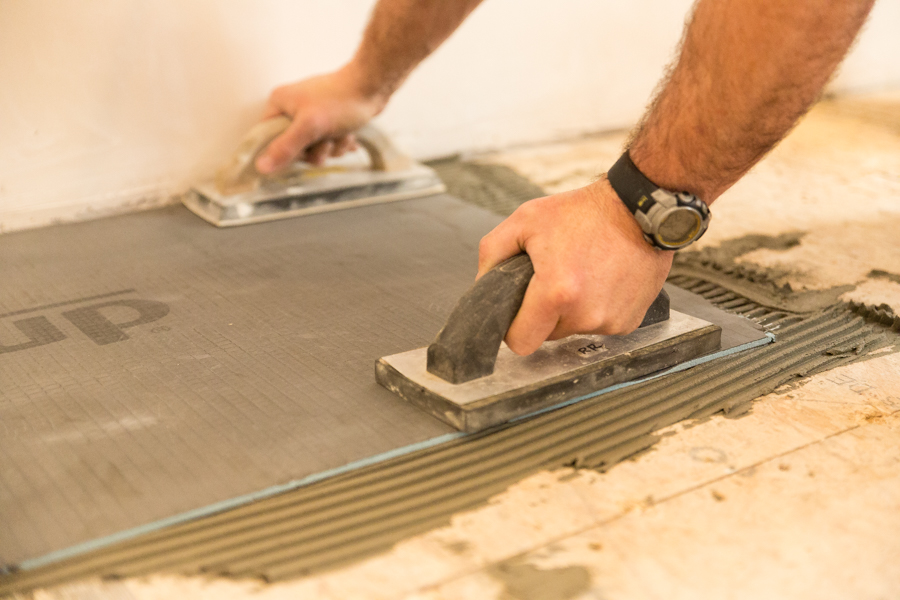
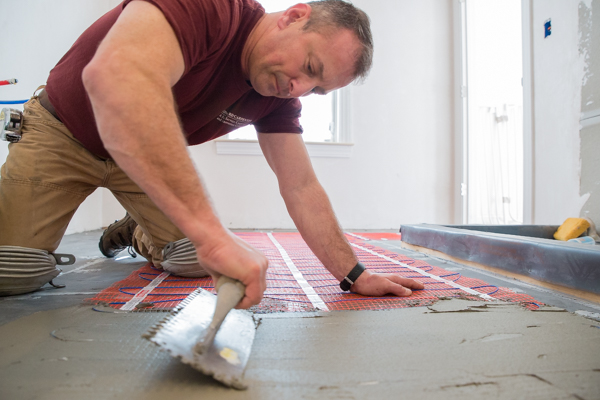
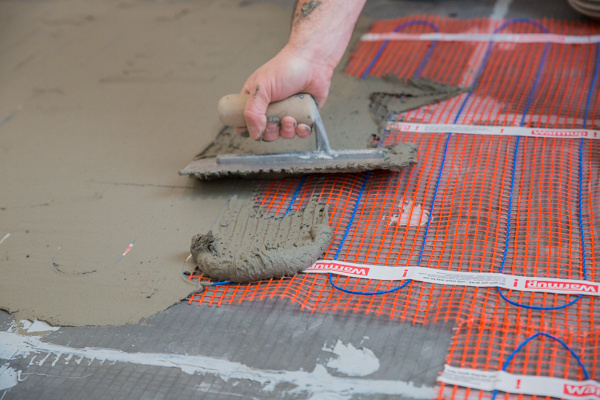
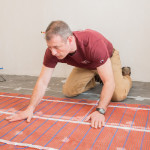
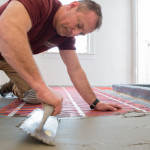
Prepare acrylic / latex modified thin-set according to manufacturer’s instructions and cover over the mat and cables. Use the flat side of the trowel when covering the mat.
NOTE: If using the Warmup Thermal boards you DO NOT need to use thin-set to secure / embed the mat down– this is where you save time! The mats stick securely to the Warmup boards and then you simply thin-set over the mat.
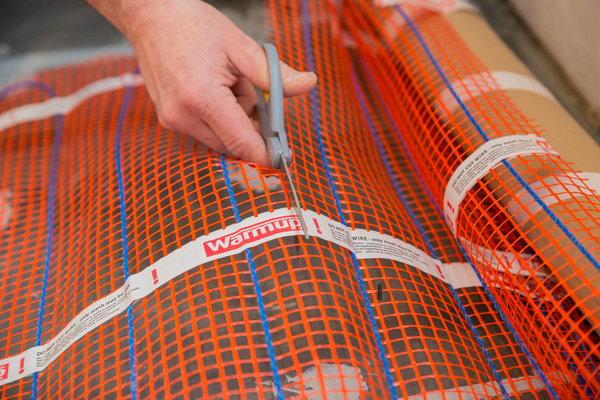
Mat was cut and turned
10 Warmup StickyMat Installation Tips:
- Take photos of the mat installation before covering over for future remodeling reference.
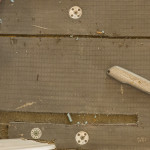
- Check the resistance of the heating before, during, and after installation to ensure that the heating cable as not been damaged. The value should match the rating label found on the product label and a tolerance of +/-5% is allowed.
- Do not use staples or other metal fixings.
- Do not cut the blue heat cable.
- The floor sensor will most likely sits too high, requiring you to cut a channel in the floor to recess the floor sensor and ensure that it sits at the same height as the heating cables.
- Dry fit your mat, and use a permanent marker to locate it on the floor. Also mark the cold leads and sensor locations.
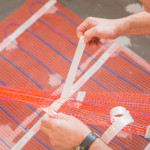
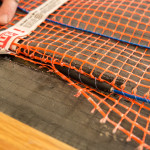
- Roll out the mat following your floor plan. Cut and turn as needed.
- Place the mat with the element facing the sub-floor.
- Avoid damaging the heating cable with trowels and other tools.
- Secure the mat to the sub-floor using the double-sided tape on the mat, press firmly and flatten out the mat..
- Use tape to fix any loose laid wires and the power leads in place.
NOTE: Do not cross cables at any time. Avoid contacting the power lead or sensor with the heating element cables.
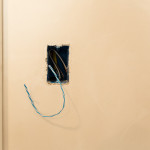
Each Warmup heat mat has one unheated lead running from the floor to the thermostat’s electric connection. The joint connecting the unheated lead to the heating coils must be at least 2 inches away from the wall and covered by a thinset adhesive under the final floor covering.
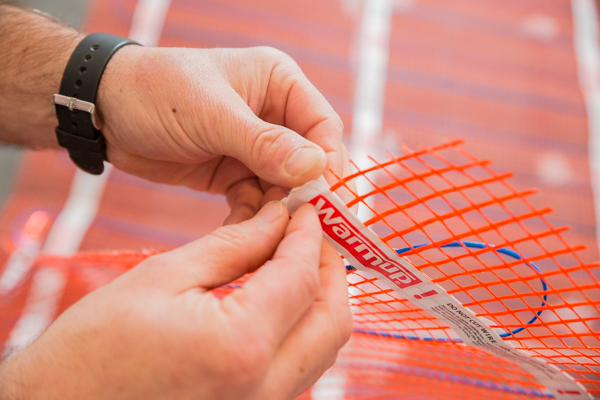
Removing the adhesive tape covering
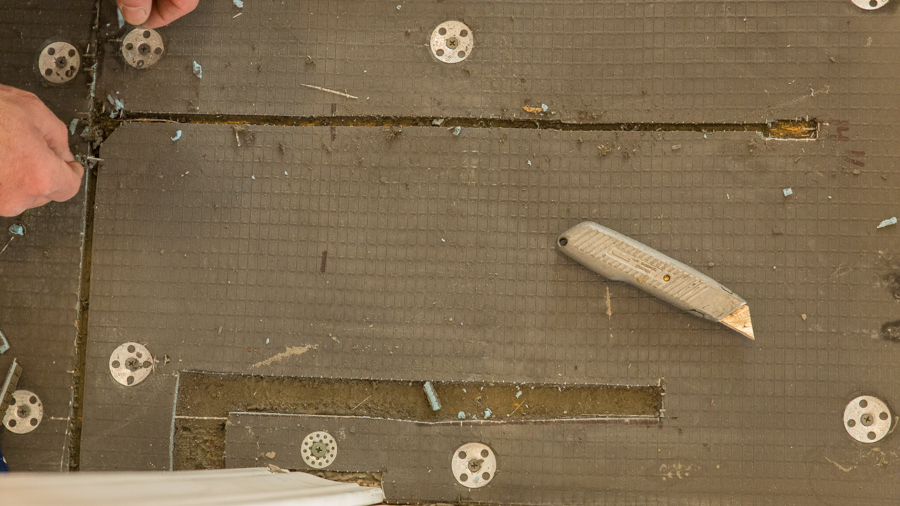
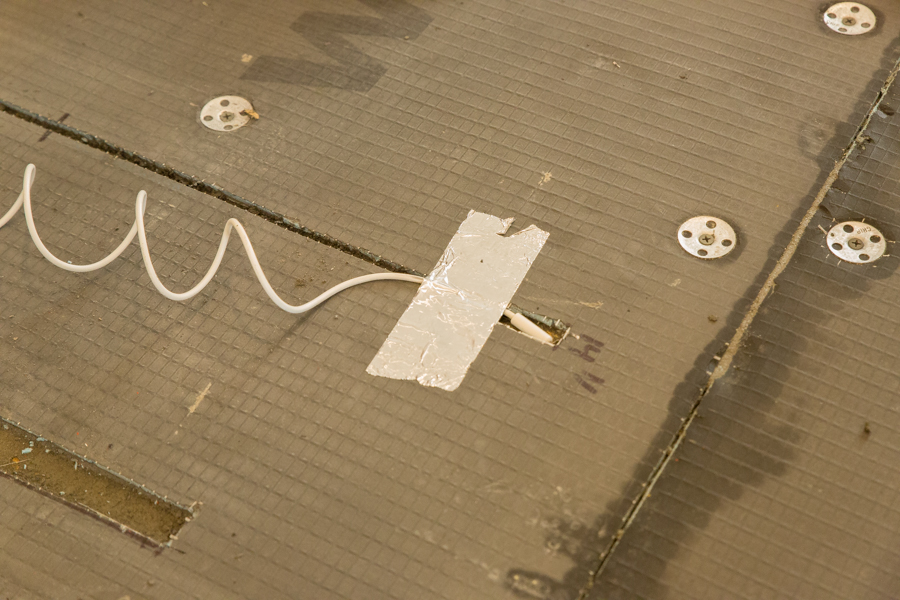
Safety Tip: This unheated lead joint SHALL NOT be installed in the wall. In order to get the joint flush with the heating mat, it will be necessary to chisel out a recess in the sub-floor. I found that recessing this joint slightly into WIB underlayment allowed me to get the mat to lay flat in this area.
Multiple StickyMats Connection Tip:
It is easier to run multiple lead wires to a junction box and then take a single wire to the thermostat. Ensure that the thermostat connected to a Ground Fault Circuit Interrupter (GFCI), is added to the circuit between the main power supply and the thermostat.

Adhering tape to sub-floor
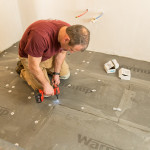
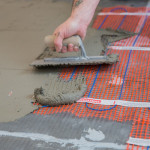
Tile Over the Warmup Stickymat
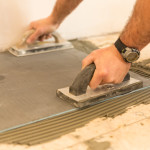
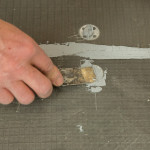
- Using the smooth trowel, apply a minimum 1 / 4” thick coat of thin-set over the heating mat and supply leads. Let dry.
- Lay out and install the tiles with a 1/4 notched trowel and thinset. Build up / level the thinset in areas where the mat was not installed.
- Use care not to damage the heating coils.

Recessing cold lead
Place Power Leads and Sensors
Route the power lead(s) from the floor to the connection box. When using multiple mats, route all power leads in parallel, from the floor to the electrical box in the wall. To ensure the power lead remains at the same level as the heating element, you may need to cut or chisel a channel in the sub-floor. Ensure there are no loose sections, paying close attention to the ends of the mats and any section, which has been cut and turned.
The thermostats also come with a 9’ sensor cable to detect the temperature under the floor finish and are used for temperature regulation of the floor surface. Place the floor sensor below the fiberglass mesh between the two runs of heating element a minimum of 12” into the heated area. Place the sensor between two heating cables. The floor sensor can be secured to the floor with tape. Avoid touching or crossing over the heating wires. To ensure the joint splice does not raise the floor, you may have to chisel a recess into the WIB.
Connect the Thermostat
When using multiple heating mats you can connect them in parallel to the same thermostat. Each lead wire must come back to the controller. The total amp load of the heating mat(s) must not exceed the thermostat’s amp limit or the amperage rating of the circuit or other control switch without using an appropriately rated contractor / relay. The Warmup thermostat has a maximum resistive load of 15 Amps.
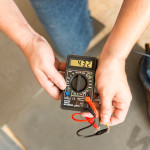
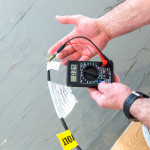
Test the Mats
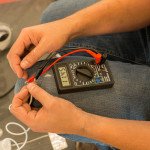
Testing the mats is a critical step and should be done before, during, and after installation. Testing can be done with a digital ohmmeter to ensure the ohms resistance is correct.
Procedure:
- The resistance should be measured between the two conductors without touching the yellow-green wire, which is the ground connection.
- Checking for resistance between the two conductor wires ensures there is no break in the cold lead conductor and the heat resistance wire. It does not assure you that there is no electrical short in the circuit.
- Place one probe on the black wire. Place the other probe on the yellow (red wire for 240V ). Resistance can vary depending on the ambient temperature and an allowance of +/- 5% from the norm is acceptable.
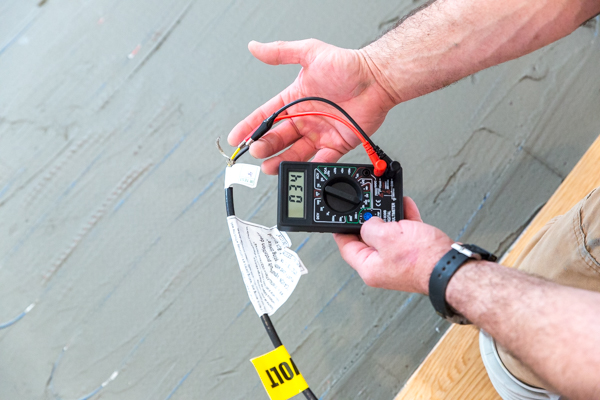
Tip: Test the Warmup heating mat four different times:
- Upon receipt (in box)
- After layout (take pictures)
- After thin-set or leveler and tile installation
- After grouting
Summary
Probably the most attractive advantage the Warmup Stickymat has over competitors is how easy it is to install onto underlayment, without thin-set, especially when applied to Warmup’s thermal insulation boards. Frankly, if you’re not using a thermal insulation board you’re wasting energy and heating inefficiently.
Overall, I was impressed with the Warmup Stickymat WIB and mat system for the following reasons:
- The Warmup thermal insulation boards install easy, and cut the heat-up time by 90%, saving energy and putting more heat into the room.
- The StickyMat measures less than 1/8” and does not impact floor heights.
- The sturdy mesh fiber is durable and the double-sided tape is super-sticky, allowing a secure installation.
- Fast installation: rolls out easily and the heating wire is pre-spaced for even heating.
- Easy to re-position: Can be re-positioned, many times, without losing the adhesive capabilities
My dealings with Warmup Inc were mostly over the phone or via email. I found them to responsive to my requests, communicate well, and deliver product fast — it was all simple and painless. Relationships are important in my line of business and relationships with folks who you can trust will deliver what they promise is paramount.
If you serious about remodeling, now is not the time to get COLD FEET – I recommend giving this product a try!
Check out the Warmup Snow Melting Mat System.
-

- 3×10 mat cut and turned
-
- L-shaped bathroom floor layout
-
- Warmup thermal Insulation Board [WIB]
-
- WIB dry fit
-
- Score and scap
-
- Dryfit – stagger seams
-
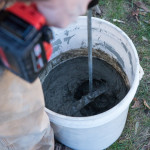
- Mixing thinset
-
- Notched trowel – WIB install
-
- Pressing down WIBs
-
- WIB setd into thinset
-
- Bath with WIBs
-

- Warmup WIB screw and washers
-
- Fastening down WIB
-
- Warmup WIB fastening
-
- Finished fastening
-
- Recessed area for cold lead and sensor
-
- Sensor install
-
- Testing sensor
-
- Warmup Sealant
-

- Sealing seams and washers
-
- Warmup Stickymat Radiant floor Heat
-
- Testing mat Ohmns
-
- cutting matting to flip and turn corner
-
- L-shape. Flip and turn
-

- Warmup Stickymat dryfit
-
- Warmup Stickymat system
-
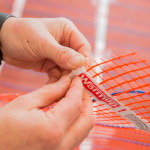
- Peeling self stick adhesive
-
- Peeling adhesive tape
-
- Adhering tape to sub-floor
-

- Adhering tape to sub-floor
-
- Recessing cold lead
-
- Thinset over mat – flat side of trowel
-
- Covering Warmup Radiant Heat Mat
-
- Thinset over mat
-
- Test coils, and sensor
-
- Thermostat pull string
-
- Warmup Thermostat