Setting Posts In Concrete
 Setting Fence and Deck Posts
While the outdoor living trend continues to grow, many homeowners are electing to do projects themselves — and opting for simple and cost effective outdoor improvements.
According to a 2010 American Society of Landscape Architects (ASLA) survey of residential landscape architects, larger scale projects such as outdoor kitchens remain popular, but the appeal of more basic projects homeowners can perform themselves has increased.
Here are some of the projects homeowners are interested in tackling this year that could be done over a weekend and on a budget:
- Ornamental water features such as fountains or splash pools — 86.7 percent
- Decks — 83 percent
- Fencing (includes gates) — 82.9 percent
If your to-do list includes any of these improvement-related projects, here’s what you need to know to get some of them done in just one weekend.
Setting Posts
Fence posts, deck footings, trellises and arbors …they all require solid posts set into concrete to make them stable. This project guide will show you the basics for your post project.
Required Tools and Materials
- Quikrete Fast-Setting Concrete Mix — poured dry from the bag and into the hole
- Quikrete All-Purpose Gravel or crushed stone
- Plumb line or level
- Shovel or post hole digger
- Pressure treated wood posts or galvanized steel posts
- Wood braces and nails (if needed)
- Deck or fencing hardware (if needed)
Note: To figure out how much concrete you will need for your post project, visit quikrete.com/calculator.
- The diameter of the posthole should be 3 times the post diameter. Hole depth should be 1/3 the overall post length, plus 6 inches (150mm) for the gravel base.
- When the post is to be used for structural support, such as for deck – ing, the hole must extend at least 6 inches (150mm) below the frost line.
- Deck hardware, if applicable, should also be kept away from water as a safeguard versus rust and other corrosives.
- When installing basketball goal poles or other equipment that requires a solid footing for safe use, follow the manufacturer’s recommendations concerning mounting hole depth and size.
- Tamp the sides and bottom of the hole until firm and place 6 inches (150mm) of gravel or crushed stone in the hole to aid in drainage. Tamp it down with the post, a 2 x 4 or tamping tool.
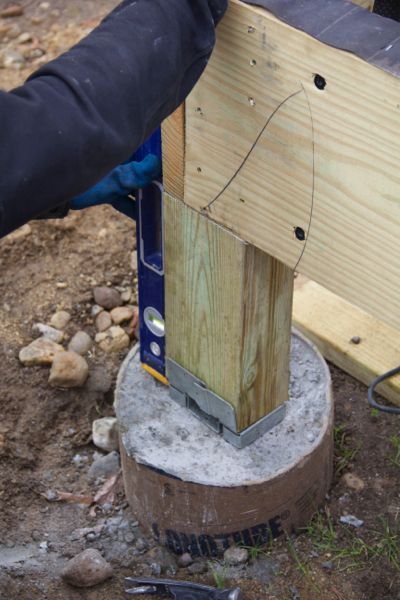
- Position the post, checking that it is level and plumb.
- Pour the concrete mix dry from the bag into the hole until it reaches 3 to 4 inches (100mm) from the top. Recheck the post for plumb and brace as needed.
- Pour water onto the dry mix and allow it to soak in. Depending on soil conditions, you will need about 1 gallon of water for each 50 pound bag of concrete mix placed in the hole. Dig larger, dish-shaped holes for posts set in loose or sandy soil.
- Fill the remainder of the hole with soil dug from the hole.
- The concrete sets in 20 to 40 minutes. Wait 4 hours before applying heavy loads to the post, such as a basketball backboard. (If the temperature is below 72 degrees, additional time for curing will be required.)
For Best Results
Use pressure-treated lumber or apply creosote equivalent to prevent below ground deterioration. Galvanized metal should also be used to prevent rust.
Read our Deck Safety – Repair vs Replace article


