Lally Lock Structural Column
Lally Lock Structural Lally Column Offers Code Compliance and Adjustability
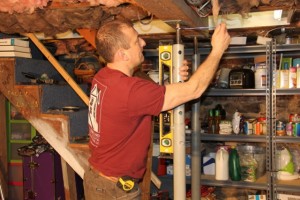
I recently had the opportunity to install a fairly new and innovative type of structural column. The folks at Lally Lock sent me some columns to review.
The column is called the Lally Lock System and it is made by Dean Column Co., Inc.Dean Column Co., Inc. has been the leader in concrete-filled steel lally columns since it was founded in 1929. Dean Column Co., Inc. has taken an old product and improved it making it stronger, easier to use and achieve code compliance.
The patented Lally Lock System is a complete column positive fastening system. Best of all . . . no welding!! That’s right the Lally Lock System is the only Code Compliant column that does not require welding.
 That saves me money from paying a welder to visit my jobsite!!!!
Dean Column Co., Inc. is the only concrete-filled column manufacturer that does not include the cheap top and bottom plates with their columns. Everything they sell can be bought separately to achieve the correct column connection for your application.
The Lally Lock structural column complies with the International Residential Code (IRC).
•R502.90 Fastening–Floor framing shall be nailed in accordance with Table R602.3(1). Where posts and beam or girder construction is used to support floor framing, positive connections shall be provided to ensure against uplift and lateral displacement.
•R407.3 Structural Requirements–The columns shall be restrained to prevent lateral displacement at the bottom end.
•R802.11.1 Uplift Resistance–A continuous load path shall be designed to transmit the uplift forces from the rafter or truss ties to the foundation.
The Lally Lock System consists of three components:
- Lally Lock column
- Cap plate
- Base plate
Lally Lock structural column:
The Lally Lock structural column is a concrete-filled column made from 16ga tubular steel, (available in 3 1/2″ and 4″) with an embedded fasten unit in the top of the column. This fastening unit is made from a 6″ anchoring bolt threaded into a 1 1/4″ coupling nut and steel disc with a 9/16″ hole, which is welded to the inside of the steel tube.
The steel tubing is manufactured in the United States from low carbon steel complying with ASTM A513 standards and has a yield strength of 32,000 psi / ultimate strength of 45,000 psi.
The gray primed tube is filled with concrete. Dean Column Co., Inc. requires a minimum 28 day compressive strength for 3,000 psi.
Galvanized columns are also available.n 3 1/2″ and 4″) with an embedded fasten unit in the top of the column. This fastening unit is made from a 6″ anchoring bolt threaded into a 1 1/4″ coupling nut and steel disc with a 9/16″ hole, which is welded to the inside of the steel tube.
Column Sizes:
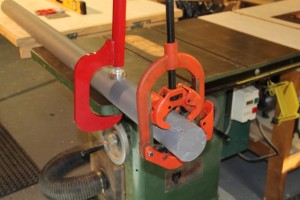
The Lally Lock Structural column is available in lengths from 6 feet to 14 feet. Longer or shorter lengths are available upon request or you can cut them onsite.
 The columns are made in 3″ increments and the bottom adjustable base set has a 3″ of adjustment so when measuring you don’t have to worry about getting your columns super tight or jacking up your structure to get them to fit.
Top Plates:
The Lally Lock system features 3 different types of top plates (Lally Lock Beam plate, Lally Lock Saddle plate and Lally Lock Cap plate) to allow you to custom fit solid sawn lumber and lvl beam sizes.
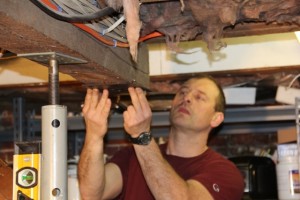
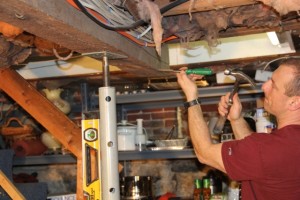
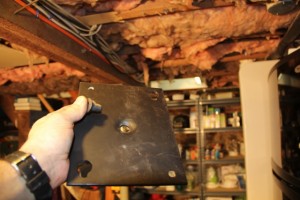
I used the Lally Lock Beam plate which is made from 1/4” low carbon steel with exclusively designed keyholes. The key holes allow one person to install the column by using the keyholes to slip over pre-installed fasteners and temporarily hanging the column off the beam before permanently installing the fasteners – it really works.
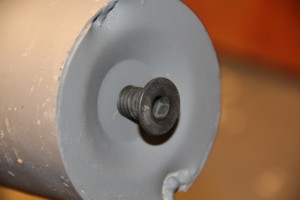 The top plate also has two 3/8” holes and two smaller holes for fastening to the beam. The center of the plate has a 19/32” counter sunk hole to connect the plate into the embedded fastening unit in the top of the Lally Lock structural column with a ½” bolt.
Lally Lock Beam Plate Sizes Available:
- 3 -1/8” x 8” x 1/4” for (2) 2x’s
- 3- 5/8” x 8” x 1/4” for (2) LVL
- 4- 5/8” x 8” x 1/4” for (3) 2x’s
- 5- 3/8” x 8” x 1/4” for (3) LVL

- 6- 1/8” x 8” x 1/4” for (4) 2x’s
- 7- 1/8” x 8” x 1/4” for (4) LVL
Bottom Plates:
Three styles of bottom plates are available (Adjustable Base Set, End plate and Lally Lock Base plate). I used the Adjustable Base Set for my installation.The bottom adjustable plate measures 4 7/8” x 4 7/8” x 3/8” with four 1/2” threaded holes and two 5/16” counter sunk holes for securing the plate to the bottom of the column with Tapcon concrete screws.Below this adjustable plate a second bearing plate measuring 4 7/8” x 9” x 1/4” is installed. This plate has four keyholes for concrete screws and two 5/8” dimples and two 1/2” threaded holes that receive four 1/2″ x 3 1/2″ adjustment screws. These adjustment screws are rated for 55,000 pounds!!
 Features:
- No More Cutting
- No More Welding
- One Person Install
- Save Time and money [no welding]
- IRC Code Compliant
- 3” of adjustment during installation
- Uplift protection
- Self leveling
- Holds up to 55,000 pounds
- Designed for New Construction and Remodeling
- Adjustable Base Set Fits 3 1/2” or 4” columns
Tools Required

- Corded or Cordless Drill
- Hex Drive Bit (5/16” for 2 x’s or 3/8” for LVL’s)
- 5/16” Allen wrench
- ¼” Ball End Bit (for Adjustable Base Set)
- Phillips Head Bit (for Adjustable Base Set)
- Hammer Drill (for Adjustable Base Set)
- 3/16” Concrete Drill Bit (for Adjustable Base Set)
- Column cutter (optional)
- Pry Bar to lift the column (optional)
Installation:
Place your beam plate in the location where the column will be installed. Screw in two screws in the small portion of the keyholes, leaving a 1/16” gap between the plate and screw head.
Slide plate off the two screws and screw the plate onto the embedded fastening unit in the column.
 Screw in the (4) 3 1/2” adjustment screws, 3/8” of an inch, into the 3/8” adjustment plate.
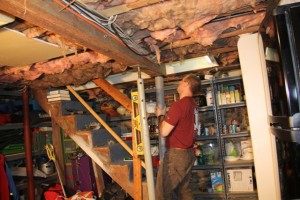
The best part of this system is there is no need to jack up the structure and it really is a one man install. As long as you use the beam plate, you can hang the column with the key hole design – super easy!
NOTE – I used them to replace temporary “screw jacks” that are available from the hardware store and many people use a lally columns BUT shouldn’t. If you look close at the pictures above you’ll see that the old screw jack columns had started to rust…. failure was a matter of time.I can see this column being used in retro fitting applications, remodeling and even in new construction.
Watch Me Install These Columns on my Concord Carpenter Cable TV Show
This review contains my opinion of a product. I take pride in providing my readers with honest and objective information as well as a practical approach to using a product. I never accept payment in exchange for a positive review. Many of the tools and products are provided to for free by a manufacturer for review.


