Electric Radiant Floor Heating

Electric Radiant Heat
New England mornings can tempt some of the toughest to roll over, turn off the alarm clock and go back to sleep.

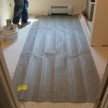
Radiant Heat Layout
Getting out of bed and stepping onto a cold wood or tile floor can send chills up your spine and set the mood for the day.
Research is showing that more and more people are remodeling their homes instead of moving or building new. In addition, 60% of homeowners 50 years and older intend to stay in their homes through retirement which will also mean aging-in-place remodeling.
Using electric radiant as a remodeling solution occurred to me several months ago while working on a bathroom which was located above my client’s garage.
It was February and the floor of the tile bathroom was frigid.
In these situations using electric radiant heat to supplement the existing heating system is a no brainer and consistently create a warm, toasty, supplemental heat source in any room – especially in bathrooms.

Securing WarmlyYours Tempzone mat to the subfloor
Why radiant heating?
As technology continues to advance, so has the concept of floor heating. Although floor-heating dates back to ancient Roman bathhouses where slaves tended fires sending hot air through channels under elevated floors, it has not until recently become popular within households.
Many people are familiar with hydraulic under-floor heating systems which require tubing to run a hot liquid beneath the floor, along base board heaters or through radiators to heat your home. Yet an alternative to hydronic heating that is easier and more cost effective is electric under-floor heating.
What makes electric floor heating systems so comfortable?
The science behind electric radiant floor heating is quite simple: the entire floor surface effectively becomes a low temperature radiator.

Installing WarmlyYours Tempzone Radiant Heat
These electric heat systems deliver heat through heat transfer: the delivery of heat directly from the heat source to the floor surface and objects in the room via infrared radiation from underneath, which in turn warms the people and objects in the room.
Floor heat is much more efficient and comfortable than heating the air which does not retain that heat for very long. Unlike forced air heating systems, under-floor heating warms your body and the objects surrounding you rather than heating the air, ultimately eliminating inconsistent room temperatures and reducing the percentage of dust mites to 80%.
Radiant heat offers smart technology. When you’re purchasing electric floor

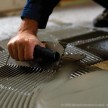
Thinset applied over WarmlyYours Tempzone mats
heating, you want to make sure that it’s as “hot” as possible – for this, pay close attention to the watts per square foot ratio.
The optimal wattage is 15 watts per square foot.
The bottom line is: the hotter the better! With 15 watts per square foot, you will be able to utilize full heating technology for a faster heat-up and a warmer floor, especially valuable in a bathroom installation where time is spent morning and night for our daily routines.
Where Can Electric Radiant Heat Be Used?
Electric floor heating is a heating system that can be used indoors or outdoors, installed under many types of flooring such as laminates, hardwood and tile. This heating system consists of electric cables built into the floor or it features mats of electrically conductive plastic that are mounted on the sub-floor. The system can be installed on a mortar bed or gypsum board with only a thin layer of thin-set cement between it and the floor tile.

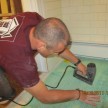
Installing Nuheat radiant mat
Retrofitting during a remodel is easy and usually does not significantly raise the floor height.
Electric floor heating systems come in several different forms such as a mat or cable to accommodate the various size and shape of the area. For complicated areas, a single heating cable is used under the floor. Heating mats are more likely to be installed in more simple and larger areas.
Using these mats allows retrofitting over existing slabs without significantly raising the floor height.
Programmable thermostats control these systems and can be set to accommodate one’s busy lifestyle. For example you can set your heat to: turn on an hour prior to your getting out of bed; to turn down or off when you leave for work; and to turn back on just before you arrive home or go to bed. In this way you are only using electricity when you need it.

Smoothing Nuheat radiant mat into thinset
Cold Floors Be Gone:
When you consider the ease of installation, the low cost, and the non-existent maintenance fees associated with electric radiant heat, it’s not only a cost effective solution but also a realistic remodeling solution to add flooring heat.
As a carpenter and re-modeler I’m always looking for easier, more efficient ways to improve an existing space. The principle of using modern accessories to achieve a better situation is and important tool in my toolbox. The concept of electric radiant heat is one of those tools: it’s easy to install, energy efficient, and can be easily programmed.
Installing Electric Radiant Heat: [General Guidelines]
The following are very basic guidelines for ordering and installing electric radiant heat. In every case you should refer to and follow manufacturer’s recommendations for specific material installations and applications. A licensed electrician should make all electrical connections.
Types of Floor Covering:
1. Ceramic Tile:
Ceramic tile is the most common and effective floor covering for radiant floor heating because it conducts heat well from the floor and adds thermal storage due to its high heat capacity.  (640x480)")
2. Vinyl:
Vinyl, linoleum, carpeting, or wood can also be used, but any covering intended to help insulate the floor from the room will decrease the efficiency of the system.
3. Wood:
Quarter-sawn wood flooring is recommended because it’s always more stable under conditions of extreme moisture or heat, and is always the better choice when placed over radiant heat. Plain-sawn wood should be avoided because it will expand and contract more.
4. Carpet:
If you decide on using carpet, choose a thin carpet with dense padding and install as little carpeting as possible. If some but not all rooms will have a carpet covering, then those rooms should have a separate thermostat loop so that the system will heat those spaces more efficiently.
Planning for your Electric Heat:
There are many great electric radiant heat companies to choose from. I suggest that you look at companies that provide assistance with custom designs and offer quality customer service.
Do-it-yourselfers and professionals alike can run into some snags along the way when installing a radiant heating system, so you want to ensure that the company you’re purchasing from offers 24/7 installation and technical support.
Be careful because some may say they offer round the clock support, but very few actually offer support from an actual person, employed by the company, often times it’s simply a recording or a call center. You want a live person who knows their stuff to be on the other end of the phone when you’re working on your project – day or night.
Also choose a company that provides a quality product that has an optimal wattage of 15 watts per square foot. The bottom line is: the hotter the better! With 15 watts per square foot, you will be able to utilize full heating technology for a faster heat-up and a warmer floor, especially valuable in a bathroom installation where time is spent morning and night for our daily routines.
WarmlyYours has one of the hottest electric radiant heating mats on the market.
Measure your floor space:
A quality radiant heating manufacturer will assist you in designing your system and, if needed, provide a detailed printed diagram for you by the next business day.
Measure your room, typically to the walls. Use graph paper to draw your floor plan with your measurements.
When measuring make sure you accurately include the location of vanities, floor vents, tubs and toilet drains in your drawing. Heat mats or wires should not be positioned below permanent fixtures or zero-clearance furniture.
Include in the drawing the placement of your thermostat to insure that when the floor system arrives the cold lead wires will reach your thermostat location.
Order Your Materials:
Determine whether you can use standard size [i.e., off the shelf] heating mats or if you need a custom design. Custom designs always cover the floor area better but many small square or rectangular rooms can be covered reasonably well with standard mats.
The better quality floor heat companies will ship the same day you place the order.
Preparing the Sub-floor:
Make sure the sub-floor is clean and free of debris. With an existing sub-floor you may want to install screws in the floor joists to prevent squeaks and ensure that it’s adequately fastened.
I usually install a tile backer board as an underlayment if installing tile. Follow manufacturer’s instructions on this install.
Tools needed: [Under tile installation]
- Acrylic or latex modified thin set
- Duct tape
- 1 ⁄ 4” square notch trowel
- Small plastic bristled brush
- Margin trowel
- Grouting float
- Digital ohm / multi-meter
- Sponge
- Bucket of water


Securing The Heating Mat To The Sub-Floor:
Avoid the temptation to tear open the box and start installing your mat without first reading through the instructions and dry fitting your electric heating mat to ensure fit.
All manufacturers have specific guidelines for their systems that must be followed. Reading your instructions will save you time, mistakes, unnecessary steps and money.
When dry fitting make careful note of the heat mat power leads and orient them to your thermostat location, making sure you have enough wire to reach your thermostat location.
There are three (3) floor preparation methods:
1. Self-leveling Method: recommended and may be used for all types of flooring
2. Thin-set Mortar Method: and may be used for all types of flooring
3. Direct Method: used for tile and stone flooring only
Self-leveling Method :
1. Prepare the self-leveling compound as per manufacturer’s instructions. Priming the subfloor may be recommended by the manufacturer.
2. Using a scraper or a flat trowel, spread a layer of the self-leveling compound until the cable and guides are completely covered.
3. Allow the self-leveling compound to set as per manufacturer’s instructions.
4. Conduct insulation and resistance tests.
5. Proceed with laying the floor covering as per the manufacturer’s instructions.
Thin-set Mortar Method:
Depending on the product you choose you may have to install thin-set first and then set the “solid mat” into the thin-set. If the product is a “mesh mat” you can secure the mesh mat to the sub-floor and then apply thin-set over the heat cables using the flat edge of the trowel.
Mesh mats can be stapled, hot glued, or taped to the sub-floor. In the installations I’ve done I’ve used a combination of the three to accomplish the install.
Note: solid mats are adhered to the sub-floor using thin-set and the flooring can then be immediately installed over top.
Note: NEVER staple through or over the heating wires or floor sensor wire.
1. Prepare the thin-set mortar as per manufacturer’s instructions.
2. Using a flat trowel, pull the trowel at a 45-degree angle (following the same direction as the cable) and spread a thin layer of thin-set mortar over the cable. The cable must be completely covered and only the very top of the guides should be visible.
3. Allow the thin-set mortar to set as per manufacturer’s instructions.
4. Conduct insulation and resistance tests.
5. Proceed with laying the floor covering as per manufacturer’s instructions.
With non-mesh mats, apply the thin-set to the sub-floor and then use a rubber float to press the entire mat surface to firmly create 100% contact between the heating mat, the thin-set and the sub-floor.
Direct Method:
1. Prepare the thin-set mortar as per manufacturer’s instructions.
2. Using a minimum 3 /8” x 3 /8” square-notched trowel, spread a thin layer of thin-set mortar over the heating cable, troweling in the same direction as the cable.
3. Conduct insulation and resistance tests.
4. To ensure that each tile has adequate adherence to the subfloor, apply a layer of thin-set mortar to the backside of the tile (back-buttering). Lay the tile directly on the thin-set mortar and firmly press down on the tile. This technique has a high level of difficulty and is not recommended for inexperienced tile installers.
Preparing For Tile:
- Using at least a 1 ⁄ 4” x 1 ⁄ 4” square notch trowel, spread a coat of fresh acrylic / latex modified thin-set over the area to be covered by mat.
- Conduct insulation and resistance tests.
- Electric radiant heat systems come with a floor-sensing thermostat with GFCI. The floor-sensor must be installed into the thin-set as well, following the manufacturers recommendations.
- Most manufactures require this sensor to be installed on top of the mat a minimum of 6 to 12” in from the edge of the heated area and in-between two heating wires.
- ¼” thin-set is then applied over the mat and supply leads using the flat side of a trowel, ensure the thin-set is level and smooth.
Tile Installation:
- Allow the first layer of thin-set to cure before installing the tile with a second layer of thin-set. This layer is applied with a ¼” square notched trowel.
- TIP: Experienced installers may wish to install the tile and covering the system with thin-set in one step. A 3/8” square notched trowel is recommended for a one step installation.
- TIP: Clean thin-set from between grout joints with a wet rag while installing tile. Never use a utility knife to remove cured thin-set from grout joints.
- Throughout this entire process you should be repeatedly performing an Ohms test.
Electrical Connections:
- Allow proper thin-set cure time as recommended by the manufacturer (typically 7-10 days) before powering up the electric radiant heat system.
- The system can then be wired to a Class “A” Ground Fault Circuit Interrupter (GFCI) or a GFCI circuit breaker and the thermostat installed in a double-gang wall box with a single mud ring by a licensed, certified electrician.
Thermostat Connections:
Refer to the thermostat installation instructions (included with thermostat) for proper wiring instructions. Thermostats should be installed at an appropriate height and in an accessible location in the same room that the thermostat is controlling.
Installing a Wood Floor:
- Install Wood Sleepers. Strips of ply wood 1”-2″ wide X 3/8″-1/2″ high, spaced 19 inches apart across the entire plywood sub-floor are appropriate. Leave space for any planned cuts and turns.
- The sleepers are installed to create lanes into which the heating system roll will be placed.
- Install the heating rolls between the sleepers.
- Install the floor heating system as recommended into the lanes created by the sleepers, adhering the mesh every 6-8 inches with hot-glue or staples (green mesh only) — never staple over wires.
- Carefully route the power leads alongside the system within the lane and back to the power supply, making sure that the leads do not pass over the sleepers or the heating wire.
- Install the thermostat sensor probe (if applicable) 6” into the heating mat, centered directly between the heating wires. Sensor wire should not cross over heating wires.
- Perform an ohm test.
- Cover heating rolls or cables with 3/8” Self-Leveling Cement up to and even with the top of the wood sleepers. Use a float trowel to spread the self-leveling cement.
- Follow the manufacturer’s recommendations for the self-leveling cement and allow proper cure time before moving to the next step.
- Install Hardwood / Engineered Wood Flooring once cured.
- Apply urethane adhesive directly to the cured self-leveling cement and wood sleepers as per manufacturer’s recommendation.
- Nail the wood flooring into the wood sleepers as per flooring manufacturer’s recommendations (minimum every 4 inches for wide plank floors / closer intervals for narrower plank floors). Be careful not to place nails or staples near the system’s heating cable or power leads.
- Perform ohm test.
Radiant floor heating benefits
- Consistent and easy to control temperature
- Efficiency: radiant floor heating is the most efficient mode of heat delivery
- Comfort can be achieved at lower temperature settings
- Savings of 20-40% over forced air systems
- Clean and healthy: radiant floor heating does not rely on circulating air and so dust particles and allergens are less likely to spread throughout the house
- Quiet: radiant floor heating operates silently
- Space saving: no bulky radiators or baseboard units
- Humidification is unnecessary because radiant heat does not alter residential air moisture content