Building A Sliding Barn Door

Building and Installing a Sliding Door
Today it seems like every home décor magazine and Pinterest board is covered with sliding barn door ideas. Whether it’s a modern, industrial-style door or a more rustic, country design, or something in between, I am seeing more and more interest in this trend from clients.
One of the latest trends in home design, is the sliding barn door. It’s for good reason, barn doors can add space-saving benefits, aesthetic detail, and functionality to the interior of your home. A sliding barn door creates more space by eliminating the need to accommodate a traditional swinging door. And unlike pocket doors, you don’t have to figure out any tricky additional wall framing.
In this article, we will discuss the pro and cons as well as explain how we recently built a sliding barn door for a client to close off a hallway.
Focal Point or Room Partition
Sliding barn doors can be used in many different ways to add architectural interest in the right space. If placed properly, a sliding barn door can become the centerpiece of a room, or provide a stylish room-diving partition.
Space Saving
A sliding barn door is a great space saver because it does not need swing clearance like hinged doors do. Sliding doors do however, need adjoining wall space in order to slide open and out of the way.
Difficult to Lock
While difficult to lock, it’s not impossible to lock a siding barn door. Door track manufacturers now offer several mechanisms that will secure and lock a sliding door. Because of the track system, sliding doors, typically have a 1/2” to ¾” clearance between the door trim due to the track system, and as a result are not usually used as privacy or noise reducing doors.
Types of Doors
Building or choosing a sliding barn doors can be as simple as a new or repurposed door slab or an elaborate custom-designed door. With a little creativity and imagination, hard woods, thick gauge metals, and repurposed materials can come together harmoniously.
Door Thickness
The thickness of your door will also depend on or influence the track you are using. If you are purchasing a commercially available track system, you will want to follow the manufacturer’s recommendation on door thickness. Some manufacturers offer different sizes and clearance giving you flexibility in door size and thickness.
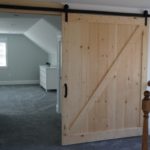
Board and Batten
A board and batten door is a simple door constructed of boards oriented in parallel rows and held together by perpendicular and diagonal support battens. These battens are fastened with nails or screws in a crosswise manner. This is a classic construction often used on barns and storage sheds.
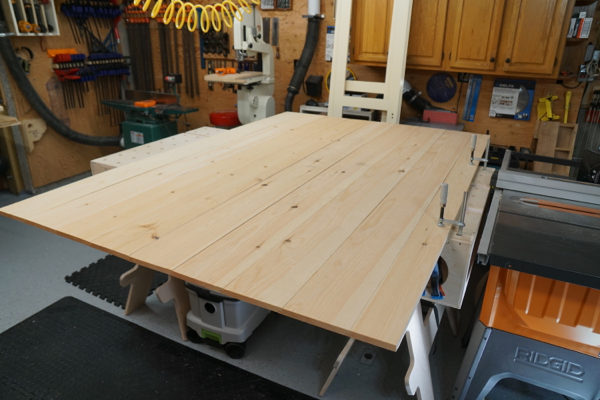
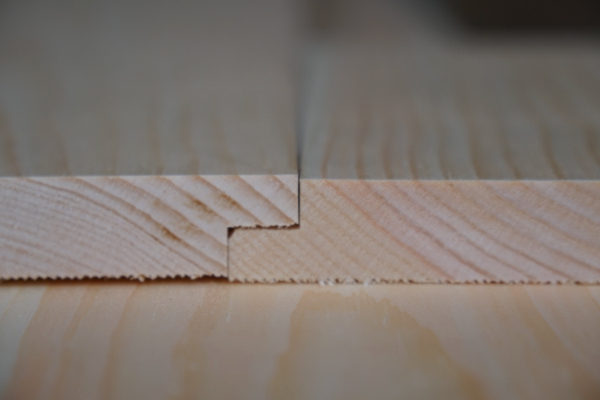
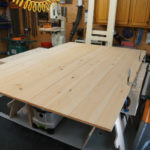
We built our board and batten style door out of 1×8 ship lap pine boards. the ship-lap boards overlap along the long part of the groove. This gives the door an opportunity to expand and contract without letting in the cold air. Another type of design that is excellent, and we think stronger, is a tongue and groove design.
Old World Charm or Modern Look
Barn doors can change the entire look of your home. You can combine vintage hardware with a door design that is rustic, classic, or modern. It can be used for main entryways, bedrooms, or closets and can be styled or painted according to your preferences.
A barn door can be a worthwhile investment once you consider what style works best for your home. Choosing the right one and installing it correctly will help you get the greatest return on that investment with improved functionality.
Sliding Barn Door Material
The list is endless. We’ve seen everything from hardwood, thick gauge metal, reclaimed doors, to re-purposed materials all come together nicely on a sliding barn door project. It pretty much comes down to your creativity and finding a material that will work, looks good, and is able to be mounted on the sliding door hardware.
Seasonal Movement
Because there are many different boards in its design, board and batten doors are extremely stable doors. There is also no technical joinery in a batten door, and its strength is derived from the fasteners used in its construction.
Avoid Using Glue
People building board and batten doors often error by trying to glue the edge joints or the battens to the boards. Unless your using a cope and stick, or tenon joinery, glue joints tend to fail with seasonal humidity changes.

Fasteners
Choose the proper length of fastener. You need to choose a fastener that allows you to fasten the panel boards together without penetrating the back side.
In our case, we used screws. We used an adjustable bevel to purposely lay out our fastener location, in a slant or 45-degree pattern. We place fasteners high and low on the horizontal battens. The goal was to get the fastener an inch in from both edges of the vertical door boards.
Sliding Barn Door Track System
One thing that I really like about sliding barn door hardware is that it allows you to handle a heavier door than most hinges will carry. It’s not uncommon for a sliding barn door track to carry a 300-400 lbs. door. There are a bunch of track designs and styles to choose from, such as:
Flat Bar Track
Flat steel bar tracks work with grooved rollers which glide on top of a steel bar. The steel bar usually has holes drilled in it and a fastener run through the middle of the steel bar, through a spacer and into the wall. The spacer keeps the steel bar off the wall the thickness of the door, or slightly larger than the door thickness.
J Track
Similar to the flat bar, rollers glide on a track but the door hangs lower. The track fasteners are usually in the upper part are of the J-track. If you’re working with an opening that doesn’t have a lot of room above it to mount a standard track system, the J-Track is your track.
Box Track
The box track is one of the oldest and most popular designs today. The Box track is a very simple design that promotes special attention to the door and not the hardware. It is also very commonly seen on real barn doors and utility buildings. This track system protects the rollers from the elements
Ceiling Mount Track
This system was designed to mount barn doors to the ceiling instead of the wall. It allows for barn doors to be hung over door frames that don’t offer enough leeway for traditional hardware. These systems also serve well as room dividers for large spaces.
Tube Track
The tube track has a rounded, tube-like shape. It is a contemporary design and is great for those wanting a modern look for their track system.
Hardware
Many manufacturers now make sliding door hardware, in numerous configurations, with matching handles, latches and pulls in a variety of finishes. Some finished that are popular are:
- Black
- Raw steel
- Bronze
- Copper patina
- Green patina
- Antique pewter
- Oil Rubbed Bronze
- Satin Nickel
- Stainless steel
- Weathered rust
- Brushed steel
- Painted – numerous colors

Sliding Barn Door Construction Steps
Start by measuring your door opening width and height. Write these measurements down and take them with you when you are shopping for materials.
After you have selected the materials you want to use, the steps involved in learning how to build a sliding barn door are fairly straightforward.

Building a Wood Sliding Door
Figure how many boards you will need to fill your opening. Cut these boards to fill the opening as measured. I suggest that you build your door to overlap your opening by an inch or two. This can be done on one or both sides, and is a good way to deal with walls that are not plumb. It also helps with privacy at the door seams, since the door track keeps the door off the trim a half inch or more.
Remember to leave room for floor clearance and to check your track hardware instructions for the proper clearance.
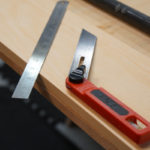
Determine Width – Consider Proportions
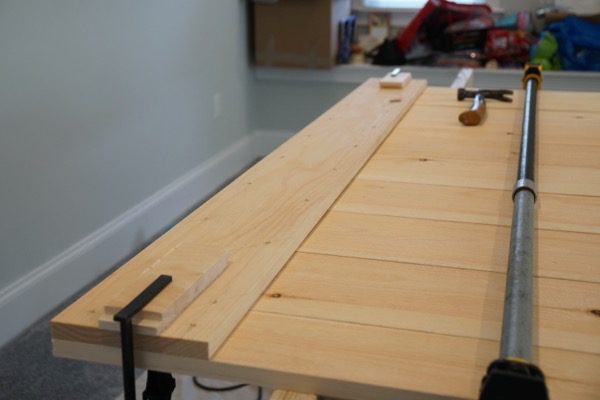
Prior to cutting the wood, assemble your boards on a flat surface. Locate the center of the door and measure left and right. Then rip the boards on a table saw to that measurement. This ensures that both the left and right sides of the door are the same width and thus proportional.
Horizontal batten
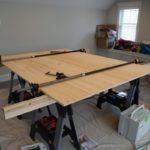
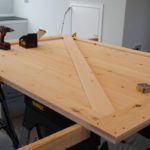
Dry Fit The Door Parts
Dry fit all of your parts before adding screws. On board and batten doors you do not need glue. Tip: to keep the door parts from moving consider clamping it to your workbench.
Check for Square
Remember to check the door for square. A framing square will help, but I prefer using diagonal measurements or the 3-4-5 Triangle method. To do this, measure diagonally from one corner to the opposite corner. Then compare that distance to the opposite diagonal measurement, the two distances should match exactly. If they are equal, the assembly is square.
If the measurements are off, adjust the assembly until the numbers match. Keep adjusting and cross-measuring both diagonals until the distances match, and your assembly is square.
Fastener pattern
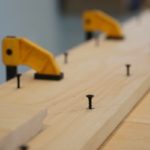
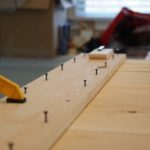
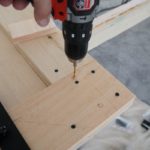
Layout Batten and Fastener locations – Be Deliberate!
Use a framing square, bevel, and pencil, lay out the exact locations of your horizontal battens and fastener locations.
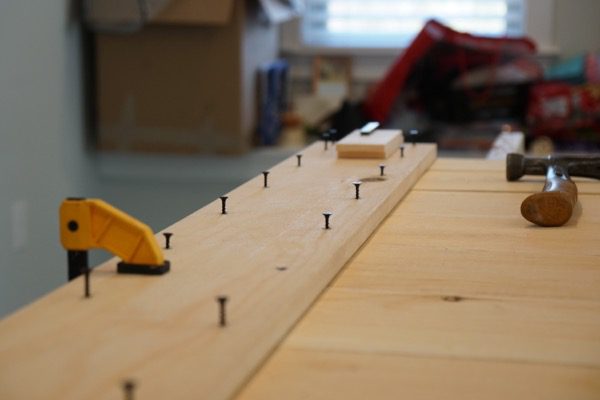
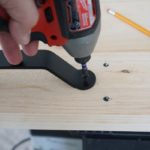
If the fasteners are going to be exposed, you want to use extra care in laying them out. Their placement should look deliberate or follow a pattern. For boards 10-inches or less, use two fasteners and keep them at least one inch in from the edges. Staggering them in your horizontal board will reduce the risk of splitting the planks.
For screws that will be hidden, consider using and installing wood plugs. Countersink any screws that will be exposed, keeping the screw head flush with the battens.
Nail or screw on the horizontal battens, avoid placing fasteners in the tongue and groove joints. Use a fastener that will not penetrate through the other side of the door. Practice on some scrap parts before actually attacking the door.

Diagonal brace meeting battens
Pro Tip: clamp the horizontal battens onto the door planks to prevent them from moving
Continue to check the door for squareness until the diagonal brace is applied. Once the diagonal brace is fastened, the door will not able to be adjusted.
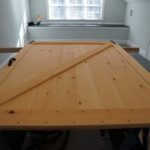
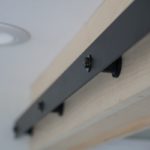
While installing the fasteners, remember to continue to check your door for squareness. We also decided to add two vertical boards between the horizontal battens. This detail creates a “picture frame” look and also adds thickness and rigidity to the frame border, as well as solid backing for the door handle.
Apply the Diagonal Brace
The diagonal brace or braces keep the door from racking and sagging. This is vital to the door’s structural integrity and longevity.
Fasten the diagonal brace(s) to the door boards. If you’re building a board and batten door that will be hinged, ensure that the diagonal brace(s) point down toward the hanging [hinge side] jamb. This is important to resist sagging. The weight of the door keeps the joints between the battens and the braces tight and secure.
Bevel or sand all outer “sharp,” edges of all the boards, including the battens. I use a block plane for this.

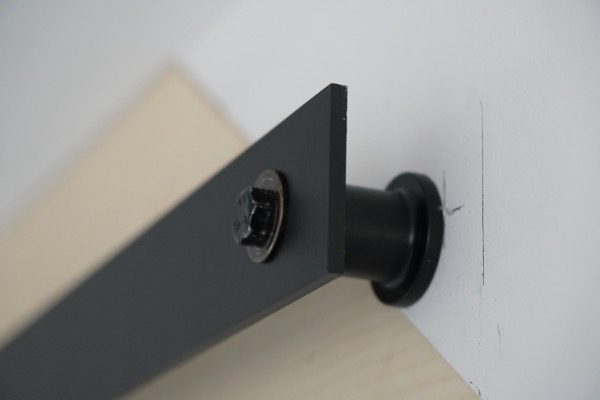
Roller spacer
Installing the Sliding Door Hardware
Install your sliding track hardware according to the manufacturer’s instructions. The track manufacturer will specify spacing of the track from the ceiling. This is needed in order to attach (or later remove) the door from the track.
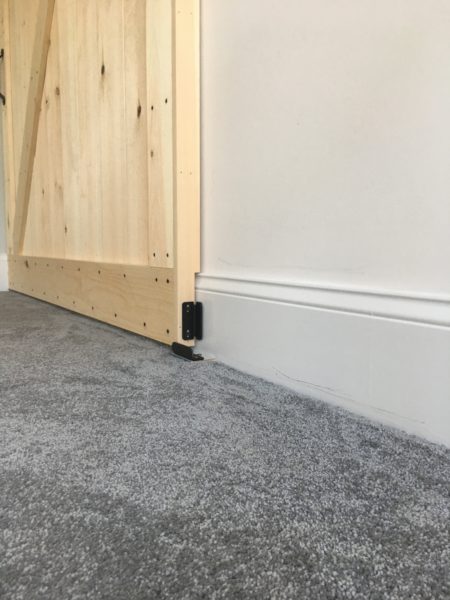
Track spacer and fastener
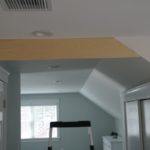
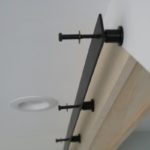
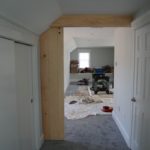
In our situation, we wanted to close off a hallway opening. To mount the track, we had to either use a ceiling mount track or build down the ceiling area. We chose to build the ceiling down, with a soffit. We secured 2×6 boards to the ceiling with TimberLok fasteners to create a soffit with solid blocking for the track hardware to be installed. This built-down soffit allowed us to mount a wall track on the adjoining wall and continue it through the open hallway. Because the door was wide, we had to order two lengths of track and join them on the wall.

Track install – micro adjustments
Sliding Track
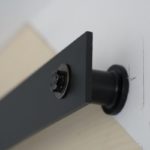
Spacers are provided with the track hardware that properly space the track from the wall for the door to slide freely. You need to specify the door thickness when ordering the track. We used www.RusticaHardware.com and purchased their “Modern” model track.
When installing the track, we started all of the track fasteners and left them loose until we were able to level the track, then slowly tightened the fasteners. Doing it this way ensured that we were able to make micro adjustments in leveling the track.
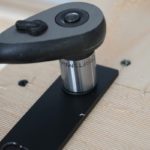
Pro Tip: When installing the rollers on the door to ensure that they are the exact spacing off the doors, use a spacer block. Ensure that the door track is perfectly level.
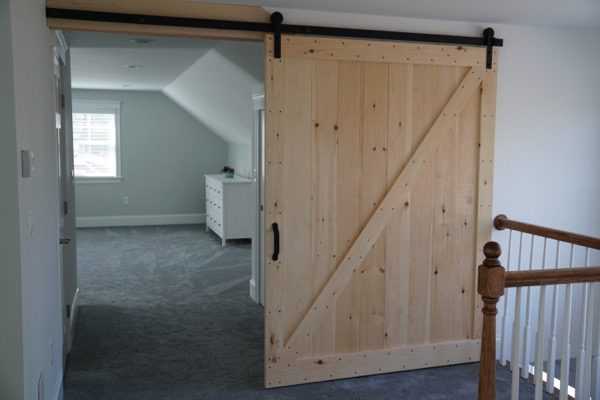
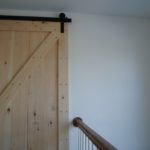
Sliding barn door – open position
Installing A Sliding Barn Door
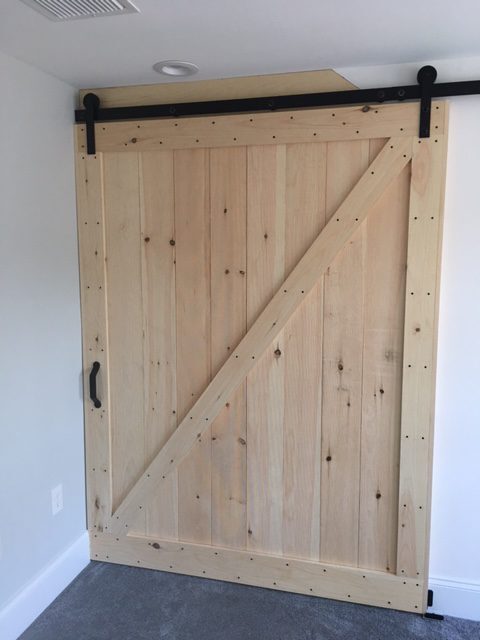
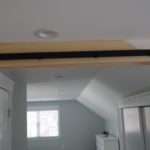
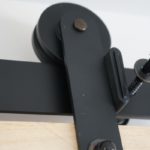
Once the track was installed we took final measurements of the door, trimmed it if necessary, and then lifted it and the rollers onto the track.
We added vertical pine jambs on the walls under both sides of the soffit to cover any gaps or seams around the door.
Now you can install any final hardware like door stops, bumpers, or floor guides. For the floor guide, we used a piece of 3/4″ plywood to mount over the carpet, and then attached our guide to the plywood. We painted the plywood gray to match the carpet color.
 Sliding Door Design
Today’s sliding barn door makes a powerful design statement, by transforming your space with a blend of old and new. You’re only limited by your creativity, so get started!
-
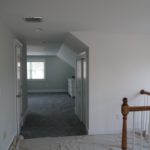
- Before photo
-

- Measuring door plank length
-

- Cutting door planks to length
-

- Joining shiplap
-
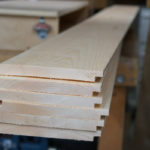
- Shiplap boards
-
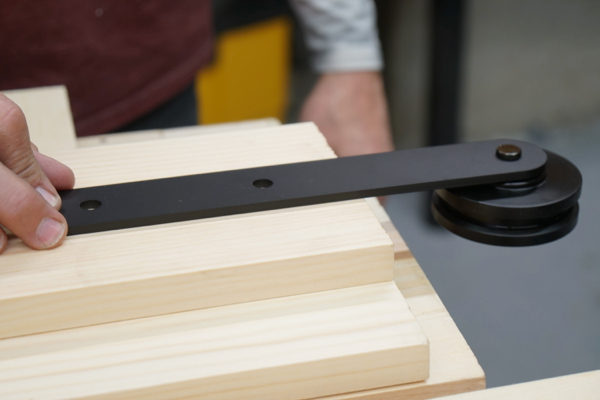
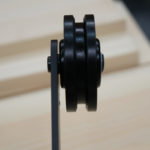
- Track wheel – roller
-
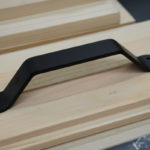
- rusticaHardware.com Handle
-
- RusticaHArdware.com Roller
-
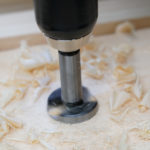
- Forstner drill bit
-

- Inside flush handle
-
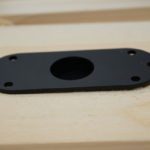
- Handle fits in Forstner hole
-

- Ripping butter boards door width
-
- Dry fitting
-

- Bottom rail
-
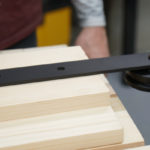
- Bevel – laying out fastener location
-

- Countersinking fasteners
-

- Consistent fastener pattern
-

- Built down soffit
-
- Door planks
-
- Pine trim soffit
-

- Horizontal batten
-

- Installing fasteners
-
- Clamps
-
- Fastener pattern
-

- Diagonal brace meeting battens
-
- Picture frame and diagonal
-
- Diagonal brace
-

- Roller spacer
-

- Fasteners – picture frame
-
- Fasteners
-
- Outside handle
-

- Handle
-

- Handle – added screws for reinforcement
-
- Track install – micro adjustments
-
- Track hardware
-
- Installing roller
-
- Track spacer and fastener
-
- Track installed
-
- Leveling track
-

- Soffit and track
-

- Long track
-
- Door stop – bumper
-
- Door open
-

- Door closed – outside bedroom view
-

- Door closed – inside bedroom view
-
- Door open – overlaps wall
-
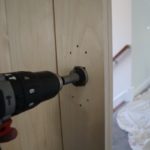
- Drilling inside handle
-

- Forstner bit hole
-

- Inside door pull – “handle”