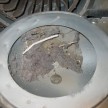
How To Clean A Dryer Duct

Do You Have The Correct Vent Pipe?
Before you clean our your dryer duct, it’s a good idea to see if you have the correct type of pipe installed, and if it was installed properly to operate safely.
Inspect the rear of the dryer and ensure that the was not pushed in too far, resulting in the dryer duct being crushed. This condition would also slow air flow and create a lint trap. A good dryer to pipe transition is the “Periscope-type connector.” I like these connectors because they eliminate the common problem of kinked and crushed transition ducts behind the dryer.
Dryer ducts should be UL-approved 4″ metal material and all the joints sealed with metal foil tape. The metal tape helps seal off air leaks form the system and makes the air flow more efficient. Avoid using metal screws or white plastic flex pipe.
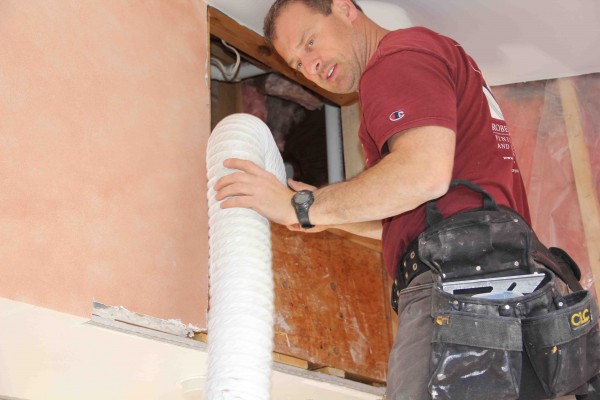
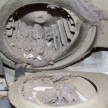
Removing white plastic flex pipe
There should be no sheet-metal screws, rivets or any other fastener used to connect the duct joints. Fasteners that extend into the airway will catch lint and obstruct airflow. Clamps or foil duct tape should be used to secure joints.
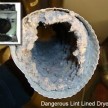
Avoid White or Mylar Spiral Type Duct
Mylar-covered spiral wire duct was popular for awhile and replaced the white vinyl duct. Mylar is a shiny metallic-coated polyester film, and it is slightly more heat-resistant than vinyl, but still presents a fire hazard. The use of solid all-metal [ridgid or semi-ridgid] exhaust ducts is now the standard, code-approved, and solid piping is still the BEST method for venting.
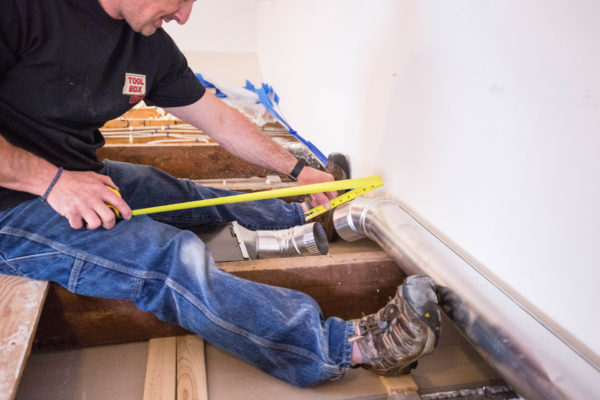
Look for sags in the dryer exhaust duct-pipe run. This happens when the pipe is not properly supported and the sag cab create a restriction, preventing all the moisture and lint from blowing out.
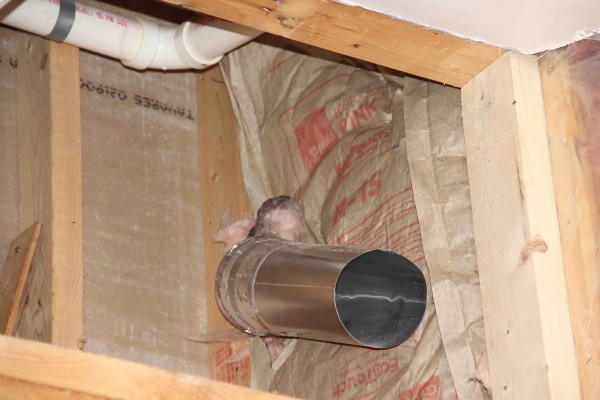
Insulate Any Vent Pipe In Unheated Spaces
Ensure that any dryer ducts traveling through unheated attic or eve spaces are insulated. Un-insulated pipe will sweat or create frost and interior lint build up. While you at it, ensure that all of the pipe seams are facing up and sealed with foil tape – to prevent seam seepage.
Follow Manufacturers Duct Runs
Dryer ducts should not exceed the dryer manufacturers recommendation. The duct must not exhaust into attics, crawl spaces, basements, chimneys, the cavity of any wall or any interior room. Always vent to the exterior with an approved exterior dryer vent hood and back draft damper flap. The damper is important to prevent outside air intrusion and the entry of small animals.
Dryer Duct Best Practices
- Use rigid aluminum or rigid galvanized steel duct (especially if concealed). If flexible metal duct must be used, use the semi-rigid type.
- The dryer duct should be as straight and short as possible. Minimize 90-degree turns. Sharp turns cause back pressure and create resistance to airflow. Two 45-degree bends are more efficient than one 90-degree bend. For best performance, separate all turns by 4 feet of straight duct.
- Duct joints should be wrapped with foil tape to make air and moisture tight.
- Rigid seamed exhaust duct ideally should be installed with the seams up to prevent any accumulation of condensation from seeping out. When possible, horizontal runs of dryer ducts should slope slightly downward (1/4 inch per foot) toward the exterior termination to reduce the possibility of condensation accumulating and collecting lint.
- The hood should point down and have at least 12 inches of clearance between the bottom of the hood and the ground.
- Ducts should always have adequate support, especially at each joint.
- A dryer duct should never exhaust near the fresh air intake of a high-efficiency furnace, water heater or any HVAC intake.
- In cold climates, insulating the dryer exhaust duct in unheated spaces may help to limit the condensation from forming inside the duct and collecting lint.
- Exhausting a dryer near or next to an air conditioning or heat pump condensing unit should be avoided. The expelled lint can collect and clog the condenser fins and will likely require continual condenser cleaning
Continue Reading . . .