How To Make A Raised Garden Bed

Benefits of Raised Garden Beds
Spring has arrived and as the days grow longer it’s time to move outdoors and work in the yard. We recently have been doing more and more lawn and garden articles and thought that writing an article on how to make a raised garden bed dovetailed nicely between gardening and carpentry.
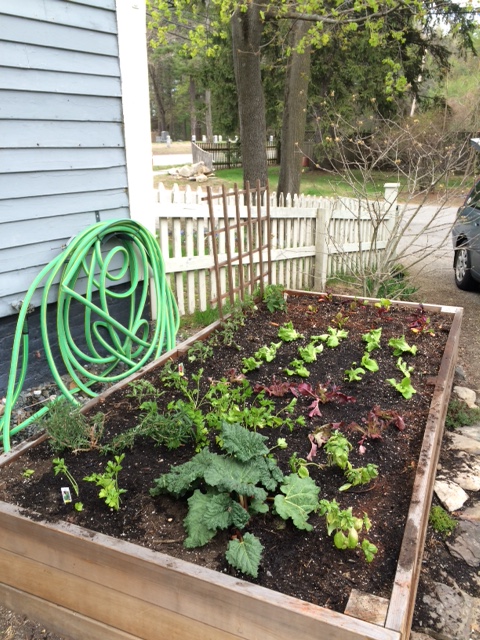
A raised garden can be used to plan vegetables, herbs, flowers or house perennial plantings.
What Is A Raised Garden Bed?
A garden bed usually refers to a raised structure that surrounds fertile and compost enriched soil for growing. The raised structure can any number of materials from stone, brick, metal, wood timbers or wood.
Benefits of a Raised Garden
Raised beds have many benefits. First they tend to be easier on the gardeners body, eliminating the need to bend over or walk on [compact] the planted soil. They also extend the planting season, reduce weeds and provide better drainage.
The close proximity of the plants tends to yield better growing results in comparison to conventional gardens. Raised garden beds enjoy increased sun exposure which warms the soil faster and tends to extended the growing season.
A raised garden also enjoys better drainage which is built into the bed walls. The garden bed walls hold the soil in place to eliminate erosion.
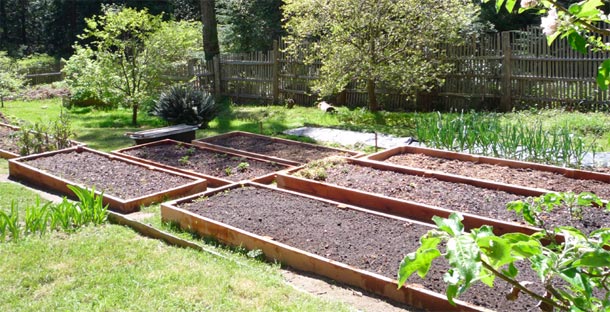 Photo: www.eartheasy.com
Building a Raised Garden
If you are interested in learning how to make a raised garden bed, it’s easy and can be accomplished in a few hours.
My preference is to use an naturally occurring insect and rot resistant wood species such as redwood or cedar and rust resistant fasteners.
Avoid creosote-treated railroad ties. Pressure treated wood infused with alkaline copper quaternary (ACQ) has been rated to be safe for food crops, but if you use this pressure-treated wood you may want to line the bed interior with landscape fabric to prevent soil contact.
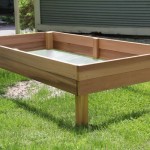
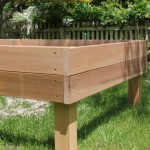
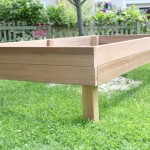
Raised gardens can be from 6 inches to waist-high. We will show you how to build a 6-inch garden bed. Most raised garden beds are constructed out of lumber and that is how we will proceed by showing you how to build a 4-foot by 8-foor raised garden bed..
Materials Needed
1. One 6-foot-long 4-by-4
2. Six 8-foot-long 2-by-6s
3. One 10-foot-long 1-inch PVC pipe
4. Two 10-foot-long ½-inch PVC pipes
5. 3½-inch #14 galvanized wood screws or self driving lag screws
6. One 4- by 10-foot roll of ¼-inch-mesh hardware cloth
7. Eight 1-inch galvanized tube straps (semicircular brackets 32 cubic feet (1 1/5 cu. yd.)
8. Enriched planting soil
Select the Raised Garden Bed Location
1. Installing your raised bed on a flat spot eliminates a lot of labor digging.
2. A north-south orientation gives good sun light exposure.
3. Leave at least 18 inches for walking and 24-inches, between beds, for wheel barrels or a lawn mower.
Make your Cuts First
1. Cut the 4-by-4 post into four 16-inch-tall corner posts.
2. Cut two of the 2-by-6s in half.
3. Cut the 1-inch PVC pipe into four 12-inch-long pieces
4. Cut the ½-inch PVC pipes into 6-foot-long pieces.
5. Assemble your pieces on a flat, level surface.
Assembling the Raised Bed
1. It’s best to assemble the bed upside down.
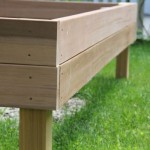
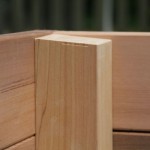
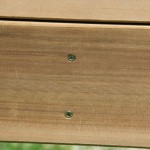
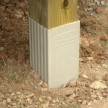
2. Set a 4-foot 2-by-6 on edge, and secure one 16-inch 4×4 post at one end. Secure post with two 3½-inch screws or Timberlok style self-driving lag fasteners. The 4×4 posts offer stability and assist in keeping the side walls from blowing outward from the soil pressure.
3. Repeat at other end of board. Do this procedure for the opposite end of the raised bed.
4. Fasten your long 8-foot board to the previously assembled 4×4 post. Do this procedure for the other long side.
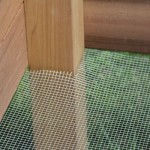
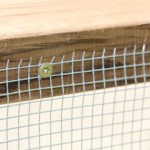
5. Line the bed bottom with ¼-inch galvanized steel hardware cloth to keep out critters; trim the cloth with tin snips to fit around the 4×4 posts.
Installing the Raised Garden Bed
1. Flip the raised garden bed right side up and position in at its resting location.
2. Mark the 4×4 leg location, move and dig four, 6-inch deep hole for each post.
3. Insert the raised garden bed into these four holes.
4. Level the sides of the bed to prevent water runs off of to one part of the raised garden bed or ponding.
5. Put the bed back into place, with posts in holes; fill in the holes.
Install Bed Lining
1. Rake the existing soil at the bottom of the bed to level it, and then tamp it smooth.
Attach Bird Screen Pipe to hold hoops for bird netting or row covers, attach four 12-inch pieces of 1-inch PVC pipe inside the bed. Use galvanized pipe straps and two 1-1/4-inch galvanized screws to fasten the strap and pipe to the garden bed side wall.
2. Space the pipes 4 feet apart, 2 feet from each end.
Filling Bed with Soil
Fill the bed with a mix of customized soil-and-compost blend and level it with a rake.
Install Bird Netting
1. Insert a framework of hoops and a lightweight cover onto the 1-inch pvc pipe.
2. Bending the 6-foot pieces of ½-inch PVC pipe to form semi-circles give you a framework for this. slip the
3. Pipe ends into the 1-inch pipe you installed ion the garden bed side walls.
4. Cover your planted seedlings with bird netting or season-extending plastic row covers.
5. Use clear polyethylene plastic sheeting to raise soil and air temperatures in early spring or fall.
Irrigation
Moisture retention with a raised garden bed is important, because raised beds tend to drain faster than conventional gardens.
1. Positioning your beds in a straight line can simplify future irrigation systems.
2. Irrigation can be set on a timer to eliminate the need to turn it on or off.
3. A simple, inexpensive irrigation setup using a hose faucet attachment that uses a series of back flow valves and a timer will work fine. Connect your system to a soaker hose or a custom 1/2-inch pvc pipe system with holes drilled I the pipe.
4. Cover your irrigation pipe or hose with mulch to keep soil moist.
Conclusion
Growing vegetables is very taxing on the soil and can strip away its nutrients and tilling hard compacted soil can be difficult and exhausting.
Raised beds require very little maintenance and can reap huge gardening yield.