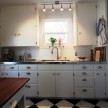
Installing A Custom Wood Countertop

Constructing a Custom Wood Counter-top
I decided to install a solid wood counter-top and came across DeVos Custom Woodworking, a small millshop in Texas, that does some real slick stuff with wood.
DeVos Custom Woodworking  is a small family business. They operate out of a small shop just outside Austin Texas where they have been designing and building custom furniture and counter tops for over 18 years.
What I liked the most about DeVos was the the communication I had with them. Communication is key in any project large or small. I felt that my small 25: x 7′ counter top was their only project! DeVos does not mass produce products, they only do custom work.
Creating A Custom Counter-top:
Creating a solid wood custom counter-top begins in the measuring and template stage. I decided to template my own counter-top and used “oak tag” to make a template. Once this was done I mailed my template to DeVos and they started the process of selecting wood and making the counter-top.
DeVos has a wood workshop and also a separate finishing room which is heated in winter and cooled in the summer. DeVos told me they keep these rooms at about 40% humidity (more humid than most houses)–very comfortable for the workers and the wood—so that the wood remains in good working condition throughout construction and finishing. They use kiln dried wood with a 6%-9% moisture content.
Preparing The Wood Slab:

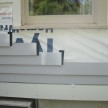
In order for DeVos to make a 2” thick counter-top, they start out with 2.5” rough sawn boards, then skip plane a number of boards before choosing and arranging the boards. My counter-top is is 3 boards wide. The boards are cut slightly longer and wider than necessary at this point in construction.
The individual boards are then planing on all sides of the board to get them as flat and square as possible for matching and gluing.
Lay-up is next, alternating the growth ring pattern if possible (the boards will go together easier if they have the alternating pattern). My counter-top boards are alternated. A Lay-up includes drawing a “v” across all of the boards to line them up properly for the glue-up phase.