Making Old Concrete Look New

A Concrete Makeover  with Quikrete Concrete Resurfacer

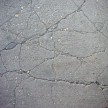
While replacing a concrete driveway, sidewalk or patio can be a costly prospect, resurfacing damaged concrete is a cost-effective repair that won’t break the bank. When revitalizing old, worn or spalled concrete, the use of certain patching or repair products, such as Quikrete Concrete Resurfacer, can provide a durable, wearresistant surface that will last the life of the concrete surface.
Here’s How
- First, the concrete must be rigorously cleaned of contaminants (dirt, oil, chipped concrete) to ensure the resurfacer will adhere to the existing concrete.
- Use a high-strength pressure washer to clean the surface to be resurfaced and saturate the driveway and finish by removing any standing water.
- You’ll need to repair any major pits, cracks or spalled areas before applying the resurfacer.
- Remember, it is essential that control joints and expansion joints are maintained, so use weather stripping to prevent the resurfacer from spilling into joints.
- Add the resurfacer powder to the mixing water and use a drill with a paddle extension to mix for about five minutes to a lump-free, pourable consistency. If the mix is too thick, add water as recommended on the bag to reach the desired consistency.
- Pour the resurfacer mixture from the bucket onto the surface.
- Using a long-handled squeegee, spread the resurfacer mixture across the surface.
- For a slip-resistant professional finish, follow within five minutes with a large push broom, making full strokes across the entire distance of the current work area without stopping. If desired, a concrete edging tool can be used within 20 minutes of pouring. At a 1⁄16-inch thickness, one 40-pound bag of Quikrete Concrete Resurfacer will cover about 90 square feet. Wait six hours before allowing foot traffic and 24 hours for automobile traffic onto the new surface, allowing longer curing times for cooler temperatures. Also, be sure to protect the new surface from rain for at least six hours—or longer in cool or damp weather.
For additional project ideas and application instructions, log on to www.quikrete.com.
If you enjoyed this post, make sure you subscribe to my RSS feed!